lAlign the pins (A) of the battery pack (9) with the
groove (B) of the battery charger (13), and insert the
battery pack (9) into the battery charger (13).
lConnect the Type-C plug of the data cable to the port
(C) of the battery charger (13).
lConnect the other plug of the data cable to the USB
port of the power adapter (15).
lInsert the power adapter (15) to a 100V - 240V power
socket (16) to charge the battery pack.
lUpon installation, the LED indicator (D) on the battery
pack charger (13) will start to glow or blink.
lAfter fully charged, remove the battery pack from the
battery charger (13).
Battery Pack Charging
100-240V
Continuously Red - battery is charging.
Continuously Green - battery is full.
Blinking Red - without battery .
B
13
9
D
C
Socket
16
Data Cable
14
Power Adapter
15
1、材质:128g铜版纸过光油
2、6折页,尺寸115*170mm
封皮
封底
内页
InfiRay Outdoor APP
lZOOM Series Thermal Camera
lPortable bag
lIBP-1 battery pack × 2
lIBC-1 battery charger for battery pack
lPower adapter
lData cable
lNeck strap
lWrist strap
lLens cleaning cloth
lQuick Start Guide
Download the InfiRay Outdoor App to transmit the image
via Wi-Fi from your ZOOM to a smartphone or tablet.
Package Contents
Attention!
Please read this guide before using the product, and
keep the guide for future reference.
You can scan the QR code below to enter the official
website (www.infirayoutdoor.com) to view and
download the detailed operating manual.
ZOOM
ZL38/ZH38/ZH50
Quick Start Guide V2.0
IRay Technology Co., Ltd.
Add: 11th Guiyang Street, YEDA, Yantai, P.R. China
Tel: 0086-400-998-3088
Email: infirayoutdoor@infiray.com
Web: www.infirayoutdoor.com
InfiRay Outdoor • Zoom Series • Quick Start Guide
Thermal Imaging
Camera
12
4
3
5678
9
11
10
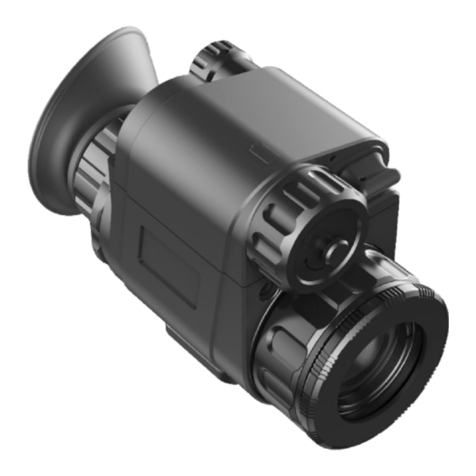
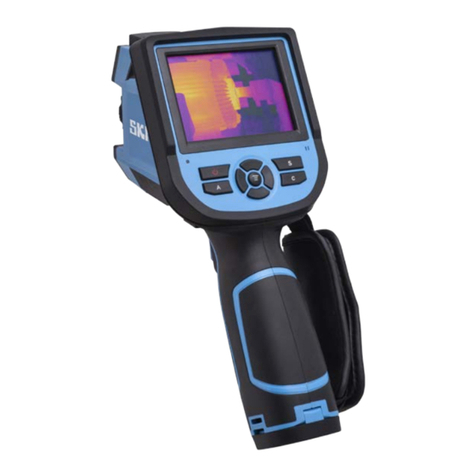
1. Lens cap
2. Lens focus ring
3. Status lamp
4. Microphone/Altimeter
5. Power (P) button
6. UP button
7. Menu (M) button
8. Down button
9. Battery pack
10. Eyepiece
11.Eyeshade
Components and Controls
lRemove the lens cap.
lPress and hold the Power button to turn on the device.
lRotate the diopter ring of the objective lens until the
image becomes clear in the eyepiece.
lRotate the focusing ring of the objective lens to focus
on the object to be observed.
lPress the M button to enter the shortcut menu. Then,
configure the image mode, display brightness, image
sharpness, and image contrast to achieve the optimal
visual effect.
lAfter completing the settings, press and hold the Power
button to turn off the thermal camera.
Getting Started Button Operation
Switch and
confirm
parameters
Save and back
to the home
screen
Enter the
submenu /
Switch and
confirm the
parameters
Save and back
to the home
screen
Defective pixel
correction
interface
Confirm
selection /
Save position
Turn on/off the
stadiametric
rangefinder
function
Turn on/off the
hotspot
tracking
function
Standby the
device (the
status lamp
breathes)
Return to the
upper menu
without saving
changes
Defective pixel
correction
Add/delete
defective
pixels
Turn on/off the
PIP function
Switch and
confirm
parameters
Save and back
to the home
screen
M
M
M
M
lPull out the ring-pull (12) from the battery pack (9),
rotate it clockwise until it is in the horizontal direction
with the battery pack (9).
lAlign the pins (A) of the battery pack (9) with the
groove of the device to install the battery pack (9) into
the ZOOM series thermal camera.
lWhen the battery pack (9) is fully inserted into the case
of the ZOOM series thermal camera, rotate the ring-pull
(12) 90 degrees counter-clockwise to lock the battery
pack (9). The ring-pull (12) is in the vertical position.
lUpon installation, flip down the ring-pull (12). When the
bulge on the ring-pull (12) points to ‘CLOSEʼ on the
battery pack (9), the battery pack (9) is installed.
Battery Pack Installation
lAlign the pins (A) of the battery pack (9) with the
groove (B) of the battery charger (13), and insert the
battery pack (9) into the battery charger (13).
lConnect the Type-C plug of the data cable to the port
(C) of the battery charger (13).
lConnect the other plug of the data cable to the USB
port of the power adapter (15).
lInsert the power adapter (15) to a 100V - 240V power
socket (16) to charge the battery pack.
lUpon installation, the LED indicator (D) on the battery
pack charger (13) will start to glow or blink.
lAfter fully charged, remove the battery pack from the
battery charger (13).
Battery Pack Charging
100-240V
Continuously Red - battery is charging.
Continuously Green - battery is full.
Blinking Red - without battery .
B
13
9
D
C
Socket
16
Data Cable
14
Power Adapter
15
12
A
9
Specifications
Detection Range,
m
(Target size:
1.7mx0.5m, P(n)=99%)
Li-ion Battery Pack IBP-1 / 4400mAh /
DC3.7V
Operating
Temperature, ⁰C
ÕThe actual operating time depends on the density of Wi-Fi
use, photographing, video recording, etc.
ØImprovements may be made to the design and software of
this product to enhance its features.
ØIf there is any change to the technical specifications of the
product, it will be made without prior notice to the user.
InfiRay Outdoor
3100300134-Zoom快速入门手册
16
234 7 8 9 10
511
