manuals.online logo
Brands
  1. Home
  2. •
  3. Brands
  4. •
  5. Invacare
  6. •
  7. Medical Equipment
  8. •
  9. Invacare Freeway Freedom IRC1175 User manual

Invacare Freeway Freedom IRC1175 User manual

1
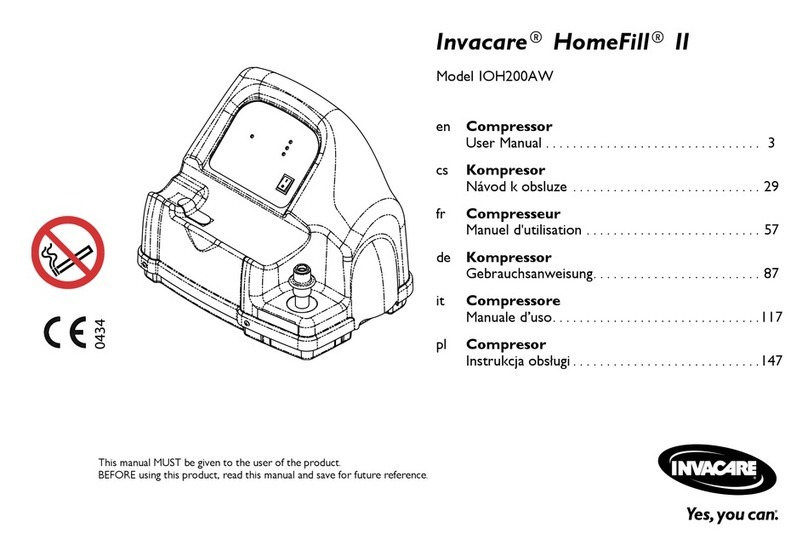
INVACARE® FREEWAY® FREEDOMINVACARE® FREEWAY® FREEDOM
INVACARE® FREEWAY® FREEDOM
AEROSOL COMPRESSOR
MODEL IRC1175
OPERATOR'S MANUAL
DEALER: THIS MANUAL MUST BE
GIVEN TO THE END USER.
USER: BEFORE USING THIS
COMPRESSOR, READ THIS
MANUAL AND SAVE FOR
FUTURE REFERENCE.
2
SPECIAL NOTES
DANGER/WARNING/CAUTION notices as used in this
manual apply to hazards or unsa e practices which could
result in personal injury or property damage.
NOTICE
THE INFORMATION CONTAINED IN THIS DOCUMENT
IS SUBJECT TO CHANGE WITHOUT NOTICE.
THIS AEROSOL COMPRESSOR IS INTENDED FOR
HOUSEHOLD USE.
WARNING
DO NOT install, maintain or operate this equipment
without irst reading and understanding this manual. I you
are unable to understand the DANGERS / WARNINGS /
CAUTIONS and INSTRUCTIONS, contact a healthcare
pro essional, dealer or technical personnel be ore
attempting to use this equipment - otherwise injury or
damage may result.
SPECIAL NOTES
SAVE THESE INSTRUCTIONS
3
TABLE OF CONTENTS
TABLE OF CONTENTS
SPECIAL NOTES ..................................................................... 2
TABLE OF CONTENTS ......................................................... 3
SAFETY SUMMARY ................................................................ 4
FEATURES ............................................................................... 6
SPECIFICATIONS ................................................................... 7
INTRODUCTION .................................................................... 8
TRAVELING INFORMATION ............................................... 8
THE FREEWAY FREEDOM BATTERY PACK .................... 9
Installing the Freeway Freedom Battery Pack .................................... 9
Initial Battery Charging...........................................................................10
Normal Battery Charging Procedures ...............................................10
OPERATION .......................................................................... 11
Ex lanation of Power Indicator Lights ...............................................11
Power Su ly O tions ........................................................................... 11
O eration from the Wall Outlet ........................................................12
O erating from the Freeway Freedom Battery Pack.....................12
O erating from a Car or a Boat..........................................................12
Pre aring for Treatment........................................................................13
Taking the Treatment.............................................................................15
After the Treatment ............................................................................... 16
MAINTENANCE .................................................................... 17
Prolonging the Life of your Battery ....................................................17
Cleaning the Freeway Freedom ...........................................................18
Cleaning the Sidestream Nebulizer..................................................... 19
Re lacing the Air Filter ..........................................................................19
Fuse Re lacement.................................................................................... 20
Servicing .....................................................................................................20
Accessories and S are Parts .................................................................20
TROUBLESHOOTING ......................................................... 21
LIMITED WARRANTY ......................................................... 22
4
SAFETY SUMMARY
SAFETY SUMMARY
CAUTION
"Caution: Federal law restricts this device to sale or rental
by or on order o a physician, or any other practitioner
licensed by the law o the state in which he practices to
use or order the use o this device."
Risk o electric shock. DO NOT disassemble. Re er
servicing to quali ied service personnel.
READ THE FOLLOWING INFORMATION BEFORE
OPERATING THIS PRODUCT.
When using electrical products, especially when children
are present, basic sa ety precautions should always be
ollowed, including the ollowing:
DANGER
TO REDUCE THE RISK OF ELECTROCUTION:
Always unplug this product IMMEDIATELY a ter using.
DO NOT use while bathing.
DO NOT place or store product where it can all or be
pulled into a tub or sink.
DO NOT reach or product that has allen into water.
UNPLUG IMMEDIATELY.
DO NOT place in or drop into water or liquid.
WARNING
TO REDUCE THE RISK OF BURNS, ELECTROCUTION,
FIRE OR INJURY TO PERSONS:
Close supervision is necessary when this product is used
by, on or near CHILDREN OR PHYSICALLY
CHALLENGED INDIVIDUALS.
5
WARNING
DO NOT operate unit longer than twenty (20) minutes
CONTINUOUSLY. Allow orty (40) minutes or the unit to
cool be ore operating again.
Use this product only or its intended use as described in
this manual. Use this product ONLY under a physician's
direction. DO NOT use attachments NOT recommended
by the manu acturer.
NEVER operate this aerosol compressor i it has a damaged
cord or plug, i it is NOT working properly, i it has been
dropped or damaged, or dropped into water; call a quali ied
technician or examination and repair.
Keep the cord away rom HEATED or HOT sur aces.
NEVER drop or insert any object into any opening.
NEVER use while sleeping or drowsy.
DO NOT operate where aerosol (spray) products are
being used or where oxygen is being administered in a
closed environment such as an oxygen tent.
This unit is oil-less. DO NOT lubricate.
DO NOT operate in the rain or other wet environments.
SAFETY SUMMARY
6
NOTE: The 12 volt DC lead, AC/DC power pack and power cord may be stored n
the detachable accessory bag.
Child Mask
Adult Mask
Sidestream
Nebulizer
Coiled
Duratube
Mouthpiece
FEATURES
FEATURES
Power Indicator
Lights
On Off
Switch
Air Filter
Cover
12V - DC Input
Plug
Storage
Compartment
Nebulizer
Holder Tab
Battery Pack
(Installed)
12 volt DC lead AC DC
Power Pack
Power Cord
Detachable
Accessory Bag
NOTE: There s a med cat on pocket and an dent f cat on tag on the ns de flap
of the carry ng case. Your nebul zer, mask or mouthp ece may be stored n the
storage compartment.
7
SPECIFICATIONS
Electrical Requirements: 90-240 VAC, 50-60 Hz, or
12 -14 VDC
Ambient Temperature
Range: 10o C - 40o C (50o F - 104o F)
NOTE: Operat ng at extreme temperatures may ncrease treatment t mes.
Power Wattage: 24 Watts, @ 11 ± 1 PSI
Thermal Protector: Int rnal Solid Stat - Auto R s ttabl
NOTE: The Freeway Freedom un t and Battery Pack each have an nternal
resettable thermal fuse n case of overheat ng (operat ng longer than 20
m nutes) or us ng ncorrect polar ty DC jack.
Safety Systems: Class II - Doubl Insulat d
Typ BF
Fuse: T3 Amp Fus
Inta e Filter: 300 micron, poly thyl n
Flowrate: Flowrat (typical): 6 lpm with Sid str am
n buliz r-mod l # MS2400 (back pr ssur
approximat ly 9.5 +/- .5 PSI)
Width: 9.25-inch s
Height: 6.5-inch s
Depth: 4.5-inch s (7.5-inch s w/acc ssory bag)
*Weight: 3.4 lbs (5.2 lbs. w/all acc ssori s)
Battery Pac Dimensions: 3.75 x 1.4 x 2.4-inch s
IMPORTANT DC Inlet
Polarity: External Positive + - Internal Negative
* Weights given include the 1.1 lb. removable battery.
Stands for Direct Current
MODEL IRC1175 SPECIFICATIONS
8
INTRODUCTION/TRAVELING INFORMATION
INTRODUCTION
Freeway Freedom is different than other aerosol com ressors because
it is smaller, lighter and quieter. It has the added benefit of having
batteries for com lete ortability.
1. Carefully un ack your Freeway Freedom. Kee the box as this may
be required when returning it for servicing.
2. The battery ack will need to be charged before use. Refer to
INITIAL BATTERY CHARGING in the OPERATION section of
this manual.
3. The Sidestream nebulizer must be boiled in water before the first
use. Refer to CLEANING THE SIDESTREAM NEBULIZER in the
MAINTENANCE section of this manual.
4. Read these instructions com letely before use.
5. Observe recommendations for maintenance and re lacement.
TRAVELING INFORMATION
NOTE: The Freeway Freedom Aerosol Compressor uses n ckel metal hydr de
batter es wh ch are accepted for use on most a rl nes. However, we strongly
adv se that you contact your a rl ne before travel to ensure the r approval.
The AC/DC Power Pack and cord are designed to o erate from U.S. and
North American outlet voltages and lug configurations (90 - 240 VAC,
50 - 60Hz). By urchasing travel lug ada tors, the Freeway Freedom can
be utilized around the world.
9
THE FREE AY FREEDOM BATTERY PACK
THE FREEWAY FREEDOM
BATTERY PACK
The Freeway Freedom battery ack contains nickel metal hydride
(NiMH) cells. Refer to PROLONGING THE LIFE OF THE
BATTERY in the MAINTENANCE section of this manual.
A second battery ack may be urchased for emergency ur oses or
if extra ower is required for more treatments (e.g. on a long air lane
flight) between charges.
INSTALLING THE FREEWAY FREEDOM
BATTERY PACK (FIGURE 1)
1. Remove the rotective film covers ( lastic ta e) from the battery
terminals before installing the Freeway Freedom battery ack.
2. Install the Freeway Freedom battery ack into the bottom of the
Freeway Freedom as shown in FIGURE 1.
FIGURE 1 - INSTALLING THE FREE AY FREEDOM
BATTERY PACK
Freeway
Freedom
Freeway
Freedom
Battery Pack
REAR VIE
10
THE FREE AY FREEDOM BATTERY PACK
INITIAL BATTERY CHARGING
To maximize the ca acity and life of the Freeway Freedom rechargeable
batteries, FULLY charge them for 16 hours before initial use.
1. FULLY discharge the batteries by running the unit 20 minutes ON
( I ) then 40 minutes OFF ( O ) until the unit no longer runs.
Re eat cycle two (2) to three (3) times.
2. Next FULLY charge the batteries for 16 hours. Now the unit is
ready for regular use with the batteries.
NOTE: Refer to NORMAL BATTERY CHARGING PROCEDURES n th s manual
for charg ng procedures.
NORMAL BATTERY CHARGING
PROCEDURES
The Freeway Freedom internal control circuit regulates the battery
charging. The Freeway Freedom battery ack can be charged for as
long as you require without damage. It will take a roximately 16
hours to recharge a fully discharged battery.
NOTE: A FULLY charged battery should prov de approx mately 36 m nutes of
treatment t me between charges.
1. Ensure that the ON/OFF switch is in the OFF ( O ) osition.
2. If not already installed, attach the battery ack to the Freeway
Freedom. Refer to INSTALLING THE FREEWAY FREEDOM BATTERY
PACK section in this manual.
CAUTION
Your power supply at the DC inlet MUST BE the correct
polarity (Re er to SPECIFICATIONS in this manual). The
Freeway Freedom will NOT charge batteries rom an
incorrect polarity DC supply.
3. Connect the AC/DC ower ack or 12 volt DC lead to the DC
ower inlet on the Freeway Freedom and connect the other end
to a suitable ower su ly (wall or car outlet). The GREEN
Charging indicator light ( ) will come ON to show that the
unit is charging.
11
OPERATION
POWER SUPPLY OPTIONS
Freeway Freedom may be operated rom three (3) di erent sources:
1. The wall outlet, using the Freeway Freedom AC/DC ower ack.
2. Freeway Freedom battery ack.
3. A 12 volt DC source (such as a car or boat).
CAUTION
DO NOT plug or unplug the 12 volt lead or AC/DC power
pack into the DC inlet when the ON/OFF switch is in the
ON ( I ) position, otherwise damage or injury may occur.
OPERATION
EXPLANATION OF POWER INDICATOR
LIGHTS
PO ER INDICATOR LIGHTS
GREEN ON Op rating Light
YELLOW Low Pow r Light
GREEN Charging Indicator Light
12
OPERATION
OPERATION FROM THE WALL OUTLET
The Freeway Freedom ower ack is required for running the Freeway
Freedom from AC wall outlets and to recharge the batteries when not
in use. Your AC/DC ower ack and cord are designed to o erate
from U.S. and North American outlet voltages and lug configurations
(90 - 240 VAC, 50 - 60Hz). By urchasing travel lug ada tors, the
Freeway Freedom can be utilized around the world.
1. Ensure that the ON/OFF switch is in the OFF (O) osition.
2. Connect the Freeway Freedom AC/DC ower ack to the ower
cord.
3. Plug the ower cord into the wall and the ower ack outlet lead
into the Freeway Freedom DC inlet. The GREEN charging
indicator light( ) will come ON.
4. Proceed to PREPARING FOR TREATMENT section in this manual.
OPERATING FROM THE FREEWAY
FREEDOM BATTERY PACK
1. Ensure the AC/DC ower ack or 12 volt lead is NOT lugged
into the control unit anel of the Freeway Freedom.
2. Ensure that the ON/OFF switch is in the OFF ( O ) osition.
3. Insert the charged Freeway Freedom battery ack into the unit.
Refer to INSTALLING THE FREEWAY FREEDOM BATTERY
PACK section in this manual.
4. Proceed to the PREPARING FOR TREATMENT section in this manual.
OPERATING FROM A CAR OR A BOAT
The Freeway Freedoms 12 volt lead will fit into the majority of car
cigarette lighter sockets. The vehicle MUST BE a negative ground
system. This is normal on ractically all modern vehicles. Connection to
a ositive ground system cannot damage the Freeway Freedom, the
unit sim ly will NOT o erate or charge the battery from an incorrect
olarity DC su ly.
13
OPERATION
CAUTION
I the unit does NOT operate, IMMEDIATELY disconnect
the power supply rom the DC inlet and check or correct
polarity (Re er to SPECIFICATIONS in this manual).
NOTE: Battery all gator cl ps can be purchased from an electron cs reta l supply
company. These connect the c garette l ghter plug of the DC lead d rectly to a
12 volt DC battery nstead of us ng a c garette l ghter.
1. Ensure that the ON/OFF switch is in the OFF ( O ) osition.
2. Plug the 12 volt DC lead into the DC inlet.
3. Connect the 12 volt DC lead to the ower su ly. The GREEN
Charging indicator light ( ) will now come ON.
4. Proceed to the PREPARING FOR TREATMENT section in this manual.
PREPARING FOR TREATMENT (FIGURE 2)
The nebulizer kit contains all the accessories that you need for your
treatment.
WARNING
DO NOT begin a treatment when YELLOW LOW
POWER light ( ) is illuminated. Charge the battery or
use another power source.
NOTE: The Freeway Freedom has been des gned to be used w th the S destream
Nebul zer. Treatment t mes w ll ncrease f nebul z ng ant b ot cs or us ng a
d fferent nebul zer.
1. Place the nebulizer in the nebulizer holder tab rovided while filling
with medication or when resting during treatment.
CAUTION
DO NOT ill the Sidestream nebulizer near the control
panel. Spilled liquid may damage the unit.
2. Dis ense your rescribed medication either directly into the to of
the Sidestream nebulizer, or into the base by unscrewing the
chamber. Refer to nebulizer instructions.
14
OPERATION
3. Connect the long hose end of the coiled duratube to the inlet on
the bottom of the Sidestream nebulizer.
4. Connect either the mouth iece (su lied) or face mask (su lied)
to the Sidestream nebulizer.
NOTE: Freeway Freedom s des gned to nebul ze 2.5 - 5cc of med cat on, 3 to 4
t mes each day.
FIGURE 2 - PREPARING FOR TREATMENT
OR OR
Sidestream
Nebulizer
Coiled Duratube
Mouthpiece
Child Mask Adult Mask
15
OPERATION
TAKING THE TREATMENT
CAUTION
DO NOT use the Freeway Freedom or more than 20
minutes continuously in any one (1) hour. Allow a minimum
o 40 minutes rest/cooling time.
DO NOT operate the unit in temperatures above 104°F
(40°C) or below 50°F (10°C), or place near heat sources
such as radiators or ires.
WARNING
DO NOT run the Freeway Freedom without an air ilter as it
may cause permanent damage to the compressor.
1. Turn the Freeway Freedom ower switch to the ON ( I ) osition
and the Sidestream nebulizer will roduce a fine mist.
NOTE: If the Freeway Freedom does NOT operate correctly, refer to the
TROUBLESHOOTING sect on of th s manual.
2. It is suggested that you are as relaxed as ossible and are sitting in an
u right osition to obtain the maximum benefit from the treatment.
3. It is suggested that two (2) or three (3) dee er breaths are
inters ersed with gentle lower chest breathing.
NOTE: If you get breathless dur ng treatment, you are probably breath ng too
qu ckly. If you want to take a short break dur ng treatment, sw tch OFF ( O )
the Freeway Freedom and resume treatment after your break.
NOTE: Dur ng use, the Freeway Freedoms battery s prevented from be ng
d scharged to a level that would cause permanent damage. If the YELLOW
LOW POWER l ght ( ) comes ON dur ng treatment, f n sh the treatment. Th s
normally nd cates that between 20 to 50% of the operat ng t me s left. Th s
actual t me w ll vary w th each un t and the l ght w ll llum nate earl er as the
batter es age.
4. When the Sidestream nebulizer begins to work intermittently and
s its, then the treatment has finished. There is no need to
nebulize every dro of your medication as there will always be a
small amount left in the chamber.
16
AFTER THE TREATMENT (FIGURE 3)
1. Disconnect the Sidestream nebulizer from the coiled duratube by
gently twisting the tubing.
2. Rinse out the Sidestream nebulizer and refill with a little clean water.
3. Reconnect the coiled duratube to the Sidestream nebulizer and run the
Freeway Freedom again for a few seconds in order to flush out any of the
medication that has become tra ed in the nebulizer jets.
4. Turn OFF (O) the Freeway Freedom and disconnect the Sidestream
nebulizer from the coiled duratube by gently twisting the tubing.
5. Run your Freeway Freedom for a roximately 15 seconds without
the Sidestream nebulizer connected to dry out any condensation in
the coiled duratube.
CAUTION
When cleaning the Sidestream nebulizer (medication
chamber), take great care not to damage the jet holes.
DO NOT use a cleaning brush, abrasive sponge or pad as
this damages the center ba le and seriously a ects the
per ormance o the Sidestream nebulizer.
NEVER put paper clips, needles or any other objects into
the jet holes.
NEVER put the coiled duratube in any liquid.
6. Disassemble the Sidestream nebulizer into three (3) ieces: the
base, the center baffle and the to as shown in FIGURE 3. Wash
Sidestream nebulizer and mask or mouth iece in warm soa y
water, rinse thoroughly and air dry.
NOTE: Electr cal tems and any other dry components may be stored n the
detachable accessory bag.
7. When all arts are thoroughly dry, store them in the storage
com artment on the to of the Freeway Freedom ONLY.
CAUTION
NEVER store your nebulizer and medication in any other
area except the storage section o the carrying case.
Liquid medication may seriously damage the compressor.
OPERATION
17
OPERATION/MAINTENANCE
FIGURE 3 - AFTER THE TREATMENT
MAINTENANCE
PROLONGING THE LIFE OF YOUR BATTERY
The Freeway Freedoms battery is fully sealed and requires no
maintenance. It should last or approximately 2000 treatments
with normal use, but may last even longer i you ollow these
rules:
1. Fully discharge the battery at least once a month and fully charge
again. This is accom lished by running the Freeway Freedom from
the battery until it sto s working (a roximately 10 to 12 minutes
after the YELLOW LOW POWER light [ ] illuminates). After
the unit is com letely discharged, use the AC/DC ower ack to
fully charge the battery ack (a roximately 16 hours).
2. Kee the battery connected to the Freeway Freedom and fully
charged at all times. If you own more than one (1) battery ack
ensure that it is stored fully charged. It will slowly discharge and
after two (2) - three (3) months will be com letely discharged.
Base
Top
Sidestream
Nebulizer
Center Baffle
Mouthpiece
Jet Holes
18
MAINTENANCE
NOTE: If you are not usng the Freeway Freedom for per ods longer than one (1) month,
remove the battery pack from the dev ce and store separately. The battery pack w ll slowly
lose charge and, dependant upon storage temperature, w ll be fully d scharged after 2-3
months of storage. Once fully dscharged the batteres wll need to be fully charged ( .e. for
16 hours) and dscharged several t mes to rega n full capac ty.
CAUTION
Storing an extra battery completely discharged may cause
permanent damage to the battery.
3. O erate your Freeway Freedom from the AC/DC ower ack or
from a 12 volt DC source whenever ossible.
4. Avoid ex osure to extreme tem eratures.
WARNING
DO NOT operate the unit or charge the batteries in
temperatures above 104°F (40°C) or below 50°F (10°C), or
place near heat sources such as radiators or ires.
DO NOT dispose o the battery pack in the household waste at
the end o its use ul li e (approx. 2000 treatments). Proper
disposal at an appropriate collection site provided in your local
area is strongly recommended.
CLEANING THE FREEWAY FREEDOM
WARNING
UNPLUG unit be ore cleaning.
DO NOT submerge in water to clean.
NEVER put the coiled duratube in any liquid.
Electrical shock hazard. DO NOT remove outer case o
this unit. All disassembly and maintenance o this unit
MUST BE done by a quali ied technician.
DO NOT wipe the air ilter or battery terminals.
19
MAINTENANCE
Your Freeway Freedom, battery ack and ower ack can be cleaned
by wi ing with a dam cloth.
The carrying case can be machine washed (40oC). Tumble dry at low
tem erature settings.
CLEANING THE SIDESTREAM NEBULIZER
NOTE: Refer to AFTER THE TREATMENT n the OPERATING sect on of th s
manual for regular use clean ng nstruct ons.
Initially and once each week your Sidestream nebulizer should be
boiled in water with two (2) dro s of dish washing liquid for 5 to 10
minutes.
REPLACING THE AIR FILTER (FIGURE 4)
The air filter cleans the air that you use during treatment. The air filter
gets dirty over time and will need to be re laced. As soon as the air
filter no longer looks white and clean (a roximately 3 months) it
should be changed.
NOTE: The a r f lter w ll need to be changed more regularly f used n an
env ronment w th excess ve d rt or smoke.
1. Remove the air filter cover and the dirty air filter.
2. Insert a clean air filter and re lace the air filter cover.
3. Dis ose of dirty air filter.
FIGURE 4 - REPLACING THE AIR FILTER
Air Filter Cover
Air Filter
20
FUSE REPLACEMENT
The 12 volt DC lead (cigarette lighter lead) is fitted with a T3 am fuse.
This is located in the cigarette lighter lug and is removed by
unscrewing the end of the cigarette lighter lug body. Re lacement
fuses can be urchased at your local electronics store.
NOTE: The Freeway Freedom battery pack and power pack are nternally fused
and cannot be serv ced. If you suspect a fault, contact your local Invacare Dealer
for serv ce.
NOTE: The Freeway Freedom s f tted w th an auto-resett ng sol d-state PCB
fuse. Th s fuse does NOT requ re serv ce.
SERVICING
Invacare recommends that the Freeway Freedom is serviced by a
qualified technician at least once a year.
Accessories should be re laced regularly. It is recommended that all
accessories are changed at least once a year, es ecially the Sidestream
nebulizer and the coiled duratube if your Freeway Freedom is being
used three (3) or more times a day.
The air filter should be re laced every three (3) months. Refer to
REPLACING THE AIR FILTER in the MAINTENANCE section of this
manual for re lacement rocedure.
If you cannot solve a roblem or would like to order any s are arts,
lease contact your Invacare Dealer.
MAINTENANCE
ACCESSORIES AND SPARE PARTS
PART NO. DESCRIPTION
1114879 AC/DC Pow r Pack
1114883 Fr way Fr dom Batt ry Pack
1114885 R plac m nt Filt rs (Qty. 4)
1114882 12V DC L ad (Car Adapt r)
1114880 Carrying Cas and D tachabl Cas
1110518 Own r's Manual
2001829 Coil d Duratub Tubing
2001831 Pow r Cord
MS2400 R usabl Sid str am N buliz r

Other manuals for Freeway Freedom IRC1175

1

Other Invacare Medical Equipment manuals

Invacare Robin Series User manual

Invacare

Invacare Robin Series User manual

Invacare Platinum IRC10LX User manual

Invacare

Invacare Platinum IRC10LX User manual

Invacare Platinum Mobile User manual

Invacare

Invacare Platinum Mobile User manual

Invacare Platinum IRC5LXO2 User manual

Invacare

Invacare Platinum IRC5LXO2 User manual

Invacare 9610 User manual

Invacare

Invacare 9610 User manual

Invacare Alegio NG User manual

Invacare

Invacare Alegio NG User manual

Invacare LiNX User manual

Invacare

Invacare LiNX User manual

Invacare 1426875 User manual

Invacare

Invacare 1426875 User manual

Invacare Medley Ergo User manual

Invacare

Invacare Medley Ergo User manual

Invacare Aquatec Ocean User manual

Invacare

Invacare Aquatec Ocean User manual

Invacare IRC5PO2AW User manual

Invacare

Invacare IRC5PO2AW User manual

Invacare Infinity AirFlo Assembly instructions

Invacare

Invacare Infinity AirFlo Assembly instructions

Invacare Perfecto2 V IRC5PO2V User manual

Invacare

Invacare Perfecto2 V IRC5PO2V User manual

Invacare Medley Ergo User manual

Invacare

Invacare Medley Ergo User manual

Invacare Platinum IRC5LXO2 User manual

Invacare

Invacare Platinum IRC5LXO2 User manual

Invacare Carroll CS3 User manual

Invacare

Invacare Carroll CS3 User manual

Invacare XPO2 User manual

Invacare

Invacare XPO2 User manual

Invacare Medley Ergo User manual

Invacare

Invacare Medley Ergo User manual

Invacare ROZE User manual

Invacare

Invacare ROZE User manual

Invacare SB 755 User manual

Invacare

Invacare SB 755 User manual

Invacare ROZE User manual

Invacare

Invacare ROZE User manual

Invacare Cascata H720T4 User manual

Invacare

Invacare Cascata H720T4 User manual

Invacare Platinum IRC10LX User guide

Invacare

Invacare Platinum IRC10LX User guide

Invacare Etude Duo User manual

Invacare

Invacare Etude Duo User manual

Popular Medical Equipment manuals by other brands

Follett REFP installation instructions

Follett

Follett REFP installation instructions

Otto Bock Genium Protector 4X880 Series Instructions for use

Otto Bock

Otto Bock Genium Protector 4X880 Series Instructions for use

Balanced Body Ron Fletcher Reformer quick start guide

Balanced Body

Balanced Body Ron Fletcher Reformer quick start guide

Breg VPULSE user manual

Breg

Breg VPULSE user manual

Stealth Products IDCH user manual

Stealth Products

Stealth Products IDCH user manual

Sonesta S2 Unpacking and assembly instructions

Sonesta

Sonesta S2 Unpacking and assembly instructions

Oregon Scientific PM138 instruction manual

Oregon Scientific

Oregon Scientific PM138 instruction manual

GE Vivid 4 BT03 RFI Service manual

GE

GE Vivid 4 BT03 RFI Service manual

Mackworth FSG Commissioning manual

Mackworth

Mackworth FSG Commissioning manual

Schiller FRED easyport Short operating instructions

Schiller

Schiller FRED easyport Short operating instructions

bort medical OmoTwinAir quick guide

bort medical

bort medical OmoTwinAir quick guide

Arrow Central Venous Catheter manual

Arrow

Arrow Central Venous Catheter manual

Zimmer Persona Trabecular Metal Femoral Component SURGICAL TECHNIQUE

Zimmer

Zimmer Persona Trabecular Metal Femoral Component SURGICAL TECHNIQUE

LEGRAND Tynetec AidCall Alarm Pullcord manual

LEGRAND

LEGRAND Tynetec AidCall Alarm Pullcord manual

endolite AqualimbTT Instructions for use

endolite

endolite AqualimbTT Instructions for use

Masimo NomoLine Luer Series manual

Masimo

Masimo NomoLine Luer Series manual

Otto Bock Cloud Instructions for use

Otto Bock

Otto Bock Cloud Instructions for use

Mopedia RS831 instruction manual

Mopedia

Mopedia RS831 instruction manual

manuals.online logo
manuals.online logoBrands
  • About & Mission
  • Contact us
  • Privacy Policy
  • Terms and Conditions

Copyright 2025 Manuals.Online. All Rights Reserved.