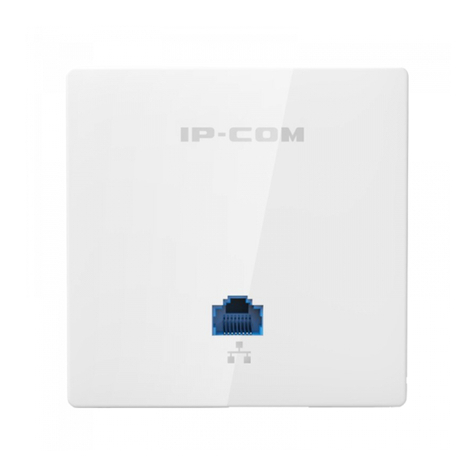
IP-COM In-wall AP Series User manual

i
i
i
i
iiiii
iiiiiiiiiiiiiiiiiiiiiii
iiiiiiiiiiiiiii
User Guide
In-wall AP Series

i
Copyright Statement
©2020 IP-COM Networks Co., Ltd. All rights reserved.
is the registered trademark of IP-COM Networks Co., Ltd. Other brand and
product names mentioned herein are trademarks or registered trademarks of their respective
holders. Copyright of the whole product as integration, including its accessories and software,
belongs to IP-COM Networks Co., Ltd. No part of this publication can be reproduced, transmitted,
transcribed, stored in a retrieval system, or translated into any language in any form or by any
means without the prior written permission of IP-COM Networks Co., Ltd.
Disclaimer
Pictures, images and product specifications herein are for references only. To improve internal
design, operational function, and/or reliability, IP-COM reserves the right to make changes to the
products described in this document without obligation to notify any person or organization of
such revisions or changes. IP-COM does not assume any liability that may occur due to the use or
application of the product or circuit layout(s) described herein. Every effort has been made in the
preparation of this document to ensure accuracy of the contents, but all statements, information
and recommendations in this document do not constitute the warranty of any kind, express or
implied.

ii
Preface
Thank you for choosing IP-COM! This user guide walks you through all functions on the Web
UI of in-wall AP products. All the screenshots herein, unless otherwise specified, are taken
from W36AP.
Web UI of different models may differ. The Web UI actually displayed shall prevail.
Conventions
The typographical elements that may be found in this document are defined as follows.
Item
Presentation
Example
Cascading menus
>
System > Live Users
Button
Bold
Click the OK button.
Parameter and value
Bold
Set User Name to Tom.
Variable
Italic
Format: XX:XX:XX:XX:XX:XX
The symbols that may be found in this document are defined as follows.
Symbol
Meaning
This format is used to highlight information of importance or special
interest. Ignoring this type of note may result in ineffective configurations,
loss of data or damage to the device.
This format is used to highlight a procedure that will save time or resources.
For More Documents
APs of this series support central management either by IP-COM Access Point Controller (AC)
or IP-COM routers with AC functionality. For detailed information, refer to user guides of
target ACs or routers.
Search target product models on our official website https://www.ip-com.com.cn to obtain
the latest product documents.

iii
Product document overview
Document
Overview
Datasheet
Walks you through basic parameters such as product overview, product
features, and specifications of APs.
Quick Installation Guide
Walks you through a rapid AP network establishment, including AP
installation, network configuration, LED/Port/Button description, FAQ, and
so on.
User Guide
Walks you through detailed functions and configurations of APs, including
all the functions on the web UI.
Technical Support
If you need more help, contact us by any of the following means. We will be glad to assist you
as soon as possible.
+86-755-27653089
https://www.ip-com.com.cn

iv
Contents
1 Log in to the Web UI................................................................................................................1
1.1 Login ...........................................................................................................................................1
1.2 Logout.........................................................................................................................................4
2 Web UI....................................................................................................................................5
2.1 Layout .........................................................................................................................................5
2.2 Common Buttons........................................................................................................................6
3 Quick Setup.............................................................................................................................7
3.1 AP Working Mode.......................................................................................................................7
3.1.1 Overview ..............................................................................................................................7
3.1.2 Quick Setup ..........................................................................................................................8
3.2 Client+AP Mode........................................................................................................................10
3.2.1 Overview ............................................................................................................................10
3.2.2 Quick Setup ........................................................................................................................10
4 Status....................................................................................................................................14
4.1 System Status............................................................................................................................14
4.2 Wireless Status .........................................................................................................................16
4.3 Traffic Statistics.........................................................................................................................17
4.4 Wireless Clients ........................................................................................................................18
5 Network Settings...................................................................................................................19
5.1 LAN Setup .................................................................................................................................19
5.2 DHCP Server..............................................................................................................................22
5.2.1 Overview ............................................................................................................................22
5.2.2 Configure the DHCP Server ................................................................................................22
5.2.3 View the DHCP Client List...................................................................................................23
6 Wireless Setting.....................................................................................................................25

v
6.1 SSID Settings .............................................................................................................................25
6.1.1 Overview ............................................................................................................................25
6.1.2 Example of Setting up an Open Wireless Network............................................................30
6.1.3 Example of Setting up a Wireless Network Encrypted with PSK .......................................32
6.1.4 Example of Setting up a Wireless Network Encrypted with WPA or WPA2.......................35
6.2 Radio Settings ...........................................................................................................................51
6.3 Radio Optimization ...................................................................................................................54
6.4 WMM Settings..........................................................................................................................57
6.5 Access Control ..........................................................................................................................60
6.5.1 Overview ............................................................................................................................60
6.5.2 Configure Access Control ...................................................................................................61
6.5.3 Example of Configuring Access Control .............................................................................61
6.6 Advanced Settings ....................................................................................................................63
6.7 QVLAN Settings.........................................................................................................................64
6.7.1 Overview ............................................................................................................................64
6.7.2 Configure the QVLAN Function ..........................................................................................66
6.7.3 Example of Configuring QVLAN Settings............................................................................66
7 SNMP....................................................................................................................................70
7.1 Overview...................................................................................................................................70
7.2 Example of Configuring the SNMP Function ............................................................................73
8 Deployment Mode ................................................................................................................75
9 Tools .....................................................................................................................................78
9.1 Firmware Upgrade....................................................................................................................78
9.2 Date & Time..............................................................................................................................80
9.2.1 System Time .......................................................................................................................80
9.2.2 Login Timeout Interval .......................................................................................................81
9.3 Logs...........................................................................................................................................83
9.3.1 View Logs ...........................................................................................................................83
9.3.2 Configure Log Settings .......................................................................................................83
9.4 Configuration............................................................................................................................86
9.4.1 Back Up and Restore Configurations..................................................................................86
vi
9.4.2 Restore the Factory Settings ..............................................................................................88
9.5 Account.....................................................................................................................................90
9.6 Diagnostics Tool ........................................................................................................................91
9.7 Reboot Device...........................................................................................................................92
9.7.1 Manual Reboot...................................................................................................................92
9.7.2 Reboot Schedule ................................................................................................................93
9.8 LED Control ...............................................................................................................................95
9.9 Uplink Check .............................................................................................................................96
9.9.1 Overview ............................................................................................................................96
9.9.2 Configure Uplink Check......................................................................................................96
Appendixes ..............................................................................................................................98

1
1 Log in to the Web UI
1.1 Login
1. Use an Ethernet cable to connect the management computer to the AP or the switch
connected to the AP.
2. Configure the IP address of the computer to one in a same network segment with the AP.
For example, if IP address of the AP is 192.168.0.254, then the IP address of the computer
can be configured to 192.168.0.X(Xranges from 2 to 253 and is not occupied by other
devices) and subnet mask is 255.255.255.0.
3. Start a browser on the computer and visit the IP address of AP (192.168.0.254 by default).

2
4. Enter the login user name and password, and click Login.
---End
If the above page does not appear, try the following solutions:
−If an IP-COM AC (including IP-COM router with AC functionality) has already been deployed in the
network, AP may have been managed by the AC and its IP address has changed. Please log in to the Web
UI of the AC and check the new IP address of the AP, and log in again using the new IP address.
−If more than one AP are deployed in the network, IP address conflicts may occur, causing web UI login
errors. Verify that the IP address of the AP is not occupied before being integrated into the network.
−Reset the AP and log in using the default IP address. How to reset: When the SYS LED indicator blinks
green, remove the front cover, hold down the reset button for about 8 seconds, and release when the
green LED indicator turns solid on. When the SYS LED indicator blinks again, the AP is reset.
Log in to the web UI of the AP. You can configure the AP now.

3

5
2 Web UI
2.1 Layout
The web UI is composed of four parts: first-level navigation bar, second-level navigation bar,
tab, and the configuration area, as shown below.
Functions or parameters displayed in gray on the web UI are not supported yet or cannot be modified
under the current configurations.
No.
Name
Description
❶
First-level navigation bar
Function menu that organizes AP by navigation tree and tab.
You can choose function menu as needed and the result
appears on the configuration area.
❷
Second-level navigation
bar
❸
Tab
❹
Configuration area
Area where you perform or check configurations.
1
2
3
4

6
2.2 Common Buttons
Buttons commonly used on the web UI are illustrated as below.
Common button
Description
Refresh
Refresh the current page.
Save
Save configurations on the current page and make the configurations take effect.
Restore
Cancel the unsaved configurations on the current page and restore to previous
configurations.
Help
Check the help information of the current page.

7
3 Quick Setup
In the Quick Setup module, you can set up the AP in a quick way to enable internet access for
your wireless devices such as smart phones and tablets.
The AP supports working modes of AP and Client+AP.
3.1 AP Working Mode
3.1.1 Overview
In this mode, AP connects to the internet using Ethernet cables and transforms wired signals
to wireless signals for wireless coverage. AP works under this mode by default. See the
following topology.
Router
PoE switch
AP
AP mode
Internet
LAN
WAN

8
3.1.2 Quick Setup
Before configuration, ensure that the upstream router has been connected to the internet.
1. Click Quick Setup.
2. Choose the Radio Band you wish to configure, for example, 2.4GHz.
3. Set the Working Mode to AP.
4. Set an SSID (Primary SSID).
5. Select a Security Mode and configure the incurred parameters.
6. Click Save.
7. If you need to configure the other radio band, repeat steps 2 to 6.
---End
Search and connect your wireless devices such as smart phones to the SSID you set. Enter the
wireless password (the Key you set) and you will be able to access the internet.

9
Parameter description
Parameter
Description
Radio Band
Select the radio band you wish to configure.
Working Mode
Choose the AP mode to transform the wireless network to wireless network.
SSID
Click to modify the WiFi name of the primary network under the selected
radio band.
Security Mode
Select the security modes for target wireless networks. Supported security
modes are as follows:
−None: No password for the wireless network and any wireless clients can
access the network. To ensure network security, this mode is not
recommended.
−WEP: It uses a static key to encrypt all exchanged data, and ensures that
a wireless LAN has the same level of security as a wired LAN. Data
encrypted based on WEP can be easily cracked. In addition, WEP
supports a maximum wireless network throughput of only 54 Mbps.
Therefore, this security mode is not recommended.
−WPA-PSK, WPA2-PSK, Mixed WPA/WPA2-PSK: WPA pre-shared key
authentication. The key you set is only used for identity verification while
data encryption key is automatically generated by AP based on
encryption rule TKIP or AES, solving the vulnerability of WEP static key
and therefore, is proper for personal or home networks. Mixed
WPA/WPA2-PSK indicates that AP is compatible with both WPA-PSK and
WPA2-PSK security modes.
−WPA, WPA2: 802.1x is used to authenticate users and generate root key
for encrypting data instead of using pre-shared key you set manually.
Data encryption key is automatically generated by AP based on
encryption rule TKIP or AE, which is proper for wireless networks with
high security requirements such as enterprises.

10
3.2 Client+AP Mode
3.2.1 Overview
In this mode, the AP is wirelessly bridged to an upstream device (such as a wireless router or
AP) to extend the wireless network coverage of the upstream device. See the following
topology.
3.2.2 Quick Setup
Before configuration, ensure that the upstream AP has been connected to the internet.
1. Choose Quick Setup.
2. Select the radio band from the drop-down list box to be configured, which is 2.4 GHz in this example.
3. Set Working Mode to Client+AP.
4. Click Scan.
AP
Client+AP
mode
Internet
Router
PoE switch
Upstream AP
AP mode
LAN
WAN

11
5. Select the wireless network to be extended from the wireless network list that appears.
−If no wireless network is found, choose Wireless Setting > Radio Settings, ensure that Enable Wireless is
selected, and try scanning wireless network again.
−After a wireless network to be extended is selected, the SSID, security mode, and channel of the wireless
network are populated automatically.
6. Click Disable Scan.
7. If the wireless network of the upstream device is encrypted, set Key to the wireless
network password of the device.
8. Click Save.

12
---End
After the configuration, you can select the SSID on your wireless devices such as smart
phones and enter your wireless network password to connect to the wireless network of the
AP and access the internet through the AP.
If you do not know the SSID and key of the AP, go to Wireless Setting > SSID Settings page.
Parameter description
Parameter
Description
Radio Band
It specifies the radio band of the WiFi network to be configured.
Working Mode
Choose the Client+AP mode to bridge the upstream WiFi network.
SSID
It specifies the WiFi network name (SSID) of the WiFi network to be bridged. After
you select the upstream WiFi network from the scanned wireless network list, this
parameter will be populated automatically.

13
Parameter
Description
Security Mode
It specifies the security mode of which the upstream WiFi network adopted. After
you select the upstream WiFi network from the scanned wireless network list, this
parameter will be populated automatically.
The AP can support WiFi network encrypted with None or WEP (Open or Shared),
WPA-PSK, WPA2-PSK and Mixed WPA/WPA2-PSK.
−None: No password for the wireless network and any wireless clients can
access the network. To ensure network security, this mode is not
recommended.
−WEP: It uses a static key to encrypt all exchanged data, and ensures that a
wireless LAN has the same level of security as a wired LAN. Data encrypted
based on WEP can be easily cracked. In addition, WEP supports a maximum
wireless network throughput of only 54 Mbps. Therefore, this security mode
is not recommended.
−WPA-PSK, WPA2-PSK, Mixed WPA/WPA2-PSK: WPA pre-shared key
authentication. The key you set is only used for identity verification while
data encryption key is automatically generated by AP based on encryption
rule TKIP or AES, solving the vulnerability of WEP static key and therefore, is
proper for personal or home networks. Mixed WPA/WPA2-PSK indicates that
AP is compatible with both WPA-PSK and WPA2-PSK security modes.
−If the wireless network to be bridged adopts the WEP security mode,
Authentication Type, Default Key, and Key x(xranges from 1 to 4) need to
be entered manually.
−If the wireless network to be bridged adopts the WPA-PSK, WPA2-PSK or
Mixed WPA/WPA2-PSK security mode, Encryption Algorithm will be
populated automatically and you only need to enter the Key.
This manual suits for next models
1
Table of contents
Other IP-COM Wireless Access Point manuals

IP-COM
IP-COM W75AP User manual

IP-COM
IP-COM AP375 User manual

IP-COM
IP-COM AP615 User manual

IP-COM
IP-COM AP345 User manual

IP-COM
IP-COM W300AP User manual

IP-COM
IP-COM W40AP User manual

IP-COM
IP-COM Pro-6-IW User manual

IP-COM
IP-COM W45AP User manual

IP-COM
IP-COM W30AP User manual

IP-COM
IP-COM W185AP User manual
Popular Wireless Access Point manuals by other brands

Devolo
Devolo WiFi pro 1750x manual

Intermec
Intermec MobileLAN access WA21 System manual

Netkrom
Netkrom AIR-PTP3500L Quick installation guide

TRENDnet
TRENDnet TEW-455APBO - 9dBi High Power Wireless Outdoor PoE Access... Specifications

Ruijie
Ruijie Reyee RG-RAP2200 Hardware installation and reference guide

HMS
HMS Anybus Wireless Bolt IoT Startup guide