7
SAFETY
SEMI-AUTOMATIC MACHINES
5.1 General
Please read the operating instructions
carefully before operating the
machine. The machine has automatic
functions which could endanger the
safety of an inexperienced operator.
5.3 Hazard zone
No persons or objects other than the
product to be wrapped shall be
present in the hazard zone during
operation of the machine. The
hazard zone is the light colored area
shown in the adjacent drawing.
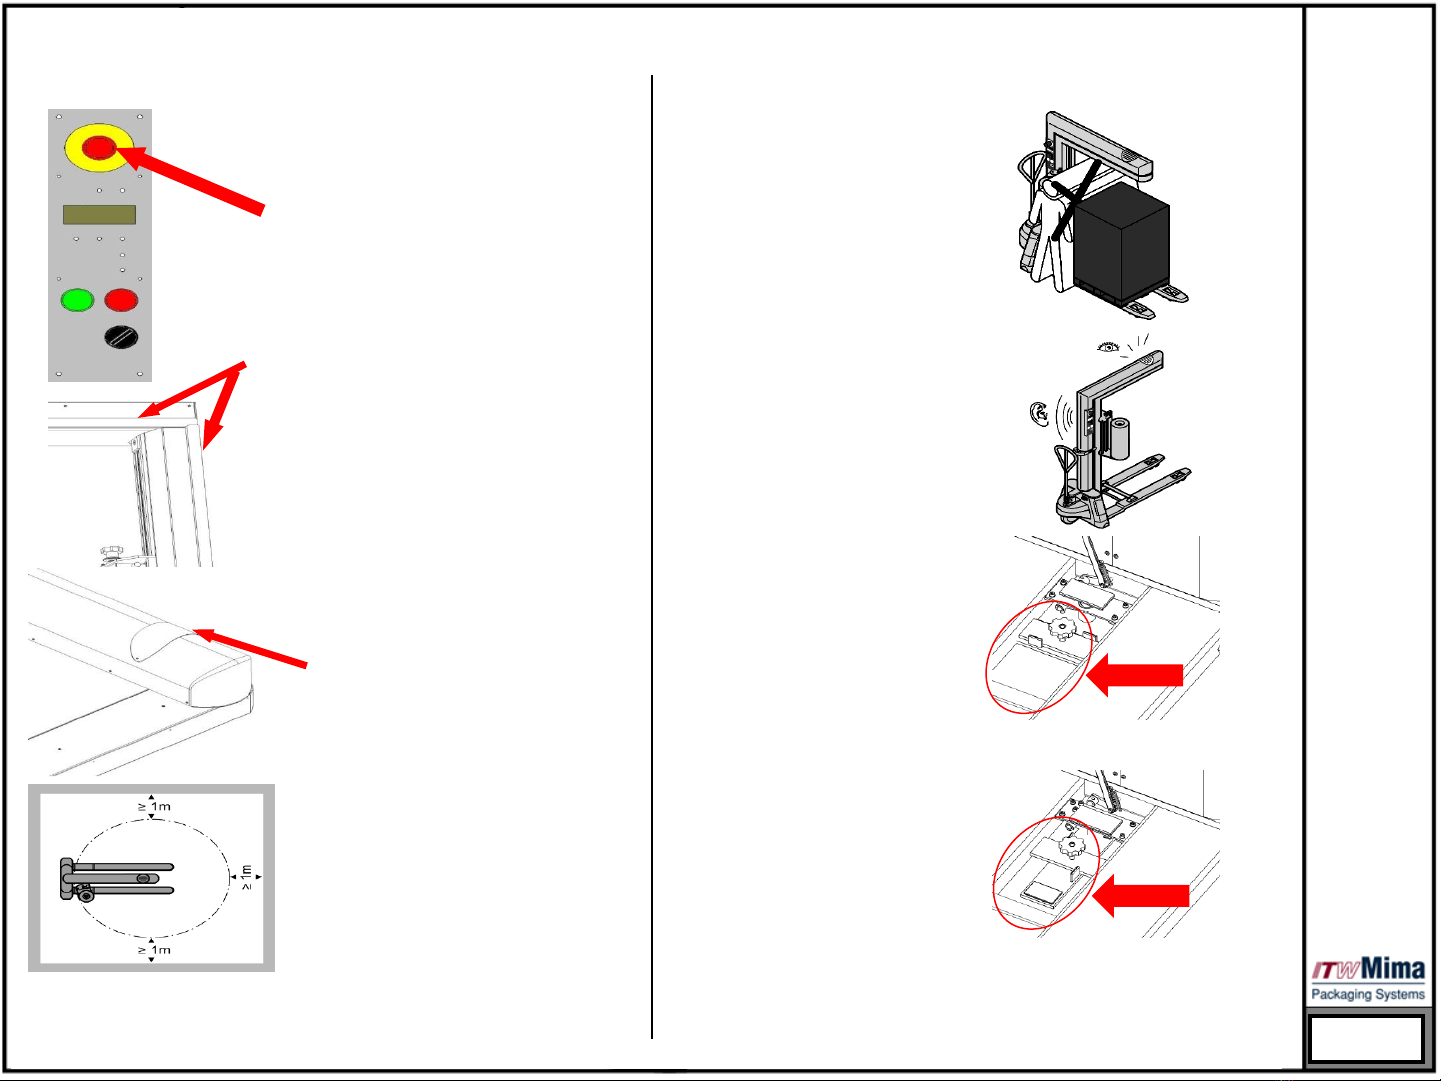
5.2 Safety equipments
1. The EMERGENCY-STOP button
stops the unit in a safe position. The
unit cannot be restarted until the
button is pulled out again.
2. The rotary arm is equipped with a
safety edges which stops the
machine in case of contact.
(counterforce of ≥100N).
3. Flashing warning light
- Flashing when machine is operating.
Do not enter the hazard zone while
warning light is flashing.
5.4 Safety notes
1. Never enter the area
between the tower and the
pallet while the machine is
in operation. You could be
trapped and seriously
injured.
2. Never enter in the hazard
zone after hearing
“wrapping start” warning
signal.
(4 *signal). Few seconds
after signal the wrapping
cycle is starting.
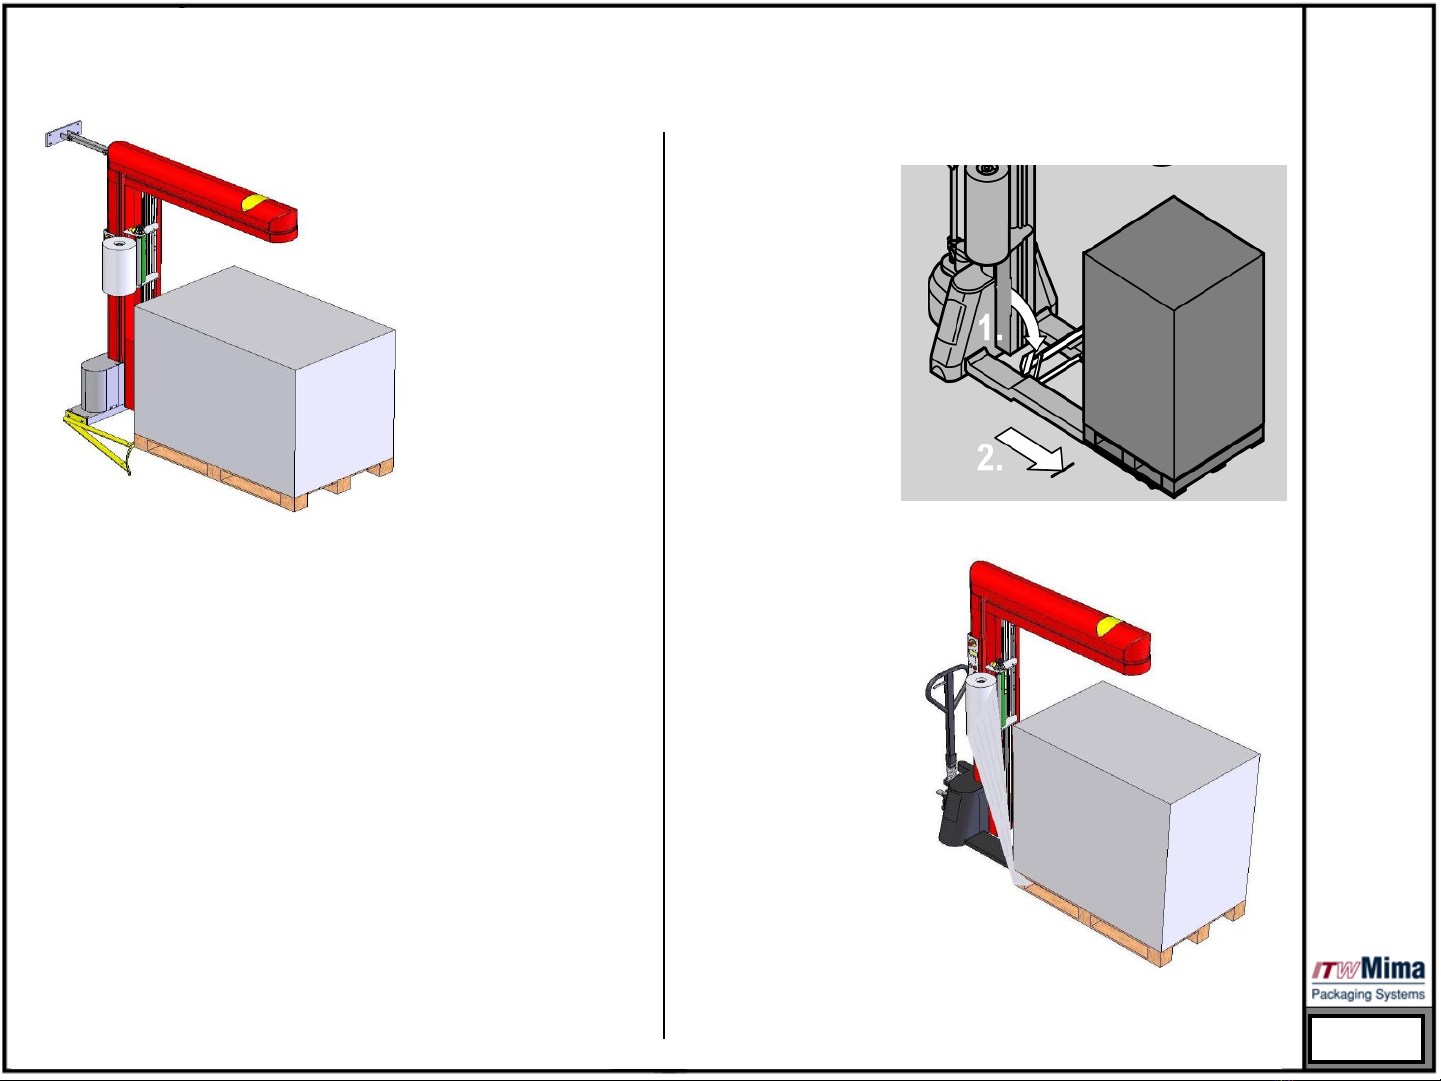
When moving RDL or PL
machines, always ensure
that the wrapping arm is
locked.
If a PL machine is connected
to a separate device, always
ensure that it is locked in
place.
RDL machines are unstable if
the pump unit is lifted too
high.
Check that the machine is
stable before you begin
wrapping.
PL-locked
PL-unlocked