JANE 40332 Assembly instructions

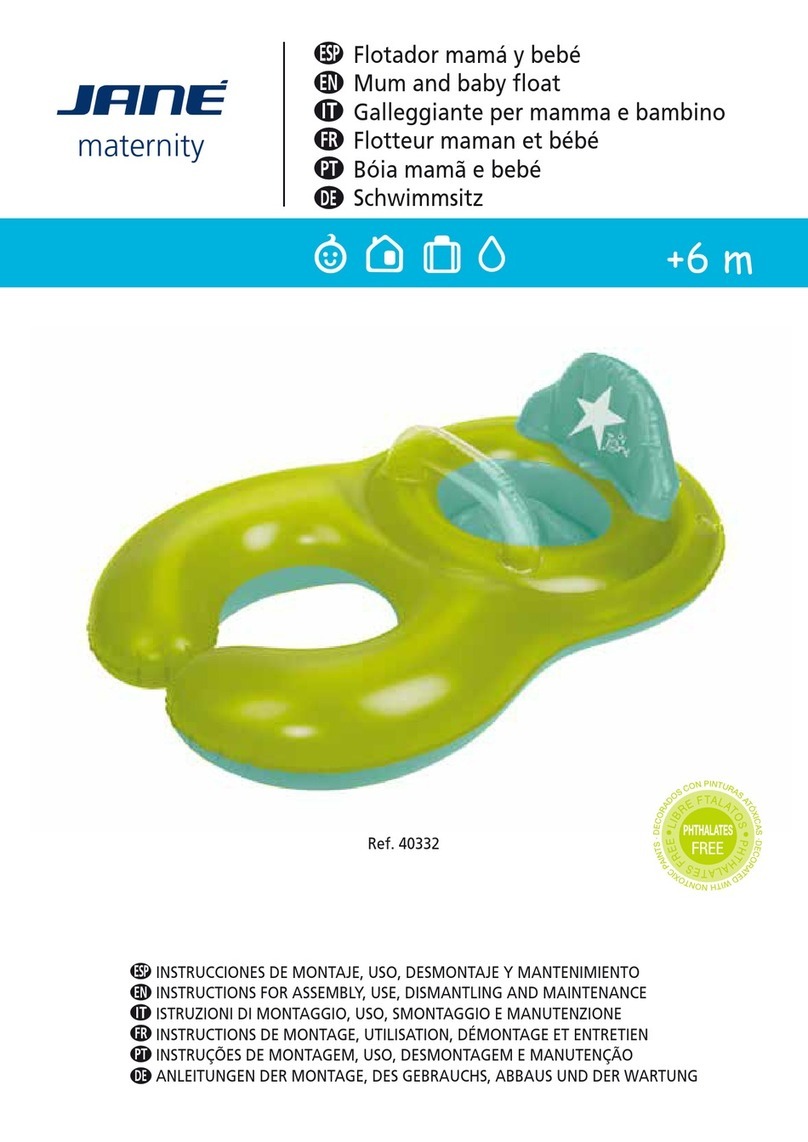
Ref. 40332
INSTRUCCIONES DE MONTAJE, USO, DESMONTAJE Y MANTENIMIENTO
INSTRUCTIONS FOR ASSEMBLY, USE, DISMANTLING AND MAINTENANCE
ISTRUZIONI DI MONTAGGIO, USO, SMONTAGGIO E MANUTENZIONE
INSTRUCTIONS DE MONTAGE, UTILISATION, DÉMONTAGE ET ENTRETIEN
INSTRUÇÕES DE MONTAGEM, USO, DESMONTAGEM E MANUTENÇÃO
INSTRUKCE PRO MONTÁŽ, POUŽÍVÁNÍ, DEMONTÁŽ A ÚDRŽBU
maternity
Flotador mamá y bebé
Mum and baby float
Galleggiante per mamma e bambino
Flotteur maman et bébé
Bóia mamã e bebé
Nafukovací kruh pro matku a dítě
EN
PT
CS
FR
EN
PT
CS
FR
+6 m

2
b d
ef
a
c
maternity

3
FLOTADOR MAMÁ Y BEBÉ
INSTRUCCIONES DE MONTAJE, USO, DESMONTAJE Y MANTENIMIENTO:
a) Para hinchar el flotador, primero debe abrir el tapón de la válvula, inflar a pulmón o con infladores
manuales (nunca un compresor) hasta el punto de que todas las cámaras del flotador queden infladas, y
tengan cierta presión (al apretar presente una cierta resistencia).
Podemos saber cuando el flotador está hinchado, cuando comience a presentar cierta resistencia al inflado.
b) Una vez hinchado, tapar rápidamente el tapón de la válvula para intentar que se escape el menor aire
posible del interior.
c) Una vez esté correctamente hinchado el flotador, colocar al niño/a en el flotador, asegurándose que quede
bien colocado y las piernas en su correspondiente ubicación. Una vez el niño/a esté estable en éste, colocar la
parte abierta del flotador en el cuerpo del adulto, rodeando a éste con los brazos del flotador, siempre
mirando hacia el niño.
Asegúrese de que los broches situados en el asiento del flotador queden bien fijados, ya que sirven para
adaptar el tamaño del flotador al peso del niño.
d) Para quitarse el flotador, primero desalojar y dejar en sitio seguro al niño/a antes de proceder a retirarse
el flotador de la cintura.
e) Para deshinchar el flotador, primero debe secarse bien, destapar el tapón de la válvula, apretar hasta que
no quede aire en el interior de las cámaras, y proceder a su plegado para almacenaje. Debe apretarse la
válvula tal y como se indica para poder vaciar el aire de su interior.
f) Para almacenar el flotador, debe quedar bien seco antes de proceder a su plegado. Colocar el tapón de la
válvula en su posición de cerrado antes de doblar el flotador.
g) Para una correcta utilización del flotador, el nivel de agua debe ser suficiente como para que el niño no
haga pie, pero que asegure que el adulto a cargo, si tenga contacto con el suelo sin sumergirse, y que
permita reaccionar ante cualquier posible complicación (vuelco, pérdida de presión,…). Se recomienda
utilizar el flotador con un nivel de agua que llegue a la altura del pecho del adulto.
ADVERTENCIA: Nunca deje al niño sin vigilancia.
El uso de pañales o de cualquier otra prenda o dispositivo no debe producir el aprisionamiento del niño en
el interior del asiento.
Equipo de flotación para el aprendizaje de la natación CLASE A con el nivel de
RENDIMIENTO 1
No es un juguete acuático.
La franja de edad-peso vulnerable del niño es: de 6 a 36 meses y de 6 a 18 kilos.
Cumple con la norma europea: EN 13138-3.
No protege frente al ahogamiento.
Hinchar siempre totalmente todas las cámaras de aire.
Usar únicamente bajo la supervisión constante al alcance directo del flotador de asiento.
AVISO - RIESGO DE VUELCO
Por usuarios que estén por encima o por debajo de la gama designada
de peso/edad.
En una profundidad en la que el niño haga pie, en rompientes de olas o en balsas de baño.
Fabricado en China - Diseñado en España.
NO UTILIZAR

4
INSTRUCTIONS FOR ASSEMBLY, USE, DISMANTLING AND MAINTENANCE:
a) To inflate the rubber ring, first open the valve cap. Inflate by blowing or with manual inflators (never use
a compressor) until all the chambers of the ring are inflated, and they have enough pressure (when you
squeeze the ring there should be a certain amount of resistance).
The rubber ring is inflated when it starts to display resistance to inflation.
b) Once it is inflated, quickly close the valve cap so that the least amount of air possible escapes.
c) When the rubber ring has been correctly inflated, place the child in the ring, making sure that he/she is
correctly positioned and his/her legs are in the correct place. Once the child is stable in the ring, place the
open part of the ring on the adult's body, surrounded by the arms of the ring, always facing the child.
Make sure that the fasteners found on the seat of the float are securely fastened, as they are used to adapt
the size of the float to suit the child's weight.
d) To take the ring off, first take the child out and leave him/her in a safe place before removing the ring
from around your waist.
e) To deflate the ring, first let it dry properly, open the valve cap, squeeze the ring until there is no air left in
the chambers, and then fold it up for storage. Squeeze the valve as shown in the diagram to get all the air
out.
f) To store the rubber ring, it should be completely dry before it is folded. Place the cap on the valve in the
closed position before folding the ring.
g) For correct use of the rubber ring, the water level should be deep enough for the child not to be able to
stand up, but the adult in charge should be able to touch the bottom without being completely submerged,
and must be able to react to any possible complication (turning over, loss of pressure,...). It is advisable to
use the rubber ring with a water level that reaches the adult's chest.
WARNING: Never leave the child unsupervised.
The use of nappies or any other garment or device should not cause the child to get trapped in the seat.
MUM AND BABY FLOAT
CLASS A float to help babies learn to swim with PERFORMANCE LEVEL 1
This is not a water toy.
The vulnerable age-weight range of the child is: from 6 to 36 months and from 6 to 18 kilos.
Conforms to European Regulation: EN 13138-3.
Does not guard against drowning.
Always inflate all the air chambers fully.
Only use under constant supervision and always keep the swim seat within arm's reach.
WARNING - RISK OF TIPPING OVER
With children that are above or below the indicated weight/age range.
At a depth where that child can stand up, near wave breakers or in bathing pools.
Made in China - Designed in Spain.
DO NOT USE
EN

5
ISTRUZIONI DI MONTAGGIO, USO, SMONTAGGIO E MANUTENZIONE:
a) Per gonfiare il galleggiante, bisogna innanzitutto aprire il tappo della valvola. Gonfiare con il fiato o con
una pompa manuale (mai con un compressore) fino a che tutte le camere del galleggiante siano gonfie ed
abbiano una certa pressione (premendo presentino una certa resistenza).
Sapremo che il galleggiante è gonfio, quando inizia a presentare una certa resistenza mentre lo gonfiamo.
b) Una volta gonfio, chiudere rapidamente il tappo della valvola in modo tale che fuoriesca la minor
quantità di aria possibile dall'interno.
c) Una volta gonfiato correttamente il galleggiante, collocare il bambino/a nel galleggiante, assicurandosi di
collocarlo bene con le gambe nella loro corrispondente ubicazione. Una volta collocato il bambino/a nella
posizione stabile, collocare la parte aperta del galleggiante nel corpo dell'adulto, in modo tale da
circondarlo con i bracci del galleggiante, e rivolto sempre verso il bambino.
Assicurarsi che le chiusure che si trovano sulla seduta del salvagente siano ben fissate, dato che servono per
adattare le misure
del salvagente al peso del bambino.
d) Per togliersi il galleggiante, innanzitutto togliere il bambino/a e lasciarlo/a in un luogo sicuro, quindi
procedere a togliersi il galleggiante dalla cintura.
e) Per sgonfiare il galleggiante, prima deve essere ben asciutto, quindi aprire il tappo della valvola, premere
fino a che non rimanga più aria all'interno delle camere, e procedere alla sua chiusura per conservarlo.
Bisogna premere la valvola come si indica per poter svuotare l'aria dall'interno.
f) Per immagazzinare il galleggiante, deve essere ben asciutto prima di procedere alla sua chiusura.
Collocare il tappo della valvola nella sua posizione di chiusura prima di piegare il galleggiante.
g) Per un corretto utilizzo del galleggiante, il livello dell'acqua deve essere tale da permettere al bambino di
non toccare, ed assicurare all'adulto a carico di toccare il suolo senza immergersi e poter reagire davanti a
qualsiasi possibile complicazione (ribaltamento, perdita di pressione, ecc.). Si raccomanda di utilizzare il
galleggiante con un livello d'acqua che arrivi all'altezza del petto dell'adulto.
AVVERTENZA: Non lasciare mai il bambino incustodito.
L'uso di pannolini o di un qualunque capo d'abbigliamento non deve causare l'imprigionamento del bambino
all'interno della seduta.
Non protegge dall'annegamento.
Gonfiare sempre completamente tutte le camere d'aria.
Usare solo sotto la supervisione costante, a diretta portata di mano del salvagente con seduta.
ATTENZIONE - RISCHIO DI CAPOVOLGIMENTO
Se il bambino è al di sopra o al di sotto dell'intervallo stabilito per peso/età.
A una profondità in cui il bambino possa toccare il fondo con i piedi, con onde frangenti o in pozze
d'acqua naturali.
Fabbricato in Cina - Progettato in Spagna.
NON UTILIZZARE
GALLEGGIANTE PER MAMMA E BAMBINO
Attrezzatura di galleggiamento per l'apprendimento del nuoto CLASSE A con livello
di RENDIMENTO 1
Non è un giocattolo acquatico.
La fascia di età-peso in cui il bambino è vulnerabile è: da 6 a 36 mesi e da 6 a 18 kg.
Rispetta la normativa europea EN 13138-3.
This manual suits for next models
1
Table of contents
Languages:
Other JANE Baby Accessories manuals

JANE
JANE GROWING PLUS User manual

JANE
JANE 30616 User manual

JANE
JANE maternity 010467 T54 User manual

JANE
JANE 050206C01 User manual

JANE
JANE 30515 User manual

JANE
JANE BABYSIDE User manual

JANE
JANE Nurse Elephant User manual

JANE
JANE 050289 S58 User manual

JANE
JANE AUTO SPORT Instruction Manual

JANE
JANE 40332 User manual