Javelin J320i User manual

General
Information
Rev. 1.1
engenyus limited - August 2003
User's manual
J320i
www.engenyus.com
C
TM
Quick Start
Getting
Started
Operation
Starting to
Print Cards
Cleaning
Trouble
Shooting
Technical
Specifications
General
Information

General
Information
a
Rev. 1.1
1. Install card cleaning cartridge
The card cleaning cartridge is packed separately from
the printer in a protective plastic bag. Remove carefully and
peel off tape from the cleaning roller before installing it.
Refer to printer user’s manual chapter 2 for more
information about the cleaning cartridge.
2. Install card feeder cassette & card output hopper
This two items are delivered separately from the printer in
protective plastic bags.
Refer to printer user’s manual chapter 2 for more
information.
Quick Start!
Before starting to work with your new JAVELINTM card
printer, please refer to this Quick Start guide.
For more complete information regarding all aspects of your
printer’s operation, please refer to the main chapters of the
printer user’s manual.
Quick Start
Getting
Started
Operation
Starting to
Print Cards
Cleaning
Trouble
Shooting
Technical
Specifications
General
Information
General
Information
b
Rev. 1.1
4. Loading ribbon
First, turn on the power to the printer and raise the
printhead. Ribbon loading involves the placement of the
ribbon onto the supply and take-up spindles. As soon as
the ribbon is installed and the printhead is locked down,
the spindles will automatically rotate to take up any slack
and to synchronize the ribbon to the correct panel.
Refer to printer user’s manual chapter 2 for more
instructions.
5. Loading cards
First shuffle a stack of new cards to reduce any electrostatic charge.
Always handle cards by their edges.
Refer to printer user’s manual chapter 2 for more instructions.
6. Set card thickness control lever
This item can be operated by the user to set the card
thickness and to prevent more than one card feeding into
the printer at the same time and causing a jam. Simply
move the lever to adjust correct card thickness position.
Refer to printer user’s manual chapter 2 for more
information.
7. Starting to print cards
First connect the interface cable and install the Windows driver on your PC.
Refer to printer user’s manual chapter 3 for more instructions.
SUPPLY SPINDLE
TAKE-UP SPINDLE
Step 1 Step 2 Step 3
Quick Start
Getting
Started
Operation
Starting to
Print Cards
Cleaning
Trouble
Shooting
Technical
Specifications
General
Information
i
Rev. 1.1
INTRODUCTION
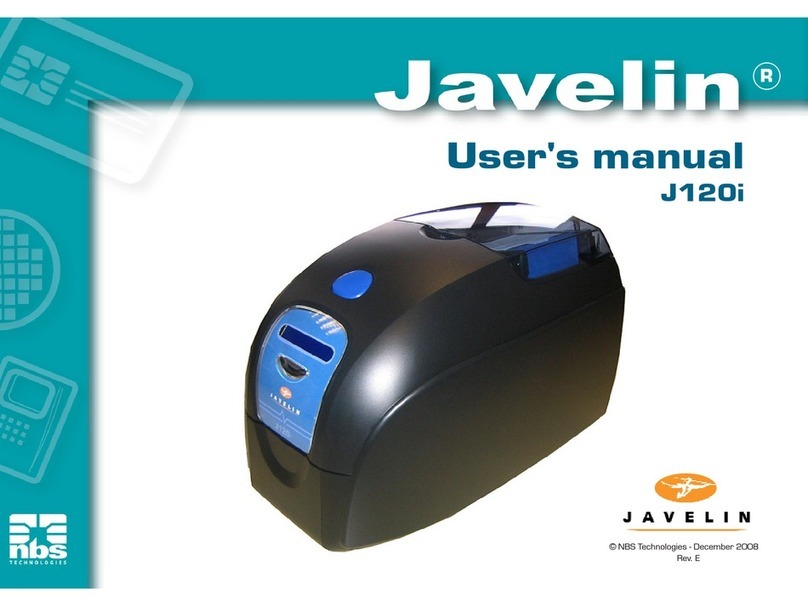
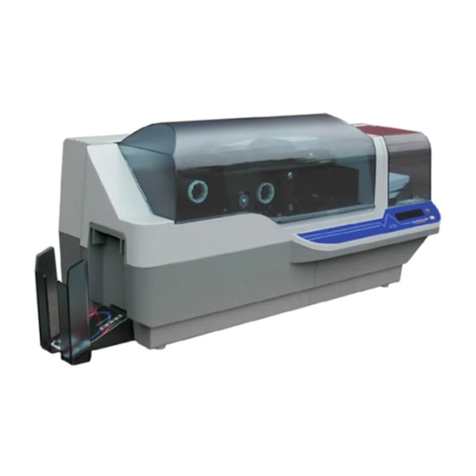
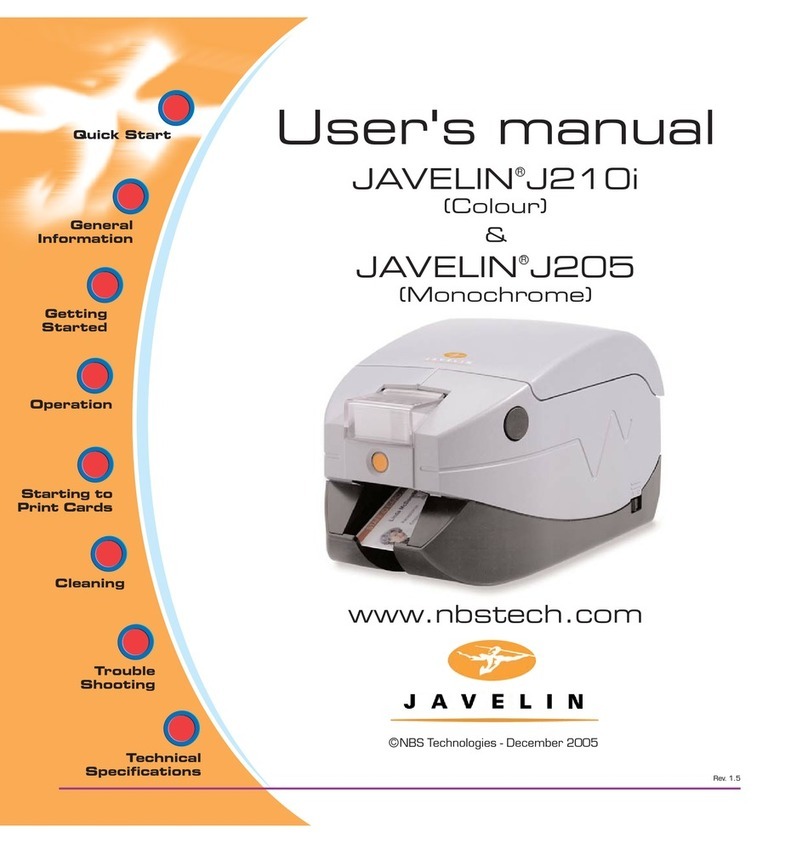
Thank you for choosing the Javelin J320i plastic card printer.
These printers produce cards ideal for personalised identification, access control,
visitor, membership, promotion and luggage card, badges and tags.
This manual guides you to an efficient start up and operation of your
new card printer.
J320i PRINTER MODELS
Here is a quick review of the Javelin card printer series numbering and lettering
system to help you.
The Javelin J320i plastic card printer employs dye sublimation and resin thermal
transfer technologies. Model numbers include identifiers that specify options are
shown using the following lettering conventions:
This information can be found on the printer serial number panel and is also shown
on the test card.
Part Number
M:Magnetic
Encoding
E: Smart Card
i: Intelligent printer.
Use only TrueColoursTM colour
ribbons from Javelin Dealers
Optional
J320i (X) (X) - nnnnnn
}
GENERAL INFORMATION
Quick Start
Getting
Started
Operation
Starting to
Print Cards
Cleaning
Trouble
Shooting
Technical
Specifications
General
Information
User's manual

ii
Rev. 1.1
ICONS
Throughout this manual, different icons highlight important information, as follows:
Important general information
Mechanical hazard, such as one associated with
moving parts, capable of resulting in equipment
damage or personal injury.
Electrical hazard, such as an exposed voltage point,
capable of causing electrical shock and personal injury.
GENERAL INFORMATION
Quick Start
Getting
Started
Operation
Starting to
Print Cards
Cleaning
Trouble
Shooting
Technical
Specifications
General
Information
TABLE OF CONTENTS
1GETTING STARTED ....................................................... 1
1.1 Unpacking your card printer 1
1.2 Indicators and controls 3
1.3 Printer installation 4
2OPERATION 5
2.1 Printer Features 5
2.2 Loading ribbons 6
2.3 Loading cards 8
A- Card Feeder 8
B- Card Cleaning Cartridge 10
C- Card Thickness Control Lever 11
D- Card Output Hopper 11
2.4 Reject Card Box 12
2.5 Feeding one card at a time 14
2.6 Printing a test card 15
2.7 Printer menu information 16
3STARTING TO PRINT CARDS 19
A- Install Driver on windows 95/98 20
B- Install Driver on windows NT4.0 21
C- Set Printer Driver Options and printing a test card 21
4CLEANING 23
4.1 Cleaning system 24
4.2 Cleaning the printhead 25
4.3 Card Cleaning Cartridge 26
5TROUBLESHOOTING 29
5.1 Interpreting LCD Display Messages 29
5.2 Print Quality issues 32
6TECHNICAL SPECIFICATIONS 35
iii
Rev. 1.1
TABLE OF CONTENTS
1GETTING STARTED ...................................................... 1
1.1 Unpacking your card printer ......................................................... 1
1.2 Indicators and controls ............................................................... 3
1.3 Printer installation ...................................................................... 4
2OPERATION ...................................................................... 5
2.1 Printer features ......................................................................... 5
2.2 Loading ribbons ......................................................................... 6
2.3 Loading cards............................................................................ 8
A- Card cartridge ....................................................................... 8
B- Card cleaning cartridge ........................................................... 10
C- Card thickness control lever...................................................... 11
D- Card output hopper................................................................. 11
2.4 Feeding one card at a time........................................................... 12
2.5 Printing a test card .................................................................... 13
2.6 Passcode Electronic Lock............................................................. 14
3STARTING TO PRINT CARDS ................................. 16
A- Install driver on Windows 98, 2000/NT or XP ............................ 17
B- Set printer driver options ......................................................... 18
C- TrueSecure Varnish Imaging Printing .......................................... 19
4CLEANING ......................................................................... 20
4.1 Cleaning system......................................................................... 21
4.2 Cleaning the printhead............................................................... 22
4.3 Card cleaning cartridge ............................................................... 23
5TROUBLESHOOTING .................................................. 25
5.1 Interpreting LCD display messages ............................................... 25
5.2 Print quality issues ..................................................................... 29
6TECHNICAL SPECIFICATIONS................................ 32
GENERAL INFORMATION
Quick Start
Getting
Started
Operation
Starting to
Print Cards
Cleaning
Trouble
Shooting
Technical
Specifications
General
Information
iv
Rev. 1.1
APPENDIX A -
JAVELIN i SERIES
INTELLIGENT PRINTING SYSTEM .............................. 36
Frequently asked questions........................................................... 36
APPENDIX B -
MAGNETIC CARD STRIPE ENCODER ...................... 39
Introduction ................................................................................ 39
A- Media loading orientation ....................................................................... 40
B- Magnetic encoder cleaning .................................................................... 41
APPENDIX C -
SMART CARD CONTACT STATION .......................... 42
Introduction ................................................................................ 42
A- Media loading orientation ...................................................................... 43
B- Smart card contact station interface .................................................... 43
APPENDIX D -
ACCESSORIES & SUPPLIES ......................................... 44
Ribbons......................................................................................................... 44
Cards ............................................................................................................ 45
Accessories ................................................................................................. 46
APPENDIX E -
WARRANTY INFORMATION .......................................... 47
APPENDIX F -
TECHNICAL SUPPORT...................................................... 49
APPENDIX G - ....................................................................... 50
Declaration of Conformity ........................................................................... 50
Trademarks .................................................................................................. 51
Copyright Notice ........................................................................................... 51
GENERAL INFORMATION
Quick Start
Getting
Started
Operation
Starting to
Print Cards
Cleaning
Trouble
Shooting
Technical
Specifications
General
Information
1
Quick Start
Getting
Started
Operation
Starting to
Print Cards
Cleaning
Trouble
Shooting
Technical
Specifications
General
Information
Rev. 1.1GETTING STARTED
Your J320i printer ships in a carton and protective anti-static bag.
Keep all packing material in case you need to move or re-ship the printer.
While unpacking, inspect the carton to ensure that no damage occured
during shipping.
Please ensure that you have a clean and nearly dust free environment for
proper operation and storage of the printer.
1 Getting started
1.1 Unpacking your card printer

2
Quick Start
Getting
Started
Operation
Starting to
Print Cards
Cleaning
Trouble
Shooting
Technical
Specifications
General
Information
Rev. 1.1GETTING STARTED
Make sure the following items are included with your J320i printer:
If any items are missing, please contact your dealer.
To reorder, please refer to Appendix D of this manual.
CLEANING KIT
POWER CABLE
USER MANUAL &
PRINTER DRIVER CD QUICK START GUIDE
INTERFACE CABLE
CLEANING CARTRIDGE
CARD OUTPUT HOPPERCARD FEEDER CASSETTE

General
Information
3
Quick Start
Getting
Started
Operation
Starting to
Print Cards
Cleaning
Trouble
Shooting
Technical
Specifications Rev. 1.1GETTING STARTED
Your J320i printer has an LCD Display and and 2 Panel Buttons.
LCD DISPLAY :
The 16 character LCD Display is used for :
●Showing the printer's current status
●Providing operator and service messages (Chapter 5)
LEDS :
The two LEDs are used for :
●Green: Power LED
●Amber: Alert LED (with beeper)
This alert LED is on when an error condition exists.
The beeper will sound three alert "beeps" and the LCD display will show the
associated error message.
PANEL BUTTONS:
The Menu/Next Button (left) is a push button used for:
●Bringing printer into menu mode when pressed with the printer showing READY
on the LCD Display.
●Using in menu mode to scroll through menu options.
The Clear/Select Button (right) is a push button used for:
●Clearing an error status (when LCD display shows an error report and alert
LED is on).
●Invoking automatic retry of the operation which gave the error.
●Selecting a menu option when in menu mode.
NOTE: the buttons “beep” when pressed
1.2 Indicators and Controls
Power
LED
Menu/Next Button
LCD Display
Clear/Select Button
Alert LED
Quick Start
Getting
Started
Operation
Starting to
Print Cards
Cleaning
Trouble
Shooting
Technical
Specifications
General
Information
4
Rev. 1.1GETTING STARTED
The following will guide you through the installation of your J320i printer.
1.3 Printer Installation
CAUTION : Limit AC power supplied to the J320i Printer to
110 - 230 V AC, 60 - 50 Hz for an associated 680 mA - 310
mA. Limit excess current draw to 16 amps or less, using an
associated circuit breaker or other such device. Never operate
the printer in a location where operator, computer, or printer
can get wet. Personal injury could result. The printer must be
connected to an earthed electrical power supply and properly
protected against electrical surges and grounding faults.
CAUTION: Intermittent or unpredictable operation may
occur from unsecured connectors. If damaged, the power
cable must be replaced by an exact equivalent.
Use only parallel cable under 3 metres in length.
1. Place the printer in a location that allows easy
access to all sides. The printer should never be
operated while resting on its side or upside down.
2. Place the printer’s power switch in the OFF
(0) position.
3. Insert the power cable to the printer power socket
and attach to grounded electrical socket of the
proper voltage and type.
4. Attach interface cable to printer and computer
and then secure.
5. Switch power on.
Quick Start
Getting
Started
Operation
Starting to
Print Cards
Cleaning
Trouble
Shooting
Technical
Specifications
General
Information
5
Rev. 1.1OPERATION
2 Operation
2.1 Printer Features
STANDARD FEATURES
1. Printhead
2. Printhead Unlock lever
3. LCD Display
4. Panel Buttons
5. Card Output Hopper
6. Card Thickness Control
7. Card Feeder Casette
8. Card Cleaning Cartridge
PLEASE NOTE : Any blue items inside the printer can be operated by the user.
OPTIONAL FEATURES
A. Magnetic Encoder Station
B. Smart Card Contact Station
The following shows the features found on your J320i printer:
Quick Start
Getting
Started
Operation
Starting to
Print Cards
Cleaning
Trouble
Shooting
Technical
Specifications
General
Information

1. Remove ribbon from packaging.
2. With printer power ON and in ‘Check Ribbon’
status, open cover and press down on the
printhead unlock lever to open the print
head carriage. The printhead carriage
will pop open.
Continued on next page ......
6
Rev. 1.1OPERATION
2.2 Loading Ribbons
The J320i printer requires approved ribbons (See Appendix A & D).
The resin thermal transfer and dye sublimation ribbons are specifically designed for
your J320i printer. For optimum performance and printer life (printhead), always
use approved ribbons.
Only intelligent TrueColoursTM colour ribbons purchased from Javelin dealer
will work in J320i printers
DO NOT TOUCH the printhead or the electronic
components on the printhead carriage. Discharges
of electrostatic charge from the human body or
other surfaces can damage the printhead or other
electronic components used in this device.
Quick Start
Getting
Started
Operation
Starting to
Print Cards
Cleaning
Trouble
Shooting
Technical
Specifications
General
Information

7
Rev. 1.1OPERATION
3. Load ribbon onto the supply spindle (under print
head carriage) and empty core (with tape attached)
onto the take-up spindle. Make sure the ribbon
comes off the top of the supply spindle and feeds to
the top of the take-up spindle. Push ribbon all the
way in.
4. Push down on the printhead lock lever until an
audible 'click' signals the locked-down position.
Please note that the ribbon automatically
synchronises whenever the printhead is
locked down. Ready status will appear.
Please note that the ribbon automatically
synchronises whenever the printhead is locked down.
SUPPLY SPINDLE
TAKE UP SPINDLE
‘CLICK’
Quick Start
Getting
Started
Operation
Starting to
Print Cards
Cleaning
Trouble
Shooting
Technical
Specifications
General
Information

8
Rev. 1.1OPERATION
2.3 Loading Cards
To help you load, print, and collect cards, the J320i has the following item:
A - CARD FEEDER CASSETTE
This item is used for loading cards.
1. Install card feeder cassette by hooking onto
printer as shown and clicking down.
2. Install cards into card feeder cassette* as shown.
3. Close card feeder cassette.
‘CLICK’
Quick Start
Getting
Started
Operation
Starting to
Print Cards
Cleaning
Trouble
Shooting
Technical
Specifications
General
Information

9
Quick Start
Getting
Started
Operation
Starting to
Print Cards
Cleaning
Trouble
Shooting
Technical
Specifications
General
Information
Rev. 1.1OPERATION
DO NOT bend cards or touch print surfaces
as this can reduce print quality. The surface
of the cards must remain clean and dust free.
Always store cards in an enclosed container.
Ideally, use cards as soon as possible.
If cards stick together, carefully shuffle them.
* See Chapter 6, Technical Specifications, for card requirements
and capacities.

10
Rev. 1.1OPERATION
B - CARD CLEANING CARTRIDGE
1. Remove card cleaning cartridge from packaging.
2. Remove the yellow reminder tape from the
location for the cleaning cartridge.
3. Make sure the arrow on top of the assembly
is facing toward the side of the printer.
Hook assembly into slot on printer and rotate down.
Ensure the assembly locks in place.
4. Close cover
Quick Start
Getting
Started
Operation
Starting to
Print Cards
Cleaning
Trouble
Shooting
Technical
Specifications
General
Information
This item is used to clean the cards entering the
printer and must be fitted before using the printer.

11
Rev. 1.1OPERATION
C- CARD THICKNESS CONTROL LEVER
This item is operated by the user to prevent more than one card feeding into
the printer at the same time and causing a jam.
D - CARD OUTPUT HOPPER
This item is used for collecting printed cards.
Install card output hopper to printer by
hooking over bottom edge of card exit aperture.
Open cover, and adjust lever to the
correct position for the card thickness you
are using. Repeat for different card thickness.
(Factory setting is for 30mil (0.762 mm) card
thickness). See diagram below :
Card thickness:
A - 60mil (1.524mm) to 50mil (1.27mm)
B - 40mil (1.016mm)
C - 30mil (0.762mm) - DEFAULT
D - 20mil (0.508mm)
E* - Less than 20mil (0.508mm)
* Start at lowest position and move lever up to
match card thickness.
For other card thickness, start lever at lowest
position and move up until cards feed.
Quick Start
Getting
Started
Operation
Starting to
Print Cards
Cleaning
Trouble
Shooting
Technical
Specifications
General
Information

12
Rev. 1.1
A manual feed slot is available on the rear of the card feeder cassette cover for
feeding single cards. Cleaning cards are fed manually through this slot.
The card feeder cassette must be empty for manual card feeding to
work properly.
For one-at-a-time printing, feed cards through
slot on rear of card feeder cassette.
Do not feed more than one card at a time.
2.4 Feeding one card at a time
OPERATION
Quick Start
Getting
Started
Operation
Starting to
Print Cards
Cleaning
Trouble
Shooting
Technical
Specifications
General
Information

13
Rev. 1.1
With ribbon and cards loaded, your J320i printer is ready to print.
To check the operation of the printer you should print a test card.
2.5 Printing a Test Card
This is an example of the test card.
OPERATION
1. Turn off printer.
2. While pressing clear button, switch printer
back on.
3. LCD will show test, depress button once self
test is displayed.
4. A test card is printed. This will show the
current printer settings.
5. The printer is now communicating with the
computer and is ready for use
Quick Start
Getting
Started
Operation
Starting to
Print Cards
Cleaning
Trouble
Shooting
Technical
Specifications
General
Information
Table of contents
Other Javelin Printer manuals

Javelin
Javelin J420i User manual

Javelin
Javelin J110i User manual

Javelin
Javelin J360i User manual

Javelin
Javelin J100i User manual

Javelin
Javelin J310 User manual

Javelin
Javelin J330i User manual

Javelin
Javelin J120i User manual

Javelin
Javelin J330i User manual

Javelin
Javelin J210i User manual

Javelin
Javelin J420 User manual
Popular Printer manuals by other brands

Star
Star MP212FP-24-A Specification and operating instructions

Infinite Peripherals
Infinite Peripherals DPP-250 user manual

Epson
Epson 1400 - Stylus Photo Color Inkjet Printer user guide

Epson
Epson 500DN - B Color Inkjet Printer Declaration of conformity

iDPRT
iDPRT iMOVE T3Pro user manual

Epson
Epson TM-U590 Series brochure