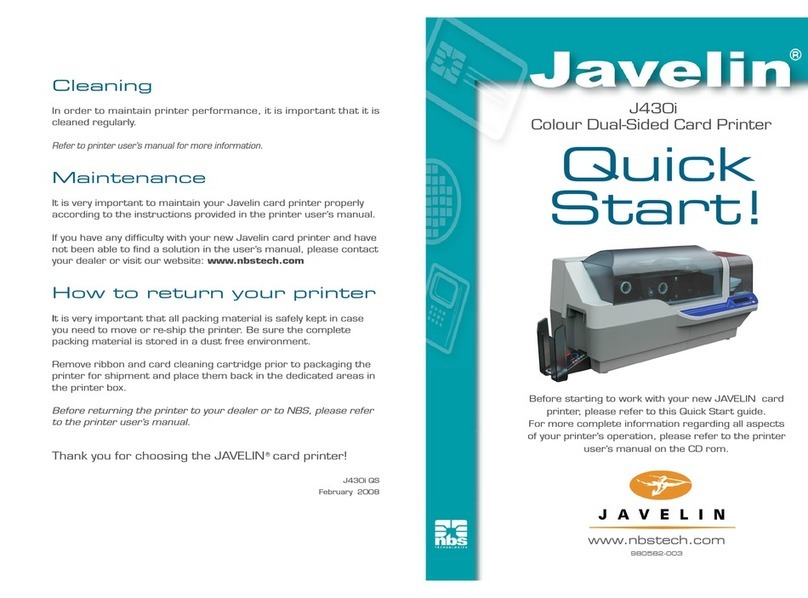
Javelin J330i User manual

User's manual
J330i & J330m
NBS Technologies - December 2008
Rev. D
C
R

Quick Start
1. Unpack your Javelin card printer
Make sure the following items are included:
- Power & USB cable - Ribbon - Cleaning cartridge
- Driver and documentation CD - Cleaning kit - Quick Start guide
If any items are missing, please contact your dealer.
2. Install card cleaning cartridge
The card cleaning cartridge is packed separately from the printer in a
protective plastic bag. Remove carefully and peel off tape before installation.
A loud ‘CLICK’ will indicate the cartridge is correctly installed.
3. Prepare card output hopper
Grab the sides of the hopper and slide out.
4. Loading ribbon Turn on the power to the printer and raise the printhead.
Ribbon loading involves the placement of the ribbon onto the supply and
take-up spindles.
As soon as the ribbon is installed and the printhead is locked down, the
spindles will automatically rotate to take up any slack and to synchronise the
ribbon to the correct panel.
2

5. Loading cards
First shuffle a stack of new cards to reduce any electrostatic charge.
Always handle cards by their edges.
Do not try to eliminate the gap by pressing down on the card stack as
this can cause a misfeed.
6. Set card thickness control lever
This item can be operated by the user to set the card thickness and to
prevent more than one card feeding into the printer at the same time
and causing a jam.
There are 4 positions to set the card thickness control.
Slide the lever to set the gauge.
The second position down is the normal position (30mil/0.76mm)
7. Starting to print cards
Install the Windows driver on your PC, connect the interface cable
and switch on the printer when prompted.
3

Table of Contents
1Introduction.............................................................................. 7
Printer features
Controls, connectors, and indicators
LCD panel
2Installation and Setup................................................................ 10
General information
Unpacking the printer
Installing the print driver software and setting driver options
Installing the print driver
Loading a ribbon
Installing the card cleaning cartridge
Setting the card thickness control
Loading cards
Card output hopper
Large feeder extension kit
Installing the print driver software and setting driver options
Connecting the printer to your computer
Connecting power
Printing a test card
3Printing a Card.......................................................................... 23
Setting printer properties
Printing a sample card
Printing one card at a time
4Cleaning................................................................................... 27
Cleaning the printer
When to clean
How to clean
Cleaning the printhead
Card cleaning cartridge
When to replace the cleaning roller
How to replace the cleaning roller
4

5Troubleshooting.......................................................................... 33
Print quality issues
Troubleshooting the ethernet connection and adapter
Resetting to factory defaults
Ethernet adapter status indicator
Network status/activity indicator
6Technical Specifications................................................................ 40
General specifications
Ribbon specifications
Card specifications
Bar codes
Fonts
Card dimensions
Bi-directional communications interfaces
Mechanical specifications
Electrical
Environmental
Options
Appendix A Magnetic Card Stripe Encoder............................................... 43
Introduction
Media loading orientation
Sample encoding program
Magnetic encoder cleaning
When to clean
How to clean
ISO standard encoding
5

Appendix B Smart Card Options............................................................ 46
Encoding and reading smart cards
Contact smart cards:
Media loading orientation for smart cards
Printing on contact smart cards
Contact station smart card interface
Contactless smart cards:
Media loading orientation for contactless smart cards
Printing on MIFARE contactless smart cards
Printing on UHF RFID contactless smart cards
Appendix C Connecting to a Network...................................................... 49
Printer sharing
External print server
Internal print server
Appendix D Accessories & Supplies........................................................ 51
Ribbons
Cards
Accessories
Appendix E Warranty Information........................................................... 55
Printers
Printheads
Supplies
Spare parts
6

1Introduction
Thank you for choosing the Javelin J360i Card Printer.
This manual guides you to efficient start up and operation of your new Card Printer.
Printer Features
The following shows the main functional features found on your J360i Printer.
2
1Introduction
Thank you for choosing the Javelin J330i/m card printer.
This manual guides you to efficient start up and operation of your new card printer.
Printer Features
The following shows the main functional features found on your printer.
7
CARD CLEANING CARTRIDGE
CARD GAUGE CONTROL
LCD DISPLAY & PANEL BUTTON
RIBBON SUPPLY SPINDLE
PRINTHEAD
RIBBON TAKE-UP SPINDLE
OUTPUT HOPPER
MAGNETIC ENCODING STATION
(OPTIONAL)

Controls, Connectors, and Indicators
Your printer has an LCD display panel and a panel button on the front and a power
connector, power switch, and interface connectors on the rear panel.
8
10/100 BASE-T CONNECTOR,
ETHERNET SWITCH,
NETWORK STATUS/ACTIVITY LED,
ETHERNET ADAPTOR STATUS LED
(THESE ARE ON THE OPTIONAL ETHERNET ADAPTOR
POWER SWITCH
POWER CONNECTOR
USB CONNECTOR
DB-9 CONNECTOR
LOCATION FOR SMART
CARD STATION (OPTIONAL)
LCD DISPLAY & PANEL BUTTON

Message Mode
Operational:
INITIALISING Scrolling
READY Fixed
DOWNLOADING DATA Fixed
PRINTING MONO Fixed
MAG ENCODING Fixed
CONTACT ENCODING Fixed
PRINTING CYAN Fixed
PRINTING YELLOW Fixed
PRINTING MAGENTA Fixed
PRINTING BLACK Fixed
PRINTING OVERLAY Fixed
DOWNLOADING FW Fixed
CLEANING PRINTER Fixed
Warnings:
CLEAN PRINTER Scrolling
REMOVE RIBBON THEN CLOSE HEAD Scrolling
EMPTY FEEDER & PRESS BUTTON Scrolling
LOAD CLEANING CARD IN FEEDER Scrolling
PRESS BUTTON TO CONTINUE Scrolling
FEED LONG CLEANING CARD IN EXIT Scrolling
CLEANING PRINTER Scrolling
ENCODING ERROR (printing stops) Blinking
INVALID MAGNETIC DATA (encoding stops) Scrolling
REMOVE RIBBON Fixed
Errors (Printer will not operate):
OUT OF RIBBON Blinking
MECHANICAL ERROR Blinking
OUT OF CARDS Blinking
PRINT HEAD OPEN Blinking
9
LCD Panel
The LCD panel
can display the
following messages:

10
2Installation and Setup
General Information
This section will guide you through the installation and setup of your printer.
This consists of the following procedures, which should be performed in the order
presented.
Unpacking the printer
Installing the print driver software and setting driver options
Loading a ribbon
Installing the card cleaning cartridge
Setting the card thickness control
Loading cards
Connecting the printer to your computer
Connecting power
Printing a test card to verify printer operation
The printer should be placed in a location that allows easy access to all sides.
The printer should never be operated while resting on its side or upside down.
Electric Shock Caution: Limit AC power supplied to the printer to
110 ~ 230 volts, 60 ~ 50 Hertz. Limit excess current draw to 16 amps or less, using an
associated circuit breaker or other such device.
Never operate the printer in a location where operator, computer, or printer can get wet.
Personal injury could result.
The printer must be connected to an earthed electrical power source and properly
protected against electrical surges and grounding faults; the electrical reliability of the
printer is based on the reliability of the mains power source and with the earth connection.
The printer’s power supply is an internal unit that can only be serviced or replaced by
trained and authorised personnel.
Unpacking the Printer
Your printer ships in a carton and protective anti-static bag.
Keep all packaging material in case you need to move or reship the printer.
Inspect the shipping container to ensure that no damage has occurred during shipment.
If any damage is apparent, file a claim with the shipper.
Please ensure that you have a clean and nearly dust free environment for proper
operation and storage of the printer.
Make sure the following items are included with your printer:
If any items are missing, please contact your dealer.
11
Quick
Start!
Driver & Documentation CD Ribbon
Cleaning Cartridge USB & Power Cables
Cleaning Kit Quick Start Guide

12
Your printer ships with warning tape where the card cleaning cartridge will be
installed, and a pad that protects the printhead from possible damage in shipment.
1Open the printer’s main cover.
2Remove the cleaning cartridge warning tape.
3Release the printhead carriage by pushing the printhead carriage latch to the left,
and raise the printhead carriage. It will remain open at about a 45° angle.
4Remove the printhead protection pad.
Keep the pad, as well as the other packing material and the shipping carton, in case the
printer is shipped or moved.
PROTECTION PAD
WARNING TAPE

13
Loading a Ribbon
Although this paragraph applies to the J330i only, the ribbon loading method applies to both
models.
Javelin i-series printers require the use of Javelin encoded i-series ribbons for full colour
printing. The resin thermal transfer and dye sublimination ribbons for J330i are specifically
designed for your J330i printer.
1Place the printer power switch in the OFF (0) position.
2Raise the printhead carriage by pressing the release latch to the left (toward the
output hopper) and lifting as shown below to about a 45° angle. The printhead
carriage will stay in that position.
Electrostatic discharge caution: DO NOT TOUCH the printhead or the electronic
components on the printhead carriage. Discharges of electrostatic energy that
accumulate on the human body or other surfaces can damage the printhead or
other electronic components used in the printer.
Note: Avoid any direct contact with the printhead to prevent transfer of oils or
contamination. Outside of normal operation, only the NBS - approved cleaning materials
should come in contact with the print head.
3Locate the ribbon supply spindle and the ribbon take-up spindle (see above). Load
ribbon onto the supply spindle (under the printhead carriage) flange side in, and load
the empty core (with tape attached) onto the take-up spindle. Make sure the ribbon
comes off the top of the supply spindle and feeds to the top of the take-up spindle.
TAKE-UP SPINDLE
SUPPLY SPINDLE

14
5Gently press the printhead carriage down until it is fully lowered, as shown below.
Very little force is necessary to perform this step.
Caution: Do not touch the printhead if the printer has been in service within
the last 10 minutes. It could be very hot and cause a burn.
Electrostatic discharge caution: A static discharge is possible if you touch any
exposed metal parts. Use of an anti-static wrist strap or comparable
anti-static protection is required.
Note: During normal operation (with power connected and turned on), the ribbon would
automatically synchronise when the printhead is restored to its fully-down position. The
ribbon would be identified and the corresponding parameters sent to the driver.
Since power is not connected at this point in the installation and setup procedure,
nothing will happen when the printhead carriage is closed. The ribbon will synchronise
when power is turned on.

15
Installing the Card Cleaning Cartridge
The card cleaning cartridge cleans the cards entering the printer and consists of a
cartridge frame and an adhesive roller, which are packed together.
1Remove the cartridge frame and the adhesive roller from their packaging. Insert the
adhesive roller into the cartridge frame. To avoid contamination, always hold the
frame and the roller by the ends and peel the protective wrapper from the adhesive
roller.
2Open the printer’s main cover and locate the area where the card cleaning cartridge
will be installed (initially, this area was covered by a warning tape).
3Locate the slot at the rear of the card cleaning cartridge mounting location.
4Hold the card cleaning cartridge by the extended ‘handle’ (so the large arrow on the
top is pointing away from you). With the cartridge at about a 30° angle (pointing
downward), insert the lip of the cartridge into the slot, until the cartridge seats
against the back wall.
Then press the front of the cartridge down until it seats all the way down and latches
with an audible ‘click’.
5Close the printer’s main cover.
SLOT

Setting the Card Thickness Control
The card thickness control is set by the user to adjust the gap as cards enter the printer, to
prevent double-feeds (which could cause a jam) or mis-feeds.
1Open the card feeder cover.
The card thickness control lever is at
the front of the left-side opening of
the card feeder area
Note: Set the card thickness control before loading cards.
Note: To reduce contamination and ensure better print quality, minimise the time the card feeder
cover is open.
There are four positions to set card thickness control.
2Slide the card thickness control to the position corresponding to the following:
Highest position: 50 mil (1.27 mm) to 60 mil (1.52 mm)
2nd position: 30 mil (0.76 mm) to 50 mil (1.27 mm) - Normal setting.
3rd position: 20 mil (0.51 mm) to 40 mil (1.02 mm)
Lowest position: 10 mil (0.25 mm) to 20 mil (0.51 mm)
Note: The overlap in settings above accommodates variations in environmental conditions
(especially humidity) and cards from different manufacturers. In general, start at the lowest
position and move the lever up until cards feed reliably.
Note: "60 mil" ("1.524 mm") cards may have a significant variation (over 10%) in the
actual thickness of the cards; do not use these cards unless each card has been measured to
have a thickness less than 66 mil (1.676 mm).
16

Loading Cards
This section shows how to load plastic cards into the printer. The J330i/m can use cards
with a range of thickness from 10 mil (0.25 mm) to 60 mil (1.5 mm).
The printer can also load and print cards fed individually. Information on this is given in
the next chapter.
The plastic cards generally come in decks of 100 cards; the card feeder can hold a full deck of
100 30-mil cards. Cards sometimes will stick together; this can cause mis-feeding or double
feeding. To avoid this, separate the cards before loading.
Note: Do not mix cards of different thicknesses!
Note: Do not bend cards or touch print surfaces as this can reduce print quality.
The surface of the cards must remain clean and dust free. Always store cards in an enclosed
container. Ideally, use cards as soon as possible.
Note: For cards with magnetic stripe, refer to Appendix A for loading instructions.
Note: To reduce contamination and ensure better print quality, minimise the time the card
feeder cover is open.
Open card feeder cover and place the cards in the input hopper.
Note: that there will be a 'gap' in the card stack, with several cards lying flat and the cards
above angled upward. This is normal and ensures proper feeding.
Caution: Do not touch print surfaces of the cards; this can reduce print quality
17

Card Output Hopper
This item is used for collecting printed cards.
Grab the sides of the hopper and slide out.
Note: To prevent movment during shipping
or operation the hopper is a very snug fit.
Firm force is therefore required to change its
position.
When the printer is not in use, slide the
hopper back into it’s closed position to
protect the printer from dust.
Optional Large Feeder Extension
This item is used for increasing card
feeding capacity.
Carefully remove card cover by forcing away
from the pivot points.
Slide feeder extension into place and secure
by using the 3 screws supplied.
Clip in the door.
18
DOORFEEDER EXTENSION
SCREW

1Introduction
Thank you for choosing the Javelin J360i Card Printer.
This manual guides you to efficient start up and operation of your new Card Printer.
Printer Features
The following shows the main functional features found on your J360i Printer.
2
Installing the print driver software and setting driver options
Printing with the J330i/m printer requires the Windows printer driver and your card
design/issuing software or printer command level programming through the printer
interface.
The printer can be used with any Windows 2000, Windows server 2003, Windows XP or
Windows Vista software application program, using the drivers provided on CD with the
printer.
This section contains information on the printing of a sample card in colour
(using the 5-panel colour ribbon YMCKO and the Windows printer driver).
Note: If updating the printer driver from a previous version, before installing the updated
printer driver, always update the firmware to the correct version first. Then delete the
existing version from your PC using the add/remove programs in Control Panel.
Installing the print driver
To install the printer driver automatically on all operating systems, use the Javelin
Install Wizard.
Note: Ensure that you have administrative privileges to perform this installation, or contact
your IT department.
The Install Wizard will walk you through the appropriate installation steps. The Wizard will:
Automatically launch when the driver CD is inserted.
From the main menu of your documentation CD, select ‘INSTALL DRIVER’. The Install
Wizard will walk you through the appropriate steps.
Delete previous versions of the driver and clean up any necessary registry entries. You
must select ‘Remove’ from the install options to remove any previous driver versions.
19

Connecting the Printer to your Computer
This printer includes a standard USB interface.
As an option, the printer can be ordered with a 10/100base-T Ethernet Adapter
(in addition to the USB interface).
If using the USB interface, use the supplied USB cable to connect between the USB
connector on the printer and a USB port on the computer, as shown below. (Note that the
figure below shows the optional Ethernet Adapter directly above the USB Connector; this
may not be present on your printer.)
If your printer includes the optional Ethernet Adapter as well as the standard USB
connection, use either the supplied USB cable or a standard Ethernet cable to connect the
printer to a corresponding port on the computer or network.
Important: Do not use both USB and Ethernet connections at the same time!
Important: Intermittent or unpredictable operation may occur from unsecured
connectors. If damaged, the power cable must be replaced by an exact equivalent.
20
POWER SWITCH
POWER CONNECTOR
USB CONNECTOR
ETHERNET CONNECTOR (OPTIONAL)
Other manuals for J330i
1
This manual suits for next models
1
Table of contents
Other Javelin Printer manuals

Javelin
Javelin J100i User manual

Javelin
Javelin J120i User manual

Javelin
Javelin J420 User manual

Javelin
Javelin J210i User manual

Javelin
Javelin J430i User manual

Javelin
Javelin J330 User manual

Javelin
Javelin J360i User manual

Javelin
Javelin J310 User manual

Javelin
Javelin J100i User manual

Javelin
Javelin J320i User manual
Popular Printer manuals by other brands

Reiner
Reiner jetStamp 1025 operating manual

Lexmark
Lexmark Multifunction Laser Using

Epson
Epson U220B - TM Two-color Dot-matrix Printer Technical reference guide

Konica Minolta
Konica Minolta Magicolor 3300 user guide

Panasonic
Panasonic KX-PX20M - Photo Printer - 20 Sheets quick guide

VinTelecom
VinTelecom FS10 user manual