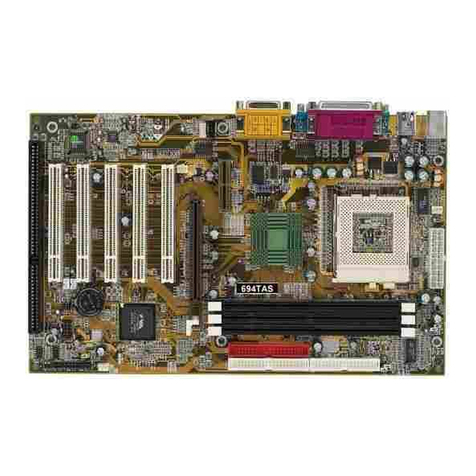
JETWAY BX2000 User manual

Chapter 1
1-1 Preface.....................................................................................................1
1-2 Feature for BX2000/BX2100....................................................................1
1-2-1 Overview.......................................................................................1
1-2-2 Key Feature..................................................................................1
Chapter 2
Hardware Installation....................................................................................3
2-1 Unpacking.................................................................................................3
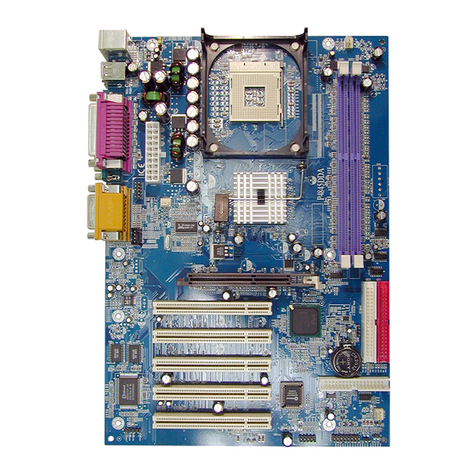
2-2 BX2000/BX2100 ainboard Diagram......................................................4
2-3 Quick Reference for Jumpers, Connectors & Expansion Socket.............5
2-4 Installation Steps......................................................................................6
2-5 Jumper Settings........................................................................................6
2-6 System emory (DRA )..........................................................................7
2-7 Central Processing Unit (CPU).................................................................7
2-8 Expansion Cards......................................................................................8
2-9 External Connectors.................................................................................9
Chapter 3
AWARD BIOS SETUP...................................................................................1
3-1 STANDARD C OS SETUP.....................................................................16
3-2 BIOS FEATURES SETUP........................................................................17
3-3 CHIPSET Features SETUP......................................................................18
3-4 POWER ANAGE ENT SETUP...........................................................19
3-5 PnP/PCI CONFIGURATION SETUP .......................................................22
3-6 LOAD OPTI AL DEFAULTS...................................................................22
3-7 LOAD STANDARD DEFAULTS...............................................................23
3-8 INTEGRATED PERIPHERALS SETUP...................................................23
3-9 SUPERVISOR/USER PASSWORD.........................................................24
3-10 SAVE & EXIT SETUP..............................................................................24
3-11 EXIT WITHOUT SAVING........................................................................24
Chapter 4
4-1 ainboard Driver Install in Win9X,WinNT................................................25
4-2 SOUND Card Driver QUICK Installation (Only for BX2100)....................26
Chapter 5
Quick Troubleshooting Guide...........................................................................44
Chapter 6
Frequently Asked Questions and Answers ......................................................45
i
TABLE OF CONTENT

Chapter 1
1-1 Preface
Thank you for chosen BX2000/BX2100 mainboard. This is a multifunction mainboard with most
flexibility you can find in today’s computer market. The mainboard integrates both Intel
Pentium®II / Pentium®III & Celeron™(Slot 1 & Socket 370) processor interface into a compact
PC/AT compatible system along with 3D Stereo Sound System audio chip. oreover, this
mainboard allows you conditionally approach 133 Hz * of Front Side Bus Frequency.
1-2 Feature of BX2000/BX2100
The BX2000/BX2100 are design for the PC user who wants highest possible quality and value in
a small package. This mainboard include following main features:
1-2-1 Overview
Support both Slot 1 & Socket 370 CPU interface (You can only use one CPU interface
at a time).
Support Ultra DMA 66 for newer hard disk interface.
Support Jump-less solution for setting Front Side Bus Frequency (CPU Host Clock)
and CPU ratio under CPU Host/PCI clock of CHIPSET FEATURES SETUP.
Conditionally support 133MHz * of Front Side Bus Frequency. This function allow user
select CPU Bus Frequency by the BIOS to approach Over-Clock possibility.
Logo-DIY: Provide CBROM utility for user to create their own loge in the BIOS.
Built in high quality PCI-Based HRTF 3D Extension Positional Audio Chip (BX2100
only )
-Supports rear side speakers, C3DX positional audio in 4 channels speaker mode.
-Professional digital audio interface to support 24-bit SPDIF IN and OUT (44.1K and 48K
format).
-HRTF-base 3D positional audio, supporting DirectSound™ 3D and Aural A3D™
interface.
- Digital functions that capable to provide hi-fi stereo, Dolby, 3D surround effects, and
playing P3 music.
You can add our Optical kit (Optional) to connect any optical Input/Output device for
super high quality sound transaction, such as playing & recording MD(Mini Disk)/CD;
CD-ROM directly recording to MD; combine with DVD player to create a home theater
system (This upgrade kit includes Optical Module, Optical Cable, and Software DVD
Driver).
1-2-2 Key Feature
Multi-Speed Support :Provide 66/75*/83*/95*/100/112*/117*/124*/133* Hz Front Side
Bus Frequency to support Intel Pentium®II / Pentium®III, Celeron processor for Slot1
interface or Intel Celeron PPGA on a ZIP Socket 370 interface.
VIA chipset: VIA 82C693,82C596B AGPset with I/O subsystems.
DRAM Memory Support:Support 3 x 168-pin DI sockets (3.3V) for memory from 8
Byte to 1.5GB Byte in either EDO (66 Hz only) or SDRA (66 Hz/100 Hz/133 Hz) type
module with ECC or parity check.
1

AGP, ISA, and PCI expansion Slots :Provide an AGP slot, one 16-bit ISA slot, and four
32-bit PCI master slots.
Super Multi-I/O: Provides two high-Speed UART compatible serial ports and one parallel
port with EPP and ECP capabilities. Two floppy drives of either 5.25” or 3.5” (1.44 B or
2.88 B) are also supported without an external card.
PCI Bus Master IDE Controller and ULTRA DMA 33/66 : On-board PCI Bus aster IDE
controller with two connectors that supports four IDE devices in two channels, provides
faster data transfer rates, and supports Enhanced IDE devices such as Tape Backup, CD-
RO , ZIP, LS-120 Drives. This controller also supports PIO odes and Bus aster IDE
Ultra D A 33/66 byte/Second.
ACPI supporting for OS Directed Power Management.
Ring-In Wake up: When Ring-In the system can wake up from S I ode.
Ring-In Power On: When Ring-In the system can power on automatic by this function.
RTC Power On: Enabled RTC Power On function, you can set RTC alarm to power on the
system at the time length that correspond to your setting.
Power Button: Press the button will place the system power on/off.
Wake on LAN : The system can power on by server in Network.
Support Software Power Off function.
Power Support: Efficient PW switching power instead of traditional Linear Voltage
Regulator to prevent power component from being burned-out.
PC 99 ready
PS/2 Mouse: This mainboard support PS/2 mouse set.
USB Port Connector: This mainboard supports two USB port connectors for USB devices.
Optional IrDA: This mainboard supports an optional infrared port module for wireless
interface, with independent 3rd UART (32-byte FIFO).
AGP: Accelerated Graphics Port, for to 533 B/sec data transfer rate and 66/133 Hz Bus
clock to improve graphic functions.
ATX Form Factor: Dimensions 30.5cm x 19cm.
* Your memory module(s) must be PC133 compliant SDRAM chips and specified or
marked as 8ns or 6ns.
* When you are running at 133MHz , make sure all of your PCI devices have enough
tolerance to run on 44MHz . Otherwise, it may cause your system become very
unstable.
2

Chapter 2
Hardware Installation
2-1 Unpacking
This mainboard package should contain the following:
The BX2000/BX2100 mainboard
USER’S ANUAL for mainboard
Cable set for Ultra D A 66 IDE x1, Floppy x1
CD for Drivers PACK
The mainboard contains sensitive electronic components that can be easily damaged by
electron-static, so the mainboard should be left in its original packing until it is installed.
Unpacking and installation should be done on a grounded anti-static mat.
The operator should be wearing an anti static wristband, grounded at the same point as the anti-
static mat.
Inspect the mainboard carton for obvious damage. Shipping and handling may cause damage to
your board. Be sure there are no shipping and handling damages on the board before
proceeding.
After opening the mainboard carton, extract the system board and place it only on a grounded
anti-static surface component side up. Again inspect the board for damage.
Press down on the entire socket IC’s to make sure that they are properly inserted. Do this only
on with the board placed on a firm flat surface.
Warning: Do not apply power to the board if it has been damaged.
You are now ready to install your mainboard. The mounting hole pattern on the mainboard
matches the ATX system board.
It is assumed that the chassis is designed for a standard ATX main board mounting. Place the
chassis on the anti-static mat and remove the cover.
Take the plastic clips, Nylon stand-off and screws for mounting the system board, and keep
them separate.
3

2-2 BX2100/ BX2000 Mainboard Diagram
Figure 2-2
Only for BX2100 mainboard
4

2-3 Quick Reference for Jumpers, Connectors & Expansion Socket
Jumpers
Jumper Name Description Page
JP15 CPU Bus Frequency Selection Refer to page 6 p. 6
U17 CPU Ratio Selector Refer to page 6 p. 6
JP17 C OS RA Clear 1-2 Normal ,2-3 Clear C OS p. 7
Connectors
Connector Name Description Page
PL1 ATX Power Connector 20-Pin Block p.9
INI-DIN PS/2 Keyboard/PS/2 ouse 6-Pin Female p.9
USB USB Port Connector 5-Pin Connector p.9
PRINT Parallel Port Connector 26-Pin Female p.9
CO 1, CO 2 Serial Port CO A , CO B 9-Pin Connector p.10
FDD Floppy Driver Connector 34-Pin Block p.10
IDE1 Primary IDE Connector 40-Pin Block p.10
IDE2 Secondary IDE Connector 40-Pin Block p.11
HDLED IDE activity LED 2-Pin Connector p.11
S I S I Suspend Switch 2-Pin Connector p.11
JP16 Front Panel Connector 16-Pin Block p.11
IR1 Infrared odule Connector 10-Pin Block p.12
CPUFAN, SYSFAN FAN Connector Extra fanning system connectors p.12
PS-ON ATX power button/soft power button 2-Pin Connector p.12
WOL Wake On LAN 3-pin Block P.12
Jumpers & Connectors for BX2100 only
Item num er Name Description Page
JP4 On-Board Sound Enable/Disable 1-2 : Disabled , 2-3 : Enabled p.13
JP1 AUX IN 4-pin Block p.13
JP2 CD-Audio 4-pin Block p.13
JP3 CD-Audio 4-pin Block p.13
AGC Line IN/Line Out/ IC /Game Connector 15-pin Connector + 3 phone jack p.13
SPKIN 1 PC Speaker In 2-pin Block p.14
SPDIFIN 1 SPDIF (Sony/Philips Digital Interface) IN 3-pin Block p.14
SPDIFOUT SPDIF (Sony/Philips Digital Interface) OUT 2-pin Block p.14
JP18 For Optional Optical Kit Connector 10-pin Connector p.14
Expansion Sockets
Socket/Slot Name Description
DI 1,DI 2, DI 3 DI odule Socket 168-Pins DI SDRA odule Expansion Socket
Slot1 CPU Slot Pentium II/III CPU Slot
Zip Socket370 CPU Socket Celeron PPGA CPU Socket
AGP SLOT AGP SLOT AGP Expansion Slot
PCI1, PCI2,PCI3 ,PCI4 PCI Slot 32-bit PCI Local Bus Expansion slots
SL1 ISA Slot 16-bit ISA Bus Expansion slot
2-4 Installation Steps
5
Before using your computer, you must follow the steps as follows:
1. Set Jumpers on the ainboard
2. Install the CPU
3. Install DRA odules
4. Install Expansion card
5. Connect Cables, Wires, and Power Supply
2- Jumper Settings
1. CPU Bus Frequency Selection : JP1
※Users also can setting the CPU Bus frequency in the “CPU Host/PCI clock” in
CHIPSET FEATURES SETUP.(Please refer to page 18)
Table for the Pentium II/III and Celeron (Slot 1 and Socket 370) CPU
CPU Type CPU BUS Clock Ratio CPU Frequency
Pentium II 266 , Celeron-266 66 Hz 4.0X 266 Hz
Pentium II 300 , Celeron-300/300A 66 Hz 4.5X 300 Hz
Pentium II 333 , Celeron-333 66 Hz 5.0X 333 Hz
Celeron-366 66 Hz 5.5X 366 Hz
Celeron-400 66 Hz 6.0X 400 Hz
Celeron-433 66 Hz 6.5X 433 Hz
Celeron-466 66 Hz 7.0X 466 Hz
Celeron-500 66 Hz 7.5X 500 Hz
Pentium II 350 100 Hz 3.5X 350 Hz
Pentium II 400 100 Hz 4.0X 400 Hz
Pentium II 450, Pentium III 450 100 Hz 4.5X 450 Hz
Pentium III 500 100 Hz 5.0X 500 Hz
Pentium III 550 100 Hz 5.5X 550 Hz
Pentium III 600 100 Hz 6.0X 600 Hz
Pentium III 533 133 Hz 4.0X 533 Hz
2. CMOS RAM Clear: JP17 (Yellow color selector)
6
Ratio 1 2 3 4 Ratio 1 2 3 4
2.0x ON ON ON ON 5.5x OFF OFF OFF ON
2.5x OFF ON ON ON 6.0x ON ON ON OFF
3.0x ON OFF ON ON 6.5x OFF ON ON OFF
3.5x OFF OFF ON ON 7.0x ON OFF ON OFF
4.0x ON ON OFF ON 7.5x OFF OFF ON OFF
4.5x OFF ON OFF ON 8.0x ON ON OFF OFF
5.0x ON OFF OFF ON
2. CPU Ratio Selector:U17
CPU External Frequency:JP15
CPU JP15
66 Hz 2-3
100 Hz 1-2
133 Hz*Control by BIOS
*Your Memory must meet the
requirement to run on 133MHz the
condition.

WA NING: Make sure your computer is POWE OFF when you CLEA CMOS.
Connect a jumper Cap over this jumper for a few seconds, will clears information stored in the
C OS RA Chip that input by user, such as hard disk information and passwords. After
CLEAR C OS, you must enter the BIOS setup (by holding down <DEL> during power-up) to re-
enter BIOS information (see BIOS SETUP).
Selections JP17
Normal 1-2 (Default)
Clear C OS 2-3 (momentarily)
2-6 System Memory (DRAM)
This mainboard supports two 168-pins DI modules, the ax emory Size is 768 B.
DIMM 1 DIMM 2 DIMM 3 System can e Accept or Not
168-pin DI x x Accept
168-pin DI 168-pin DI x Accept
168-pin DI 168-pin DI 168-pin DI Accept
2-7 Central Processing Unit (CPU)
2-7-1 The mainboard provides a Slot-1 for Pentium II/III processor. The CPU on board must
have a fan or heat sink attached to prevent overheating.
WA NING: Without a fan or heat sink, the CPU will overheat and cause damage to both the CPU
and the mainboard.
To install a CPU, first turn off your system and remove its cover. Locate the Slot- 1 and place
RETENTION ODULE as following:
IMPO TANT: You must set jumper JP15 for “Bus Frequency Selection” on page6 depending on the
CPU that you install.
1. Attach heat sink to the CPU.
2. Place Part A on Slot-1 and gently screw four corners on top of the main- board.
2-7-2 The mainboard also provides a 370-pin ZIF Socket 370. The CPU on mainboard must
have a fan attached to prevent overheating.
7

To install a CPU, first turn off your system and remove its cover. Locate the ZIF Socket and
open it by first pulling the lever sideways away from the socket then upwards to a 90-degree
right angle. Insert the CPU with the white dot as your guide. The white dot should point towards
the end of the level. The CPU has a corner pin for three of the four corners, the CPU will only fit
in the one orientation as shown as follow. With the added weight of the CPU fan, no force is
required to insert the CPU. Once completely inserted, hold down on the fan and close the
Socket’s lever.
IMPO TANT: You can setting the CPU ratio and Host Frequency in the BIOS setup on page 18
2-8 Expansion Cards
You must read the documentation come with expansion card for any hardware or software
settings that may be required to setup your specific card.
Installation Procedure:
1. Read the documentation from your expansion card.
2. Set any necessary jumpers on your expansion card.
3. Remove your computer’s cover.
4. Remove the bracket on the slot you intend to use.
5. Carefully align the card’s connectors and press firmly.
6. Secure the card on the slot with the screw you remove in step 4.
7. Replace the computer’s cover.
8. Setup the BIOS if necessary.
9. Install the necessary software drivers for your expansion card.
Assigning IRQs for Expansion Cards
Some expansion cards may require an IRQ to operate. Generally an IRQ must be exclusively
assigned to only one device. In an standard design there are 16 IRQs available but most of
them are occupied by the system and leaves 6 free for expansion cards.
With most recent device, the BIOS automatically assign an IRQ number to PCI expansion cards.
Please make sure there are no any of two devices use same IRQs, otherwise your computer
may experience some problems when those two devices are in use at the same time.
Assigning DMA Channels for Expansion Cards
Some devices may also need to use a D A (Direct emory Access) channel. D A
assignments for this mainboard are handled the same way as the IRQ assignment process
described above. You can select a D A channel in the PCI and PnP configuration section of the
BIOS Setup utility.
2-9 External Connectors
1. Power Connector: ATX Power Connector (20-pin block): PL1
8

ATX Power Supply connector. This is a new defined 20-pins connector that usually comes
with ATX case. The ATX Power Supply allows to use soft power on momentary switch that
connect from the front panel switch to 2-pins Power On jumper pole on the mainboard.
When the power switch on the back of the ATX power supply turned on, the full power will
not come into the system board until the front panel switch is momentarily pressed. Press
this switch again will turn off the power to the system board.
2. PS/2 Mouse & PS/2 Keyboard Connector: MINI-DIN
The connectors for PS/2 keyboard and PS/2 ouse.
3. USB Port connector: USB
The connectors are 4-pins connector that connect USB devices to the system board.
4. Parallel Port Connector (2 -pin female): PRINT
Parallel Port connector is a 25-pin D-Subminiature Receptacle connector. The On-board
Parallel Port can be disabled through the BIOS SETUP. Please refer to Chapter 3
“INTEGRATED PERIPHERALS SETUP” section for more detail information.
9
PS/2 Key oard
PS/2 Mouse

. Serial Port COMA, COMB: COM1, COM2
CO A is the 9-pin D-Subminiature mail connector. The On-board serial port can be disabled
through BIOS SETUP. Please refer to Chapter 3 “INTEGRATED PERIPHERALS SETUP“
section for more detail information.
6. Floppy drive Connector (34-pin block): FDD
This connector supports the provided floppy drive ribbon cable. After connecting the single
plug end to mainboard, connect the two plugs at other end to the floppy drives.
7. Primary IDE Connector (40-pin block): IDE1
This connector supports the provided IDE hard disk ribbon cable. After connecting the single
plug end to mainboard, connect the two plugs at other end to your hard disk(s). If you install
two hard disks, you must configure the second drive to Slave mode by setting its jumpers
accordingly. Please refer to the documentation of your hard disk for the jumper settings.
10

8. Secondary IDE Connector (40-pin block): IDE2
This connector connects to the next set of aster and Slave hard disks. Follow the same
procedure described for the primary IDE connector. You may also configure two hard disks
to be both asters using one ribbon cable on the primary IDE connector and another ribbon
cable on the secondary IDE connector.
9. IDE activity LED: HDLED
This connector connects to the hard disk activity indicator light on the case.
10.SMI Switch : SMI
If your case has Suspend switch , you may connect the cable to this connector in order to
have Suspend mode control from your case.
11. Turbo LED switch: TBLED
The mainboard‘s turbo function is always on. The turbo LED will remain constantly lit while
the system power is on. You may wish to connect the Power LED from the system case to
this lead. See the figure below.
12. Reset switch lead: RST
This 2-pin connector connects to the case-mounted reset switch for rebooting your computer
without having to turn off your power switch. This is a preferred method of rebooting in order
to prolong the life of the system‘s power supply. See the figure below.
13. Keyboard lock switch lead: KEYLOCK
11

This 5-pin connector connects to the case-mounted key switch for locking the keyboard for
security purposes. See the figure below.
14. Speaker connector: SPEAKER
This 4-pins connector connects to the case-mounted speaker. See the figure below.
1 . IR infrared module connector: IR1
This connector supports the optional wireless transmitting and receiving infrared module.
This module mounts to small opening on system cases that support this feature you must
also configure the setting through BIOS setup. Use the four pins as shown on the Back View
and connect a ribbon cable from the module to the mainboard according to the pin definitions.
16. FAN connector: CPUFAN , SYSFAN
17. Power-On button connector: PS-ON
18. Wake On Lan connector: WOL
12

※ake On LAN Function worked only when power supply support 5VSB more than 750mA current.
Jumpers & Connectors for BX21 ONLY
19. On Board Audio chip Enabled / Disabled connector: JP4
20. Auxiliary Input connector: JP1
21. CD Audio in connector : JP2,JP3
JP2 and JP3 are the connectors for CD-Audio Input signal, Please connect it to CD-RO
CD-Audio output connector
22. Audio and Game Connector : AGC
This Connector are 3 phone Jack for LINE-OUT,LINE-IN, IC and a 15-pin
D-Subminiature Receptacle Connector for joystick/ IDI Device.
Line-out : audio output to speaker
Line-in : audio input to sound chip (Please plug here for second pair speakers as output
channels when use 4 speakers)
13
JP1
JP2 :CD-Adio/Panasonic
JP3 :CD-Audio/Sony
JP2
JP3

IC : icrophone Connector
Game/ IDI : for joystick or IDI Device
23. PC Speaker signal Input connector: SPKIN 1
24. SPDIF (Sony / Philips Digital Interface) Input / Output Connectors: SPDIFIN 1 /
SPDIFOUT
2 . Optical kit connector: JP18
This connector is for user that has Optical kit(optional) to provide other set of SPDIF
INPUT and SPDIF OUTPUT function.
Chapter 3
14

AWARD BIOS SETUP
This mainboard has previously set to its best stable status. If you are not an experienced user,
please do not change the default setting. When you are encounter any problem, please choice
“LOAD STANDARD DEFAULTS” to restore best setting.
Award’s RO BIOS provides a built-in Setup program which allows user modify the basic
system configuration and hardware parameters. The modified data will be stored in a battery-
backed C OS RA so data will be retained even when the power is turned off. In general, the
information saved in the C OS RA stay unchanged unless here is configuration change in the
system, such as hard drive replacement or new equipment is installed.
It is possible that C OS had a battery failure which cause data lose in C OS_RA . If so, re-enter
system configuration parameters become necessary.
To enter Setup Program
Power on the computer and press <Del> key immediately will bring you into BIOS CMOS
SETUP UTILITY.
ROM PCI/ISA BIOS (2A6LGJ1F)
CMOS SETUP UTILITY
AWARD SOFTWARE, INC.
STANDARD CMOS SETUP
BIOS FEATURES SETUP
CHIPSET FEATURES SETUP
POWER MANAGEMENT SETUP
PNP/PCI CONFIGURATION
LOAD OPTIMAL DEFAULTS
LOAD STANDARD DEFAULTS
INTEGRATED PERIPHERALS
SUPERVISOR PASSWORD
USER PASSWORD
SAVE & EXIT SETUP
EXIT WITHOUT SAVING
Esc : QUIT ↓→← : Select Item
F10 : Save & Exit Setup (Shift) F2 : Change Color
Time, Date, Hard Disk Type…
Figure 3-1
The menu displays all the major selection items and allow user to select any one of shown item.
The selection is made by moving cursor (press any direction key) to the item and press <Enter>
key. An on_line help message is displayed at the bottom of the screen as cursor is moving to
various items which provides user better understanding of each function. When a selection is
made, the menu of selected item will appear so the user can modify associated configuration
parameters.
3-1 STANDARD CMOS SETUP
15

STANDARD CMOS SETUP (Figure 3-1) allows user to configure system setting such as current
date and time, type of hard disk drive installed in the system, floppy drive type, and the type of
display monitor. emory size is auto-detected by the BIOS and displayed for your reference.
When a field is highlighted (direction keys to move cursor and <Enter> key to select), the entries
in the field will be changed by pressing <PgDn> or <PgUp> keys or user can enter new data
directly from the keyboard.
ROM PCI/ISA BIOS (2A6LGJ1F)
STANDARD CMOS SETUP
AWARD SOFTWARE, INC.
Date (mm:dd:yy) : Wed, Sep, 10 1997
Time (hh:mm:ss) : 10 : 33 : 52
HARD DISKS TYPE SIZE CYLS HEAD PRECOMP LANDZ SECTOR MODE
Primary Master : Auto 0 0 0 0 0 0 Auto
Primary Slave : Auto 0 0 0 0 0 0 Auto
Secondary Master : Auto 0 0 0 0 0 0 Auto
Secondary Slave : Auto 0 0 0 0 0 0 Auto
Drive A : 1.4M , 3.25 in.
Drive B : None
Video : EGA/VGA
Halt On : All Errors
Base Memory : 640K
Extended Memory : 7168K
Other Memory : 384K
Total Memory : 8192K
Esc : Quit ↓→← : Select Item Pu/Pd/+/- : Modify
F1 : Help (Shift)F2: Change Color
Figure 3-2
NOTE: If hard disk Primary Master/Slave and Secondary Master/Slave were used Auto, than the
hard disk size and model will be auto-detect on display during POST.
NOTE: The “Halt On:” field is to determine when to halt the system by the BIOS is error occurred
during POST.
3-2 BIOS FEATURES SETUP
Select the “BIOS FEATURES SETUP” option in the C OS SETUP UTILITY menu allows user
to change system related parameters in the displayed menu. This menu shows all of the
16

manufacturer’s default values of this mainboard. Again, user can move the cursor by pressing
direction keys and <PgDn> of <PgUp> keys to modify the parameters. Pressing [F1] key to
display help message of the selected item.
This setup program also provide 2 convenient ways to load the default parameter data from
BIOS [F6] or C OS [F7] area if shown data is corrupted. This provides the system a capability
to recover from any possible error.
ROM PCI/ISA BIOS (2A6LGJ1F)
BIOS FEATURES SETUP
AWARD SOFTWARE, INC.
Virus Warning : Disabled
CPU Internal Cache : Enabled
External Cache : Enabled
CPU L2 Cache ECC Checking : Enabled
Processor Number Feature : Enabled
Quick Power On Self Test : Enabled
Boot Sequence : A,C,SCSI
Swap Floppy Drive : Disabled
Boot Up Floppy Seek : Enabled
Boot Up NumLock Status : On
IDE HDD Block Mode : Enabled
Gate A20 Option : Fast
Memory Parity/ECC Check : Disabled
Typematic Rate Setting : Disabled
Typematic Rate (Chars/Sec) : 6
Typematic Delay (Msec) : 250
Security Option : Setup
PCI/VGA Palette Snoop : Disabled
OS Select For DRAM > 64MB : Non-OS2
HDD S.M.A.R.T Capability : Disabled
Video BIOS Shadow : Enabled
C8000-CBFFF Shadow : Disabled
CC000-CFFFF Shadow : Disabled
D0000-D3FFF Shadow : Disabled
D4000-D7FFF Shadow : Disabled
D8000-DBFFF Shadow : Disabled
DC000-DFFFF Shadow : Disabled
Esc: Quit ↓→← : Select Item
F1 : Help PU/PD/+/-:Modify
F5 : Old Values (Shift)F2 : Color
F6 : Load Optimal Defaults
F7 : Load Standard Defaults
Figure 3-2
NOTE: The Security Option contains “setup” and “system”. The “setup” indicates that the password
setting is for CMOS only while the “system” indicates the password setting is for both CMOS
and system boot up procedure.
Security Option: This category allows you to limit access to the system and
Setup, or just to Setup. The default value is Setup.
System:The system will not boot and access to Setup will be denied if the correct
password is not entered at the prompt.
Setup:The system will boot, but access to Setup will be denied if the incorrect password is
entered at the prompt.
NOTE: To disable security, select PASSWO D SETTING at Main Menu and then you will be asked
to enter password. Do not type anything and just press <Enter>, it will disable security. Once
the security is disabled, the system will boot and you can enter Setup freely.
3-3 CHIPSET FEATURES SETUP
This section describes features of the VIA 82C693 AGPset. If your system contains a different
chipset, this section will bear little resemblance to what you see on your screen.
17

ADVANCED OPTIONS. The parameters in this screen are for system designers, service
personnel, and technically competent users only. Do not reset these values unless you
understand the consequences of your changes.
ROM PCI/ISA BIOS (2A6LGJ1F)
CHIPSET FEATURES SETUP
AWARD SOFTWARE, INC.
Bank 0/1 DRAM Timing : SDRAM 10ns
Bank 2/3 DRAM Timing : SDRAM 10ns
Bank 4/5 DRAM Timing : SDRAM 10ns
SDRAM Cycle Length : 3
Memory Hole : Disabled
Read Around write : Disabled
Concurrent PCI/Host : Disabled
System BIOS Cacheable : Enabled
Video RAM Cacheable : Enabled
AGP Aperture Size : 64M
AGP-2X Mode : Enabled
OnChip USB : Enabled
USB Keyboard Support : Disabled
Auto Detect DIMM/PCI Clk : Enabled
Spread Spectrum : Disabled
CPU Host/PCI Clock : Default
Esc: Quit ↓→←: Select Item
F1 : Help PU/PD/+/-:Modify
F5 : Old Values (Shift)F2 : Color
F6 : Load Optimal Defaults
F7 : Load Standard Defaults
Figure 3-3
CPU HOST/PCI Clock: In this item you can choose the CPU HOST/PCI Clock. The setting
are: Default ,66/33,75/37,83/41,100/33,103/34, 112/37,124/41,133/44, 105/35,110/36,115/38,
120/40
When the setting is :’default” the CPU HOST Clock will depend on the setting of JP15.
If JP15 is set to 66 Hz only have the choice of 66/33, 75/37, 83/41on screen.
If the JP15 is setting at 100 Hz, then you can have 100/33,103/34,112/37,124/41,
133/44,105/35,110/36,115/38,120/40.
* Please turn off system power if the screen does not have any display after change of the
setting. Then press and hold down “ INS ” key, and turn on system power again (release “
INS ” key till the screen has display) to reset correct frequency of CPU HOST clock.
3-4 POWER MANAGEMENT SETUP
The Power anagement Setup allows you to configure you system to most effectively save
energy while operating in a manner consistent with your own style of computer use.
18

ROM PCI/ISA BIOS (2A6LGJ1F)
POWER MANAGEMENT SETUP
AWARD SOFTWARE, INC.
ACPI function : Enabled
Power Management : User Define
PM Control by APM : Yes
Video Off After : Suspend
Video Off Method : V/H SYNC+Blank
MODEM Use IRQ : 3
Soft-off by PWRBTN : Instant-off
HDD Power Down : Disabled
Doze Mode : Disabled
Suspend Mode : Disabled
** PM Events **
VGA : OFF
LPT & COM : LPT/COM
HDD & FDD : ON
DMA/master : OFF
Modem Ring Resume : Disabled
RTC Alarm Resume : Disabled
Primary INTR : ON
IRQ3 (COM 2) : Primary
IRQ4 (COM 1) : Primary
IRQ5 (LPT 1) : Primary
IRQ6 (Floppy Disk) : Primary
IRQ7 (LPT 1) : Primary
IRQ8 (RTC Alarm) : Disabled
IRQ9 (IRQ2 Redir) : Secondary
IRQ10 (Reserved) : Secondary
IRQ11 (Reserved) : Secondary
IRQ12 (PS/2 Mouse) : Primary
IRQ13 (Coprocessor) : Primary
IRQ14 (Hard Disk) : Primary
IRQ15 (Reserved) : Disabled
Esc: Quit ↓→←: Select Item
F1 : Help Pu/Pd/+/-: Modify
F5 : Old Values (Shift)F2 : Color
F6 : Load Optimal Defaults
F7 : Load Standard Defaults
Figure 3-4
Power Management: This category allows you to select the type (or degree) of power
saving and is directly related to the following modes:
1. Doze ode
2. Standby ode
3. Suspend ode
4. HDD Power Down
There are four selections for Power anagement, three of which have fixed mode
settings.
Disable (default) No power management. Disables all four modes
in. Power Saving inimum power management. Doze ode = 1 hr. Standby ode
= 1 hr., Suspend ode = 1 hr., and HDD Power Down = 15 min.
ax. Power
Saving
aximum power management -- ONLY AVAILABLE FOR SL
CPU’S. Doze ode = 1 min., Standby ode = 1 min., Suspend
19
This manual suits for next models
2
Table of contents
Other JETWAY Motherboard manuals

JETWAY
JETWAY J-791A User manual

JETWAY
JETWAY 848PTR2A User manual

JETWAY
JETWAY NF697 Series User manual

JETWAY
JETWAY P4XFM User manual

JETWAY
JETWAY NC8J Series User manual

JETWAY
JETWAY 875PMAXR2A User manual

JETWAY
JETWAY NP591 User manual

JETWAY
JETWAY MI23 Series User manual

JETWAY
JETWAY 917PDCP User manual

JETWAY
JETWAY I406R1A User manual

JETWAY
JETWAY NC9L User manual

JETWAY
JETWAY MU03 Series User manual

JETWAY
JETWAY For Socket 370 User manual

JETWAY
JETWAY 993BSR4A User manual

JETWAY
JETWAY J-530BF User manual

JETWAY
JETWAY 615TCFR3A User manual

JETWAY
JETWAY P4XDMR1A User manual

JETWAY
JETWAY 865GFTR3A User manual

JETWAY
JETWAY 618AFP2A User manual

JETWAY
JETWAY 830CF User manual