01 02
Parts list Image Q-ty
Introduction Thank you for purchasing this Baldwin Plug-In Wall Light.
Please read the instructions carefully before
use to ensure safe and satisfactory operation
of this product.
Warnings This is a Class II product and must NOT be earthed.
Please read these instructions carefully before commencing any work.
This product is designed to be xed to a wall and connected to a mains power outlet
via the supplied 3-pin plug. Do not remove the plug and connect by other means.
IMPORTANT: Children can become entangled in loose cable. Ensure excessive loops
of cable are secured against the wall using the ttings supplied. Do not use
this product in children’s bedrooms.
Recommended bulb (not included)
1 x 40W (Max.) SES Golf Ball, or
1 x 28W SES Eco Halogen Golf Ball, or
1 x 6W SES LED Energy Efcient Golf Ball
When changing a bulb, always switch off at the mains and allow the bulb to cool
before handling. Dispose of used bulbs carefully. Do not exceed the rated power
stated or use a different shape bulb from that indicated on the tting.
Recommended Bulb
Product assembly
1
2
3
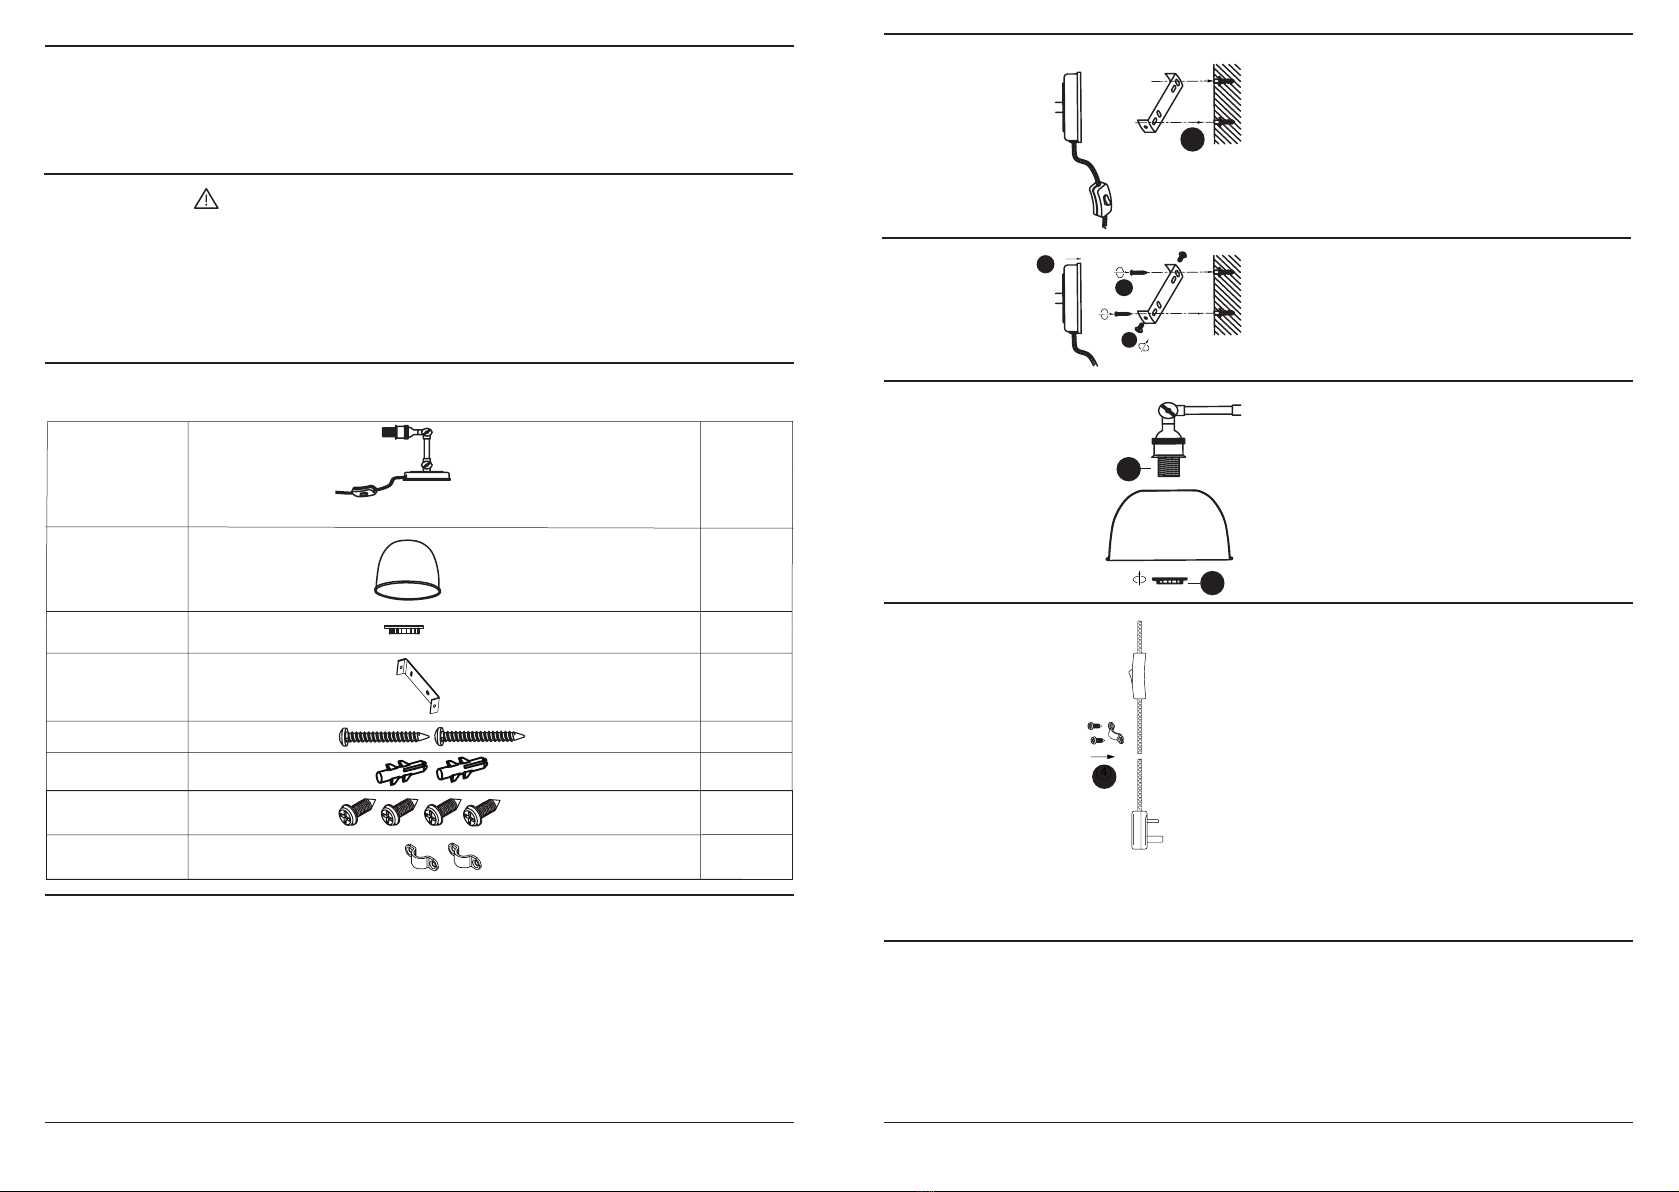
To attach the shade remove shade ring (E) from
threaded body (F), place shade over threaded body (F)
and replace and tighten the shade ring ().
Fit the recommended bulb per specications.
To keep the cable tidy, this product is supplied with two
retaining clips. Decide on the cable position. Using the
retaining clips as a template mark and drill the position
of the xing holes.
Be careful not to damage any wiring or pipes. Place the
clips around the cable and x in place using the supplied
small screws (G).
Fix the bracket to the the wall using the supplied screws
(B).
Fix the product (C) to the bracket using the supplied
screws (D).
A
D
C
5Plug into a mains outlet. Your wall light is now ready
to use. Switch on using the inline switch. Note: The
shade may get hot. Only adjust after the tting has been
switched off for ten minutes.
1Select the mains power outlet you wish to connect the
plug to and hold the xing bracket in place on the wall,
marking the xing hole positions. Check there are no
mains cables or pipes beneath the wall. Drill the holes
and t the supplied wall plugs (A) - which are suitable
for masonry only. This product is not suitable for use in
children’s bedrooms.
E
F
B
G
Light tting
Shade
Shade ring
Fixing bracket
Screws (B)
Wall plugs
Small screws (G)
Retaining clips
1
1
1
1
2
2
4
2


