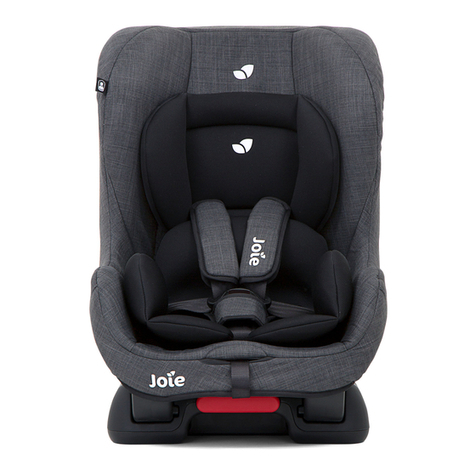
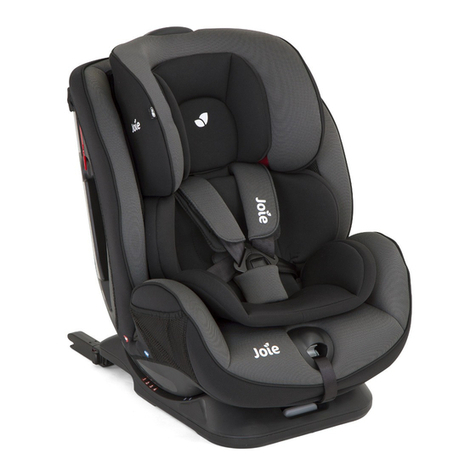
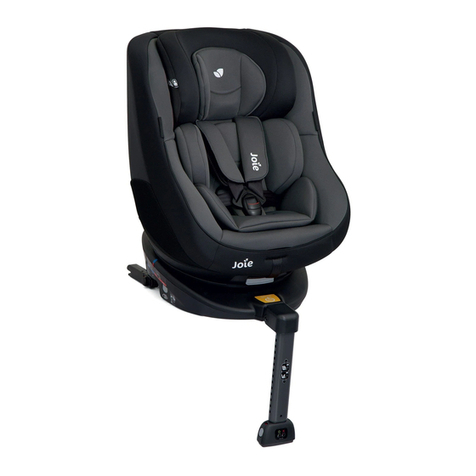
Joie steadi User manual

0+/1 (0–18kg)
child seat
steadi
GB Instruction Manual
ES Manual de Instrucciones
DE Anleitung
IT Manuale di Istruzioni
PT Manual de Instruções
FR Manuel d'instructions
NL Instructiehandleiding

3
Congratulations
You have purchased a high quality, fully certified child
safety child restraint. This product is suitable for the
use of children weighing UNDER 18 kg (approximately 4
years old or under).
Carefully read this Instruction Manual and follow the
installing steps because this is the ONLY way to protect
your child from serious injury or death in case of an
accident, and to provide comfort to your child while
using this product.
Keep this instruction manual for future reference.
For warranty information, please visit our website at
joiebaby.com
Please Confirm
Make sure that your vehicle is equipped with 3-point
retractor safety-belt.
Seat belts may be different in design and length
according to maker, manufacturing date, and type of the
vehicle. This child restraint is only suitable for use in the
listed vehicles fitted with 3-point retractor safety-belts,
approved to UN ECE No. 16 or other equivalent stan-
dards.
! Please keep the instruction manual in the storage com-
partment of the rear cover for future reference.
GB Parts List
Small seat pad include head support and inner cushions. Soft goods
include Seat Pad, Shoulder Strap, Crotch Strap, Small Seat Pad. Please
make sure there are no missing parts. Please contact the retailerif anything
is missing.
Fig. 1.1 Head Support
Fig. 1.2 Shoulder Strap
Fig. 1.3 Buckle
Fig. 1.4 Crotch Strap
Fig. 1.5 Adjustment Adaptor
Fig. 1.6 Adjustment Webbing
Fig. 1.7 Shoulder Harness
Fig. 1.8 Lock-off Device
Fig. 1.9 Rearward
Safety-belt Slot
Fig. 1.10 Head Support
Fig. 1.11 Head Support Slot
Fig. 1.12 Inner Cushions
Fig. 1.13 Reclining Position Indicator
Fig. 1.14 Reclining Adjustment
Handle
Fig. 1.15 Forward Safety-belt Slot
Fig. 1.16 Head Support Adjustment Lever
Fig. 1.17 Instruction Manual
Storage Compartment
1
2
8
7
9
11
3
4
5
6
15
14
16
17
13
12
10

1 2
!NO child restraint can guarantee full protection from injury in an
accident. However, proper use of this child restraint will reduce the
risk of serious injury or death to your child.
!This child restraint is designed ONLY for child weighing under 18kg
(approximately 4 years old or under).
!DO NOT use forward facing mode before the child's weight exceeds
9kg.
!DO NOT use or install this child restraint until you read and under-
stand the instructions in this manual and in your vehicle owner's
manual.
!DO NOT install or use this child restraint without following the instruc-
tions and warnings in this manual or you may put your child in serious
risk of injury or death.
! DO NOT make any modification to this child restraint or use it along
with component parts from other manufacturers.
! DO NOT use this child restraint if it has damaged or missing parts.
!After your child is placed in this child restraint, the safety belt must be
used correctly, and ensure that any lap strap is worn low down, so
that the pelvis is firmly engaged.
! DO NOT leave this child restraint unbelted or unsecured in your
vehicle because unsecured child restraint can be thrown around and
may injure occupants in a sharp turn, sudden stop, or collision.
Remove it if not in regular use.
! NEVER leave your child unattended with this child restraint at all
times.
!DO NOT place this child restraint in seating positions where an active
frontal airbag is installed if your child is still in rear facing mode.
!NEVER use a second-hand child restraint or a child restraint whose
history you do not know because they may have structural damage
that endangers your child's safety.
!NEVER use ropes or any other substitutes in place of seat belts in
case of injuries from restraint.
!DO NOT use this child restraint as a regular chair as it tends to fall
down and injure the child.
!DO NOT have your child in unfitted clothes because this may prevent
your child from being properly and securely fastened by the shoulder
harnesses and the harnesses between thighs.
!Please keep this child restraint away from sunlight, otherwise it may
be too hot for the child's skin.
!The child restraint shall not be used without the soft goods.
!The soft goods should not be replaced with any besides the ones
recommended by the manufacturer, because the soft goods
constitute an integral part of the child restraint performance.
!DO NOT put anything other than the recommended inner cushions
in this child restraint.
!DO NOT put unsecured items in the vehicle because they can be
thrown around and may injure occupants in a sharp turn, sudden
stop, or collision.
!Make sure that no part of the child restraint become trapped by a
movable seat or in a door of the vehicle.
!DO NOT continue to use this child restraint after it has suffered any
violent crash. Replace immediately as there may be invisible
structural damage from the crash.
!Remove this child restraint from the vehical seat when it is not in
use.
!Consult the retailer for issues concerning maintenance, repair
and part replacement.
!DO NOT use any load bearing contact points other than those
described in the instructions and marked in the child restraint.
!DO NOT install this child restraint under the following conditions:
1. Vehicle seats with 2-point safety belts.
2. Vehicle seats facing sideward or rearward with respect to the
running direction of the vehicle.
3. Vehicle seats unstable during installation.
!Any straps holding the restraint to the vehicle should be tight, that
any straps restraining the child should be adjusted to the child’s
body, and that straps should not be twisted.
!Please do not use this child restraint if the car seat has dropped
from a significant height, hit the ground at a considerable speed, or
has visible signs of damage. We are not responsible to replace if
the child restraint has been damaged under these abnormal
conditions. A new child restraint will need to be purchased when
any of the aforementioned conditions occurs.
WARNING WARNING

3 4
Emergency
In case of emergency or accidents, it is most important to have your child
taken care of with first aids and medical treatment immediately.
Product Information
1. This is a ‘Universal’ child restraint. It is approved to UN ECE regulation
44, 04 series of amendments, for general use in vehicles and it will fit
most, but not all, car seats.
2. A correct fit is likely if the vehicle manufacturer has declared in the vehicle
handbook that the vehicle is capable of accepting a ‘Universal’ child
restraint for this age group.
3. This child restraint has been classified as ‘Universal’ under more stringent
conditions than those which applied to earlier designs which do not carry
this notice.
4. If in doubt, consult either the child restraint manufacturer or the retailer.
Product Child restraint
Suitable for Child weighing under 18kg
Mass Group Group 0+/1
Materials Plastics, metal, fabrics
Patent No. Patents pending
Choose the Installation Mode
Important
1. DO NOT use forward facing mode before the child's weight exceeds 9kg.
Child restraint in forward facing mode is dangerous for a child under 9kg.
2. When the child is suitable for both forward and rearward facing
modes, it is recommended to install this child restraint in the
rearward facing mode as it is relatively safer.
Concerns on Installation
see images 2- 7
1
2
2

5 6
1
3
2
3
5
7
4
6
Installation for
Rearward Facing Mode
(for Child under 18kg /
New born-4 years old)
see images 8- 20
Reference age New born - 4 years old
Seat position Last position (with top
blue artwork align
with bottom reclining
position indicator, as
8)
!Please install the child restraint on the
vehicle seat, and then put the child in
the child restraint.
i. Proper Position of the
Shoulder Harnesses
Please adjust the head support and
shoulder harnesses to proper height
according to the child's height.
!The shoulder harness slots should
be slightly below the infant's
shoulder. Shoulder harnesses too
high or too low are not safe.
!If the shoulder harnesses are not at
proper height, the infant may be
thrown from the child restraint
when there is an accident.
8

7 8
ii. Use of Small Seat Pad
see images 9- 13
1. While pulling up on the webbing
adjuster, pull out the shoulder harness
straps to proper length.
2. Press the red button to disengage the
buckle 10 -1, and then place the infant
body support in the child restraint.
3. Engage the buckle until it clicks. 11
9
10
1
11
13
12
4. Pull the adjustment webbing tight. 13
1. Small seat pad include head support and inner cushions.
2. Head support is suitable for child in all installation modes.
3. Small seat pad is for child's protection. Child weighing under 9kg must
use small seat pad.
4. After removing the foam from the small seat pad, please store it in a
place where the child cannot access it.
5. Before using the small seat pad, please assemble the foam. 9
Note
!While pulling up the webbing adjuster, pull out the shoulder harnesses
to proper length. 12

910
22
14
11
iii. Rearward Reclining
Angle Adjustment
see images 14
While pushing the reclining adjust-
ment handle 14 -1, pull the child
restraint from the first position to the
last position. 14 -2
Angle indication: with top blue
artwork align with bottom reclining
position indicator, as 8
iv. Rearward Facing
Installation
see images 15 - 18
!
The child restraint can not be
used if the vehicle safety belt
buckle (female buckle end) is
too long to anchor the child
restraint securely.
15
-1
16
15
1
17
18
1122
1. Make sure the shoulder harness
is adjusted to proper height before
installing this child restraint.
2. First adjust the angle of the child
restraint to the last position. Angle
indication: with top blue artwork
align with bottom reclining
position indicator, as 8
3. When installing and adjusting the
safety belts, make sure that both
the shoulder belt and the waist belt
are not twisted and will not stop
the safety belts from functioning
properly.
Note
1. Fasten the belts in the a rearward
blue safety-belt slots at the back
of the body. 16
!Shoulder belt must pass through
the rearward safety-belt slot.
2. Open the lock-off device and
insert the safety belt through it. 17
3. While pressing the child restraint,
pull the belts to fasten the child
restraint tightly and securely.
!Please check by moving the
child restraint back and forth.
!Shoulder belt passes through
the rearward safety-belt slots,
as 18 -1
!Shoulder belt passes through
Lock-off Device, confirm the
Lock-off Device is pushed
down, as 18 -2

11 12
1. Small seat pad is for child's protection. Child weighing under 9kg must
use small seat pad.
2. Please install the child restraint on the vehicle seat, and then put the
child in the child restraint.
3. After the child is placed into the seat, check whether the shoulder
harnesses are at proper height.
Note
1. Pull up the webbing adjuster,
while pulling out the shoulder
harnesses to the proper length. 12
2. Place the child in the child
restraint and pass both arms
through the harnesses. 19
3. Pull down the adjustment webbing
and adjust it to the proper length
to make sure your child is snugly
secured. 20
!Make sure the space between
the child and the shoulder
harness is about the thickness
of one hand.
v. Securing your Child in the child restraint
see images 19 - 20
19
20
Installation for Forward
Forward Facing Mode
(for Child between
9-18kg / 1-4 yearsold)
see images 21 - 27
Reference age 1 - 4 years old
Seat position Position 1 - 3 (with
top red artwork align
with bottom reclining
position indicator, as
21 )
!Please install the child restraint on the
vehicle seat, and then put the child in
the child restraint.
i. Forward Reclining
Angle Adjustment
see images 21
ii. Proper Position of the
Shoulder Harnesses
Please adjust the head support and
shoulder harnesses to proper height
according to the child's height.
21

13 14
iii. Forward Facing
Installation
see images 22 - 25
!The child restraint can not be used if
the vehicle safety belt buckle (female
buckle end) is too long to anchor the
child restraint securely. 22 -1
1. Please adjust the shoulder
harnesses to proper height
(slightly above the child's
shoulder) before installing the
child restraint.
2. Please adjust the child restraint
to proper angle (3 positions for
forward facing mode). Angle
indication: with top red artwork
align with bottom reclining
position indicator, as 21
3. When installing and adjusting the
safety belts, make sure that both
the shoulder belt and the waist
belt are not twisted and will not
keep the safety belts from being
properly positioned.
Note
22
1
23
25
24
While pressing the child restraint,
pull the belts to fasten the child
restraint tightly and securely. 24
!Please check by moving the
child restraint back and forth.
!Shoulder belt passes through
Lock-off Device, confirm the
Lock-off Device is pushed
down, as 23
!The vehicle buckle tongue is
engaged with the buckle
correctly, as 22
iv. Securing your Child in
the child restraint
see images 26 - 27
1. When installing the child restraint
in the forward facing mode, DO
NOT use the small seat pad.
2. Please install the child restraint on
the vehicle seat, and then put the
child in the child restraint.
3. After the child is placed into the
child restraint, check whether the
shoulder harnesses are at proper
height.
Note

15 16
1. Loosen the shoulder belts by
activating the belt adjuster on the
center and simultaneously pulling
both shoulder belts upwards. 12
2.
Open the belt buckle by pressing
firmly on the red button.
10
-1.
place the child in the seat and put
the shoulder belts over the child's
shoulder.
26
3. Bring both belt tongues together
and lock them into place in the
belt buckle with an audible
"CLICK". 11
4. Pull down the adjustment
webbing and adjust it to the
proper length so that your child is
snugly secured. 27
!Make sure the space between
the child and the shoulder
harness is about the thickness
of one hand.
for Head Support and
Shoulder Harnesses
see images 28
1. Please adjust the head support
and shoulder harnesses to proper
height according to the child's
height.
2. Squeeze the head support
adjustment lever 28 -1, meanwhile
pull up or push down the head
support until it snaps into one of
the 6 positions. The head support
positions are shown as 28
26
27
Height Adjustment
28
11
!After removing the foam of small seat pad, please store it somewhere that
the child can not access it.
!Please wash the soft goods with cold water under 30°C.
!Do not iron the soft goods.
!Do not bleach or dry clean the soft goods.
!Do not use undiluted neutral detergent, gasoline or other organic solvent to
wash the child restraint. It may cause damage to the child restraint.
!Do not twist the soft goods to dry with great force. It may leave the soft
goods with wrinkles.
!Please hang dry the soft goods in the shade.
!Please remove the child restraint from the vehicle seat if not in use for a
long period of time. Put the child restraint in the shade and somewhere your
child can not access it.
Cautions
Soft Goods Assembly
see images 29 - 34
1. Place the seat pad on the body and
thread the buckle through the seat
pad slot. 29
2. Wrap the buckle with the elastic on
the inside of the crotch strap. 30
3. Thread the adjustment webbing and
harnesses on both sides through the
seat pad respectively. 30 -1
29
30 11

1817
34
32
33
31
4. Place the fastening pieces in top of seat pad into the two slots on the head
of the body. 31
5. Place the fastening pieces on sides of the seat pad into the four slots on
both sides of the body. 32
6. Assemble 2 pairs of elastic straps on both sides of head support. 33
7. Put the small seat pad into the child restraint and engage the buckle. 12
The assembled soft goods are shown as 34
Notes

20
1
2
8
7
9
11
3
4
5
6
15
14
16
17
13
12
10
Parabéns
Você adquiriu um assento infantil de alta qualidade e de
segurança infantil totalmente certificada. Este produto é
adequado para o uso de crianças pesando MENOS de 18
kg (aproximadamente 4 anos de idade ou menos).
Leia cuidadosamente este Manual de Instruções e siga os
passos de instalação, por esta é a ÚNICA forma de prote-
ger seu filho contra lesões sérias ou morte no caso de um
acidente, e para fornecer conforto a seu filho ao utilizar
este produto.
Mantenha este manual de instruções para referência futura.
Para informações de garantia, visite nosso website em
joiebaby.com
Favor Confirme
Certifique que seu veículo é equipado com cinto de se-
gurança retrátil de 3 pontos.
Os cintos de segurança podem diferir em projeto e com-
primento de acordo com o fabricante, data de fabricação
e tipo do veículo. Este assento infantil é adequado ape-
nas para uso nos veículos ajustados com cintos de segu-
rança retráteis de 3 pontos e aprovados pelo Regulamen-
to Europeu N.º 16 ou outros padrões equivalentes.
! Favor mantenha este manual de instruções no comparti-
mento de armazenamento da tampa traseira para refer-
ência futura.
PT Lista de Peças
A almofada de assento pequena inclui suporte para cabeça e almofadas
internas. As partes macias incluem a Almofada de Assento, Faixa de Ombro,
Faixa Bifurcada, Almofada de Assento Pequena. Favor certifique que não haja
peças faltando. Favor contate o vendedor se algo estiver faltando.
Fig. 1.1 Suporte de Cabeça
Fig. 1.2 Faixa de Ombro
Fig. 1.3 Fivela
Fig. 1.4 Faixa Bifurcada
Fig. 1.5 Adaptador de Ajuste
Fig. 1.6 Rede de Ajuste
Fig. 1.7 Arnês de Ombro
Fig. 1.8 Dispositivo de Destravamento
Fig. 1.9 Encaixe do Cinto de
Segurança Traseiro
Fig. 1.10 Suporte de Cabeça
Fig. 1.11 Encaixe do Suporte de Cabeça
Fig. 1.12 Almofadas Internas
Fig. 1.13 Indicador de Posição de
Reclinagem
Fig. 1.14 Alavanca de Ajuste de Reclinagem
Fig. 1.15 Encaixe do Cinto de Segurança
Dianteiro
Fig. 1.16 Alavanca de Ajuste do Suporte de
Cabeça
Fig. 1.17 Compartimento de Armazenamento
do Manual de Instruções

21 22
!NENHUM assento infantil pode garantir proteção total contra lesão
em um acidente.
Contudo, o uso apropriado deste assento infantil irá reduzir o risco
de lesão séria ou morte de seu filho.
!Este assento infantil é projetado APENAS para crianças pesando
menos de 18kg (aproximadamente 4 anos de idade ou menos).
!NÃO utilize ou instale este assento infantil até que você tenha lido e
entendido as instruções neste manual e no manual do proprietário de
seu veículo.
!NÃO instale ou utilize este assento infantil sem seguir as instruções e
alertas neste manual ou você pode colocar seu filho em sério risco de
lesão ou morte.
!NÃO faça qualquer modificação a este assento infantil ou o utilize
junto com peças de componente de outros fabricantes.
!NÃO utilize este assento infantil se houver peças danificadas ou
faltando.
!NÃO use roupas não ajustada em seu filho visto que isto pode
prevenir que seu filho esteja apropriada e seguramente preso pela
faixa de ombro e pela faixa entre as pernas.
!NÃO deixe este assento infantil sem o cinto de segurança ou solto
em seu carro, pois o assento infantil solto pode ser arremessado e
pode pode ferir os ocupantes em curvas acentuadas, paradas
repentinas ou colisões. O remova se não estiver em uso regular.
!NUNCA deixe seu filho desatendido neste assento infantil em todos
os momentos.
!Garanta que a faixa (cinto de segurança abdominal) sobre o
estômago esteja o mais baixa possível, de forma a suportar
apropriadamente a pélvis.
!NÃO coloque este assento infantil em posições de assento onde um
airbag frontal ativo esteja instalado se seu filho ainda estiver no modo
virado para frente.
!NUNCA utilize um assento infantil de segunda mão ou um assento
infantil cuja história você não conhece, visto que pode haver dano
estrutural que compromete a segurança de seu filho.
!NUNCA utilize cordas ou quaisquer outros substitutos ao invés de
cintos de segurança no caso de lesões da restrição.
!NÃO utilize este assento infantil como uma cadeira regular visto que
ele tende a cair e machucar a criança.
!Favor mantenha este assento infantil longe da luz do sol, senão ele
pode ficar muito quente para a pele da criança.
!NÃO utilize este assento infantil sem as partes macias fornecidas.
!As partes macias não devem ser substituídas por qualquer uma além
daquelas recomendadas pelo fabricante, pois as partes macias
constituem uma parte integral do desempenho do assento infantil.
!NÃO coloque nada além das almofadas internas recomendadas neste
assento infantil.
!NÃO coloque itens soltos dentro do veículo, pois eles podem ser
arremessados e podem pode ferir os ocupantes em curvas
acentuadas, paradas repentinas ou colisões.
!Certifique-se de que nenhuma parte do sistema de retenção infantil
fica preso por um assento móvel ou em uma porta do veículo.
!NÃO continue a utilizar este assento infantil se ele tiver sofrido
qualquer colisão violenta. Substitua imediatamente, visto que pode
existir dano estrutural invisível da colisão.
!Remova esta assento infantil do assento do veículo quando não em
uso.
!Consulte o vendedor para assuntos relacionados a manutenção,
reparos e substituição de peças.
!NÃO utilize qualquer pontos de contato de sustentação de carga
além daqueles descritos nas instruções e marcados no conto infantil.
!NÃO instale este assento infantil sob as seguintes condições:
1. Assentos de veículos com cintos de segurança de 2 pontos.
2. Assentos de veículos virados para a lateral ou para trás com relação
à direção de curso do veículo.
3. Assentos de veículos instáveis durante a instalação.
!Quaisquer tiras da cadeirinha e cinto de segurança do veículo devem
estar apertados e não torcidos.
!Por favor, não use este assento de carro se o assento do carro caiu
de uma altura significativa, bateu no chão a uma velocidade
considerável, ou tem sinais visíveis de danos. Nós não somos
responsáveis pela substituição se o assento de carro foi danificado
nestas condições anormais. Um assento de carro novo deverá ser
comprado quando qualquer uma das condições acima ocorrer.
AVISO AVISO

23 24
Emergência
No caso de emergência ou acidentes, é mais importante que seu filho
receba primeiros socorros e tratamento médico imediatamente.
Informações do
Produto
1. Este é um sistema de segurança infantil "Universal". Ele é aprovado por
UN ECE regulamento 44, série de emendas 04, para uso geral em veículos
e irá se ajustar à maioria, porém nem todos, os assentos infantis.
2. Um ajuste correto é provável se o fabricante do veículo tiver declarado
no manual do veículo que o veículo é capaz de suportar um sistema de
segurança infantil "Universal" para este grupo de idade.
3. Este sistema de segurança infantil foi classificado como "Universal" sob
condições mais estringentes do que aquelas aplicadas aos projetos
anteriores que não portam esta notificação.
4. Se em dúvida, consulte o fabricante ou o vendedor do sistema de
segurança infantil.
Produto de Assento Infantil
Adequado para Crianças pesando até 18kg
Grupo de Massa Grupo 0+/1
Materiais Plásticos, metal, tecido
N.º de Patente Patentes pendentes
Seleção do Modo de Instalação
Preocupações na Instalação
consulte as imagens 2- 7
1
2
2
Importante
1. NÃO utilize o modo virado para frente antes que a criança atinja o peso
de 9kg.
O assento infantil em modo virado para frente é perigoso para uma criança
com menos de 9kg.
2. Quando a criança é adequada para ambos os modos virado para
frente e para trás, é recomendável instalar este assento infantil no
modo de frente para trás visto que é relativamente mais seguro.
Peso da
Criança
Instalação
Modo de
Figura para
Instalação
Idade de
Referência
Posição do
Assento
<18kg Modo
virado para
atrás
<4 anos
9 - 18kg Modo
virado para
frente
1 ano a 4
anos
Posição
4
Posição
1 - 3
Instruções da
almofada de
assento
Bebês abaixo de
9kg devem
utilizar a
almofada de
assento pequena
Desmontar a
almofada de
assento pequena

25 26
1
3
2
3
5
7
4
6
Instalação para Modo
Virado para Trás
(para Crianças abaixo de
18kg / Recém-nascidos
- 4 anos de idade)
consulte as imagens 8- 20
Idade de referência
Recém-nascido - 4 anos de idade
Posição do assento
Última posição (com ilustrações azuis
superiores alinhado com indicador de
posição de reclinagem inferior, como 8)
!Favor instale o assento infantil no
assento do veículo, e então coloque a
criança no assento infantil.
i. Posição Apropriada da
Faixa de Ombro
Favor ajuste o suporte de cabeça e
faixas de ombro na altura apropriada
de acordo com a altura da criança.
!Os encaixes da faixa de ombro
devem estar levemente acima do
ombro da criança. Faixas de
ombro muito altas ou muito baixas
não são seguras.
!Se a faixa de ombro não estiver na
altura apropriada, a criança pode
ser arremessada do assento
infantil se houver um acidente.
8

27 28
ii. Uso da Almofada de
Assento Pequena
consulte as imagens
9- 13
1. Ao levantar o ajustador do cinto, puxe
para fora os cintos do arnês de
ombros até ao comprimento correcto.
2. Prima o botão vermelho para soltar a
fivela 10 -1,e em seguida coloque a
criança na cadeira infantil para au-
tomóvel.
3. Aperte a fivela ate ouvir um click. 11
9
10
1
11
13
12
4. Puxe bem o cinto de ajuste. 13
!Ao puxar o ajustador de rede, empurre a faixa de ombro no compri-
mento desejado. 12
1. A almofada de assento pequena inclui suporte para cabeça e almofadas internas.
2. O suporte de cabeça é adequado pata crianças em todos os modos de
instalação.
3. A almofada de assento pequena é para a proteção da criança. Crianças com
peso inferior a 9kg devem utilizar a almofada de assento pequena.
4. Depois de remover a espuma da almofada de assento pequena, favor a
armazene em um local onde a criança não possa alcançá-la.
5. Antes de utilizar a almofada de assento pequena, favor monte a espuma. 9
Nota

29 30
22
14
11
iii. Ajuste do Ângulo de
Inclinação Traseira
consulte as imagens 14
Ao puxar a alavanca de ajuste de
reclinagem 14 -1, puxe o assento
infantil da primeira posição para a
última posição. 14 -2
Indicação de ângulo: com ilustrações
azuis superiores alinhado com
indicador de posição de reclinagem
inferior, como 8
iv. Instalação Virada
para Atrás
consulte as imagens
15 - 18
!
O sistema de retenção para
crianças não pode ser usado se a
fivela do cinto de segurança do
veículo (final fêmea da fivela) for
muito longo para ancorar o
sistema de retenção para crianças
com segurança.
15
-1
16
15
1
17
18
1122
1. Certifique que a faixa de ombro
esteja ajustada na altura
apropriada antes de instalar este
assento infantil.
2. Primeiro ajuste o ângulo do
assento infantil na última
posição. Indicação de ângulo:
com ilustrações azuis superiores
alinhado com indicador de posição
de reclinagem inferior, como 8
3. Ao instalar e ajustar os cintos de
segurança, certifique que o cinto
de ombro e o cinto de cintura não
estejam torcidos e não irão impedir
que os cintos de segurança
funcionem apropriadamente.
Nota
1. Aperte os cintos nos encaixes de
cintos de segurança azuis na
traseira do corpo. 16
!O cinto de ombro deve passar
através do encaixe do cinto de
segurança traseiro.
2. Abra o dispositivo destravamento e
encaixe o cinto de segurança nele.
17
3. Ao pressionar o assento infantil,
puxe os cintos para apertar o
assento infantil segura e
firmemente.
! Favor verifique movendo o
assento infantil para frente e
para atrás.
!O cinto de ombro passa através
dos encaixes do cinto de
segurança traseiro, como 18 -1
!O cinto de ombro passa através
do Dispositivo de
Destravamento, confirme que o
Dispositivo de Destravamento
esteja pressionado, como 18 -2

31 32
1. A almofada de assento pequena é para a proteção da criança. Crianças
com peso inferior a 9kg devem utilizar a almofada de assento pequena.
2. Favor instale o assento infantil no assento do veículo, e então coloque a
criança no assento infantil.
3. Depois que a criança tiver sido posicionada no assento, verifique se a
faixa de ombro está na altura correta.
Nota
1. Puxe o ajustador de rede,
enquanto empurra a faixa de
ombro no comprimento desejado.
12
2. Coloque a criança no assento
infantil e passe ambos os braços
através das faixas. 19
3. Puxe a rede de ajuste e a ajuste
no comprimento apropriado para
certificar que seu filho esteja
apropriadamente preso. 20
!Certifique que o espaço entre a
criança e a faixa de ombro é de
aproximadamente a espessura
de uma mão.
v. Prendendo seu Filho no assento infantil
consulte as imagens 19 - 20
19
20
Instalação para Modo
Virado para Frente
(para Crianças entre 9-18kg
/ 1 - 4 anos de idade)
consulte as imagens 21 - 27
Idade de referência
1 - 4 anos de idade
Posição do assento
Posição 1 - 3 (com ilustrações azuis
superiores alinhado com indicador de
posição de reclinagem inferior, como 21 )
!Favor instale o assento infantil no
assento do veículo, e então coloque a
criança no assento infantil.
i. Ajuste do Ângulo de
Inclinação Dianteira
consulte as imagens 21
ii. Posição Apropriada da
Faixa de Ombro
Favor ajuste o suporte de cabeça e
faixas de ombro na altura apropriada
de acordo com a altura da criança.
21

33 34
iii. Instalação Virada para
Frente
consulte as imagens
22 - 25
!
O sistema de retenção para crianças
não pode ser usado se a fivela do cinto
de segurança do veículo (final fêmea
da fivela) for muito longo para ancorar
o sistema de retenção para crianças
com segurança.
22
-1
1. Favor ajuste a faixa de ombro
na altura apropriada (logo acima
do ombro da criança) antes de
instalar o assento infantil.
2. Favor ajuste o assento infantil no
ângulo apropriado (3 posições
para modo virado para frente).
Indicação de ângulo: com
ilustrações vermelhas superiores
alinhado com indicador de
posição de reclinagem inferior,
como 21
3. Ao instalar e ajustar os cintos
de segurança, certifique que
o cinto de ombro e o cinto de
cintura não estejam torcidos
e não irão impedir que os
cintos de segurança sejam
apropriadamente posicionados .
Nota
22
1
23
25
24
Ao pressionar o assento infantil,
puxe os cintos para apertar o
assento infantil segura e
firmemente. 24
!Favor verifique movendo o
assento infantil para frente e
para atrás.
!O cinto de ombro passa através
do Dispositivo de
Destravamento, confirme que o
Dispositivo de Destravamento
esteja pressionado, como 23
!A lingueta da fivela do veículo
está engatada com a fivela
corretamente, como 22
iv. Prendendo seu Filho
na assento infantil
consulte as imagens
26 - 27
1. A almofada de assento pequena
é para a proteção da criança.
Crianças com peso inferior a 9kg
devem utilizar a almofada de
assento pequena.
2. Favor instale o assento infantil
no assento do veículo, e então
coloque a criança no assento
infantil.
3. Depois que a criança tiver sido
posicionada no assento, verifique
se a faixa de ombro está na altura
correta.
Nota

35 36
1. Solte os cintos de ombros,
activando o ajustador do cinto no
centro e puxando
simultaneamente ambos os cintos
de ombros para cima. 12
2.
Abrir a fivela do cinto pressionando
com firmeza o botão vermelho.
10
-1. Coloque a criança no banco e
coloque o cinto de ombro sobre o
ombro da criança.
26
3. Junte as duas linguetas do cinto e
trave-as no lugar da fivela do
cinto com um audível "CLIQUE".
11
4. Puxe a rede de ajuste e a ajuste
no comprimento apropriado de
forma que seu filho esteja
apropriadamente preso. 27
!Certifique que o espaço entre a
criança e a faixa de ombro é de
aproximadamente a espessura
de uma mão.
para Suporte de Cabeça
e Faixa de Ombro
consulte as imagens 28
1. Favor ajuste o suporte de cabeça
e faixas de ombro na altura
apropriada de acordo com a
altura da criança.
2. Aperte a alavanca de ajuste do
suporte de cabeça 28 -1,
enquanto puxa ou empurra o
suporte de cabeça até que ele
encaixe em uma das 6 posições.
As posições do suporte de
cabeça são apresentadas como
28
26
27
Ajuste de Altura
28
11
!Depois de remover a espuma da almofada de assento pequena, favor a
armazene em um local onde a criança não possa alcançá-la.
!Favor lave as partes macias com água fresca abaixo de 30°C.
!Não passe as partes macias.
!Não aplique água sanitária ou lavagem a seco nas partes macias.
!Não utilize detergente neutro não diluído, gasolina ou outros solventes
orgânicos para lavar o assento infantil. Isto pode causar danos ao assento
infantil.
!Não torça as partes macias para secar com muita força. Isto pode deixar as
partes macias com rugas.
!Favor pendure as partes macias para secar na sombra.
!Favor retire o assento infantil do veículo se ele não for utilizado por um
longo período de tempo. Coloque o assento infantil na sombra e em algum
lugar onde seu filho não consiga o acessar
Cuidados
Montagem de Partes Macias
consulte as imagens 29 - 34
1. Coloque a almofada de assento no
corpo e prenda a fivela através do
encaixe da almofada e assento. 29
2. Enrole a fivela com o elástico no interior
do cinto de entrepernas. 30
3. Prenda a rede de ajuste e as faixas em
ambos os lados através das almofadas
de assento respectivamente. 30 -1
29
30 11
Other manuals for steadi
1
Table of contents
Languages:
Other Joie Car Seat manuals

Joie
Joie Stages User manual

Joie
Joie bold R User manual

Joie
Joie Every Stage FX User manual

Joie
Joie i-Venture User manual

Joie
Joie Signature i-Traver User manual

Joie
Joie Signature i-Spin Grow User manual

Joie
Joie i-Traver User manual

Joie
Joie i-Spin 360 E User manual

Joie
Joie trillo shield User manual

Joie
Joie duallo User manual