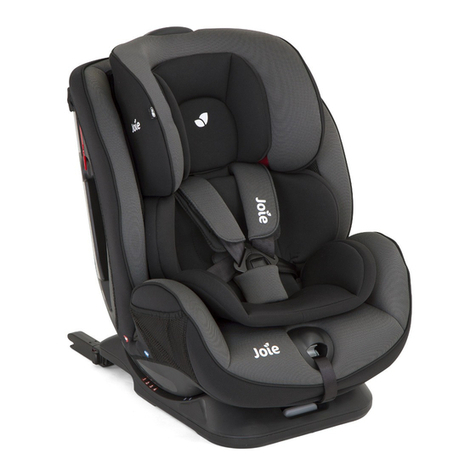
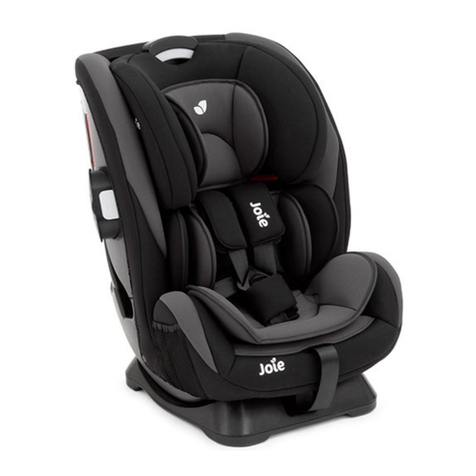
Joie Stages User manual

stages
0+/1 /2 (0-25kg)

21
Congratulations
You have purchased a high quality, fully certified child
safety child restraint. This product is suitable for the use
of children weighing up to 25 kg (approximately 7 years
old or under). Carefully read this Instruction Manual and
follow the installation steps. This is the ONLY way to pro-
tect your child from serious injury or death in the case of
an accident and to provide comfort to your child while
using this product.
Please Confirm
Make sure that your vehicle is equipped with a 3-point
retractor safety belt. Seat belts may be different in de-
sign and length according to maker, manufacturing date,
and the type of vehicle. This child restraint is only suit-
able for use in vehicles fitted with 3-point retractor safe-
ty belt and approved to European UN/ECE Regulation No.
16 or other equivalent standards.
Please keep the Instruction Manual in the storage com-
partment of the rear cover for future reference.
GB Parts List
1 Adjustable Head Support
2 Seat Pad
3 Buckle
4 Harness Adjustment Cover
5 Adjustment Webbing
6 Reclining Adjustment Handle
7 Webbing Lock
8 Crotch Pad
9 Shoulder Harness Strap
10 Shoulder Harness Strap Covers
11 Infant Insert
12 Lock-off Device
13 Head Support Adjustment Handle
14 Rear-Facing Vehicle Shoulder Belt Slot
15 Rear Cover
16 Instruction Manual Storage Compartment
17 Base
18 Seat Shell
19 Forward-Facing Vehicle Belt Slot
20 Vehicle Waist Belt Slot
21 Vehicle Shoulder Belt Guide
22 Soft Goods Attachment Piece
23 Locking Clip
1
2
3
4
5678
9
11 10
21
17
19 18
20
12 13
14
15
16
22 23
Accessories
(May not be included)
Hood (on certain models)
Accessories may be sold separately or may
not be available depending on region.

3 4
Warning
!NO child restraint can guarantee full protection from injury in an accident. However﹐ proper use of this child
restraint will reduce the risk of serious injury or death to your child.
!This child restraint is designed ONLY for a child weighing up to 25kg (approximately 7 years old or under).
!DO NOT use or install this child restraint until you read and understand the instructions in this manual and in
your vehicle owner's manual.
!DO NOT install or use this child restraint without following the instructions and warnings in this manual or you
may put your child in serious risk of injury or death.
!Concern the danger of making any alterations or additions to the device without the approval of the Type
Approval Authority﹐ and a danger of not following closely the installation instructions provided by the Infant
child restraint manufacturer.
!DO NOT use this child restraint if it has damaged or missing parts.
!Child is not left in the child restraint system unattended.
!DO NOT have your child in large/oversized clothes when using this child restraint. This may prevent your child
from being properly and securely fastened by the harness straps.
!DO NOT leave this child restraint﹐ or other items﹐ unbelted or unsecured in your vehicle. Unsecured items can
shift or move around and may injure occupants in a sharp turn﹐ sudden stop﹐ or crash. Remove child restraint
from vehicle if not in regular use.
!Do not place this child restraint in seating positions where an active frontal airbag is installed If your child is
still in rear facing mode.
!NEVER use a second-hand child restraint or a child restraint whose history you do not know because it may
have structural damage that could endanger your child's safety.
!NEVER use ropes or any other substitutes to secure child restraint in vehicle or to secure child into child
restraint. Only use vehicle belt to secure child restraint in vehicle.
!The parts of this child restraint should never be lubricated in any way.
!Always secure child in child restraint while in the vehicle﹐ even on short trips﹐ as this is when most accidents occur.
!DO NOT use this child restraint in Group 0+﹐ 1 for more than 7 years after the date of purchase and do not use this
child restraint in Group 2 for more than 10 years after the date of purchase﹐ as parts may degrade over time﹐ or from
exposure to sunlight﹐ and may not perform adequately in a crash.
Warning
!DO NOT use this child restraint as a regular chair as it may fall down and injure the child.
!Please keep this child restraint away from sunlight﹐ otherwise it may be too hot for the child's skin. Always
touch test seat before placing child in it.
!The child restraint shall not be used without the soft goods.
!The soft goods should not be replaced with any other than the one recommended by the manufacturer﹐
because the soft goods constitutes an integral part of the restraint performance.
!DO NOT put anything other than the recommended inner cushions in this child restraint.
!DO NOT carry this child restraint with a child in it.
!The child restraint should be changed when it has been subject to violent stresses in an accident. An
accident can cause damage to the child restraint that you cannot see.
!Consult the retailer for issues concerning maintenance﹐ repair and part replacement.
!DO NOT install this child restraint under the following conditions:
1. Vehicle seats with 2-point vehicle belts.
2. Vehicle seats facing sideways or rearward with respect to the running direction of the vehicle.
3. Vehicle seats unstable during installation.
!Be sure that the child restraint is installed in such a way that no part of it interferes with movable seats or in
the operation of vehicle doors.
!After your child is placed in this child restraint﹐ the safety belt must be used correctly﹐ and ensure that any
lap strap is worn low down﹐ so that the pelvis is firmly engaged.
!DO NOT use any load bearing contact points other than those described in the instructions and marked on
the child restraint.
!Any straps holding the restraint to the vehicle should be tight﹐ that any straps restraining the child should be
adjusted to the child’s body﹐ and that straps should not be twisted.
5 6
Product Information
Product Group 0+/1/2 Child restraint
Model C0925
Suitable for Child weighing up to 25kg (approximately 7 years old or under)
Mass Group 0+/ 1 / 2
Materials Plastics﹐ metal﹐ fabrics
Patent No. Patents pending
Brand Name Joie
Website www.joiebaby.com
Manufacturer Joie Children's Products (UK) Limited
Read all the instructions in this manual before using this product. If you have any further questions﹐ consult the
retailer directly.
This is a "Universal" child restraint. It is approved to European Regulation No. 44﹐ 04 series of amendments﹐ for
general use in vehicles and it will fit most﹐ but not all﹐ vehicle seats.
Emergency
In case of emergency or accident﹐ it is most important to have your child taken care of with first aid and medi-
cal treatment immediately.
Child's
Weig ht
Installation
Mode
Figure for
Installation
Reference
Age
SeatSeat pad
PositionInstructions
18kg
9 -18 kg
15- 25 kg
4year
1 year
to
4 years
3 years
to
7 years
Group
0+/1
1
2
Rearward-
facing mode
with
Infant insert/
Infant mode
Forward-
facing
mode/
Toddler
mode
Forward-
facing
mode/
Youth mode
Infant insert
shall not be
used for child
over 6 months
Remove
crotch pad
and Infant insert
and store harness
in proper
storage locations
Infant insert must
be used from
0-6 months
to help restrain
the child tightly
Necessary
(0-6 Months)
Position 4:
Positions
1-3:
Positions
1-2:
1 2 3
4
1 2
Less
Than Less
Than
Important
1. DO NOT use child restraint forward-facing in Toddler or Youth mode before the child's weight exceeds
9kg. Child restraint in Toddler or Youth mode is dangerous for a child under 9kg.
2. When the child is suitable for both forward and rearward-facing modes, it is recommended to install this
child restraint in the rearward-facing mode as it is safer.
Installation Modes

7 8
Detach the snaps on the head support to
remove the head portion of the insert.
We recommend using the full
infant insert
while the baby
is 0-6 months or until they
outgrow the insert. The
infant insert
increases side impact
protection.
Use Infant Insert
Installation Concerns
!DO NOT install this child restraint on vehicle seats with 2-Point Retractor Vehicle Belts. 1
!This child restraint is only suitable for vehicle seats with 3-Point Retractor Vehicle Belts. 2
!DO NOT install this child restraint on vehicle seats that face sideways 3or rearward 3with respect to the
moving direction of the vehicle.
!Do not place this child restraint in seating positions where an active frontal airbag is installed If your child is
still in rear facing mode. Death or serious injury may occur 3. Please reference vehicle owner's manual for
more information.
!It is recommended to install this child restraint on a rear vehicle seat. 3Squeeze the reclining adjustment handle 4- 1﹐
and adjust the child restraint to the proper position
4- 2.
see images 1- 3
1
3
2
2
1
2
1
3
Reclining Adjustment
4
2
1
see images 4- 5

910
32
1
4
5
The recline positions are shown in 5.
There are three recline positions (1-3) for
forward-facing Toddler mode and two recline
positions (1-2) for forward-facing Youth mode 5.
The recline position 4 is for rearward-facing Infant
mode 5.
Angle indication: with top and bottom triangles
aligned 5.
Please adjust the head support and shoulder harness straps to the proper height according to the child's
height.
!When used in rearward-facing Infant mode﹐ the shoulder harness slots must be even with or just below the
child's shoulders. 6- 1
!When used in forward-facing Toddler mode﹐ the shoulder harness slots must be even with or just above the
child’s shoulders. 6- 2
!When used in forward-facing Youth mode﹐ the shoulder belt guides must be even with or just above the
child’s shoulders. 6- 3
If the shoulder harness straps are not at proper height﹐ the child may be ejected from the child restraint during
a crash.
Reference age Newborn -4 year old
Seat position Position 4 (with top triangle and blue triangle aligned﹐ as shown in 5).
!Please install the child restraint on the vehicle seat first﹐ and then place the child in the child restraint.
i. Installation for Rearward-Facing Infant Mode
Height Adjustment
(for Head Support and Shoulder Harness Straps)
Height Adjustment
(for Head Support and Shoulder Harness Straps) Infant Mode
(for Child under 18kg / Newborn -4 year old)
6
123
see images 6- 7
71
Squeeze the head support adjustment handle
7-1and pull up or push down the head support
until it snaps into one of the five positions.
The head support positions are shown in 7.
see images 8- 22
1. First adjust the child restraint to recline Position 4. Angle indication: With top triangle and blue triangle
aligned 5. Please refer to image 4 (Reclining Adjustment).
2. Make sure the shoulder harness straps are adjusted to the proper height before installing this child
restraint. Please refer to images 6-7 (Height Adjustment for Head Support and Shoulder Harness Straps).
3. When installing and adjusting the vehicle belts, make sure that both the vehicle shoulder belt and the
vehicle waist belt are not twisted or the belts may not function properly.
Note
see images 8- 16

11 12
8
2
1
9
1. Remove infant insert.
!Vehicle waist belt must pass underneath
infant insert.
2. Pass the vehicle waist belt 8- 1 through the
vehicle waist belt slots and then engage the
vehicle buckle tongue into the buckle. 9
3. Install the vehicle shoulder belt 8- 2in the
two rear-facing vehicle shoulder belt slots at the
back of the seat shell. 10
!Vehicle shoulder belt must pass through the
rear-facing vehicle shoulder belt slots.
!The locking clip is used only when the child
restraint is used in the rearward facing mode.
!The locking clip will make the child restraint
safer.
!Please replace the locking clip and string in
the bag when they are not in use.
4. Take the locking clip out of the bag. 11
5. While pressing the child restraint down firmly
into the vehicle seat 12 - 1﹐ pull the vehicle
shoulder belt to fasten the child restraint tightly
and securely 12 - 2.
!The child restraint cannot be used if the
vehicle safety belt buckle (female buckle end)
is too long to anchor the child restraint
securely. 12 - 3
6. Press button to open the locking clip. 13
10
11
2
1
12
3
13
13

13 14
14
15 3
2
1
16
7. Thread the diagonal belt through the locking
clip﹐ and then fasten the locking clip. 14
8. Refasten the locking clip. 15
!Please check if child restraint is installed
tightly by moving the child restraint back and
forth at the vehicle belt path. Please
reference vehicle owner's manual for more
information. (Child restraint should not move
more than 25mm/1").
Correctly assembled vehicle belt is shown in 16 .
!Vehicle waist belt passes through the vehicle waist belt slots﹐ as show in 16 - 1.
!Vehicle shoulder belt must pass through the rear-facing vehicle shoulder belt slots﹐ as shown in 16 - 2.
!The vehicle buckle tongue is engaged with the buckle correctly﹐ as shown in 16 - 3.
ii. Securing your Child in the Child restraint
see images 17 - 22
Note
1. Infant insert is for child's protection. Child 0-6 months must use infant insert.
2. Please install the child restraint on the vehicle seat, and then place the child in the child restraint.
3. After the child is placed into the child restraint, check whether the shoulder harness straps are at the
proper height. Please refer to images 6-7 (Height Adjustment for Head Support and Shoulder Harness
Straps).

15 16
18
19
20
21
4. Place the child in the child restraint and pass
both arms through the harness straps. 20
!After the child is seated﹐ double check
whether the shoulder harness straps are at
the proper height. Please refer to images 6-7
(Height Adjustment for Head Support and
Shoulder Harness Straps).
5. Engage the buckle. 21
17
1
2
1. Press down the harness adjustment lock ﹐ then
pull the shoulder harness straps to the proper
length. 17
2. Press the red button down to disengage the
buckle. 18
3. Place the infant insert in the child restraint﹐ and
then leave the harness straps on the left and
right sides of the child restraint. 19

17 18
22
6. Pull down the adjustment webbing and adjust
the harness so that your child is snugly secured.
22
!Make sure the space between the child and
the shoulder harness strap is about the
thickness of one hand. 22
Reference age 1-4 years old
Seat position Positions 1-3 (with top triangle and a red triangle aligned 5).
!Please install the child restraint on the vehicle seat first﹐ and then place the child in the child restraint.
i. Installation for Forward-Facing Toddler Mode
Toddler Mode
(for Child between 9-18kg / 1–4 years old)
see images 23 - 29
see images 23 - 27
Note
1. Please adjust the child restraint to the proper recline position (3 positions for forward-facing Toddler
mode). Angle indication: With top triangle and a red triangle aligned 5. Please refer to image 4 (Reclining
Adjustment).
!Recline position must be selected before child restraint is installed in the vehicle. Recline is not
intended to be adjusted while child restraint is installed in vehicle. Adjusting the recline while child
restraint is installed in vehicle may loosen installation of child restraint leading to death or serious injury
in a crash.
2. Please adjust the shoulder harness straps to the proper height before installing the child restraint. Please
refer to images 6-7 (Height Adjustment for Head Support and Shoulder Harness Straps).
3. When installing and adjusting the vehicle belts, make sure that both the vehicle shoulder belt and the
vehicle waist belt are not twisted or the belts may not function properly.
!It is not recommended to install child restraint forward facing on front seat with airbag. Please reference
vehicle owner's manual for more information.
23
24
25
1
1. Thread the vehicle belt through the two
forward-facing vehicle belt slots at the back of
the child restraint. 23
2. Engage the vehicle buckle tongue into the
buckle. 24
3. While pressing the child restraint down firmly
into the vehicle seat﹐ pull the vehicle shoulder
belt to fasten the child restraint tightly and
securely. 25
!The child restraint cannot be used if the
vehicle safety belt buckle (female buckle end)
is too long to anchor the child restraint
securely. 25 - 1

19 20
26
27
1
2
3
28
29
4. Open the lock-off device and insert the shoulder safety belt. 26
!Please check if the child restraint is installed tightly by moving the child restraint back and forth at the
vehicle belt path. (child restraint should not move more than 25mm/1").
The assembled vehicle belt is shown in 27 .
!Vehicle Shoulder belt passes through Lock-off Device. 27 - 1
!Vehicle Waist belt passes through the forward-facing vehicle belt slots. 27 - 2
!The vehicle buckle tongue is engaged with the buckle correctly shown in. 27 - 3
ii. Securing your Child in the Child restraint
1. When installing the child restraint in the forward-facing Toddler mode, do not use the infant insert.
2. Please install the child restraint on the vehicle seat, and then place the child in the child restraint.
3. After the child is placed into the child restraint, double check whether the shoulder harness straps are at
the proper height. Please refer to images 6-7 (Height Adjustment for Head Support and Shoulder Harness
Straps).
Note
see images 28 - 29
1. Pull up the webbing lock 17 - 1﹐ while pulling
the shoulder harness straps to proper length.
17 - 2
2. Press the red button down to disengage the
buckle. 18
3. Leave the harness straps on the left and right
sides of the child restraint. 28
4. Place the child in the child restraint and engage
the buckle. 21
!After the child is seated﹐ double check
whether the shoulder harness straps are at
the proper height. Please refer to images 6-7
(Height Adjustment for Head Support and
Shoulder Harness Straps).
5. Pull down the adjustment webbing and adjust
the harness so that your child is snugly secured.
29
!Make sure the space between the child and
the shoulder harness straps is about the
thickness of one hand. 29

21 22
Youth Mode
(for Child 15–25kg / 3–7 years old)
see images 30 - 35
Reference age 3-7 years old
Seat position Positions 1-2 (with top triangle and a red triangle aligned 5).
i. Converting from Toddler Mode to Youth Mode
1. Press the red button down to disengage the buckle. 18
2. To remove the crotch pad﹐ first locate the elastic on the inside of the crotch pad. Pull both the elastic
and the crotch pad over the buckle to remove. 30
3. Remove the infant insert.
4. Detach the snaps 31 - 1 and the hook and loop fastener on the seat pad. 31 - 2
5. Lift the upper flap of seat pad upward and pull the lower flap forward. Then store the shoulder straps
31 - 3 and buckle tongues in their storage compartments. 31 - 4
6. Pull the buckle through the slot in the seat pad and then store the buckle in its storage
compartment. 31 - 5
7. Reattach the snaps 31 - 1 and the hook and loop fastener 31 - 2 to recover the seat shell. 32
!To convert back to Toddler mode from Youth mode﹐ please reverse the above steps.
32
33
1
2
1
31
45
1
2
3
see images 30 - 32
ii. Installation for Forward-Facing Youth Mode
see images 33 - 36
Note
1. Only use the vehicle seat belt when installing the child restraint in the forward-facing Youth mode. Do not
use the infant insert, shoulder straps or crotch strap. Please store the shoulder straps, buckle and buckle
tongues in their storage compartments. 31
!It is not recommended to install child restraint forward facing on front seat with airbag. Please
reference vehicle owner's manual for more information.
2. Please adjust the shoulder harness straps to the proper length before storing the shoulder straps and
buckle in their storage compartments. 17
3. Please adjust the child restraint to the proper recline position (Only positions 1-2 are acceptable for
forward-facing Youth mode). Angle indication: With top triangle and a red triangle aligned 5. Please
refer to image 4 (Reclining Adjustment).
4. When installing and adjusting the vehicle belts, make sure that both the vehicle shoulder belt and the
vehicle waist belt are not twisted or the belts may not function properly.
1. Place your child in the child restraint. Check
whether the shoulder belt guides are at proper
height. Please refer to images 6-7 (Height
Adjustment for Head Support and Shoulder
Harness Straps).
2. Install vehicle shoulder belt through vehicle
shoulder belt guide 33 -1and pass vehicle
waist belt through vehicle waist belt slots shown
in 33 - 2. Engage vehicle belt tongue into
buckle.
30

23 24
34
1
2
36
35
21
3
!Shoulder belt must pass through shoulder belt
guide. 34 - 1
!Waist belt must pass through seat slots. 35 - 1
!The vehicle buckle tongue is engaged with the
buckle correctly shown in. 35 - 2
!The child restraint cannot be used if the vehicle
safety belt buckle (female buckle end) is too long
to anchor the child restraint securely. 35 - 3
!Never use a 2-point vehicle belt across front of child. 36 - 1
!Do not use vehicle shoulder belt loose or positioned under child's arm. 36 - 2
!Do not use vehicle shoulder belt behind child’s back. 36 - 3
! Do not allow child to slide down in the child restraint. 36 - 4
Soft Goods Assembly
1. Remove the infant insert and crotch pad.
2. To remove the shoulder pads﹐ first unsnap the pads then
remove the webbing attached by the velcro. 37
3. Press the red button down to disengage the buckle. 18
4. Detach hook and loop fasteners 31 -2on the head support
from slots in vehicle shoulder belt guides﹐ and then remove
the head support cover.
5. Detach the snaps on sides of seat pad. 31 - 1
6. Detach elastic tabs﹐ located behind head support﹐ from the
seat shell.
7. Detach the fabric attachment piece from the upper rear of
seat shell.
8. Pull the buckle through the slot in the seat pad and then
remove seat pad from seat shell.
The soft goods can be re-assembled by reversing the above steps.
!Please reference images 30-32 (Converting from Toddler Mode to Youth Mode) for proper routing of harness
through seat pad.
1
3
2
4
37

25 26
!When using the child restraint in Toddler or Youth mode﹐ please remove the infant insert and store it
somewhere that the child cannot access it.
!Please machine wash the soft goods with cold water under 30°C.
!Do not iron the soft goods.
!Do not bleach or dry clean the soft goods.
!Do not use undiluted neutral detergent﹐ gasoline or other organic solvent to wash the child restraint. It may
cause damage to the child restraint. Use only mild detergent﹐ water and a soft cloth to clean child restraint
shell﹐ harness and shoulder harness strap covers.
!Shoulder harness straps are not removable. Clean with mild detergent﹐ water and a soft cloth only.
!Do not twist the soft goods with great force to dry. It may leave the soft goods with wrinkles.
!Please line-dry the soft goods in the shade only. Do not use a clothes dryer to dry the soft goods.
!Please remove the child restraint from the vehicle seat if not in use for a long period of time. Store the child
restraint in a cool﹐ dry place where your child cannot access it.
!Remove foam insert from infant insert before machine washing.
Please reference the Illustration when re-inserting foam insert into infant insert.
Care and MaintenanceUse Hood
42
3938
41
40
43
see images 38 -43
!Use this hood only with the stages child restraint.
!The hood can be used for both front facing and rear facing modes.

27 28
Félicitations
Vous avez fait l’achat d’un siège-auto pour enfant
dûment breveté. Ce produit convient pour les enfants
pesant jusqu’à 25 kg (approximativement 7 ans ou
moins). Lisez attentivement ce Manuel d’instructions et
suivez les étapes d’installation. Ceci est le SEUL moyen
de protéger votre enfant contre de graves blessures voire
la mort dans le cas d’un accident et de fournir un confort
à votre enfant tout en utilisant ce produit.
Veuillez confirmer
Assurez-vous que votre véhicule est équipé d’une
ceinture de sécurité à enrouleur automatique à 3 points.
Les ceintures de sécurité peuvent varier en design
et longueur en fonction du fabricant, de la date de
fabrication et du type de véhicule. Ce siège auto con-
vient uniquement aux véhicules munis d’une ceinture de
sécurité à enrouleur automatique à 3 points et approuvé
selon la Réglementation européenne CEE-ONU N° 16 ou
autres normes équivalentes.
Veuillez conserver le Manuel d’instructions dans le
compartiment de rangement de la housse arrière pour
référence future.
FR
1
2
3
4
5678
9
11 10
21
17
19 18
20
12 13
14
15
16
22 23
1 Appui-tête réglable
2 Coussin de siège
3 Boucle
4 Housse d’ajustage de harnais
5 Sangles d’ajustage de harnais
6 Poignée de réglage d’inclinaison
7 Régleur de sangles
8 Coussin d’entre-jambes
9 Sangle de harnais de sécurité
10 Housse de courroies de harnais pour
épaules
11 Support de corps de bébé
12 Dispositif de verrouillage
13 Poignée de réglage d’appui-tête
14 Fente de ceinture diagonale de véhicule dirigée vers
l’arrière
15 Housse arrière
16 Compartiment de rangement du Manuel
d’instructions
17 Base
18 Coque de siège
19 Fente de ceinture de véhicule dirigée vers l’avant
20 Fente de ceinture abdominale de véhicule
21 Guide de ceinture diagonale de véhicule
22 Pièce de fixation de matériaux souples
23 pince de blocage
Nomenclature
Accessoires
(Peuvent ne pas etre
inclus lors de l’achat)
Capuche

29 30
! AUCUN siège auto ne peut garantir une totale protection contre des blessures dans un accident.
Néanmoins﹐ l'emploi approprié de ce siège-auto diminuera le risque de blessures graves voire la mort pour
votre enfant.
! Ce siège auto est conçu UNIQUEMENT pour les enfants pesant jusqu’à 25 kg (approximativement 7 ans ou moins).
!NE PAS utiliser ni installer ce siège auto jusqu’à ce que l’on lise et comprenne les instructions de ce manuel
et du manuel du propriétaire du véhicule.
! NE PAS installer ni utiliser ce siège auto sans suivre les instructions et les avertissements et ce﹐ pour ne pas
mettre l’enfant en danger de blessure voire de mort.
! NE PAS effectuer de modifications à ce siège auto ni l’utiliser avec des composantes d’autres fabricants.
!NE PAS utiliser ce siège auto s’il est endommagé ou s’il manque des pièces.
! NE JAMAIS laisser un enfant sans supervision avec ce siège auto.
! NE PAS habiller l’enfant dans des vêtements amples/trop grands lors de l’utilisation de ce siège auto. Ceci
risque d’empêcher l’enfant d’être bien attaché en toute sécurité par les sangles du harnais.
! NE PAS laisser ce siège auto ni d’autres articles non attachés ou non sécurisés dans le véhicule. Les articles
non sécurisés peuvent se déplacer ou bouger et risquent de blesser les occupants dans un virage serré﹐ un
arrêt brusque ou un accident. Retirer le siège auto du véhicule s’il n’est pas utilisé régulièrement.
!NE placez pas le siège auto à des endroits où un airbag frontal actif est installé si votre enfant est encore en
position tournée vers l'arrière.
!NE JAMAIS utiliser de siège auto d’occasion ni de siège auto dont on ne connait pas les antécédents parce
qu’il risque d’avoir des dommages structurels susceptibles de mettre en danger la sécurité de l’enfant.
!NE JAMAIS utiliser de cordes ni d’autres substituts pour sécuriser le siège auto dans le véhicule ou
sécuriser l’enfant dans le siège auto. Utiliser uniquement la ceinture de sécurité du véhicule pour sécuriser le
siège auto dans le véhicule.
!Les pièces de ce siège auto ne doivent jamais être lubrifiées de quelque façon que ce soit.
!Toujours sécuriser l’enfant dans le siège auto dans le véhicule﹐ même pour de courts déplacements étant donné
que la majorité des accidents se produisent à ces moments-là.
! N'utilisez PAS ce siège auto pour les groupes 0+ et 1 pendant plus de 7 ans après la date d'achat et n'utilisez pas
ce siège auto pour les groupes 2 pendant plus de 10 ans après la date d'achat﹐ car les pièces peuvent se
dégrader avec le temps ou l'exposition au soleil﹐ et pourraient mal fonctionner lors de crashs.
! NE PAS utiliser ce siège auto comme siège normal étant donné qu’il risque de tomber et de blesser l’enfant.
! Garder ce siège auto à l'écart de la lumière du soleil et ce﹐ pour qu'il se soit pas trop chaud sur la peau de
l'enfant. Toujours tester le siège avant d’y placer l’enfant.
! NE PAS utiliser ce siège auto sans les articles de consommation intermédiaire.
! Les articles de consommation intermédiaire ne doivent pas être remplacés par tout autre article que ceux
recommandés par le fabricant. Les articles de consommation intermédiaire constituent une partie intégrale
de la performance du siège auto.
!NE PAS mettre quoi que ce soit autre que les coussins internes recommandés dans ce siège auto.
! NE PAS transporter ce siège auto avec un enfant dedans.
!NE PAS continuer à utiliser ce siège auto à la suite d’un accident modéré ou grave. Remplacer
immédiatement car celui-ci peut avoir subi des dommages structurels invisibles de l’accident.
!
Consulter le revendeur pour toute question concernant la maintenance﹐ la réparation et le remplacement des pièces.
!NE PAS installer ce siège auto dans les conditions suivantes :
1. Sièges de véhicule avec ceintures de sécurité à 2 points.
2. Les sièges de véhicule dirigés vers le côté ou vers l’arrière par rapport au sens de marche du véhicule.
3. Sièges de véhicule instables pendant l’installation.
!S’assurer que le siège auto est installé de sorte qu’aucune partie du siège auto n’interfère avec des sièges
mobiles ou le fonctionnement des portes du véhicule.
!Vérifiez que les sangles (ceinture à la taille) sous l'estomac sont aussi basses que possible﹐ pour bien
soutenir le pelvis.
!NE PAS utiliser des points de contact avec charge autres que ceux décrits dans les instructions et marqués
sur le dispositif de retenue pour enfant.
!Les sangles du siège de bébé et du siège de véhicule doivent être serrées﹐ sans torsion.
Avertissements Avertissements
Informations techniques
Produit Groupe 0+/1/2 Siège-auto
Modèle C0925
Convient pour Enfants pesant un maximum de 25 kg(approximativement 7 ans ou moins)
Groupe masse 0+/ 1 / 2
Matériaux Plastiques﹐ métal﹐ tissus
N° Brevet Brevets en instance
Nom de marque Joie
Site Web www.joiebaby.com
Fabricant Joie Children's Products (UK) Limited
Lisez toutes les instructions de ce manuel avant d’utiliser ce produit. Pour toute autre question﹐ consultez le
revendeur directement.
Ceci est un harnais d’auto « universel ». Il est approuvé selon la série d’amendement de la Réglementation
européenne n° 44﹐ 04﹐ pour un emploi général dans les véhicules et il conviendra à la majorité des sièges auto
mais pas tous.
Urgence
En cas d’urgence ou d’accident, il est extrêmement important de traiter immédiatement votre enfant avec
des premiers soins ou un traitement médical.

31 32
Modes d’installation
Préoccupations
d’installation
Poids de
Poids de
Mode
d’installation
Figure pour
Figure pour
Âge de
référence
Position
du siège
Instructions
relatives au
coussin du siège
18kg
9 à
18 kg
Nécessaire
0-6 mois
4 an
Position 4
Groupe
1
2
Mode dirigé
vers l’arrière
avec support
corps de
bébé/
Mode Bébé
Mode dirigé
vers l’avant/
Mode
Tout-petit
Mode dirigé
vers l’avant/
Mode
Jeune enfant
Le support de
corps de bébé doit
être utilisé pour
permettre de
retenir l’enfant bien
serré ou de position-
ner correctement le
bébé dans le siège
auto par 0-6 mois
15 à
25kg
1 an
à
4 ans
3 ans
à
7 ans
Position 1-3
Position 1-2
Démonter le
support de corps
de bébé (le
support de corps
de bébé ne devra
pas être utilisé pour
un bébé de plus
6 mois)
Retirer les housses
du harnais de
sécurité, la sangle
d’entrejambe et le
support de corps de
bébé (ranger dans
les lieux de range-
ment appropriés)
Moins
de Moins
de
0+/1
4
1 2 3
1 2
Nous conseillons d'utiliser le support pour enfant
intégral lorsque le bébé fait moins de
6 mois ou jusqu'à ce qu'il dépasse du support. Le
support pour nourrisson augmente la protection
contre les impacts latéraux.
Détachez les attaches du support pour tête
afin d'enlever la portion haute du
support pour nourrisson.
Utilisation du support pour petits enfants
Important
1. NE PAS utiliser le mode Tout-petit ou Jeune enfant en direction avant que le poids de l’enfant
ne dépasse 9kg. Le siège auto en mode Tout-petit ou Jeune enfant est dangereux pour un
enfant pesant moins de 9 kg.
2. Lorsque l’enfant peut être installé dans les deux modes de direction vers l’avant et vers
l’arrière, il est recommandé d’installer ce siège auto dans le mode dirigé vers l'arrière car celui-
ci est plus sûr.
voir images 1-3
!
NE PAS installer ce siège auto sur des sièges de véhicule ayant des ceintures de sécurité à enrouleurs
automatiques à 2 points.
1
!Ce siège auto ne convient que pour les sièges de véhicule munis de ceintures de sécurité à enrouleur
automatique à 3 points. 2
!NE PAS installer ce siège auto sur les sièges de véhicule dirigés vers le côté 3ou vers l’arrière 3par
rapport au sens de la marche du véhicule.
!Ne placez pas le siège auto à des endroits où un airbag frontal actif est installé si votre enfant est encore en position tournée
vers l'arrière. De graves blessures voire la mort peuvent se produire. Prière de consulter le manuel d’utilisation du véhicule
pour de plus amples informations. 3
!Il est recommandé d’installer ce siège auto sur un siège de véhicule arrière. 3
1
3
2
2
1
2
1

33 34
3
4
2
1
voir images 4- 5
32
1
4
5
Height Adjustment
(for Head Support and Shoulder Harness Straps)
6
123
voir images 6- 7
Prière d’ajuster l'appui-tête et les sangles de harnais de sécurité à la hauteur appropriée par rapport à la
taille de l'enfant.
!Quand utilisé en mode Bébé dirigé vers l’arrière﹐ les fentes de harnais de sécurité doit être à fleur ou juste
au-dessous des épaules de l’enfant. 6- 1
!Quand utilisé en mode Tout-petit dirigé vers l’avant﹐ les fentes de harnais de sécurité doit être à fleur ou juste
au-dessous des épaules de l’enfant. 6- 2
!Quand utilisé en mode Jeune enfant dirigé vers l’avant﹐ les guides de ceintures diagonales doivent être à fleur
ou juste au-dessous des épaules de l’enfant. 6- 3
Si les sangles de harnais de sécurité ne sont pas à la hauteur appropriée﹐ l’enfant risque d’être éjecté du
siège auto en cas de collision.
Ajustage de l’inclinaison
Ajustage de la hauteur
(pour appui-tête et sangles de harnais de sécurité)
Appuyer sur la poignée d’ajustage de l’inclinaison 4
- 1﹐ et ajuster le siège auto à la position
appropriée 4- 2.
Les positions d’inclinaison sont illustrées à la 5.
Il existe trois positions d’inclinaison (1-3) pour le Mode
Tout-petit en direction avant et deux positions
d’inclinaison (1-2) pour le Mode Jeune enfant 5. La
position d’inclinaison 4 est réservée au Mode Bébé en
direction arrière 5.
Indication d’angle : avec les triangles supérieur et
inférieur alignés 5.

35 36
71
voir images 8- 22
voir images 8- 16
8
2
1
9
10
Serrer la poignée de réglage d’appui-tête 7- 1 et relever
ou appuyer sur l’appui-tête jusqu’à ce qu’il
s’enclenche en place dans l’une des cinq positions.
Les positions d’appui-tête sont illustrées à la 7.
Height Adjustment
(for Head Support and Shoulder Harness Straps)
Mode Bébé
(pour enfant de moins de 18 kg / Nouveau-né à 4 ans)
Âge de référence Nouveau-né à 4 an
Position de siège Position 4 (avec triangle supérieur et triangle bleu alignés﹐ comme l’indique la 5).
!
Prière d’installer le siège auto sur le siège du véhicule en premier﹐ puis placer l'enfant dans le siège auto.
i. Installation pour mode Bébé faisant face
vers l’arrière
1. Ajuster d’abord le siège auto en position d’inclinaison 4. Indication d’angle : Avec triangle supérieur et
triangle bleu alignés 5. Consulter la images 4 (Ajustage d’inclinaison).
2. S’assurer que les sangles du harnais de sécurité sont ajustées à la bonne hauteur avant d’installer ce
siège auto. Consulter la images 6-7 (Ajustage de hauteur pour appui-tête et sangles de harnais de sécu-
rité).
3. Lors de l’installation et du réglage des ceintures du véhicule, s’assurer que la ceinture diagonale et la
ceinture abdominale du véhicule ne sont pas tordues, et n’empêchent pas les ceintures de sécurité du
véhicule de fonctionner correctement.
Note
1. Retirer le support de corps de bébé.
!La ceinture abdominale du véhicule doit passer
sous le support de corps de bébé.
2. Passer la ceinture abdominale
8
- 1
dans les fentes
de la ceinture abdominale du véhicule﹐ et ensuite﹐
enclencher l’ardillon de la boucle du véhicule dans la
boucle
9
.
3. Installer la ceinture diagonale de véhicule
8
- 2
dans les deux fentes de ceinture diagonale du
véhicule dirigées vers l’arrière sur l’arrière de la
coque du siège
10
.
!La ceinture du véhicule doit passer par les fentes
de ceinture diagonale dirigées vers l’arrière.
!La pince de blocage s'utilise uniquement dans la
position dos à la route.
!La pince de blocage renforce la sécurité du
siège-auto.
!Veuillez ranger la pince de blocage et la ficelle
dans le sac de rangement hors utilisation.

37 38
11
2
1
12
3
13
13
14
15
7. Passer le brin diagonal par la pince de blocage﹐ et
puis fermer la pince de blocage.
14
8. Refermer la pince de blocage.
15
!Vérifier que le siège auto est bien attaché en
déplaçant le siège auto d’avant en arrière au
niveau de l’acheminement de la ceinture de
véhicule. Prière de consulter le manuel du
propriétaire du véhicule pour de plus amples
informations. (le siège auto ne doit pas bouger de
plus de 25 mm/1").
4. Sortir la pince du sac.
11
5.
Tout en appuyant sur le siège auto
12
- 1
﹐ tirer sur les
sangles pour qu'il soit maintenu fermement.
12
- 2
!Le siège de bébé ne peut pas être utilisé si la
boucle de ceinture de sécurité du véhicule
(extrémité femelle de la boucle) est trop longue
pour retenir le siège de façon sûre.
12
- 3
6. Ouvrer la pince en appuyant sur le loquet.
13
Other manuals for Stages
1
Table of contents
Languages:
Other Joie Car Seat manuals

Joie
Joie i-Spin Safe R User manual

Joie
Joie i-Spin Safe User manual

Joie
Joie gemm User manual

Joie
Joie Tilt User manual

Joie
Joie fortifi R129 User manual

Joie
Joie signature i-Prodigi User manual

Joie
Joie i-Spin 360 E User manual

Joie
Joie bold R User manual

Joie
Joie I1404C User manual

Joie
Joie Tilt Locking Clip User manual
Popular Car Seat manuals by other brands

inGarden
inGarden KneeGuardKids 3 INNO SENSE instruction manual

Safety 1st
Safety 1st Complete air 65 instruction manual

Graco
Graco 4Ever instruction manual

Bertoni
Bertoni PREMIUM UNO Manual instruction

Graco
Graco NAUTILUS 65 LX instruction manual

Dorel Juvenile Group
Dorel Juvenile Group ALPHA OMEGA ELITE 4358-3340A owner's manual