Joto E-HP-JMP-2S5E User manual

Joto Digital Mug Press Manual -
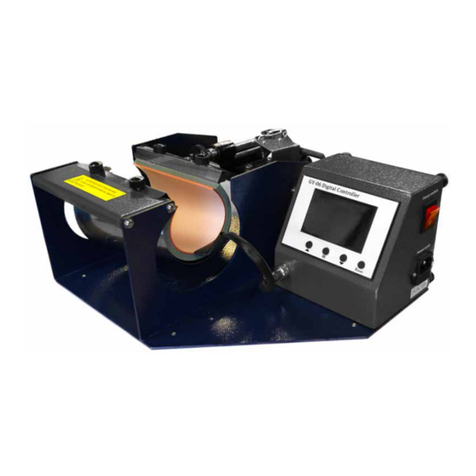
Dual Station includes 5 Elements
Model No.: E-HP-JMP-2S5E
OPERATOR’S MANUAL
Dual Station
Includes 5 elements
This product is SGS
Electrical Safety Certied

2www.jotoimagingsupplies.com 1-800-565-5686 Blaine, WA | Las Vegas, NV | Antioch TN | Coquitlam, BC | Brampton, ON
Safety Instructions
For Use By Qualied Personnel Only
When using your Mug Press,
basic precautions should always be followed,
including the following:
Read all instructions.
Use mug press only for its intended use.
Always keep the mug press dry. Do not get the mug press wet to reduce the risk of electric shock.
Avoid storing mug press in a wet/ damp area.
Never pull the cord to disconnect the power. Instead, grasp plug and pull to disconnect from power
outlet.
Make sure you protect the power cord by keeping it away from hot surfaces. Avoid placing objects
on top of the cord. This could cause damage to the cord and could be a re hazard risk.
Do not operate mug press with a damaged cord or if the equipment has been damaged. To prevent
risks of injury, please do not disassemble or attempt to repair the mug press by yourself if you are
not qualify to do so. Instead, call or take it to a qualied service person for examination and repair.
Incorrect assembly or repair could increase the risk of re, electric shock, or injury to persons when
the equipment is used.
If mug press being used by or near children, please make sure that it is supervised. Do not leave
equipment unattended while connected.
Metal parts on the press can become hot. Avoid touching the hot metal parts to prevent burns.
Proceed with caution when using the heat press.
To reduce the likelihood of circuit overload, Joto recommends to use a dedicated circuit if possible.
Make sure that the cord is safely secured so it cannot be pulled or tripped over.
If you need to use an extension cord, make sure you use a 20 amperage rated cord. Cords rated
below 20 amperage can overheat. Make sure that the extension cord is safely secured so it cannot
be pulled or tripped over.
Note: Temperature is in Fahrenheit or Celsius. This mug press should not be set to exceed
400˚F/ 200˚C. Setting the press temperature to above 400˚F/ 200˚C will burn out your mug
element and may cause a re hazard.
Do not use any other power cords other than the one provided with this machine.
Doing so may result in a re hazard. If you need a replacement cord, please call Joto at
1-800-565-5686 to request one.
PLEASE KEEP THE BOX THAT YOUR MUG PRESS ARRIVED IN,
ALONG WITH ALL ORIGINAL PACKAGING.
3
www.jotoimagingsupplies.com 1-800-565-5686 Blaine, WA | Las Vegas, NV | Antioch TN | Coquitlam, BC | Brampton, ON
Congratulations on your purchase of a Joto Dual Station Mug Press with 2 elements! In order
to work professionally with the machine and start production, please make sure you read this
manual carefully.
Reproduction of this manual requires written consent from Joto. Errors and amendments
of technical details excepted, all rights reserved. Joto is not liable for any direct or indirect
damages caused by the use of this product.
Table of Contents
Safety........................................................2
Introduction .............................................3
Mug Press Overview ..............................4-5
Machine Parts Diagram ............................6
Setting Up Your Mug Press.......................7
Elements Overview...................................8
Operating Instructions .............................9
Replacing The Mug Element ...................10
Joto Sublimation Guide ..........................11
Maintenance ...........................................11
Expanded View ................................. 12-13
Circuit Diagram.......................................14
Warranty.................................................15
Contact Information...............................16
This product is
SGS Certied

4www.jotoimagingsupplies.com 1-800-565-5686 Blaine, WA | Las Vegas, NV | Antioch TN | Coquitlam, BC | Brampton, ON
Mug Press Overview
Technical Specs
Model No.: E-HP-JMP-2S5E
Machine Type: Dual Station Mug Press includes 5 elements
Machine Size: 18.42” x 15.47” x 10.51”
(468 x 393 x 267mm)
Printable Articles Max Size: 6” x 4”
Mug Heater Size: 30x235mm for 6oz,9oz,10oz etc Mug
130x235mm for 11oz,15oz etc Mug,
12oz/17oz Latte Mug
Voltage: 220V/1Phase; 110V/1Phase
Power: 2x 300W = 600W, 5.5A
Recommended Settings: 30~280s; 356~400°F or 180~200°C
Time Range: 0~999s
Maximum Temp: 400˚F (200˚C)
Packing Size: 21.65” x 20.27” x 14.96”
(55 x 51.5 x 38cm)
Gross Weight: 30.86lbs (14kg)
Note: Temperature is in Fahrenheit or Celsius. This mug press should not be set to exceed
400˚F/ 200˚C. Setting the press temperature to above 400˚F/ 200˚C will burn out your mug
element and may cause a re hazard.

5
www.jotoimagingsupplies.com 1-800-565-5686 Blaine, WA | Las Vegas, NV | Antioch TN | Coquitlam, BC | Brampton, ON
Mug Press Overview
FRONT VIEW
SIDE VIEW
TOP VIEW

6www.jotoimagingsupplies.com 1-800-565-5686 Blaine, WA | Las Vegas, NV | Antioch TN | Coquitlam, BC | Brampton, ON
Machine Parts Diagram
Mug Heater
Limit Switch
Digital
Controller
Handle Bar Grip
Pressure
Adjustment
Knob
Power Switch
TOP VIEW
SIDE VIEW

7
www.jotoimagingsupplies.com 1-800-565-5686 Blaine, WA | Las Vegas, NV | Antioch TN | Coquitlam, BC | Brampton, ON
Setting Up Your Mug Press
Turning On Your Mug Press
Turn the Main Power Switch ON. The
Main Power Switch is at the right/Left side
of the heat press.
Current temperature will display. Usually has the value
“LO”, indicating low temperature.
How to Read The Display
1.) If a number value shows on this display and no lights
are on in either of the middle three slots, mug press is
displaying the current temperature.
2.) If the display has a value of “LO” it means low
current temperature (under 200˚F (93˚C)).
Setting Press Temperature
1.) Press OK to start for 2 seconds. Use the up and down
arrows to choose to display in °F or °C.
°F stands for Fahrenheit
°C stands for Celsius
2.) Once you select Fahrenheit or Celsius, press OK to save.
3.) Use the arrow to change the value of the set
temperature. The left light in the middle is on to
indicate you are in the set temperature mode.
Setting Press Time
Press the OK button to save the set temperature value
Now change the set time value with the up and down
arrows. Please note, the set time is in seconds.
The middle light in the middle is lit to indicate you are
in the set temperature mode. Now Press OK to save
the set time value.
Wait until the current temperature is the same as the set
temperature before using. The press will beep once set temperature is reached.
Close and open the press to stop the beeping.
Note: This mug press should not be set to exceed 400˚F (200˚C). Setting the press temperature
to above 400˚F (200˚C) will burn out your mug element and may cause a re hazard.

8www.jotoimagingsupplies.com 1-800-565-5686 Blaine, WA | Las Vegas, NV | Antioch TN | Coquitlam, BC | Brampton, ON
Elements Overview
11oz/ 15oz Mug Element*
SKU: X-HP-JMP-01
● 10oz SS Coee Mug
● Bone China Mug with Gold
Rim
● 11oz/ 15oz Mugs
● 12oz Mason Jar
● 12oz Enamel Cup
● 14oz/ 17oz Travel Mug
● 16oz /20oz Beer Stein
Water Bottle Element
SKU: X-HP-JMP-02
● 17oz Coke Shaped Bottle
● Water Bottle with Bamboo
lid
● 650ml Aluminium Bottle
with Straw
● Stainless Steel Water Bottle
● Aluminum Water Bottle
17oz Latte Element
SKU: X-HP-JMP-04
● 12oz Wine Cup with Lid
● 16 Stainless Steel Tumbler
● 17oz Latte
12oz Latte Element
SKU: X-HP-JMP-03
● 12oz Latte
* This mug press comes with 2x 11oz/ 15oz Mug Elements

9
www.jotoimagingsupplies.com 1-800-565-5686 Blaine, WA | Las Vegas, NV | Antioch TN | Coquitlam, BC | Brampton, ON
Operating Process
Pressing a Drinkware
1.) Turn OFF the Power Switch.
2.) Change to the correct element (see Page 8), and turn ON the Power Switch.
2.) Set the appropriate Press Temperature, and Time.
3.) Tape your imaged transfer/sublimation paper to your mug with heat tape.
4.) Set the pressure. To do this, place a blank drinkware into the element.
Adjust the pressure knob until the drinkware ts snuggly in the element with
the heat shield wrapped around the bottle (just enough pressure so that the
drinkware cannot be moved once press is closed).
Turn pressure knob counter-clockwise to tighten and clockwise to loosen.
5.) Wait until current temperature is the same as set temperature. Once the mug
press is at temperature, place drinkware into the press. Close the mug press.
Note: Ensure the timer starts immediately after closing the press. If it does
not, take the bottle out & wait for the temperature to go up to the set temp.
6.) Timer will start counting down. The press will beep when the set time has
lapsed. When mug press beeps, open mug press and take out your drinkware.
7a.) For sublimation, peel immediately and dunk into warm-cold water to stop the
sublimation process.
7b.) For Hard Surface Papers, dunk in warm-cold water. Then wait until the
mug is cold before peeling.
Mug Pressing Guide
11oz Mugs
Temperature: 360˚F (180˚C)
Time: 150-180 seconds
20oz Glass Beer Mug
Temperature: 360˚F (180˚C)
Time: 240 seconds
Aluminum Water Bottles
Temperature: 320˚F (160˚C)
Time: 120-140 seconds
15oz Mugs
Temperature: 360˚F (180˚C)
Time: 150-180 seconds
16oz Frosted Beer Mug
Temperature: 360˚F (180˚C)
Time: 240 seconds
Stainless Steel Water Bottles
Temperature: 320˚F (160˚C)
Time: 120-140 seconds
For more instructions, please visit our website at www.jotoimagingsupplies.com/support/how-to-library/instructions.html

10 www.jotoimagingsupplies.com 1-800-565-5686 Blaine, WA | Las Vegas, NV | Antioch TN | Coquitlam, BC | Brampton, ON
Replacing your Mug Element
1.) Ensure the power switch is OFF.
2.) Unplug the mug press if it is still plugged in.
3.) Detach the mug element cord from the mug press. Unscrew the ring that holds
the cord in place before detaching. See below diagram for detailed instructions.
4.) With the Mug Press open, unscrew the four screws that hold the mug
element in place.
5.) Gently slide the mug element out of the mug press. Please be careful not to
damage the cord or the mug press.
6.) Gently slide the new mug element into the mug press.
7.) Re-screw the four screws to keep the mug element in place.
8.) Connect the new mug element cord to the mug press.
Ensure that the pattern on the cord matches the socket on the mug press.
Replacing The Mug Element
Mug Element
Cord and ring
4 screws that
hold mug
element in place

11
www.jotoimagingsupplies.com 1-800-565-5686 Blaine, WA | Las Vegas, NV | Antioch TN | Coquitlam, BC | Brampton, ON
Maintenance
General Maintenance
Please switch OFF the machine and unplug the power cord when the machine is not in use.
To prolong the life of the mug press, do not use excessive pressure when pressing mugs.
Excessive pressure can damage the mug press or the mug element and cause it to malfunction.
Always keep the mug press in a dry place.
Mug elements will wear out over time. When they wear out, you will need to replace them with
new ones. The rated life expectancy of an mug element is approximately 1000-2000 mugs.
Elements may wear out earlier due to other factors:
1.) No mug is in the press when on and the press is closed
2.) Physical abuse
3.) Environmental factors
Note: Temperature is in Fahrenheit or Celsius. This mug press should not be set to
exceed 400˚F (200˚C). Setting the press temperature to above 400˚F (200˚C) will
burn out your mug element and may cause a re hazard.
If your mug press stops working, please contact Joto at
1-800-565-5686 so we can help you troubleshoot.

12 www.jotoimagingsupplies.com 1-800-565-5686 Blaine, WA | Las Vegas, NV | Antioch TN | Coquitlam, BC | Brampton, ON
Expanded Diagram
18 19 34
21
15
38
1
6
10
7
16
23
13
14
17
22
19
25
28
29 30
31 33
37
2
8
3
4
5
9
12
20
36
24
26
27
32
35

13
www.jotoimagingsupplies.com 1-800-565-5686 Blaine, WA | Las Vegas, NV | Antioch TN | Coquitlam, BC | Brampton, ON
Expanded Diagram
Serial No. Part Name Qty
1 Mug holder 1
2Middle Rack Reinforcement
Plate 1
3 Front Support Plate 1
4 Quick Clamp Mounting Plate 1
5 Front Strut 1
6 Electrical installation plate 1
7Mug Press Back Cover 1
8 Tapered Feet 4
9 Power Cable Connection 2
10 Socket Connector 2
11 Power Electrical Board 2
12 M5x12 Adjustment Screws 8
13 Transformer 2
14 Limit Switch 2
15 Power Switch 2
16 Mug Press Handle Base 2
17 Guide Post 1 2
18 Mug Press Handle 2
19 Mug Press Handle Connector 4
20 Rivet Head 12
21 Mug Press Handle Plate 2
22 Switch Plate 2
23 Mug Element Top Plate 2
Serial No. Part Name Qty
24 Handle Reinforcement Plate 2
25 GB_FASTENER_NUT_SNAB1
M3-N 9
26 Torx Screw Star Handle Bolt
M8 2
27 Adjusting Screw 2
28 Metal Tube 12 2
29 GY6 Digital Controller 1 2
30 GY6 Digital Controller Housing 2
31 Mug Element 5 2
32 GB_CROSS_SCREWS_TYPE1
M3X16-16 H type-N 38
33 GB_FASTENER_SCREWS_
HSHCS M5X8-N 22
34 GB_FASTENER_WASHER_
SMWC 5 10
35 GB_FASTENER_WASHER_
SWCA 6 8
36 GB_FASTENER_WASHER_
CSLW 6 16
37 GB_ROUND_WASHERS_TYPE7 8
38 GB_CROSS_SCREWS_
TYPE138 M3X12-N 2

14 www.jotoimagingsupplies.com 1-800-565-5686 Blaine, WA | Las Vegas, NV | Antioch TN | Coquitlam, BC | Brampton, ON
Circuit Diagram

15
www.jotoimagingsupplies.com 1-800-565-5686 Blaine, WA | Las Vegas, NV | Antioch TN | Coquitlam, BC | Brampton, ON
Warranty Statement
JOTO warrants to the original purchaser JOTO’s E-HP-JMP-2S5E mug press or component that such mug press
or component is free from defects in materials and workmanship, subject to the limitations set forth below.
IN LIEU OF ALL WARRANTIES, EITHER EXPRESS OR IMPLIED, INCLUDING WITHOUT LIMITATION ANY
IMPLIED WARRANTY OF MERCHANTABILITY OR FITNESS FOR A PARTICULAR PURPOSE, WHICH JOTO
HEREBY DISCLAIMS, THE OBLIGATIONS OF JOTO UNDER THIS WARRANTY ARE EXPRESSLY LIMITED TO
THE FOLLOWING:
a. JOTO will repair or replace at its option, free of charge, any product, component of its products, and any
component it sells separately which is installed in JOTO’s heat presses, within twelve months and six months
for the heating element after shipment by same.
b. This warranty does not apply to damage incurred in shipment. Damage incurred in shipment should be
reported to the designated carrier. It is the carrier’s responsibility to ensure arrival in undamaged condition.
c. Service labor, when requested in connection with any of the above items covered by this warranty, will be
charged for traveling expenses only.
d. This warranty applies only if the product or component proves to be defective under conditions of normal
use. It does not apply to breakage or to defects resulting from accident, alteration, misuse, or improper
installation.
e. This warranty does not include installation of the product or component.
f. Prior to any return of a product or component, Buyer must receive written authorization to do so from JOTO.
After written authorization, Buyer shall return the defective product or component freight prepaid by the
original purchaser and JOTO will ship the replacement or repaired component freight prepaid by JOTO.
g. This warranty is eective only if the product or component is installed in a location and manner prescribed
by JOTO instructions and only if it is maintained in accordance therewith. This warranty shall become
ineective if the product or component is altered by anyone other than JOTO employees. JOTO neither
assumes, nor authorizes any person to assume for it, any obligation or liability other than as specied herein.
JOTO WILL IN NO CASE AND UNDER NO CIRCUMSTANCES BE LIABLE FOR SPECIAL OR CONSEQUENTIAL
DAMAGES, LOSS OF PROFIT OR COMMISSION, OR FOR LOSS OR DELAY IN PRODUCTION.
Without limiting the generality of the foregoing, JOTO will not be liable with respect to furnishing or delay in
furnishing any product or component, the use, resale, or other disposition thereof, failure to furnish the same,
or any other cause. JOTO liability arising out of the supply of any product or component, its use, resale, or
other disposition, or out of any guarantee or warranty, express or implied, or any other cause shall in no case
exceed the cost to JOTO of the product or component which JOTO has agreed to supply. All liability of JOTO
with respect to any product or component shall terminate upon the expiration of the twelve-month period
described above.
-Any controversy or claim arising out of or relating to transactions or orders or breach thereof, including
breach of warranty, shall be settled by arbitration in Blaine, Washington, pursuant to the rules of American
Arbitration Association. Any award made against JOTO shall be limited as provided above. Judgment upon
award rendered by arbitration may be entered in any court having jurisdiction thereof. However, at JOTO’s
option, this paragraph shall not apply to collection by JOTO of the price of any product sold or any action
related thereto.
PLEASE KEEP THE BOX THAT YOUR MUG PRESS ARRIVED IN,
ALONG WITH ALL ORIGINAL PACKAGING.
www.jotoimagingsupplies.com
Tel: 1-800-565-5686
Fax: 1-800-565-5622
Coquitlam, BC | Brampton, ON
Blaine, WA | Las Vegas, NV |Antioch TN
Table of contents
Other Joto Power Tools manuals

Joto
Joto E-HP-JCH-51 User manual

Joto
Joto SwingAway E-HP-JSA-1620 User manual

Joto
Joto E-HP-JMP-1S7E User manual

Joto
Joto XSTM-40 User manual

Joto
Joto E-HP-JSP-1620 User manual

Joto
Joto E-HP-JAR-DS-1620 User manual

Joto
Joto MugPress User manual

Joto
Joto E-HP-JMP-1S2E User manual

Joto
Joto E-HP-JLF-3243 User manual

Joto
Joto E-HP-JAR-DS-1620 User manual
Popular Power Tools manuals by other brands

Stihl
Stihl KM 55 R instruction manual

Black & Decker
Black & Decker JS700 instruction manual

Stahls
Stahls WEEDING TABLE Installation instructions manual

Hilti
Hilti SIW 22-A Original operating instructions

Powerfix Profi
Powerfix Profi 275402 Operation and safety notes

Bosch
Bosch PHO 1 Original instructions