JOYTECH DET-306 User manual

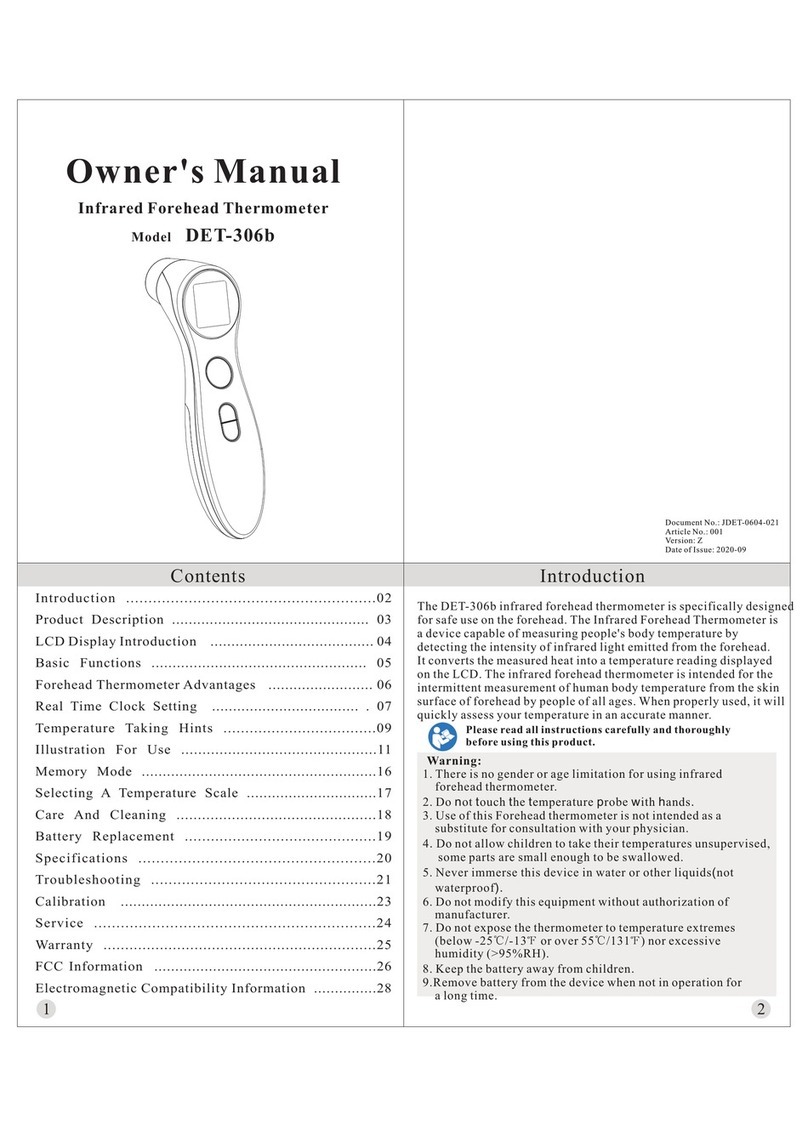
Owner'
s
Manual
Infrared
F
orehead
Thermometer
Model
DET-306
Introduction
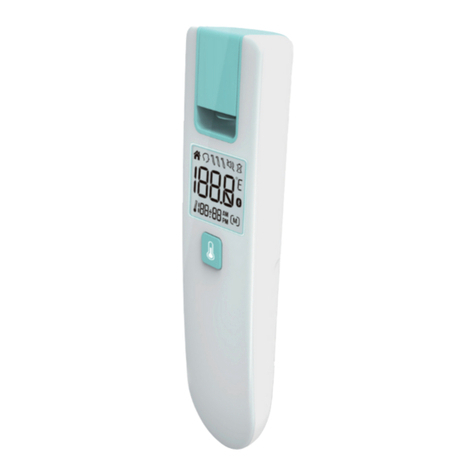
The
DET-306
infrared
forehead
thermometer
is
specifically
designed
for
safe
use.on the forehead.
The
Infrared
Forehead
Thermometer
is
a
deviee
capable
ofmeasuring
people's
body
temperature
by
detec
ting
the
intensity
ofinfrared
light
emitted
from
the
forehead.
It
converts the
measured
beat
into a
temperature
reading
displayed
on
the
LCD.
The
infrared
forehead
thermometer
is
intended
for the
intermittent
measurement
ofhuman
body
temperature
from the skin
surfa
ce
offorehead
by
people
of
ali ages. When
properly
used, it will
quickly
assess
your
temperature
in an
accurate
manner.
~
Please
read
ali
instructions
carefully
and
tboroughly
~
be
fore
using
this
product.
Warning
:
!.
There
is no
gender
or
age
limitation
for
using
infrared
forehead
thermometer.
2.
This
thermometer
is inte
nded
for
home
use
on!y.
3.
Use
of
this
Forehead
thermom
eter is not
intended
as a
s
ubstitute
for
con
s
ultation
with
y
our
physician.
4.
Do
not
allow
children
to
take
the
ir
temp
er
atures
un
supervised,
sorne
parts
are
sma
ll
enough
to
be
swallowed.
5.
Never
immerse
this
deviee
in
water
or
other
liquids(not
wa
terproof).
6.
Do
not
modify
this
equ
ipment
without
aut
horization
of
m
an
ufacturer.
7.
Do not
expose
the
thermometer
to
temperature
extremes
(below
-25.C/-13•F
or
over
ss•C/131.
F)
nor
excessive
humidity
(>95%RH).
8.
Keep
the
battery
away
from children.
9.
Rem
ove
battery
from the
deviee
wh
en
not in
operation
for
a lon
gt
ime.
Product
Description
1.
Probe
2. START
Button
3.
(!)
Button
4.
,;,
;1f
Button
5.
Battery
Cover
LCD
Display
Introduction
Low
voltage
sign
1
88"'88AM
OQ
1 •
PM
M
Memorymode
Forehead mode
,&.1J
QQ
0E
Object
mode
-+--c='
Unit sign: 0( or °F
Temperature
Indicator
Rea!Ti
meCiock
ForeheadMode
ObjectMode
BeepAlarm
Me
mory
Mode
~c
/
~FS
witch
111111~1
UJOJJ
Temperature resuit
Basic
Functions
The
real
time c Jock will
b~
rccorded
with
the
rn
emory
function
a
nd
he
lp
y
ou
to
recognize
c a
ch
rn
ca
s
ure
ment
res
ult.
-Pleases
ee
the
R
cal
time c Jock
settings
ect
ion
to
le
am
how
to
setupthetime
in
the
firstuse.
The
the
rmomete
r
has
b
een
des
igne d
forpr
aetica
1
use
. lt's
not
mean!
to
replace
a v islt
to
the
doc
tor.
Pl
esse
a Iso
remember
to
compare
the
rn
easurement
re
suit
toyourr
egu
larbody
temperature.
--P
le
ases
cet
he
lllustra
tion
For
Use
s
ectîon
to
!carn
h
ow
to
me a
sure
the
body
temperature.
Theo
bject
modes
hows
the
a
ct
ua
1, u
nadjus
ted
s urfn
ce
temperatures,
which
is
different
from
the
body
temperature.
It
ean
he
lp
you
to
monitor
if
theo
bject
tempera
ture
is s
uita
ble
forthe
baby
or
patient.
for
example
the
b
aby's
rn ilk.
--P
le
ases
ee
the
mus tra tion
For
Use
section
to
le a
rn
h
ow
to
me
a
sure
theo
bject
temperature.
Ifthermometerdeteets
ab
odytemperature
>
37
.S"C(l
OO.O"F)
un
der
fore
head
m
ode,
the
re
will
be
a 1
ong
beep
sou
nd
fo
ll
owed
b y
three
short
bee
p
sou
nd
to
wa
rn
the
u
ser
.
The
re a re e a
ch
1Os
ets
rn
emories
for
fore
head
a
nd
object
measurements.
"Each m e m
ory
a
iso
records
the
rn
eas
urem
ent
date
/time/
mode
icon.
Pie
ases
ee
the
Selecting
A
TemperatureS
cale
section
to
lea rn
how
toc
bange
b
etween
Cels
i
us
a
nd
Fahrenheit.
Forehead
Thermomete
r
Advantages
Infrared
Forehead
Thermometer
measures
core
body
temperature,
which
is the
temperature
of
a
body's
vital
organ
s.
(See
Figure
1)
This
thermometer
is
designed
to
measure
the
temperature
of
the
skin
surface
over
the
temporal
artery, a
major
artery
of
the head.
The
temporal
artery
is
connected
to the he
art
via the
carotid
artery,
direct!y
leading
from
the
aorta, the
main
trunk
of
the
arterial
syste
m.
1t
offers
constant
blood
flow.
Therefore
,
body
temperature
changes
are
reflected
sooner
in the
forehead
than
they
are in
other
parts
of
the
body
such as
oral,
rectal
and
underarm.
Vita
l
Organs
----
Figure
1
Real
Time
Clock
Setting
Wh
en
using
thermometer
for the first
time
,
please
set
the
parameters
of
the
thermometer.
With
the
thermometer
off,
pre
ss
and
hold
<9
BUTTONto
enter
into setting
mode
for 3
seconds.
LJLJ
CD
Set the lime format
The deviee cao display the
ti
me
in
either
an
AM
/PM (12-hour) or
a 24:00(24-hour) format. Press
and release
START
BUTTON to
select the format. With the preferred
ti
me
format
on
the
display,
press
(!)
BUTTON, the Hour figure is
flashing automatically.
~
LJ
0 Set the hour
Press and release the
START
BUTTON to·advance
one hour until the correct hour appears.
After the
houris
set, press
(!)
BUTTON, the Minute
figure is flashing automatically.

~
LJ
4
LJ
1
(~
-
OB
!
4
lJ
® Set the minute
Press and reliiase the STARTBUTTON to advance
one minute until the
co
rr
ect minute appears.
After the minute is set, press
<!>
BU
TT
ON, the
Ye
ar
figure is
fl
ashing
au
to
ma
tica
ll
y.
@Set the year
Press and release the S
TART
BU
ITON
to
advance
one yearuntil
th
e correct year appears.
A
ft
er the year is set, pres
s<!>
BUTTO
N,
the Month
figure will appea
r.
® Set the mon
th
Press and release the STARTBUTTON to
ad
vance
one month
un
ti
l the correct mon
th
appears.
After the
mo
nth is set, press
<!>
BUTTO
N,
the Date
fig
ur
e is flashing a
ut
omatically.
® Set the date
Press and release the ST
AR
TBUTTON to adv
an
ce
one day
un
ti
l the correct
mo
nth appear
s.
After the day is set, press
<!>
BUTTON to exit the
setti
ng
mode.
Temperature
Taking
Hints
To ens
ure
that the
reading
always r
eflec
ts the body t
emperat
ure
a
cc
urately,
you
need
to
take
ac
count
of the foll
ow
ing factors which
may
af
fect
an
accurate
reading.
1.
It
is
imp
or
tant
to know each indivi
dua
l's normal
tem
p
era
tur
e
when they are
wei
l.
Th
is is the on!y way to accurately diagn
ose
a fever. To determine
normal
temperatur
e, take
multiple
r
eadings
when healthy.
Re-mea
sure with a s
tand
ard
digital the
rmomet
er
for
conf
ir
mation.
2. U
ser
s must be
inside
for
30
minutes
before
taking
a
measureme
nt.
N
ot
e: Users and the ther
mometer
should
be
in the
same
ambient
t
emp
erature for at !east l0 minutes befo re taking a r
ead
ing.
3.
Us
ers s
hould
not
drink
, eat,
or
be physi
ca
lly
ac
ti
ve such as
ba
thin
g, show
er
ing, sh
am
p
ooing
and
h
air
dr
ying
befo
re/while
tak
ing
the
me
asurem
ent. Rem
ove
hat and hair and
wa
it
10
minute
s
bef
ore
tak
ing
a r
eading
.
4. Oils
or
cosmetics on t
he
for
ehead
may
give
a lower
temper
at
ur
e
reading
than
the
ac
tuai one.
Rem
ove
dirt
from the
forehead
before
taking a me
asur
ement. Wail at !east 10 minutes after washing the
f
ore
head area
before
ta
king
a r
ea
din
g.
5.
Holding
a
band
on the f
oreh
ead
for
an
y len
gt
h of
lim
e will
aff
e
ct
the tem
pe
rat
ur
e
read
ing.
6.
Do not
lake
temperature
ov
er
scar
tissu
e,
open
sores
or
a
bra
sio
ns.
7.
Do not u
se
the
thermomet
er on a
perspiring
or
swea
tin
g
forehead
,
as this may
affect
the
read
ing.
8. Don't
lake
a meas
urement
while
or
immediate
!y after
nur
s
ing
a
bab
y.
9.
Do
not use this
ther
mom
eter
outd
oors.
JO.
Do
not
take
tem
pe
ratures
with
thi
s th
er
m
omete
r
near
place
s
thal
ar
e
ver
y hot, such as
fireplace
s
and
stoves.
1
1.
The
probe
windo
w
of
the
thermometer
is the most de
licate
part
of the deviee.
Do
not touch the probe windo
w.
The
accuracy
of
the rea
ding
m
ay
be
aff
e
ct
ed if the probe w
indow
is
damaged
or
dirty.
12. If the ther
mometer
is
stor
ed in a significantly
different
environment than tes
ting
location,
pl
ac
e it in the tes
ting
location
for ap
pr
oximately 30
minute
s
pr
ior to u
se
.
13.
It
is n
ot
in
tend
ed for
use
in
the
oxy
g
en
rich
env
ironment
and
pre
se
nce of
flammable
anesthetic
mixt
ur
e w
ith
air
, oxy
gen
or
nitrous
oxi
de.
Illustration
For
Use
.... To
mea
s
ure
forehead
temp
e
ratur
e:
1.
Press
the
<!>
BUTTON,
The
dis
pla
y is acti
va
ted to sh
ow
ali
s
egments
.After
self-checking
Fi
gure
2 a
ppears
on the
display
s
creen
with
beep
s, so
you
can
star! a
ne
w meas
urem
ent.
2
Aim
the
thermometer
at
the
center
of
the forehead
wi
th a
distance
of
2 to 3
cm(See
figure 3)
and
th
en
pre
ss the START BUTTON.
Note:
Do
not rem
ove
the
thermometer
from.the
forehead
before
hearing
the
final
beep.
A
waiting
period
of3
second
s
between
testing
is
recommended
to ensure
complete
accuracy.
3. Re
ad
the
temp
er
atur
e on the
displa
y.
4. Press the
<!>
B
UTION
to turn off.
....
Ho
\Y
to
change
the
forehead
mode
and
o
bj
ect
m
ode:
You
can
pres
s
,;,
l
it
BUTTON to switch the mode
betwee
n
Fo
rehead
mode
and
Object
mod
e.
.... To
measure
obj
ect
t
emperature
:
1.
Pres
s the
<!>
BUTTON to turn on the ther
mome
ter, you
can
take
the
ab
ject
tempe
r
ature
after
hear
ing
two
beep sounds.(see fig
ur
e 4)
2. Aim the t
hermometer
at the
cente
r
of
the
abjec
t
you
want to
me
asure w
ith
a
distance
of 1 to 2
cm
.
3.
Press
t
he
STARTBUTTON and then read the
tem
perature on the
disp
l
ay
.
4. Press the
<!>
BUTTON to turn off.
1
5.
nn
1 ·
uu
If
oc
Figure
4
....
Af
ter
meas
u
rement
:
1.
Power
off:
De
viee will au
tomaticall
y shut o
ff
if l
eft
idle for
more
th
an
1 minute to extend
battery
li
fe
.
2.
Clean
the
pro
be after each u
se
to ens
ur
e an ac
cura
te reading and
avoid cross contam
in
ation.
(See the
section
ofCa
re
an
d Cl
ea
ning
for
d
et
ails.)
.... Tem
pera
tur
e i
nd
ica
tor
:
In
For
ehe
ad
mode:
l.
If
the
temperature
reading is below 37.8°
((
1
00.0
°F
),
a
happ
y face
Q will be displayed next to
the
reading.
2.
If
the
temper
ature rea
ding
is 3
7.8°((
1
OO.O
o
F)
or above, a
bad
face
Q will be
disp
layed next to
the
readin
g.
Me
m
oryM
ode
1. T
he
M
em
ory Mode can be
accesse
d
et
h
er
in foreh
ead
mode
or
ab
je
ct
mode:
When the
thermomet
er
ha
s
be
en tu
rned
on and foll
owe
d by
F
igur
e 2/4
or
finished
testing,
pr
ess and h
old
the
<!>
BUTT
ON
for
thr
ee
second
s.
The
letter
M will appe
ar
in the center righi
co
rner
of the
di
splay. (
See
Figure
5)
2. T
he
thermometer
will
automaticall
y
memori
ze the las! 10
te
mperature
readings.
Each
memory
also
records
the
meas
urement
date
/time/
mode
icon. Each ti
me
the<!>
BUTTON
is pres
se
d, the
sc
reen
displays
past
readings
thal
corre
s
pond
with a nu
mber
1-10.
The
number
1
reflects
the
most
recent
rea
din
g, while the
number
10
reveals
the
oldest
reading
stored
in mem
or
y.(See Fi
gur
e 6)
3. In the
me
mory mode,
,;,
mark
or
if
mark al
ways
exi
st
.
The
user
can
pr
ess
the STÂRTBUTTON to
take
new
measurements.
•
,.,
Figure
5
M
oc
1
1
•
,.,
15.nn
1 ·uu M
Q oc
1 1
_1_1
JO.J
Figure
6
Selecting
A
Temperature
Scale
1.
Temperature
reading
s are av
ailable
in
the
Celsius ("C) or
F
ahrenheit
(F)
scale
.
2. With
the
thermometer
off
,
press
and
hold
the STARTBUTTON
f
or
3
seconds
to
enter
into
unit
changing
mode
.
3.
Press
and
release
START BUTTON to
se
lect
the unit.
4.
Wh
en the
preferred
unit
on the
display
,
press
<!>
BUTION
to
e
xit
the
unit
changing
mode.

DO
Figure 7
Care
And
Cleaning
1. The
probe
wind
ow
must be
kept
clea
n, dry,
and
und
amage
d at ali
times to ens
ur
e accu
rate
readings.
The
accu
racy
of t
emp
erature
r
eadings
can be affected by
damage
to the
probe
window, or the
pre
s
enc
e
of
dirt
, fing
erprints
, e
ar
w
ax
, dust and
ath
er
soiling
compound
s on the
probe
wind
ow
.
Degraded
se
nsor
s
can
degra
de
per
formance
or
c
ause
other
problems.
2. The
probe
window
is
the
most
deli
ca
te
part
of
the therrn
omete
r.
Use a s
oft
elat
h slightly moistened
with
a 75% iso
prop
yl
alcohol
solution to dis
infect
probe wind
ow
and
the therrno
rn
eter. Do not
use abrasive cl
eaner
s. After cl
ea
ning, allow at !
east
10
mi nutes
drying ti
me
before t
ak
ing
tempera
tures.
N
ote
:
Do
not use any chernical
other
than is
opr
opyl alc
ohol
to
clean
the
probe
window.
3.
Us
e a s
oft
, dry
elath
to
clean
the ther
mom
eter dis
pla
y
and
exterior.
4.
The
thermometer is not
waterpro
of. Do n
ot
s
ubm
erge the
unit
in
w
ater
when cleaning.
5. Store
the
therrnometer in a
dr
y location, free from
dust
and
con
tamination and
awa
y from
direct
su
nligh
t.
6. Str
ong
electromagnet
ic fields
may
int
er
fere with
the
proper
operation
of
the
thermometer.
Th
e
de
viee
need
s spe
cial
pr
e-cautions
regarding
EM
C accordi
ng
to the
EMC
inf
orm
ation.
7. Put the t
hermometer
back
to the orig
in
al
packagin
g
after
using.
Battery
Replacem~nt
1.
Rep
lace
batt
ery wh
en"
è!Q
" app
ears
in the
upp
er
right
co
rner
of
LCD
displa
y. (See
Figur
e 8)
2. Slide battery co
ver
d
ow
n as sh
awn
in
Figure
9.
3. Remove
batter
y
and
install2
new
AAA
al
kaline
batteries
as s
ha
wn in Figure
10
.
4.
Slide
batter
y caver
back
on.
Figure
8
1
0
Figure
9
Mcas
ur
ing range
Measu
ri
ng site
Ref
erence body s
it
e
Operation mode
Laboratory accuracy
Di
splay
re
solution
Fi
gure
10
Specifications
Fo
rehcad mode: 34.
00C
-43.0
"C(9
3.
2·
F- 109.4"F)
Obj
ect
mode:
O"
C-
!OO"C
(32"F-
21
2
"F)
Forehead(Forehead Mode)
Or
al (This
th
ermomcter
co
nvcr
ts
th
e fo
re
head temperat
ur
e
to display i
lS
Ô
ral
e
qui
va
l
e
nt.
~
)
Forehead mode(Adjustmode)
For
e
head
mod
e:
â 0.2
0C
(0.4"F) during 3
5.
5"C
-42.o"C(95.9"F-
t0
7.6"F)
at 15
0C
-
35"C
(59
.0"F
-95.
0"F)
op
erati
ng
temperature r
an
ge
à
0.3
"C
(0.5"F) for othcr measuring
an
d opcrating
temperature range
Object mode: à
4%
or à
2
•
((4~F)
whi
ch
ev
er is greater
Meas
ur
e
ti
me Approximately 1second
Operatîng tempera
tur
e 1
O"C
-
40
..
C(So•F-104.F), 1S%
-8
5
%R
H, non-condens
in
g
range: Atmospheric
Pr
ess
ur
e:
70
0hP
a-
1
060
hPa
Stora
ge
and transpo
rt
-2S"C
-
SS"C
(
-13•F
-131•F), 1
5%-9S
o/.
RH
, non-
co
ndensing
temperature range Atm
os
pheric
Pr
es
sur
e:
7
00
hPa -
10
60hPa
Clinical bias:
-0
.09"C(- 0.
!6
"F)
Cli
ni
cal accuracy Clînical repeatability:0.
13"C(
0.23°F)
Limits
ofagr
ee
me
nt:
0.
87•
((
1.57°F)
Shock withstands d
ro
po
f3
feet
Dimension 153*
41*44mm
Weig
ht
Approx. 84g
ram
s(
with batte
ri
es)
Battery DC3V(2ii AAA batter
y)
Battery !ife Approx. 1 year/
60
00
readings
Expected service life
Thr
ee ycars
lngr
ess
protecting
ra
ting IP22
Trouble
shoot
ing
Err
ormes
sage
Pro
bl
em
Solution
Er
1 Measurement before
Ta
ke a measureme
nt
un
t
il
.&.
or
ill
ap
pe
ar
s
1 thermometer is ready on
th
edisplay.
Place the th
er
mometer
Erë
1 The ambient temperature in a r
oom
for at least 30
is not within the range minut
es
at
r
oom
between
lOo
( and 40°( temperat
ur
e between
(
50
°F-
104
°F). 1OoCa
nd
40
°C
(5
0°F- 1
04°
F)
E
-~
The
th
er
mometer is Read Illustration For
Use
thoroughlya
nd
r:t
placed
in
correct!y
ta
ke a
new
temper
atu
re
or unsteady. measuremen
t.
Allow the thermometer
[_1_1 The thermometer to
re
st in a room for at
sh
owing
a rapid ambient !e
as
t 30 minutes
at
'-'
1 temperature change. room temperature:
between 1
OoC
a
nd
40
°C
(
50°
F- l04°F)
Unload
the
ba
tte
ry
,
Erc
w
ai
t for 1minute and
The
thermometer is not rep
ower
it.
If
th
e
f
unctioning
properly.
message
reappe
ars
,
-J
co
ntact the retai l
er
for
se
rvice.
Err
or mess
age
Problem Solution
In
Forehe
ad
mode:
Te
mperature taken is Re
ad
Temper
atu
re Taking
higher than43.0 oc
Hl (
109
.4
°F). Hints Thoroug
hl
y,
then
ln
O
bj
ec
t mode: take a new temperature
Temperature taken is meas
ur
eme
n
t.
higher than 1
00
oC
(2!2°F)
In Forehead
mod
e:
Temperature taken is Re
ad
Temperature
1 l
owe
r
th
an 34.0 °C Taking Hints thoroug
hl
y ,
(93
.
2°
F). then make s
ur
e the lens
1_[1
lnO
bje
ct mode: filter
~
r
e
clean, then take
Te
mperature taken is a new temperature
lowe
r
th
an 0°( measu
re
rn
ent.
(32°
F).
The thermomet
er
coul
d Replace two
new
CZ!
not wo
rk
due
to
l
aw
al
ka
line ba
tt
e
ri
es
batter
y.
sizeAAA.
Calib
rat
i
on
The
thermometer
is
initia
l!
y
ca
libraled at the
ti
me of manufacture.
If the
thermomete
r is used accor
ding
to the use
instruct
ion,
periodic
re
adjustment
is not req
uir
ed. H
owever
, We r
eco
m
men
ds c
he
c
king
ca
libratio
n
every
two
yea
rs or w
hen
eve
r
clini
cal accuracy of the
thermo
me
ter
is in
question.
Please
send
the
complete
deviee
to
the
dealers or
manufacturer.
The
ab
ove
recommendations
do not s
upersede
the legal
requirements.
The
u
ser
must
always
comply
with
legal
requirements
for the
contro
l
of
the
me
asurement
,
functionality,
and
accuracy
of
the deviee
which
are requ
ir
ed by the
scope
of
relevant
laws,
directives
or
ordinances
w
here
the deviee is
used
.
A
clinic
al
summary
and
procedures
for
checking
calibration
are
ava
ilable
upon
request.(Turn
on
the
thermometer
and
press
the
power
b
utton
long
time until
entering
into
calibra
te
mode
,
software
version
will
be
di
splayed.)
[!] Type BF applied.part
D
îr
e
ctCur
re
nt
Disposai
of
this product a
nd
used batteries should be car
ri
ed o
ut
in
accordance
with the national regulations for
th
e disposai of electronic products
Consult Accomp
an
ying Documents
Batch Code
J--$S
'C
Storage and Transportation Temperature Limit:
·""
.Il
-l3°F-13l°F(-25°C-
55°C)
Service
The
the
r
mometer
has a
limited
one
year
warranty.
Do
not
attempt
to disass
emble
or
repair
the ther
mometer
by
yourself.
Should
se
rvice
be
required
during
or
after
the
warranty
period
you
must
co
ntact
the
manufacturer.
Repackage
the
thermometer
carefully
in
its
original
packaging
or
securely
pack
to a
void
damage
during
s
hipping
.
Include
the
original
sales
slip
indicating
the
date
of
purcha
se
, a
note
describing
the
problem,
and
your
return
address.
Send
the
thermometer
prepaid
and
insured.
The
lay
operator
or
lay
responsible
organization
should
contact
the
manufacturer
or
the
manufacturer's
representative:

-for
assistance
,
ifn
e
eded
, in setting up,
using
or
mainta
ining the
therm
ometer;
or
-to r
eport
unexpected
ope
r
ation
or
events.
Warranty
This
appliance
conforms
to the
following
standards:
ISO
80601-2-56
Medical
electrical
equipment
- P
art
2-56:
Particular
requirements
for
basic
safety
and
essen
tial
performance
of
clinical
thermometer
s for
body
temperature
measurement
,
IEC 60601-1-11
Medi
ca
l
electrical
equipment
-P
art
1-11 :
General
requirements
for basic s
afety
an
d
essentia
l p
erformance
-Co
llater
al
Standard
:
Requirement
s for
medica
l el
ectr
i
ca
l
equipment
and
medical
electrical
s
ystems
used
in the
home
healt
hcare
env
ironment
and
complie
s with
the
requireme
nts
ofiEC
6060
l-l-2{EMC),
IEC
6060
1-l(Safety)
standards.
And
the
manufacturer
is ISO 13485
certified.
Thermometer
is
warranted
by
ma
nu
facture
to be free from
defects
in
material and
workmans
hip un
der
normal
use
and
service
for a
period
of
one
year
from the
date
of
delivery
to
the
first
user
who
purchases
the
instrument.
This
warranty
does
not
co
ver
batteries
,
damage
to
the
probe
window,
or
damage
to the
instrument
caused
by misuse,
negligence
or
accident
,
and
ex
tends to
only
to the first
purcha
s
er
of
the
product.
Electromagnetic
Compatibility
Information
The
deviee s
atisfie
s the
EMC
requirements
of
the
international
sta
nd
ard
IEC 6
0601-1-2.
The
requirements
are
satisfied
under
the
condition
s desc
ribed
in
the
table
below
.
The
deviee
is
an
ele
ctri
cal
medic
al
produ
ct
and
is
subject
to
specia
l
precaut
i
onary
measures
with r
ega
rd to
EM
C
which
mu
st
be
published
in the
instruction
s for use.
Portable
and
mobile
HF
communications
equipment
can
af
f
ect
the
deviee
.
Use
of
the
unit
in
conjunction
with
non-approved
acces
s
ories
can
affect
the·
de
vice negativ
el
y
and
alter
t
he
electroma
g
netic
compatibility.
The
de
viee
should
not
be used direct!y
adja
ce
nt to
or
betw
een
othe
r
ele
ct
rica
l
equipm
ent.
Table 1
Guidance
and
declarauon
of
manufacturer
-electromagnelic:
emiSSIOns
The
dev
i
ee
is intended fo r use m the el
ectromagnetic
environment
specified
below.
Th
e c
ustomer
or the user
of
the
dev
iee sh
oul
d a
ss
ure tbat it is u
sed
in
su
ch
an
envi
ro
nment
.
Emissions test
RF emissions CISPR
11
Rf
emissions
CISPR
l 1
Harmonie emissions
IEC61000-3
-2
Voltage
nuctu
ations
f
nic
ke
r
emissions
IEC61000·3·3
Warning:
Compliance
Group 1
ClassB
NIA
NIA
Electromagnetic
envi
r
onment-guidance
The
deviee u
ses
RF ener
gy
only
for
its
internai function.
Ther
efo
re, its
emissions
are very l
ow
and
are
not
likely
10
cause
any
interference
in
nearby
elecuonic
eq
uipm
ent.
Thede\·ice
is
sultable
for
us
e in ali
establi
s
hments
,
mcludtng
do
mc
stic
establ
is
hments
and
those
d
irectly
connected
to
the
publ
ic IOW·\'Oitage
power
su
ppl
y
nctwork
thal
supplies
buildings
used
for
domcstic
purposes.
1. The Use
of
this equipment adjacent to
or
stacked with
other
equipment should be
avoided because it could result in impr
operoperation.
lfsuch
use is necessary, this
equipment and t
he
other
cquipment should be observed to verify that they are
operating normally.)
2. Portable RF communications equipment (including peripherals such as antenna
cables and externat antennas) should be used no cl
oser
than 30 cm (12 inches) to any
part
of
the [ME EQUIPMENT or ME SYSTEM), including cables specified by the
manufacturer. Otherwise, d
eg
radation
of
the performance
of
this equipment couid
result.
Table2
Guidance
and
dec
laration
of
manufacturcr·clcctr
oma
gnctic
immunity
The deviee is intendcd for use in the
c\cctromagn
ctic coviro
omeot
specified
below.
The
cu
stome
r
or
the us
er
of
the devic:e
should
u sure that it is
U5Cd
in
su
ch an cnvir
onmc
nt.
IMMUN
\TY
test
E
lccuost
atic
di
sc
harg
e(ES
D)
I
EC61000·4·2
El
cct
rostatic
tr
ans
ic:DI
Iburst
IEC
61
000·4-4
Surgc
I
EC6
1000·4·5
Vo
h
age
dip
s,
s
hortintcrrupti·
ons
and
volt
age
variation
so
np·
owe
r
supplyin·
putlin
ca
I
EC61000·4·11
Powcrfrcqucncy
(50
/
60Hz
)
IEC 60601 test leve!
1
SkV
co
ntact
i 2kV
.i
4kV
i S k
V,
ii
ISkV
air
i
2kVfo
r
powcrsupply
!ines
1 1k
Vfor
input/
output
li nes
•
lk
V
diffe
rentiai
mode
i
HV
common
mode
< SY.
UT(
>
9S
%
dip
in UT}
forO.Scycle
40%
UT(
60
Y.
dip
in UT)
fo
rS
cycle
70% UT
(JO
~~
dip
in
UT}
for2Scycle
<SY.
UT(
>9S%
dip
in UT)
forS
sec
magnctic
field JOA/m;
SOHz
o r 6
OHz
I
EC61000·4·8
Compli
ancc
level
1
Sl:V
contact
i
2k
V .
i H V
li SkV.
3
ISkVair
NIA
NIA
N
IA
JOA/m;SOHz
or 6
OHt
Elcctromagnctic:envi
ronm
c:n
tguidancc
Floors
sho
uld
be
wood,
concrctc
or
ccramict
ilc.
lffl
oorsa
r
ecovcrcdw
ith
synthe
ticmat
c
ri
a
l.th
c rclati
vch
umidit
y
shou
ldbeatlcastJO
•t..
Power
frcquency
masnctic
fields
shouldbcatlevclsc
h
aractctlicofa
t
ypicalloca
ti
o
ni
na
typi
calcomm
e·
rcialorho
s
pilllcn
vîronmcnt.
Tabl
c3
Guidance
und
d
ec
laration ofmanufacturer·cl
cc
tro
ma
gnctic i
mm
unity
Th
e
devke
il
intcndcdforu$einthcclcctrom
agnctic cnvironment 5pccifie
dbcl
ow.
ThecuSi
om
erort
hc u
scrof
the de\
'Î
Cc
shoul
dus
ureth
atitis
us
ed
insucha
nenvironment.
IM
MUN
ITYte
:o
t IEC60601 Compli
ft
nc
c
le
\·
el Electr
om
agne
ti
ce
nviro
nm
entguidanec
test lev
e!
Con
ducted
3V
O.I
SMH
zto
RFIE
C
SO
MH
z
NIA
61 0
00·4·6
6Vi
ni
SMa
nd
am
ateur radio
ba
nd
sbc
tween
O.
l5MH
zand8
0
MHZ
80"~AM
:u
1kHz
Rad
iate
dRF
IOV/m
SO
IEC61000-
M
Hzt
o2.7
IO
Vftn
4-
3 GH<
~~~~~~~
:;
tion
1!0
Mih
,
27V
380M
II
z,2
7V
lm
E
qui
pme
nt
450MH:t,
28V
4SOMH:t,28V
lm
IE
C 61
000
-lm
4-3
Tablc4
710MH:t.745
MHZ,780MHz
9V/m
810MHz,870
MHZ,930MHz
28VIm
710MH:t.74S
1-fHZ.
780MHz
9V/m
810MH:t,870
MHZ.930MHz
28V
/m
1720
MH:t,l845 1720MHz,i845
MHZ.1970MHl. MHZ,l970
MH
:t
2SV
/m 2
SV/
m
24SOM
H
z.
2SV
24SO
MH
z.
2SV
lm
S2
40
MH
z,5SOO
S2
40
MH
z.55
00
MH
Z.5
7SS
MH
z
MHZ.
57SS
MH
z
9V/m 9V/m
Portable and mobile
RF
communtcations cquipmcnt
sho
uldbeu
s
ednocl
os
crt
oa
ny
panoft
he dcvicc,
in
cluding u
blcs,thanth
e rcco mmcnded scparation
db
ta
nc
eca
lculated fr
omthe
equati
ona
pplieab
leto
t
hcf
requc
neyof
thetransmi
ct
cr.
Reco
mm
c
nd
cd sepcrationdis
ton
cc
.!
r:;
~\.:'Jo
80
MH
z to 800
Mlh
u'
r;
]v'Ï'
II
OOMHzto2.7Ghz
••:hcrc:Pisth
cm
uimum outputpo
wc
rrat
i
ns
oft
hc
transm
mcr
in wans
(W
)acco
rdingtoth
ctransm·
merm
an
ufacturc
runddt
sthcrecommendcd
sep~rationdista
n
cei
n
me
tr
es(
m)
.
Ftcld
streng
th
~
from l
he
d
RF
transmitters, as
determi
ne
dby
an
clectromagnc
ticsitc
survey
,a
lhould
bc
less thanth
eco
mplia
nccie
v
cltn
eacb
frequcncynmgc.
Jntcrferencc
ma
yoccurin thc vicinit
yo
fcquipmcnt
markc
dwit
hthe follow
in
gsy
mbol:
Rccommendcd separa
ti
ondistancesbctwcen portable and mobile RF communications
eq
ui
pm
ent and
the deviee
The devic
ei
si
ntendc
dforu
se î
na
nclcctromagnetic em·iron
menttnwhich
radiatcd thcr
cf
ore
dtsturbances arc contro
ll
cd. The customcr
or
the user
of
the deviee can hclp prevent clcctromasnetic
interference by maintaining a mini mum distance betwecn portable and mobile
RF
communic
al!
ons
equipment (transmittcrs) and the de\'ice as rccommcndcd bclow, according to
th
e mu imum output
power
of
the communications cquipmcn
t.
Ratcd
ma
ximum output power
oftnnsmi
tt
er
Separationd
istanccaccord
ingto
frequen
cyof
transmitter
rn
80 MHz to 800 MHz
800M
H
zto2.7G
Hz
d•I~J/P
E d·
ff
!
·lP
0.01 0.12 0.23
0.38 0.73
1.2 2.3
10 3.8 7.3
100
12
23
For transmittcrs rated at a maximum output po
...
•c
r not liste d abovc, the recommendcd
se
paration
distancc
dinmc
tres
(m)canbecstimatedusingtheequali
on appl
icablct
o
thefrcquen
cy
ofthe
transmitte
r,
whcre
Pi
s the maximum output power rating of the trans
mittcrin
watts{W) aceording to
the trans
mittcrm
anu facturcr.
NOTE! At
S:O
MH
z and 800 MHz, t
he
separation distance for the
hiscr
frcquency range applics.
NO
TEl
Thesc guide!ines may not apply in ali sttuations. Elcctroma
snctic
propagation is
aff
ccted by
absorpti
onandrcfl
c
ctionfrom
st
ructures,obj
c
ctsandpeopl
e.
JO
YTECH
HEALTHCARE
CO.
LTD
.
•
Manufacturer:
No.365,Wuzhou Road,Yuhang Economie Development
Zone,
hangzhou city, 3 1
11
00 zhejiang, China
Telephone: +86·571 ·8
19
57767
Fax:
+8
6·571·8
1957750
Made
in
China
( E The product is in
comp
li
an
ce
with the rcquiremen
ts
of
0
19
7 MDD
.93
/42/EEC, "0 197" is the identification
number
ofnollfy
body
;
European
Authorized
Representative:
Shanghai International Holding Corp. GmbH {Europe)
Eiffcstr
asse
80, 20537 Hamburg, Germany
Document No.: JDET-0604-005
Artic
le
No.:
00
1
Version:
B
Dateoflssue
: 20 17
-1
2
Table of contents
Other JOYTECH Thermometer manuals

JOYTECH
JOYTECH DMT-4735b User manual

JOYTECH
JOYTECH DET-3023b User manual

JOYTECH
JOYTECH DET-1115b User manual

JOYTECH
JOYTECH DET-3011b User manual

JOYTECH
JOYTECH DET-1015b User manual

JOYTECH
JOYTECH DET-306b User manual

JOYTECH
JOYTECH DET-3019b User manual

JOYTECH
JOYTECH DET-3015b User manual

JOYTECH
JOYTECH HNK-ECT-1 User manual

JOYTECH
JOYTECH DET-3024b User manual