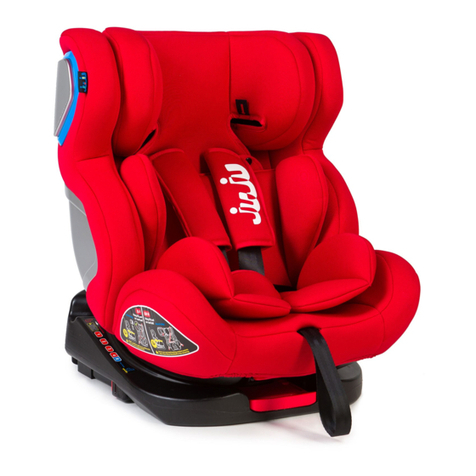
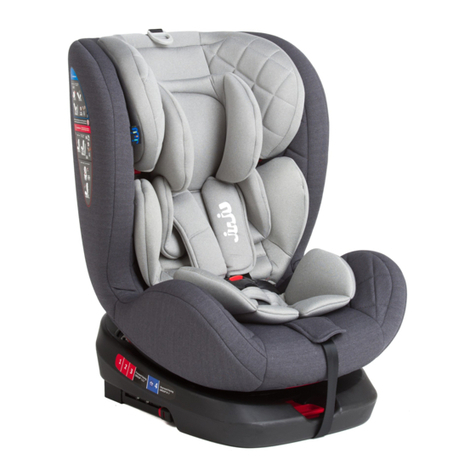
juju Navi Safe User manual

Navi Safe
Child Safety Car Seat
Groups 0+I+II (0~ 25kg)
User Manual
EN RO BG HU PL

2
EN
Instructions for safe use and installation of the child car seat Group 0, I, ll
Child car seat suitable for children from birth to 9 kgs (Group 0), 9 to 18 kgs
(Group l)and 15 to 25 kgs (Group II)

3

4

5

6
NOTICE
This is a ”Universal” child restraint. It is approved to Regulation No. 44, 04
series of amendments, for general use in vehicles and it will fit most, but not
all, car seats.
A correct fit is likely if the vehicle manufacturer has declared in the vehicle
handbook that the vehicle is capable of accepting a ”Universal” child restraint
for this age group.
This child restraint has been classified as ”Universal” under more stringent
conditions than those which applied to earlier designs which do not carry this
notice.
If in doubt, consult either the child restraint manufacturer or the retailer.
The child car seat can only be fitted into cars equipped with 3 point seat belt
system. The belt system must be approved to Reg. ECE 16 or equivalent.
The safety seat can not be used without its original cover. The original cover is
part of the homologation. Only replace the seat cover with one recommended
by manufacturer.
Instructions for use as a ”Group 0” car safety seat (from
birth to 9 kgs appr. )
1. Step 1. For Group 0, the safety seat must only be used in the most
reclined Position .(see Fig. 1/a). The safety seat must never be used in
any other position (Fig. 1/b). To adjust the reclining position of the
safety seat, pull the red handle (J) forward until the most recline forward
position. Take off the Basic wedge and change the position as the
picture position, then press it inside with a “click”. The Basic wedge must
be in position B when used rearward facing(Fig.2).

7
2. Step 2. The seat must always be rear facing (Fig. 3). If your car has an
airbag on the Passenger seat, the safety seat must only be used on the
rear seats in the vehicle (Fig. 1/c).
3. Step 3. Secure the safety seat onto the car seat using the car seat belt
(see Fig. 3).
4. Step 4. Pass the lap part of the seat belt under the base of the safety
seat into the two points marked by a blue label (A) and fasten the clip to
the corresponding buckle (M).
5. Step 5. Pass the upper diagonal part of the belt in the metallic guide (B).
6. Step 6. Take the red Lock-off clip (D)and attach it to the shoulder belt
directly above the buckle(Fig. 4).
7. Step 7. Make sure that the belt is not twisted and strongly tightened
before the Lock-off clip is attached.
Instructions for use as a ”Group I” car safety seat (from 9 to
18 kgs)
1. Step1. The Basic wedge must be in position A when used forward
facing.
2. Step 2. Fasten the Child car seat in forward facing position on either the
passenger or rear seat of your car using the 3 point belt system which is
installed in the car.
3. Step 3. Pass the 3 point belt system (lap and shoulder belt) through the
red marked openings (Fig. 4)
(K1 and K2) and through the upper metallic guide. Fasten the buckle (M)
in the lock until a click is heard. (Fig. 5).
4. Step 4. At the same time the lap belt is pulled through the 2 plastic
holes. (Fig. 4)
5. Step 5. Place and fasten the red Lock-off clip (D) on the shoulder belt
directly above the buckle. (Fig. 5)

8
Instructions for use as a ”Group II” car safety seat (from 15
to 25 kgs)
1. Step1. The Basic wedge must be in position A when used forward
facing.
2. Step 2. Fasten the Child car seat in forward facing position on either the
passenger or rear seat of your car using the 3 point belt system which is
installed in the car.
3. Step 3. Separate the safety belt from the conection component, which is
placed behind the backpart of the safety seat. (Fig. 8)
4. Step 4. Sit the child on the car seat, pull out of the seat belt, thread the
shoulder harness ofthe seat belt under the oxter through bellyband, then
through the guiding hole, the through the safety guiding hook and
attache to belt buckle, complete. (Fig. 9).
IMPORTANT-DO NOT USE FORWARD FACING BEFORE THE CHILD’ S
WEIGHT EXCEEDS 9 kgs.
WARNING:
The forward facing position in group 1 can only be done if the child has
reached a weight over 9 kgs.
Your child seat can only be fitted into the front passenger seat of a car
with a lap and diagonal seat belt the child seat and without an airbag. Do
not use any load bearing contact points other than those described in
the instructions and marked on the child restraint.
The vehicle seat buckle is not positioned in or in front of the specified
belt guide.

9
Securing your child into the safety seat
Place the child into the safety seat and position the attached safety
harness.
Fasten the buckle (G) byjoining the two parts of the belt (E and F)
together, until a click is heard (Fig 6/a). To strongly tighten the safety
harness, the child car seat is equipped with a central belt system (H) :it
means that, if you pull on the belt of the front, the harness system is
tightened. To loose the belt, just press the metallic button with on hand
and with the other hand, simultaneously, pull on the harness system
towards you. (Fig 6/ b)
Make sure that the harness system is not twisted or jammed
somewhere.
Altering the position of the harness system depending on
your child's weight
In the back of the safety seat, there are 3 pairs of holes, which can be
used to adjust the shoulder straps to suit your child's weight (Fig. 7/a).
The lower holes are suitable for children up to a weight of 6 kgs.
The middle holes are suitable for children between appr 6 to 12 kgs.
The upper holes are suitable for children between appr 12 to 18 kgs
The pairs of holes should not be lower than the child's shoulders, when
the child sits in the safety seat.
To change the height position of the harness belt, you must separate it
from the connection component (L), which is placed behind the back
part of the safety seat.
Pass the safety belt through the required holes and join it at the
connection component (L).
Make sure that the harness system is not twisted or jammed
somewhere.

10
Important safety instructions !
1. Each modification is submitted to the homologation of the responsible
authorities.
2. Alterations of the child car seat, must not be made as the safety and
function of the seat can be diminished.
3. The safety and use of the child car seat is only guaranteed, if it is fitted
as per the mentioned instructions.
4. Any changes can make the seat unsafe and will eliminate the
manufacturers responsibility.
5. Make sure that the child car seat is always fastened to the car seat with
the belt, even if no child is transported.
6. Do not leave any loose objects on the back seat of your car, as they will
become dangerous to your child if you brake suddenly.
7. If the safety seat is involved in an accident, it must be replaced.
8. Do not let the child car seat reach high temperatures through sun rays,
these rays being also dangerous to your child.
9. Never leave your child unattended in the safety seat.
10. The child and the safety seat are correctly placed and that the safety
belt is well and strongly fastened.
11. If you have any problems regarding the use of your car safety seat,
please contact the manufacturer or your sales man.
12. Please keep these instructions. You can put these instructions in your
vehicle handbook or insert these instructions into any gap between the
cover and plastic seat.
Washing instructions
The covers are easily removable and can be cleaned by using neutral soap and
cold water.
Do not tumble dry, iron the covers. Do not use dry machine, just airing it.
The plastic parts can be cleaned by using a wettish cloth, please do not use
any solvent.
11
RO
Instructiuni pentru instalarea si folosirea in siguranta a scaunului auto pentru
grupele 0, I, II. Scaunul auto este potrivit copiilor de la nastere pana la 9kg
(Grupa 0), de la 9kg la 18 kg (Grupa I) si de la 15 kg la 25 kg (Grupa II).
NOTA
Acesta este un scaun auto „universal”. Este aprobat conform legii nr. 44/04 din
seria de amendamente, pentru uz general in vehicule si se va potrivi pe cele
mai multe, dar nu pe toate, banchetele masinilor.
Acest scaun auto a fost clasificat ca fiind unul universal, sub mai multe conditii
riguroase decat celelalte din clasa lui, care nu sunt insotite de acesasta nota.
Daca aveti nelamuriri consultati producatorul scaunului auto sau vanzatorul.
Este potivit doar daca autovehiculul are in dotare centura fixa in 3 puncte si
retractabila tot in 3 puncte, aprobata de UN/ECE legea numarul 16 sau alte
standarde echivalente.
Husa scaunului auto nu trebuie inlocuita cu nimic altceva ce nu este
recomandat de producator, deoarece husa este parte importanta a
functionalitatii scaunului auto.
Instructiuni de folosire a scaunului auto pentru Grupa 0 ( de
la nastere la aproximativ 9kg)
1. Pasul 1: Pentru Grupa 0, scaunul auto trebuie folosit la nivelul maxim de
inclinare (vezi figura 1/a). Scaunul auto nu trebuie folosit niciodata in
nicio alta pozitie (figura 1/b). Pentru a ajusta inclinarea scaunului auto,
trageti de manerul rosu (J) pana ajungeti la pozitia necesara.

12
2. Pasul 2: Scaunul auto trebuie intotdeauna montat cu spatele la sensul de
mers (fig. 3). Daca masina dumneavoastra are airbag pe scaunul din
dreapta fata, atunci scaunul auto va fi montat intotdeauna numai pe
bancheta din spate a autoturismului (fig 1/c)
3. Pasul 3: Asigurati scaunul in masina folosind centura de siguranta (vezi
figura 3)
4. Pasul 4: Treceti centura mediana a masinii prin cele doua puncte
marcate cu eticheta albastra (A), si inchideti in catarama corespunzatoare
(M).
5. Pasul 5: Treceti cu partea superioara diagonala a centurii prin ghidul
metalic (B)
6. Pasul 6: Luati clipsul rosu de blocare (D) si atasati-l la centura de de
siguranta a masinii, chiar deasupra cataramei de blocare.
7. Pasul 7: Asigurati-va ca centura nu este rasucita si este bine stransa
inainte sa atasati clipsul de blocare.
Instructiuni de folosire a scaunului auto pentru grupa I (de la
9 la 18 kg)
1. Pasul 1: Montati scaunul auto pentru copii montat cu fata la sensul de
mers, centura trebuie sa fie in pozitia A cand scaunul auto este folosit cu
fata la sensul de mers.
2. Pasul 2: Montati scaunul auto pe scaunul din dreapta fata sau pe
bancheta din spate a masinii, folosind centura de siguranta a
autovehiculului cu prindere in 3 puncte cu care este echipata masina.
3. Pasul 3: Treceti cu centura de siguranta cu prindere in 3 puncte
(mediana si de umar) prin fantele marcate cu rosu (fig 4) (k1 si K2) si prin
ghidul metalic superior. Inchideti catarama (M) pana auziti un click. (fig 5)
4. Pasul 4: In acelasi timp, centura mediana trebuie prinsa prin cele doua
gauri de plastic (fig 4)
5. Pasul 5: Plasati si inchideti clipsul rosu (D) si atasati-l la centura de de
siguranta a masinii, chiar deasupra cataramei de blocare. (fig 5)

13
Instructiuni de folosire a scaunului auto pentru grupa II (de
la 15 la 25 kg)
1. Pasul 1: Montati scaunul auto pentru copii montat cu fata la sensul de
mers, centura trebuie sa fie in pozitia A cand scaunul auto este folosit cu
fata la sensul de mers.
2. Pasul 2: Montati scaunul auto pe scaunul din dreapta fata sau pe
bancheta din spate a masinii, folosind centura de siguranta a
autovehiculului cu prindere in 3 puncte cu care este echipata masina
3. Pasul 3: Treceti cu centura de siguranta cu prindere in 3 puncte
(mediana si de umar) prin fantele marcate cu rosu (fig 4) (k1 si K2) si prin
ghidul metalic superior. Inchideti catarama (M) pana auziti un click. (fig 8)
4. Pasul 4: Asezati copilul in scaunul auto, trageti centura de siguranta a
masinii, treceti cu centura de umar pe sub bratul copilului, peste burta,
apoi prin gaura de ghidare, prin carligul de siguranta si atasati-o in
catarama. (fig 9)
IMPORTANT –A NU SE FOLOSI CU FATA LA SENSUL DE MERS INAINTE
CA GREUTATEA COPILULUI SA AJUNGA LA 9 KG.
AVERTISMENT!
Pozitia cu fata la sensul de mers pentru grupa I este posibil doar daca
copilul a atins o greutate ce depaseste 9kg.
Scaunul dumneavostra auto poate fi folosit pe scaunul din dreapta fata a
masinii daca autovehiculul este prevazut cu centura mediana si diagonala
de siguranta si nu are airbag. Nu utilizati scaunul decat in modalitatile
descrise in instructiuni si marcate pe scaunul auto.
Catarama de prindere a centurii masinii trebuie fixate in inchizatoarea sa,
nu fixata in punctele de ghidaj.

14
Asigurarea copilului in scaunul auto
Puneti copilul in scaunul auto si puneti-i hamul de siguranta.
Inchideti catarama (G) prin alaturarea celor doua centuri ale hamului (E si
F), pana cand auziti un click (fig 6/a). Pentru a strange bine hamul
scaunului auto, scaunul auto este echipat cu un sistem de centuri central
(H): aceasta inseamna ca daca trageti de centura din fata, hamul este
bine strans. Pentru a desface centura, apasati butonul metalic cu o mana
si cu cealalta mana, simultan, trageti de ham. (Fig 6/b).
Asigurati-va ca hamul nu este rasucit sau deteriorat.
Fixarea pozitiei sistemului de ham in functie de greutatea
copilului dumneavoastra
In spatele scaunului auto se gasesc 3 perechi de gauri care pot fi folosite
pentru a ajusta inaltimea centurilor de umar ale hamului pentru a se
potrivi greutatii copilului dumneavoastra (fig 7/a).
Gaurile cele mai de jos se potrivesc copiilor cu greutatea de pana la 6 kg.
Gaurile din mijloc se potrivesc copiilor cu greutatea intre 6 -12 kg.
Gaurile de sus se potrivesc copiilor cu greutatea intre 12-18 kg.
Perechea de gauri folosita nu trebuie sa fie mai joasa decat umerii
copilului, atunci cand acesta este asezat in scaun.
Pentru a schimba inaltimea centurilor hamului, acestea trebuie separate
din punctual de prindere (L) care este plasat in spatele scaunului auto.
Treceti centurile prin gaurile corespunzatoare apoi aduceti-le in punctul
de prindere.
Asigurati-va ca centurile hamului nu sunt rasucite sau deteriorate.

15
Instructiuni de siguranta importante!
1. Orice modificare trebuie aprobata de autoritatile competente.
2. Nu se permit deteriorari ale scaunului auto, deoarece acestea pot scadea
functionalitatea si siguranta scaunului auto.
3. Garantia scaunului auto este valabila doar daca acesta a fost instalat
conform manulului de instructiuni.
4. Orice schimbare poate face ca scaunul sa devina nesigur si elimina
responsabilitatea producatorului.
5. Asigurati-va ca scaunul auto este intotdeauna ancorat cu centura de
siguranta, chiar daca copilul nu este transportat in acel moment.
6. Nu lasati obiecte neasigurate pe bancheta din spate a autovehiculului,
pot deveni periculoase pentru copil daca frantic brusc.
7. Daca scaunul auto a fost implicat intr-un accident auto, trebuie inlocuit.
8. Nu lasati scaunul auto in temperaturi foarte inalte sau in razele directe
ale soarelui. Razele soarelui pot fi periculoase pentru copilul
dumneavoastra.
9. Nu lasati niciodata copilul nesupravegheat in scaunul auto.
10. Copilul si scaunul auto trebuie pozitionati corect in centura de siguranta
si prinse cu fermitate.
11. Daca aveti orice fel de problema cu privire la folosirea scaunului auto, va
rugam contactati fabrica sau importatorul produsului.
12. Va rugam pastrati instructiunile. Le puteti pastra in cartea de instructiuni
a masinii sau le puteti pastra intre husa si scaunul din plastic.
Instructiuni de spalare
Husa este usor de scos si poate fi spalata folosind un sapun natural si apa
calda. Husa nu se usuca la uscator si nu se calca.
Nu folositi uscarea cu abur, ci doar prin aerisire.
Partea de plastic poate fi curatata folosind o laveta uda. Va rugam sa nu
folositi niciun fel de detergent.

16
BG
Инструкции за безопасно монтиране и използване на столче за кола за
групи 0, I, II.Столчето за кола е подходящо за деца от раждането до 9кг
(група 0), от 9кг до 18 кг (група I) и от 15 кг до 25 кг (гупа II).
ЗАБЕЛЕЖКА
Това е „универсално” столче за кола. Одобрено е съгласно закон №
44/04 от серията с поправки, за обща употреба в автомобили и
подходящо за повечето, но не за всички задни седалки на автомобилите.
Това автомобилно столче е класифицирано като универсално при по-
строги условия в сравнение с прилаганите в предишни конструкции, на
които няма тази бележка.
Ако имате съмнения, консултирайте се с производителя на детското
столче за кола или с продавача.
Подходящо е само, ако автомобилът е оборудван с 3-точков предпазен
колан или прибиращо устройство, също 3-точково, одобрени от правило
№ 16 на ИКЕ при ООН или други еквивалентни стандарти.
Тапицерията на столчето не трябва да се заменя с нищо друго, което не е
препоръчано от производителя, защото тя е важна част от
функционалността на столчето за кола.
Инструкции за употреба на столчето за кола за група 0
(от раждане до приблизително 9кг)
1. Стъпка 1: За Група 0, столчето трябва да се използва при
максимално ниво на накланяне (виж фиг. 1/a). Столчето за кола не
трябва да се използва никога в никаква друга позиция (фиг. 1/b). За

17
регулиране на наклона на столчето, издърпайте червената дръжка
(J) докато достигнете необходимата позиция.
2. Стъпка 2: Столчето трябва винаги да се монтира с гръб към
посоката на движение (фиг. 3). Ако автомобилът Ви има възд.
възглавница на предната дясна седалка, тогава столчето трябва да
се монтира винаги само на задната седалка на автомобила (фиг. 1/c)
3. Стъпка 3: Осигурете столчето в колата, като използвате
предпазния колан (виж фиг. 3)
4. Стъпка 4: Прекарайте средния колан на колата през двете точки
отбелязани със син етикет (A), и закопчейте в съответната катарама
(M).
5. Стъпка 5: Преминете с горната диагонална част на колана през
металния отвор (B)
6. Стъпка 6: Вземете червената скоба за блокиране (D) и я прикачете
към предпазния колан на колата, дори над катарамата за
блокиране.
7. Стъпка 7: Уверете се, че коланът не е усукан и е добре захванат
преди да прикачите скобата за блокиране.
Инструкции за употреба на детското столче за кола за
група I (от 9 до 18 кг)
1. Стъпка 1: Монтирайте столчето с лице към посоката на движение,
коланът трябва да е на позиция A, когато столчето се използва с
лице към посоката на движение.
2. Стъпка 2: Монтирайте столчето на предната дясна седалка или на
задната седалка на колата, като използвате 3-точковия предпазен
колан на автомобила
3. Стъпка 3: Преминете с предпазния колан с 3-точково захващане
(среден и раменен) през прорезите маркирани с червено (фиг. 4) (k1
и K2) и през горния метален отвор за направление. Заключете
катарамата (M) докато чуете кликване. (фиг. 5)

18
4. Стъпка 4: Същевременно, средният колан трябва да се захване през
двата пластмасови отвора (фиг. 4)
5. Стъпка 5: Поставете и затворете червената скоба (D) и я закрепете
за предпазителя на колата, дори и над катарамата за блокиране.
(фиг. 5)
Инструкции за употреба на детското столче за кола за
група I (от 15 до 25 кг)
1. Стъпка 1: Монтирайте столчето с лице към посоката на движение,
коланът трябва да е на позиция A, когато столчето се използва с
лице към посоката на движение.
2. Стъпка 2: Монтирайте столчето на предната дясна седалка или на
задната седалка на колата, като използвате 3-точковия предпазен
колан на автомобила
3. Стъпка 3: Преминете с предпазния колан с 3-точково захващане
(среден и раменен) през прорезите маркирани с червено (фиг. 4) (k1
и K2) и през горния метален отвор за направление. Заключете
катарамата (M) докато чуете кликване. (фиг. 8)
4. Стъпка 4: Сложете детето в столчето, издърпайте предпазния
колан на колата, прекарайте раменния колан под ръката на детето,
над стомаха, после през насочващия отвор, през предпазната
щипка и го прикрепете към катараата. (фиг. 9)
ВАЖНО – ДА НЕ СЕ ИЗПОЛЗВА С ЛИЦЕ КЪМ ПОСОКАТА НА
ДВИЖЕНИЕ ПРЕДИ ТЕГЛОТО НА ДЕТЕТО ДА Е ДОСТИГНАЛО 9 КГ.
ПРЕДУПРЕЖДЕНИЕ!
Позицията с лице към посоката на движение за група I е възможна
само, ако детето е достигнало тегло, надвишаващо 9кг.
Вашето столче за кола може да бъде използвано на предната дясна

19
седалка на автомобила, ако той е оборудван с надбедрен и с
диагонален предпазен колан и няма въздушна възглавница.
Използвайте столчето само по начините описани в инструкциите и
отбелязани върху столчето.
Катарамата за захващане на колана на автомобила трябва да бъде
фиксирана в своята заключалка, а не в точките водачи.
Осигуряване на детето в столчето за кола
Поставете детето в столчето за кола и му сложете предпазния
колан.
Закопчейте катарамата (G), чрез доближаване на двата ремъка на
колана (E и F), докато чуете клик (фиг. 6/a). За да стегнете добре
колана на автомобила, столчето е оборудвано със система century
central (H): това означава, че ако издърпате предния колан, ремъкът
е добре стегнат. За да откопчеете колана, натисните металния
бутон с едната ръка, а с другата, едновременно, издърпайте
ремъка. (Фиг. 6/b).
Уверете се, че ремъкът не е усъкан или повреден.
Фиксиране на позицията на ремъчната система в
зависимост от теглото на детето Ви
На гърба на столчето за кола има 3 двойки отвори, които могат да
се използват за регулиране височината на раменните колани, за да
паснат на теглото на детето Ви (фиг. 7/a).
Най-долните отвори са подходящи за деца с тегло до 6 кг.
Отворите по средата са за деца с тегло между 6 -12 кг.
Горните отвори са за деца с тегло между 12-18 кг.
Използваната двойка отвори не трябва да бъде по-ниска от
раменете на детето, когато той е сложено в столчето.

20
За да смените височината на ремъците на коланите, те трябва да се
отделят от точката на захващане (L), която е разположена на гърба
на столчето за кола.
Прекарайте коланите през съответните отвори, после ги доведете
до точката на захващане.
Уверете се, че ремъците на колана не са усукани или повредени.
Важни инструкции за безопасност!
1. Всяка промяна трябва да бъде одобрена от компетентните органи.
2. Не са позволени повреди на столчето за кола, защото те могат да
понижат функционалността и безопасността на столчето.
3. Гаранцията на столчето за кола е валидна само, ако то е монтирано
съгласно ръководството с инструкциите.
4. Всяка промяна може да направи столчето несигурно и премахва
отговорността на производителя.
5. Уверете се, че столчето винаги е стегнато с предпазния колан, дори
и детето да не е в него в този момент.
6. Не оставяйте неосигурени предмети на задната седалка на
автомобила, те могат да станат опасни за детето, ако ударите рязко
спирачки.
7. Ако столчето за кола е участвало в инцидент, трябва да се смени.
8. Не оставяйте столчето на много високи температури или на пряка
слънчева светлина. Слънчевите лъчи могат да бъдат опасно за
детето Ви.
9. Никога не оставяйте детето в столчето без наблюдение.
10. Детето и столчето трябва да се позиционира правилно в
предпазния колан и здраво закопчани.
11. При всякакви проблеми относно използването на столчето за кола,
моля, свържете се с фабриката или вносителя на продукта.
12. Моля, пазете инструкциите. Можете да ги съхранявате при
инструкциите за колата или между тапицерията и пластмасовия
стол.
Table of contents
Languages:
Other juju Car Seat manuals

juju
juju Total 360 User manual

juju
juju Fun Racer User manual

juju
juju Complete 360 User manual

juju
juju Young Rider User manual

juju
juju Safe Rider User manual

juju
juju Fun Racer User manual

juju
juju Gladiator User manual

juju
juju Little Rider User manual

juju
juju Pro Rider User manual

juju
juju Baby Boo User manual