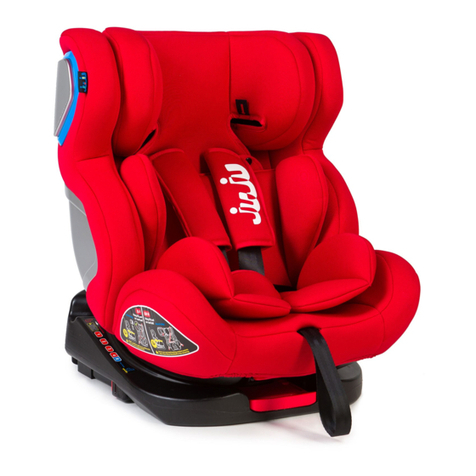
juju Total 360 User manual

User Manual
Total 360
Child Safety Car Seat
(Groups 0+, I, II, III / 0-36 kg)

Page 2
EN
RO
BG
HU

Page 3
1
2
3
4
5
6
7
8
9
10
11
Döntésbeállító fogantyú
12
13
14
15
16
17
18
Backrest Rotating Handle, Maner rotire spatar, Въртяща се дръжка на
облегалката, Háttámla forgatható fogantyúja
Top Tether
ISOFIX Button, Buton ISOFIX, Бутон ISOFIX, ISOFIX gomb
ISOFIX Connector, Conector ISOFIX, ISOFIX конектор, ISOFIX csatlakozó

Page 4
1
2

Page 5
3
4

Page 6
5
6
7

Page 7
8
9
10

Page 8
11
12
13

Page 9
10.3
10.4
10.5
10.7
14
16
15

Page 10
10.7
10.5
17
18
19

Page 11
WARNING
EN
1. Please read this user guide carefully BEFORE installing your child seat and retain for
future reference.
2. Do not use a child safety seat if the vehicle seat is equipped with a front airbag. This
can be dangerous. This does not apply to so-called side airbags.
3. The correct fitting of 3-point belt or the ISOFIX anchoring systems is of vital
importance for the safety of your child.
4. The product has been approved according to the strictest European safety standards
(ECE R44/04) and is suitable for Group 0+(0-13kg), Group I (9-18kg),Group II (15-25kg)
and Group Ill (22-36kg).
5. Only suitable if the vehicle is fitted with 3—point static, 3-point retractor safety
belts, approved to UN/ECE Regulation No.16 or other equivalent standards.
Safety instructions
Please invest a few minutes in your child’s safety to read these instructions. Many
injuries, which are easily avoidable, are caused by carelessness and incorrect use.
1. DO NOT remove any labels on the child safety seat. Important information is
contained on the labels.
2. Do not use this child seat at home. It is not designed for home use and should only
be used in your car.
3. Before each journey check whether the child car seat is installed firmly.
4. Do not change the child car seat in any way.
5. Do not leave your child unattended in the seat at any time.
6. In the event of an emergency it is important that the child can be released quickly.
This means that the buckle is not fully tamper proof and so your child must be taught
never to play with the buckle.
7. Protect the child restraint system against direct sun light otherwise the high
temperature will hurt your child.
8. Ensure that all parts are locked in place correctly and not penned in the adjustable
seats or doors.

Page 12
9. Luggage or other objects liable to cause injuries in the event of a collision shall be
properly secured.
10. The child car seat must not be used without the cover.
11. The seat cover should not be replaced with any other than the one recommended
by the manufacturer.
12. Periodically inspect the harness, pay particular attention to attachment points,
stitching and adjusting devices.
13. Do not continue to use the child car seat if parts have become damaged or have
loosened after an accident.
14. When you drive without a child in the child restraint system, always secure the
system with the adult belt.
15. Not to use any load bearing contact points other than those described in the
instructions and marked in the child car seat.
16. We recommend using the baby car seat on the back seat of cars.
17. Make sure the adult safety-belt buckle do not contact or interfere with the main load
bearing contact points on the car seat.
18. DO NOT use belt routing methods not shown in these instructions.
19. DO NOT allow children to play with or adjust the child safety seat. Always check the
tightness of the restraint and the harness before each use.
20. The straps holding the restraint to the vehicle should be tight, that any straps
restraining the child (harness) should be adjusted to the child's body, and that straps
should not be twisted not liable to become trapped by a movable seat or in a door of
the vehicle.
21. Ensuring that any lap strap is worn low down so that the pelvis is firmly engaged.
22. We advise you strongly that not to use a second-hand product, because you are not
sure what has happened to it. The harness pads are important for the safety of your
child, therefore use them at all the time.
23. The rigid items and plastic parts of a child restraint shall be so located and installed
that they are not liable, during everyday use of the vehicle, to become trapped by a
movable seat or in a door of the vehicle.
24. After an accident the seat may become unsafe due to damage that is not be

Page 13
noticeable immediately. It should therefore be replaced.
25. Please read the car manufacturer’s handbook during use of child restraint system
with ISOFIX.
Use in the vehicle
!!! Only suitable if the approved vehicles are fitted with 3-point static, 3-point
retractor safety-belts, approved to UN/ECE Regulation No. 16 or other equivalent
standards.
!!! DO NOT use with 2-points belt.
You can use your child car seat as in Pic 1.
2. How to use the harness buckle - Pic 2
2.1. Guide the two buckle latches together.
2.2. Make sure right side up.
2.3. Engage them before putting them into thehamess buckle, this should make a
CLICK noise.
2.4. Pull shoulder belts to remove all slack from the lap section ensuring the harness
lies flat and harness buckle locked. Open the harness buckle by pressing the red
button.
3. Removing 5-point harness - Pic 3,4
3.1. Loosen the 5-point harness of the child seat as much as possible by press the
button of the crotch bell
3.2. Tum the baby safety car seat to back, unzip the seat cover.
3.3. Loosening the shoulder belt in order to access the metal link and connector at the
back of the child seat, remove the belt from connector.then remove the shoulder belt
from metal link.
3.4. Then from the front of the child seat, pull out shoulder belt through the slots.
3.5. Pull below both the shoulder pads and the belts to the front through the slots.
(front side of the child seat).
3.6. Remove the shoulder pads from the shoulder belts and put them in the storage
bag.
3.7. Roll the shoulder belts separately on both side and place them into the fabric
cover from the slot of fabric.

Page 14
3.8. Grasp the metal plate from underneath and tum it into a vertical position.Push
upwards and slide the metal plate through the slot.
3.9. Remove the harness buckle with the crotch pad and store it in the storage bag.
4. Adjust the angle of child safety car seat - Pic 5, 6
There are 3 levels adjustment in the child safety car seat.
Before fixing a child in the child restraint system, the seat must be set on the recline
position for rear-facing use, see picture 6.3 or in the sitting position for forward-facing
use.see picture 6.1 and 6.2.
To achieve that, use the recline handle located in front of the child restraint system
between the sitting part and the base to adjust the desired position.
Total has three level positions:
*first level
*second level
*third level
Use backrest reclining handle to adjust the postion 1,2 and 3 when forward facing
installation. - Pic 5
Adjust the reclining angle to position 3 first, then use backrest rotating handle to
swivel the seat 180" for rearward facing installation. - Pic 5
5. Adjust the length of harness - Pic 7
In order to protect your child much better.after fix him/her in the child
restraint system and lock the buckle,you should tighten the harness so
they are snug and flat against the child's body.they should never be
twisted or loose.
5.1. To tighter the hamess,pull the shoulder belt upwards to remove the
slack from the lap sections of the harness.at the same time to pull the
adjuster crotch belt coming from the lock by your another hand.
5.2. To lengthen the harness, press the button on lock between the
child's two leg, then pull the two shoulder belt simultaneously in
yourdirection, please note while you are doing this hold the
harness.nharness.not the cover.
CAUTION! Check that the harness straps are not twisted and that they
have been correctly inserted in the belt slots on the cover.

6. Adjusting the headrest in an installation with a 5 point
harness .Group O+ and 1 - Pic 8
6.1. A correctly adjusted harness ensures that the diagonal seat belt section is
positioned,and gives your child the optimal protection.
6.2. The harness must be adjusted to that there is a space two fingers wide
between the harness and your child's body.
6.3. A Correctly adjusted headrest ensures optimal protection for your child in the
safety seat:shoulder belts are at the same level as your child's shoulders.
6.4. Pull the headrest hand le, the shoulder straps will be moved
together,select correct height and fix them In the correct position for
the child by releasing the headrest handle. - Pic 8
Page 15
7. Adjusting the headrest In an installation that uses the
vehicle safety belt Groups 2 and 3.
7.1. A correctly adjusted headrest ensures that the diagonal seat belt section is
optimally positioned, and gives your child the optimal protection.
7.2. The headrest must be adjusted so that a space equivalent to two fingers
remains between the headrest and the child 's shoulders.
7.3. Pull the headrest handle to adjust headrest to the correct height , then release the
headrest handle.Place the safety seat on the car seat.put the child In the seat and
check the height.
7.4. Repeat the process until the correct height is achieved.
lnstallation
Warning :
Don't use forward facing before the child's weight exceeds 9kg.
8. Group 0+1 (birth to 18kg) lnstall Rearward Facing - Pic 9, 10
8.1. Check the safety seat is ready to be installed rearward facing(Group 0+1 ), pull the
backrest reclining handle to recline the seat fully, adjust the angle of recline to position
3 then release the handle.
8.2. It is necessary swivel the seat 180°to place the seat in the opposite direction of
travel. Release the backrest rotating handle when the seat is In the desired
position.

Page 16
8.3. Locate the ISOFIX arms in the base of the seat.
8.4. Place the seat in the back seat of the vehicle in the opposite direction of travel.
8.5. Hold the safety seat with both hands and insert the two ISOFIX arms firmly
into the vehicle's ISOFIX anchoring points until they fasten with a click on both
sides. The red button will change to green on both sides.
8.6. Shake the seat to check that it is correcUy anchored to the vehicle's ISOFIX
points.
8.7. Pull out the Top Tether and press the tether strap release button to
extend the strap until it is long enough to connect it to the Top
Tether anchorage point In the vehicle.
If the Top Tether is tightened favorably and correctly, the button will change to
green.
8.8. Make sure the 5-point harness of safety seat has been correctly
installed (see section 5)
8.9. Open the buckle, put the shoulder harness to the sides, then put
the child into the safety seat.
Please check If shoulder harness height is equal to your child's shoulder height,
press the adjusting device and pull the shoulder harness to be loose, then press the
headrest handle to adjust the shoulder harness to the suitable position.
8.10. Slide the two tongues together Into the buckle. The buckle will not work well till
you hear "click". Adjust the child restraint belt to make sure the lap belt is well
restrained the child's pelvis. Then tighten the shoulder straps by pulling the
adjustable strap at the front of the bottom cushion.
8.11. If you want to release your child from the safety seat, press the
adjusting device at the front of the bottom, at the same time pull
the shoulder straps. Then press the red button on the buckle,
place the shoulder straps at the side and let your child out.
Uninstalling the ISOFIX system:
1.To free the Top Tether, press the button and pull the tether strap in the opposite
direction{the indicator will change from green to red color), in order to take off the
top tether.

9. Group 1 (9 to 18kg) Install Forward Facing - Pic 11
2.To free the ISOFIX anchoring, press backwards the ISOFIX System unlock buttons
(the indicator will change from green to red color), in order to free the seat from
the vehicle ISOFIX anchoring system.
Page 17
9.1. Ensure the seat is ready to install in forward facing (Group 1), pull the backrest
reclining handle to adjust to angle to position 1, 2 or3, then release the handle.
9.2. It is necessary swivel the seat 180° to place the seat in the direction of travel.
Release the backrest rotating handle when the seat is in the desired position.
9.3. Locate the ISOFIX arms in the base of the seat.
9.4. Place the child safety seat in the back seat of the vehicle facing in the
direction of travel.
9.5. Hold the child seat with both hands and insert the two ISOFIX arms
firmly into the vehicle's ISOFIX anchoring points until they fasten with
a click on both sides. The red button will change to green on both
sides.
9.6. Shake the seat to check that it is correctly anchored to the vehicle's
ISOFIX points.
9.7. Pull out the Top Tether and press the tether strap release button to extend
the strap until it is long enough to connect it to the Top Tether anchorage point in
the vehicle. If the Top Tether is tightened favorably and correctly, the button will
change to green.
9.8. Make sure the 5-point harness of safety seat has been correctly
installed (see section 5)
9.9. Open the buckle, put the shoulder harness to the sides, then put the
child into the safety seat. Please check if shoulder harness height is
equal to your child's shoulder height, press the adjusting device and
pull the shoulder harness to be loose, then press the headrest handle to adjust the
shoulder harness to the suitable position.
9.10. Slide the two tongues together into the buckle. The buckle will not work well
till you hear "click". Adjust the child restraint belt to make sure the lap belt is well
restrained the child's pelvis.

Then tighten the shoulder straps by pulling the adjustable strap at the front of the
bottom cushion.
9.11. If you want to release your child from the safety seat, press the adjusting
device at the front of the bottom, at the same time pull the shoulder straps. Then
press the red button on the buckle, place the shoulder straps at the side and let
your child out.
Page 18
Note:
Use backrest rotating handle to swivel the seat 180° for forward facing installation,
backrest hanger and L-backrest hanger are hooked each other. - Pic 13
Uninstalling the ISOFIX system:
1.To free the Top Tether, press the button and pull the tether strap in the opposite
direction(the indicator will change from green to red color), in order to take off the
Top tether.
2.To free the ISOFIX anchoring, press backwards the ISOFIX System unlock buttons
(the indicator will change from green to red color), in order to free the seat from
the vehicle ISOFIX anchoring system.
10. GROUP 2/3(15 to 36kg) Install Forward Facing:belt+Fix
or belt only
For belt+Fix, please refer to 10.1-10.9.
For belt only, please refer to 10.1-10.5, then turn to 10.8-10.9.
10.1. Ensure that the child seat's 5-point harness and buckle is removed
correctly( see section 3)
10.2. Ensure the seat is ready to install in forward facing (Group 2/3), pull the
backrest reclining handle to adjust to angle to position 1, 2 or 3, then release the
handle.
10.3. It is necessary swivel the seat 180° to place the seat in the direction of travel.
Release the backrest rotating handle when the seat is in the desired position.
10.4. Before installing the safety seat, place your child in the seat and adjust the
headrest to the correct height(see section 7)

10.5. Place the child safety seat in the back seat of the vehicle facing in the
direction of travel
10.6. Hold the child seat with both hands and insert the two ISOFIX arms
firmly into the vehicle's ISOF IX anchoring points until they fasten
with a click on both sides. The red button will change to green on
both sides.
10.7. Shake the seat to check that it is correctly anchored to the vehicle's
ISOFIX points.
10.8. Place your child in the safety seat.
10.9. Pass the vehicle seat belt through the bottom of the armrest, ensure the lap
belt is stretched as low as possible over the child's hips, buckle the vehicle seat belt
until hear a click. Place the diagonal belt through red belt guide hook and must
pass the middle between child's shoulder and neck.
Note:
Use backrest rotating handle to swivel the seat 180° for forward facing installation,
backrest hanger and L-backrest hanger are hooked each other.
11. Removal Fabric Cover and Assembly
Uninstalling the ISOFIX system
To free the ISOFIX anchoring, press backwards the ISOFIX System unlock buttons
(the indicator will change from green to red color), in order to free the seat
from the vehicle ISOFIX anchoring system. - Pic 12
Page 19
11.1. Removal - please follow the Pic 13,14,15,16
11.2. Assembly - please follow the Pic 17, 18, 19
Please be sure to use only original seat covers, as the seat cover is important to the
proper functioning of the system.
!!! The child seat must not be used without the seat cover.
12.1. The cover can be removed and washed with a mild detergent using the
washing machine's cycle for delicate items (30°C). Please observe the instructions
on the washing label of the cover. The colours of the cover may fade if washed at
more than 30°C.
12. Cleaning

Do not spin, and never tumble dry in an electric clothes dryer (the fabric may
separate from the padding).
12.2. The plastic parts can be cleaned using soapy water. Do not use
harsh cleaning agents (such as solvents).
13. Checklist
For safety's sake read through this checklist before you set off.Check that the
harness belt system fits properly and tightly around your child and that the
shoulder belts are at the correct height.
Check regularly that the belt in the baby car seat is not damaged. If it is damaged
do not use your product in any circumstances.
Check that you have secured your baby car seat with the seat belt.
Page 20
RO
14. Procedure after an accident
The child car seat must be replaced when it has been subject to violent stresses in
an accident.
IMPORTANT
1. Vă rugăm să citiți cu atenție acest manual ÎNAINTE de a folosi scaunul auto pentru
copii și să îl păstrați la îndemână.
Vă rugăm să păstrați acest manual de instrucțiuni pentru consultare ulterioară.
2. Nu utilizați un scaun de siguranță pentru copii dacă scaunul vehiculului este
echipat cu un airbag frontal. Acest lucru poate fi periculos. Acest lucru nu se aplică
scaunelor echipate cu airbag-uri laterale.
3. Fixarea corectă a centurii în 3 puncte sau a sistemelor de ancorare ISOFIX este de o
importanță vitală pentru siguranța copilului dumneavoastră.
4. Produsul a fost aprobat conform celor mai stricte standarde europene de
siguranță (ECE R44/04) și este potrivit pentru Grupa 0+(0-13kg), Grupa I (9-18kg),
Grupa II (15-25kg) și Grupa Ill ( 22-36kg).
5. Potivit doar dacă autovehiculul are în dotare centură fixă în 3 puncte și
retractabilă tot în 3 puncte, aprobată de UN/ECE legea numărul 16 sau alte
standarde echivalente.
Table of contents
Languages:
Other juju Car Seat manuals

juju
juju Complete 360 User manual

juju
juju Navi Safe User manual

juju
juju Fun Racer User manual

juju
juju Safe Rider User manual

juju
juju Fun Racer User manual

juju
juju Baby Boo User manual

juju
juju Little Rider User manual

juju
juju Gladiator User manual

juju
juju Young Rider User manual

juju
juju Pro Rider User manual