10
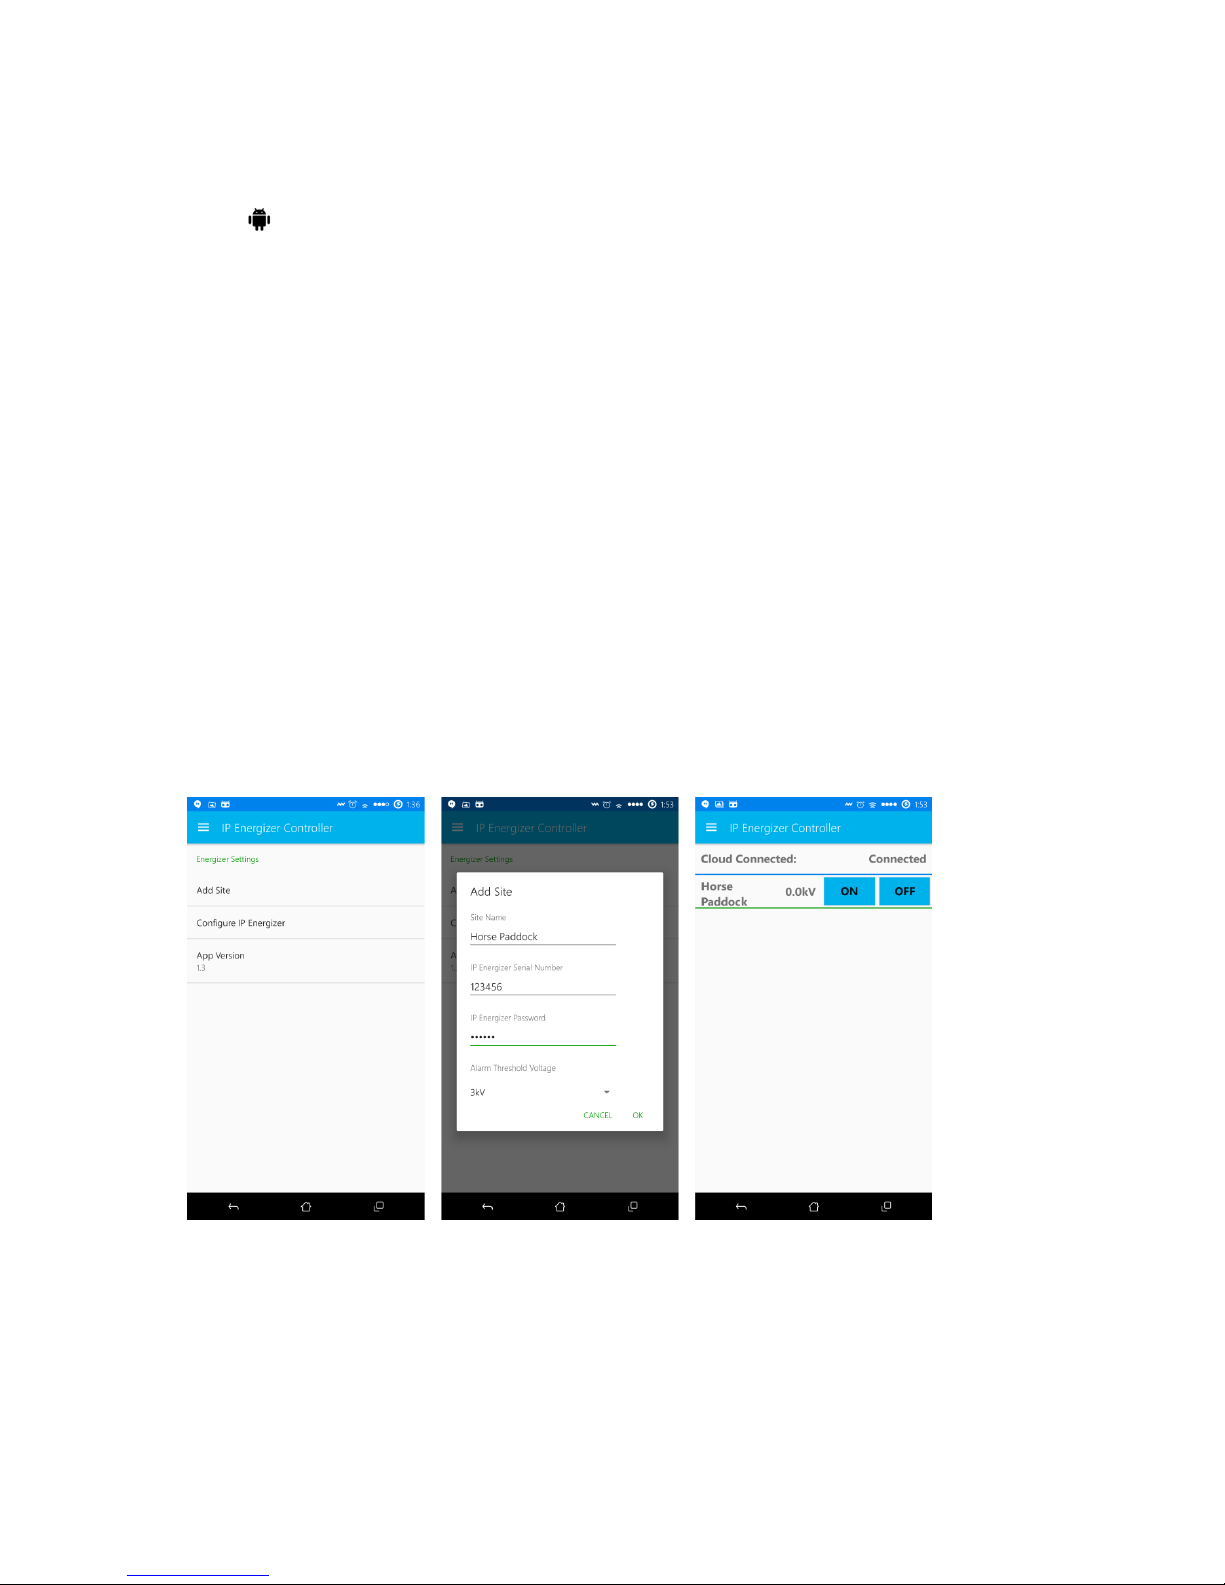
3. The Home screen should show ‘Cloud Connected: Connected’ indicating that you have
successfully connected to our cloud servers. Below this is a list of your IP Energizer sites; these
show the fence voltage and two buttons to turn on and off your IP Energizer. For a more in
depth view of one of your sites you can press the sites name, in our case ‘Horse Paddock’.
From here the Site Name you entered will appear at the top of the screen, followed by the
status information of your IP Energizer, which includes:
a. Signal Strength: This indicates how well your IP Energizer is connected to your Wi-Fi
network; it is not the signal strength of your mobile phone.
b. Energizer Model: This shows the model name of your IP Energizer.
c. IP Energizer State: This shows ‘On’ when the IP Energizer is running and putting voltage
down your fence. It states ‘Off’ if the IP Energizer is in standby mode waiting for you to
turn it on.
d. Fence Voltage: This shows the actual voltage on the Energizer fence terminals. This will
update in real time.
e. Stored Joules: This shows the stored energy used by the Energizer for each pulse. It will
rise when the IP Energizer has to work harder under heavy fence loads.
f. Supply Voltage: This shows voltage of the power supply that is being used to power
your IP Energizer. This could be a battery’s voltage, or a power pack’s output voltage.
g. IP Energizer IP Address: This is the IP address that has been allocated by your home
Wi-Fi router to your IP Energizer.
9. Should you wish to add additional IP Energizers to your App, simply navigate back to the
settings and add another Site.