20
Always perform maintenance on the marine case
after you have finished recording.
Salt crystal or dirt will accumulate inside the
marine case if maintenance is not performed, and
this can cause water leakage.
zDo this within 30 minutes after diving.
zPour in fresh water until the marine case is
completely submerged in the container, and
shake the marine case in the upward,
downward, left and right directions.
zMove the buttons and levers while the marine
case is submerged, and rinse the dirt out from
any gaps or grooves. Proceed to C
zIf used in the sea
-> Proceed to Aerforming salt removal
If the marine case was used in the sea, submerge
the marine case in fresh water for at least 1 hour
to remove salt.
APrepare a container that contains fresh
water that is five times more than the
volume of the marine case.
zThe container must be big enough to allow
the marine case to submerge fully.
zIf only small containers are available, pour
in fresh water that is equivalent to at least
five times the volume of the marine case
over a few times.
zShaking the marine case in the upward,
downward, left and right directions will be
more effective.
zMove the buttons and levers while the
marine case is submerged, and rinse the
salt out from any gaps or grooves etc.
zMake sure the grip is also free of salt.
BPut in fresh water for at least 1 hour.
CRemove the marine case and wipe off
water droplets on the case surface using a
dry towel.
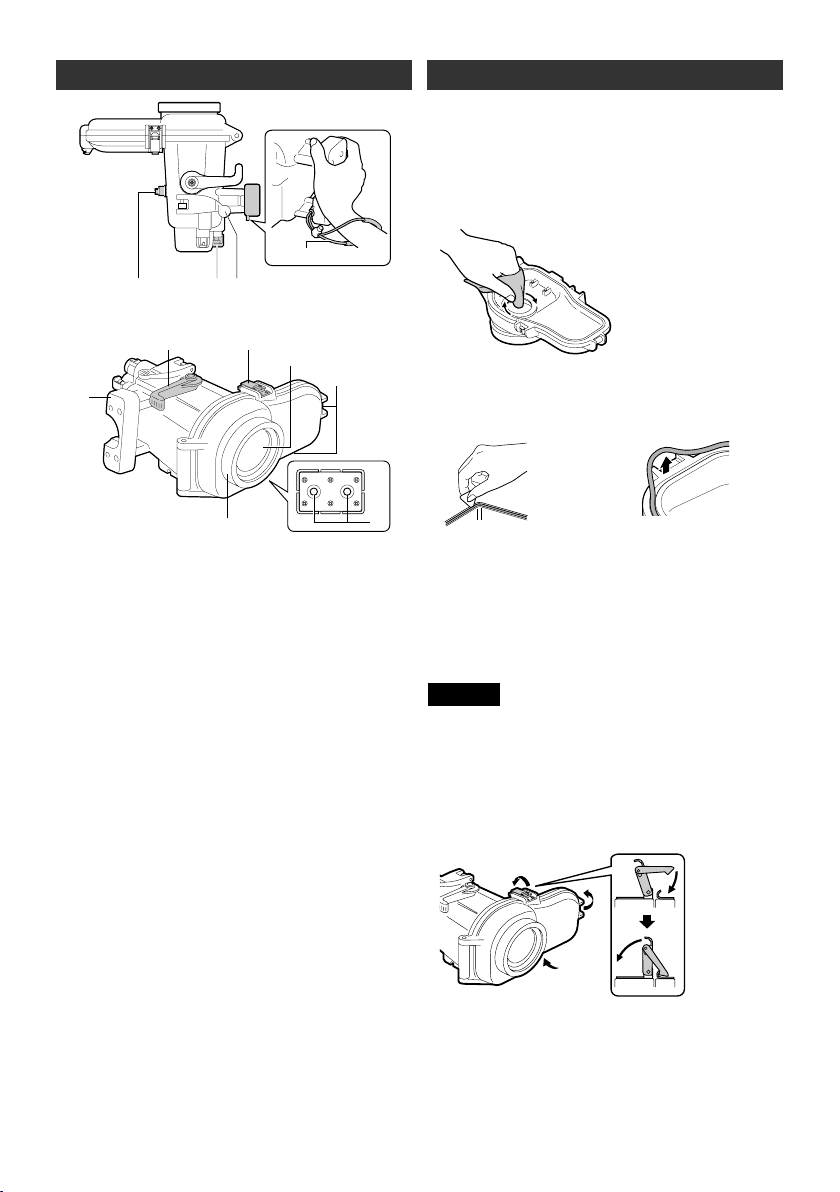
DRemove the camera.
zFace the front glass of the marine case
upwards, and open the buckles to remove
the camera, while paying attention not to let
water droplets at O-ring or buckles enter
the case.
zThe camera may fall out if the buckles are
opened with the front glass facing down.
zIf you cannot avoid opening the marine case at
the diving location, pay attention not to let
water droplets from your hair or your body
enter the case.
ERemove the O-ring, and wipe off salt, sand
and other foreign matter.
zAlso wipe the groove in which the O-ring
was inserted, and the part of the marine
case that was in contact with the O-ring,
and allow them to dry.
¹For details on handling and storing the
O-ring, refer to the “O-ring Maintenance
Manual”.
FWipe the inside and outside of the marine
case with a dry cloth.
¹Use a lint-free cloth to wipe the inside of
the marine case.
GWipe the inner side of the front glass.
zAdd a few drops of the cleaner liquid
(commercially available) onto the inner side
of the front glass, and wipe off using a lens
tissue paper, clean cloth, etc.
Maintenance on the marine case
Wash the marine case in water
while it is still sealed
Performing salt removal
Caution
Dirt, sand, salt
crystals, etc.
Hair, lint, etc.
WR-MG270_EN.book Page 20 Wednesday, March 24, 2010 1:36 PM