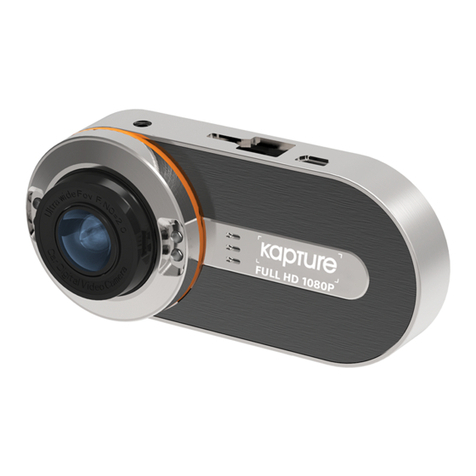
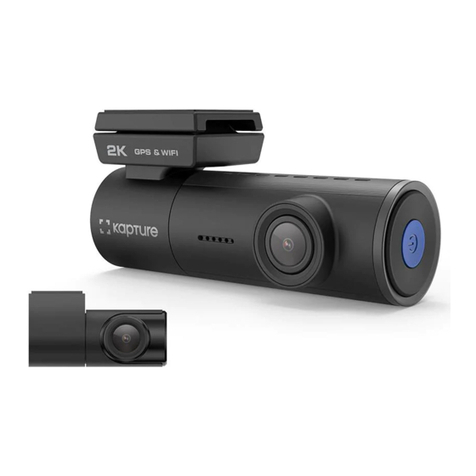
Kapture KPT-850 User manual

DISCREET DASH CAM
1080P WITH GPS, WIFI & SUPER CAPACITOR
YOUR EYEWITNESS ON THE ROAD™
USER MANUAL
KPT-850
152°


3
CAUTION ...............................................................................................................................................4
SUPER CAPACITOR WARNING ................................................................................................................4
NOTES ON INSTALLATION ........................................................................................................................4
PRODUCT INFORMATION..........................................................................................................................5
1 INTRODUCTION .......................................................................................................................5
1.1 FEATURES .............................................................................................................................................5
1.2 PACKAGE CONTENTS.........................................................................................................................5
1.3 PRODUCT OVERVIEW .........................................................................................................................5
1.4 LED INDICATORS .................................................................................................................................5
1.5 GESTURE INDUCTION AREA.............................................................................................................5
1.6 GPS RECEIVER .....................................................................................................................................6
2 GETTING STARTED..................................................................................................................6
2.1 INSERTING THE MEMORY CARD..................................................................................................... 6
2.2 REMOVING THE MEMORY CARD.....................................................................................................6
2.3 MOUNTING YOUR KPT-850 ...............................................................................................................6
2.4 INSTALLING YOUR KPT-850 WINDSHIELD BRACKET................................................................. 7
2.5 INSTALLING YOUR GPS RECEIVER ................................................................................................. 7
2.6 CONNECTING POWER TO YOUR KPT-850 .....................................................................................7
2.7 REMOVING THE KPT-850 FROM THE MOUNT..............................................................................7
2.8 POWERING UP THE KPT-850 .........................................................................................................7-8
2.8.1 MANUALLY POWERING OFF THE KPT-850.......................................................................8
2.9 SMARTPHONE CONNECTION........................................................................................................... 8
2.9.1 DOWNLOADING THE APP.....................................................................................................8
2.9.2 WIFI CONNECTION.................................................................................................................8
3 USING THE KPT-850 APP ........................................................................................................ 9.
3.1 LIVE VIEW SCREEN .............................................................................................................................9
3.2 FORMATING YOUR MEMORY CARD................................................................................................9
3.3 ALBUM (STORED ON KPT-850).......................................................................................................10
3.4 TRANSFERRING VIDEOS TO YOUR SMART DEVICE ................................................................10
3.5 PLAYBACK (FROM KPT-850) .....................................................................................................10-11
3.6 DELETING VIDEOS (FROM SMART DEVICE)................................................................................11
4 SETTINGS .........................................................................................................................11
5 FEATURES .........................................................................................................................12
5.1 GPS .............................................................................................................................................12
5.2 WIFI .............................................................................................................................................12
5.3 GESTURE ACTIVATED SNAPSHOT ................................................................................................12
5.4 G-SENSOR ...........................................................................................................................................12
5.5 TIME STAMP .......................................................................................................................................12
6 VIEWING MEDIA ON YOUR PC...............................................................................................12
7 SPECIFICATIONS................................................................................................................... 12
8 ABOUT THIS GUIDE ...............................................................................................................13
9 WARRANTY TERMS & CONDITIONS .....................................................................................13

4
CAUTION
• Ensure you are using your Car Dash Cam within your countries’ road laws. Please make
sure you are familiar with your local road legislation before use.
• Avoid leaving your Car Dash Cam in direct sunlight for extended periods of time in an
unventilated space.
• Please set time and date before you use this device to record.
• The results of GPS positioning are only for reference. The Car Dash Cam will lose GPS
positioning abilities when signal is blocked (eg driving through tunnels, enclosed car
parks).
• GPS positioning accuracy may vary depending on weather and surroundings such as
dense cities, tunnels, or forests. GPS satellite signals cannot pass through most solid
materials. Tinted windows may also affect the GPS signal.
• GPS positioning can take up to 3 minutes to gain an accurate position. This may result in
your rst clip of each journey not having GPS data tied to it.
• The values displayed in this system, such as speed, position, and the distance warning,
may be affected by the surrounding environment.
• The system is to be used only for non-commercial use, within the limits permitted by the
relevant laws.
• Avoid using the Car Dash Cam in the vicinity of any devices that emit radio interference
(eg. Microwave Ovens).
• It is considered normal operation for the Car Dash Cam to get warm during use.
SUPER CAPACITOR WARNING
• The KPT-850 has a built in super capacitor, this is designed to record momentarily after
your vehicle has been powered off.
• The KPT-850 is designed to be powered using the included cable and 12V USB power
• The super capacitor is not designed to power the dash cam for long periods of use. Where
possible please keep your KPT-850 powered via the 12V USB power.
• Do not attempt to remove replace, or expose the super capacitor
NOTES ON INSTALLATION
• It is advised that the Car Dash Cam is installed near the rear view mirror, at the top centre
of the windshield for optimal operation.
• Make sure that the lens is within the range of the windscreen wiper to ensure a clear view
when it rains.
• Do not touch the lens with your ngers. Finger prints left on the lens will result in unclear
videos or photos. If photos or videos are blurred, please clean the lens gently with a
microber cloth.
• Do not install the device on a tinted window. Doing so may damage the tint lm and
restrict the Car Dash Cam’s GPS signal.
• Make sure that the installation position does not hinder or block the eld of view or GPS
signal.
• Only use the included cable to power the KPT-850.
• When running the power KPT-850’s power cable be sure to run it to the right of your
windscreen ensuring that the cable does not impede the drivers view.

5
PRODUCT INFORMATION
For latest manual and product updates please visit our website at
www.kapturecam.com.au or www.kapturecam.co.nz
1. INTRODUCTION
Thank you for purchasing a Kapture Car Dash Cam. Please read through these instructions
before attempting to install or use this product.
NOTE:
Your KPT-850 is congured by using the app (Refer page 8). There are no buttons or menus on the actual device.
1.1 FEATURES
• Recording Full HD 1080P footage at 30 frames per second
• Built in GPS
• WiFi Smart device connectivity
• 152° field of view
• Built in G Sensor
• App allowing video transfer and playback alongside GPS tracking
• Gesture Activated Snapshot
1.2 PACKAGE CONTENTS
Barrel Dash Cam Windshield
Bracket Spare Adhesives User Manual
4M USB Cable
with GPS
Receiver
Dual Output
USB Car Plug/
Charger
1.3 PRODUCT OVERVIEW
1.4 LED INDICATORS
The LED indicators on the KPT-850 let you know the recording and connection to your
phone status.
LED STATUS
RECORDING RED FLASHING LED
MOBILE PHONE CONNECTION GREEN LED
DEVICE NOT RECORDING SOLID RED or NO LED
1.5 GESTURE INDUCTION AREA
Your KPT-850 features a gesture Activated Snapshot
that allows you to take a photo when you wave your
hand across the Gesture Induction Area. In most
installation cases, the gesture induction area will
be facing downwards. To take an instant snapshot, wave your hand across the
induction area. Images will be stored in your Album (Refer to FIG 3 page 9)
__________________________________________________________________________________________________________________
NOTE:
It is not necessary to touch this area to trigger a photo. Simply wave your hand across the Gesture Induction
Area.
____________________________________________________________________________________________________________

6
1.6 GPS RECEIVER
The GPS receiver is embedded in-line with the USB power cable. When installing the
power cable in your vehicle please run the cable to the right of the interior of your
windscreen to ensure that the GPS receiver sits correctly. The GPS receiver should
not be adhered to any tint on your front windscreen as this may interfere with the
GPS signal or damage your vehicle’s tint.
__________________________________________________________________________________________________________________
NOTE:
• GPS will be unavailable in covered or built up areas (e.g. tunnels, parking buildings, tall buildings, dense forest).
When in these conditions the GPS signal may be blocked.
• If you receive a memory card error, please ensure that you are using a class 10 Micro SD card that is up to 64GB.
Please also ensure that the Micro SD card is formatted in the FAT32 format..
__________________________________________________________________________________________________________________
2. GETTING STARTED
2.1 INSERTING MEMORY CARD
Please note that the MicroSD card can only go into your device one way. Attempting
to install the card other than how it’s described below will cause damage to either
your card, device, or both.
Do not force your card into the slot. If force is required, it is likely that your card is
in the wrong way. A correctly inserted card will require you to use your nger nail to
push the card into the slot until a click sound is heard/felt.
2.1.1 INSTRUCTIONS
Ensure that your KPT-850 is not connected to any power. Position the MicroSD card
with the gold contacts facing the small reset switch. The gold contact ends of your
memory card should always go into the slot rst. Use your ngernail to press the
card into the slot until a click is heard.
__________________________________________________________________________________________________________________
NOTE:
• Do not insert or remove a Micro SD card while your KPT-850 is powered up or recording. This may damage your
Micro SD card.
• Please use Class 10 or higher rated Micro SD cards up to 64GB
• Please format the Micro SD card before initial use (in FAT 32 format if you are using a computer to format your
Micro SD card). The card can also be formatted using the app.
• To quickly delete all items on your Micro SD card you can format the card in the settings menu of the App (Refer
to page 9)
__________________________________________________________________________________________________________________
2.2 REMOVING MEMORY CARD
Ensure that your KPT-850 is powered off. Using your ngernail press the SD card
until a click is heard and release. The card should eject from the slot. Please ensure
you always handle your Micro SD Card with care.
2.3 MOUNTING YOUR KPT-850
Please read through all mounting instructions before you
attempt to mount your KPT-850.
It is recommended that you install the KPT-850 in a
position behind your rear-view mirror, ensuring that
your front driving view is not obstructed. Once you have
mounted your camera using your preferred method it is
recommended that you run the power cable around your
windscreen under your vehicles interior trim in the driver’s side direction.
__________________________________________________________________________________________________________________
NOTE:
If your car has side curtain air bags, please be very careful when running cables along your vehicles windows.
Please ensure that you do not run the cables past any of these airbags as this can prevent the airbags from
deploying in an emergency. If in any doubt, consult a professional installer.
_______________________________________________________________________________________________________________
Step 1 Step 2 Step 3 Step 4

7
2.4 INSTALLING YOUR KPT-850 WINDSHIELD BRACKET.
1. To install the Windscreen Bracket, clean your windscreen with an Alcohol Wipe
making sure there is no dust, moisture, or oil on the desired mounting point of the
windscreen. This is very important for correct adhesion.
2. Remove the protective lm on the adhesive pad and with the open side of the slot
facing the driver’s side. Place the Windscreen Bracket in your desired placement,
ensuring that the open side of the mount is facing the driver’s side of the vehicle,
and allowing at least 4cm between the top of the bracket and the top of your
windscreen.
3. Firmly press and hold the windscreen bracket against your windscreen for 60
seconds to ensure that the adhesive sets.
4. Once the adhesive has set (allow 5 minutes), slide the barrel camera into the slot
by sliding the camera from right to left direction until it stops.
__________________________________________________________________________________________________________________
NOTE:
• It is recommended that the KPT-850 is mounted behind your rear view mirror so that it is not obstructing the
drivers view.
• Once installed it is not recommended that the Windshield Bracket is removed as it is not possible to re-install
once it has been removed.
__________________________________________________________________________________________________________________
2.5 INSTALLING YOUR GPS RECEIVER
Using your preferred method, it is recommended that
you run the power cable around your windscreen
under your vehicles interior trim toward the driver’s
side. The 12V power cable is supplied with an in-
line GPS receiver that must be mounted onto the
windscreen with the supplied adhesive.
For best GPS reception, the GPS module should be placed as far away as possible
from the barrel camera.
__________________________________________________________________________________________________________________
NOTE:
• It is advised that you run the cable beneath head liner trim and under the dash ensuring that the cable does not
interfere with the operation of your vehicle.
__________________________________________________________________________________________________________________
2.6 CONNECTING POWER TO YOUR KPT-850
Your KPT-850 must be connected to a constant supply of power
from your vehicles electrical system via the 12V cigarette or
accessory port for continuous operation. Your KPT-850 does not
have an internal battery and will turn off when disconnected from
its power source.
Your unit is supplied with a dual USB output 12VDC charger that
will supply power to your unit, and offers a spare USB output to
connect to other USB powered devices such as a mobile phone.
1. To connect power to your KPT-850, plug the Dual Socket USB
Car Charger into your vehicles accessory power socket (cigarette
lighter port), and then connect the USB end of the supplied cable
to the USB port labelled 2.4A (The spare 1A socket can be used to
charge any of your 1A USB devices capable of taking a 1A charge).
2. Connect the USB micro end of the cable into your KPT-850 Barrel
camera.
2.7 REMOVING THE KPT-850 FROM THE WINDSHIELD MOUNT
To remove your KPT-850 from your car, simply slide the unit horizontally
from left to right.
2.8 POWERING UP THE KPT-850
1. The KPT-850 will power up and begin recording automatically once it has been
correctly installed (micro SD card must be installed), and you start your vehicle.
2. A blinking RED LED (after approx. 30 seconds from start-up) indicates
recording.
8
3. There are no buttons to press on the device so recording will only stop when the
vehicle is turned off or if the micro USB cable is disconnected from the unit.
__________________________________________________________________________________________________________________
NOTE:
Recording will stop whilst playing back footage from your KPT-850 to your app.
__________________________________________________________________________________________________________________
2.8.1 MANUALLY POWERING OFF THE KPT-850
There are no buttons to press on the device so recording will only stop when the
vehicle is turned off or if the micro USB cable is disconnected from the unit.
2.9 SMARTPHONE CONNECTION
Connecting your smartphone to your KPT-850 allows you to transfer video les to
your Smartphone and view your videos alongside your GPS footage.
2.9.1 DOWNLOADING THE APP
To wirelessly connect your smartphone to the KPT-850 you
will need to download the Kapture KPT-850 App. This can
be found by searching “KPT-850” on the Apple App Store on
iPhones or the Google Play Store on Samsung Galaxy Android
smartphones.
__________________________________________________________________________________________________________________
NOTE:
1. The KPT-850 is compatible with iPhones using iOS 8.0 and above.
2. The KPT-850 is compatible with Samsung Galaxy models using Android 4.1 and above.
__________________________________________________________________________________________________________________
2.9.2 WIFI CONNECTION
Once you have downloaded the KPT-850 app onto your smartphone, you will be
ready to connect to your KPT-850 via a WiFi connection. A WiFi connection from
your barrel camera and your mobile phone must be established rst to access
media from the barrel camera.
1. To connect to your KPT-850, power up the device with it plugged into your
vehicles power and your vehicles accessory power on.
2. Wait for approx. 30 seconds for the KPT-850 to start up and go into your
smartphones WiFi setting.
3. Once in your phones WiFi settings, connect to the KPT-850’s WiFi SSID titled
KPT850-xxxxx (Refer to FIG 2.9.2)
4. Use the password 12345678 then press connect. (Refer to FIG 2.9.3)
5. Wait for the phone to connect to the Barrel camera, a successful connection is
established when connected is seen on the KPT850-xxxxx’s SSID (Refer to FIG
2.9.4)
6. Once connected, open the KPT-850 App. (Refer to page 9 - FIG 3 - point 1)
FIG 2.9.2 FIG 2.9.3 FIG 2.9.4
850

9
3. USING THE KPT-850 APP
Once you open the KPT-850 App (ensuring your phone is connected to the camera via
WiFi) the front page will give you access to options available such as live view, GPS data,
Album, and app details. (Refer to FIG 3)
The below app screens are the most common and will be referenced throughout this manual. Please
ensure to familiarise yourself with their functions as listed below.
FIG 3 FIG 3.1
1Open KPT-850 - Shows the live view of
your KPT-850
1Flashing Red LED indicates recording status
2Main live view screen
2Trip - Journey information with GPS
information
3Microphone on/off status
4Landscape view
3Album - Photos & Videos downloaded
onto phone
5Settings menu
6Instant image
4Me - FAQ and App information 7Access to media on barrel camera
8Return to main menu
3.1 LIVE VIEW SCREEN
The live view screen is used to
see the live feed from the KPT-
850 (Refer to FIG 3.1 - point 2) and
is also where barrel camera
media content can be found.
(Refer to FIG 3.1 - point 7)
3.2 FORMATTING YOUR MEMORY
CARD
To format your card, follow the
following instructions:
1. Open the KPT-850 app (Refer
to FIG 3 above - point 1)
2. Press the cog wheel button
to access the app settings
(Refer to FIG 3.1 - point 5).
3. Scroll towards the bottom of the menu until “Manage the
SD card” option is found and select it (Refer to FIG 3.2).
4. Memory card details are displayed with the Format option
listed at the bottom. (Refer to FIG 3.3)
5. Format by selecting Format option, conrm selection (Refer to FIG 3.4)
FIG 3.1FIG 3
FIG 3.2 FIG 3.3
FIG 3.4

10
3.3 ALBUM (STORED ON KPT-850)
Your recorded videos and photos can be accessed via
your smart device while connected to the KPT-850 via
WiFi. Once connected, open the KPT-850 app, press the
Open KPT-850 menu and then press the folder icon
(Refet to page 9 FIG 3.1 point 7). This menu will allow
you to view the recorded les stored on the Micro SD
Card inserted in the KPT-850.
3.4 TRANSFERRING VIDEOS TO YOUR SMART DEVICE
Videos recorded on your KPT-850 can be transferred to
your mobile phone so you can view them without being
connected to your KPT-850. To Transfer les please
follow the instructions below.
1. In the KPT-850 App press Open KPT-850 from the
main app menu. (Refer to page 9 - FIG 3)
2. Press the folder icon on the live screen page
(please note that recording will STOP whilst in any other
menu other than live screen) (Refer to page 9 - FIG 3.1)
3. Press the select button in the top right hand
corner (Refer to FIG 3.5)
4. Select the video/s you would like to transfer to
your smart device. Selected videos will show a
white tick next to the selected video/s. (Refer to
FIG 3.6 - point 1)
5. Press the download button (Refer to FIG 3.6 - point
2) at the top left hand corner bottom centre of the screen.
6. Your les will now begin to download. (Large les will take a few minutes to download.)
7. Once downloaded your les can be found & played back from the Album menu.
(Refer to page 9 - FIG 3 point 3)
3.5 PLAYBACK (FROM KPT-850)
When playing back your video les the GPS mapping
will be displayed underneath the playing video.
Please note that the GPS mapping requires GPS connection
at the time of recording and data connection at the time of
playback (to download mapping).
To playback your videos please follow the instructions below.
1. In the KPT-850 App press the Open KPT-850 on
the main app screen. (Refer to page 9 - FIG 3)
2. Press the folder icon in the bottom left of the
screen. (Refer to page 9 - FIG 3.1 - point 7) At this
stage recording will pause.
3. Press the video thumbnail of the video to be
played back. (Refer FIG 3.7)
4. Press the play button, your video will start playing.
(Refer to FIG 3.8 - point 1)
5. To enter full screen playback, press the landscape
orientation button. (Refer to FIG 3.8 - point 2)
6. To capture a specic moment in the video, press
the camera icon. Images are stored in your Album.
(Refer to FIG 3.8 - point 3)
7. If you wish to download the video showing to your
phone, press the download button (Refer to FIG 3.8 -
point 4)
__________________________________________________________________________________________________________________
NOTE:
• The GPS mapping requires GPS connection at the time of recording and data connection at the time of playback
(to download mapping).
FIG 3.5
FIG 3.6
FIG 3.7
FIG 3.8

11
• Android users, please make sure the Smart Network Switch or WiFi Scanning setting on your phone is turned off.
• For mapping to appear while connected to the KPT-850’s WiFi connection, the WiFi assist function must be
activated on your smartphone.
• If your smart device does not have WiFi assist, please transfer your video file to your smart device using the
instructions noted in the Transferring videos to your smart device section (Refer section 3.3 - page 10) of this
manual. Once transferred, connect to a WiFi or 4G internet connection. Once connected to the internet, playing
back the transferred video will be accompanied by the GPS mapping data.
• GPS mapping will use a small amount of data to download mapping imagery.
__________________________________________________________________________________________________________________
3.6 DELETING VIDEOS (FROM SMART DEVICE)
Videos can be deleted
on your mobile device
by following the
instructions below.
1. In the KPT-850 App
select the Album
option from the
main app menu.
(Refer to page 9 - FIG
3 - point 3)
2. Select whether
you would like to
delete photos (refer
to FIG 3.9 - point 1) or
videos (refer to FIG
3.9 - point 2) from the
Album.
3. Press the select
(refer to FIG 3.9 - point 3) button from the top right hand corner.
4. Select the videos or photos that you would like to delete. Selected videos or photos
will show a white tick in the left corner of the thumbnail. (Refer to FIG 4 - point 1)
5. Press the delete button at the bottom left of the screen. (Refer to FIG 4 - point 2)
4. SETTINGS
Settings of the App and the KPT-850 can be changed through the settings menu. The
Settings menu can be accessed by pressing the cog icon in the bottom right corner of
the live screen of the App. Once in the settings menu the KPT-850 settings can be edited
using the ‘Device Setting’ section.
M-F4592 Mac address of the device
VOICE PROMPT Turn vocal prompts on/off
CONNECTION VERIFICATION Control what smart devices can connect to your KPT-850’s WiFi connection
PHOTOGRAPH WITH VIDEO Takes a short video after a picture is taken lasting 5 seconds at start and 5
seconds at the end
SOUND RECORDING Record video with or without audio
GESTURE PHOTOGRAPHY Gesture Activated Snapshot settings
LANGUAGE English or Chinese
RESOLUTION Records in 1080P or 720P
G-SENSOR Adjust the built in G Sensor sensitivity
TIME SYNCHRONIZATION Synchronize the time on your KPT-850 with the time on your smart device.
VOLUME Adjusts volume of barrel camera
CARD STORAGE MANAGEMENT Overview of memory card and memory left, used, etc. Format option is
located in this menu
VERSION CHECK Checks to ensure the latest App version is installed
FIG 4FIG 3.9

12
5. FEATURES
5.1 GPS
GPS records your location and speed and saves this information to your video les as
it is being recorded. This data is then played back via the KPT-850 Smartphone App
showing your mapped location and speed at the time of recording.
5.2 WIFI
WiFi is used to connect your KPT-850 to your smart device. By using the KPT-850 App,
you can edit setting on the camera, playback videos and GPS recording, and transfer
video.
5.3 GESTURE ACTIVATED SNAPSHOT
The Gesture Activated Snapshot feature at the front of the camera will trigger a
snapshot and when you move your hand in front of the sensor. Files are saved in your
Album. (These clips are saved away from the normal loop recording les and will not be
recorded over until manually deleted.) The Gesture Activated Snapshot settings can be
adjusted via the Gesture Photography setting in the KPT-850 App. To access Gesture
Activated Snapshot go to Open KPT-850>Tool Button>Gesture Photography
5.4 G-SENSOR
The built-in G Sensor detects impacts on your vehicle and
saves the video that is being recorded at the time of impact
to the EVENT section in the KPT-850 Video library headings.
These les then will not be overwritten until they have been
manually deleted. The G Sensor sensitivity can be adjusted
using the G Sensor setting in the KPT-850 App. To acccess
G-Sensor Open KPT-850 > Tool button > G-Sensor (Refer to page 11).
5.5 TIME STAMP
This is important as some insurance companies will not honor footage as evidence
unless it is correctly date stamped. The KPT-850 will stamp your recorded footage with
the current time and date. The time and date of the KPT-850 can be synchronized via
the KPT-850 App which allows for syncing with the date and time of your mobile phone.
To access press Open KPT-850 > Tool button > Time Synchronization.
6. VIEWING MEDIA ON YOUR PC
To access your videos, you will need to eject the Micro SD card (not included) from your
KPT-850 and connect it to your computer using a SD card converter (not included) if your
computer has a SD card slot, or via a USB Micro SD card reader (not included) if your
computer does not have a SD card slot.
The Micro SD card should appear as a Removable Storage Device on your computer
after being connected. Most standard video players, like Windows Media Player and
Quicktime will be able to play back videos.
7. SPECIFICATIONS
MAX VIDEO RESOLUTION 1080P@30fps mp4
AUDIO INFORMATION 8KHz, 2 channels, AAC
LENS 6-glasses 152° Field of view, F1.8
STORAGE MEDIA Class 10 Micro SD Card (TF) up to 64GB
WI-FI 2.4GHz, 802.11b/g/n
OPERATING TEMPERATURE -20°C ~ 70°C
G-SENSOR Three-axis accelerometer
OPERATING VOLTAGE 5VDC@1A
INTERFACE Micro USB
INTERNAL POWER METHOD Super Capacitor
MICROPHONE Yes
WEIGHT 50g
DIMENSIONS 100mm x 35mm x 47mm
FIG 4.1

13
8. ABOUT THIS GUIDE
Thecontent in this document is for information purpose and is subject to change
without prior notice. We made every effort to ensure that this User Guide is accurate and
complete. However, no liability is assumed for any errors and omissions that may have
occurred. The manufacturer reserves the right to change the technical specications
without prior notice.
9. WARRANTY TERMS & CONDITIONS
Our goods come with guarantees that cannot be excluded under the Australian & New
Zealand Consumer Law. You are entitled to a replacement or refund for a major failure
and for compensation for any other reasonably foreseeable loss or damage. You are
also entitled to have the goods repaired or replaced if the goods fail to be of acceptable
quality and the failure does not amount to a major failure.
This warranty is provided in addition to your rights under the Australian & New Zealand
Consumer Law.
Directed Electronics warrants that this product is free from defects in material and
workmanship for a period of 12 months from the date of purchase or for the period
stated on the packaging. This warranty is only valid where you have used the product in
accordance with any recommendations or instructions provided by Directed Electronics.
This warranty excludes defects resulting from alterations of the product, accident,
misuse, abuse or neglect.
In order to claim the warranty, you must return the product to the retailer from which it
was purchased or if that retailer is part of a National network, a store within that chain,
along with satisfactory proof of purchase. The retailer will then return the goods to
Directed Electronics. Directed Electronics will repair, replace or refurbish the product at
its discretion. The retailer will contact you when the product is ready for collection. All
costs involved in claiming this warranty, including the cost of the retailer sending the
product to Directed Electronics, will be borne by you.
Directed Electronics Address: 44 Translink Drive, Keilor Park Victoria Australia 3042
Ph: +61 03 8331 4800

14

15

www.directed.com.au
www.directed.co.nz
www.kapturecam.com.au
www.kapturecam.co.nz
© Kapture 2017 V1.0
YOUR EYEWITNESS ON THE ROAD™
This manual suits for next models
1
Table of contents
Other Kapture Dashcam manuals

Kapture
Kapture KPT-2200 User manual

Kapture
Kapture KPT-890 User manual

Kapture
Kapture KPT 860 User manual

Kapture
Kapture KPT-200 User manual

Kapture
Kapture KPT-920 User manual

Kapture
Kapture KPT-250 User manual

Kapture
Kapture KPT-590GPS User manual

Kapture
Kapture KPT-590 User manual

Kapture
Kapture KPT-942 User manual

Kapture
Kapture KPT-1240 User manual