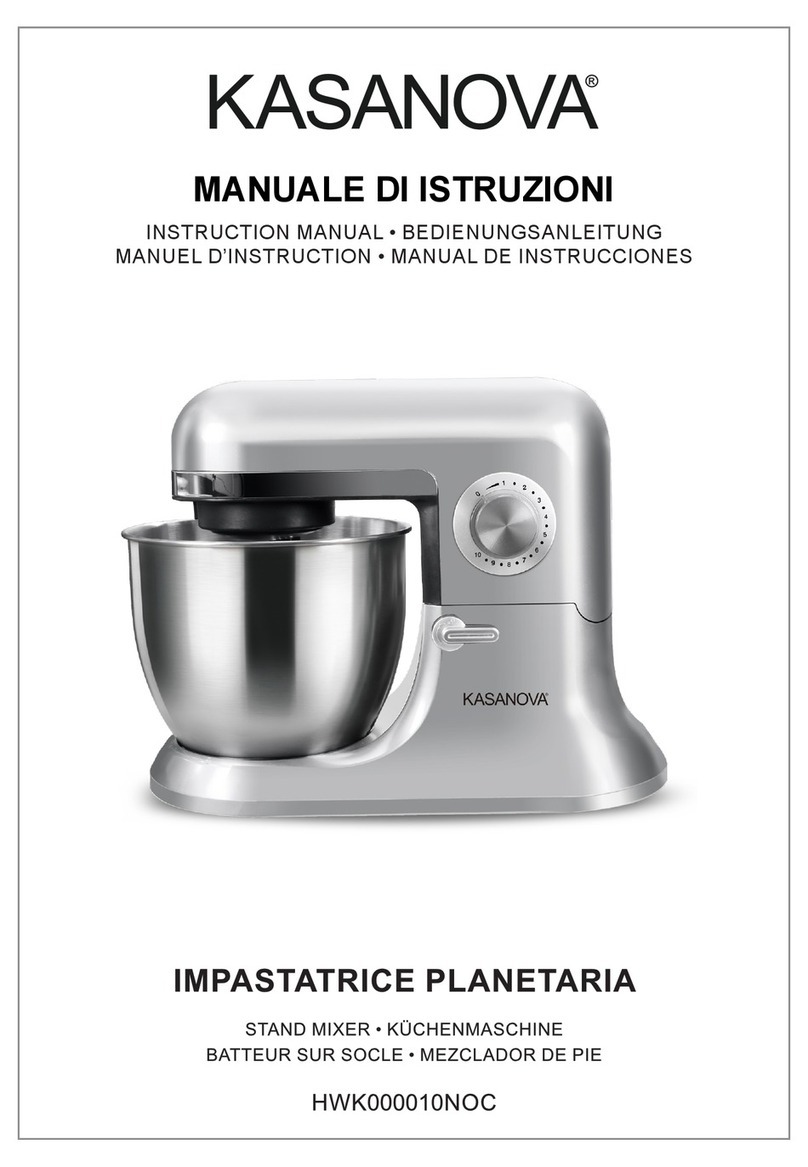
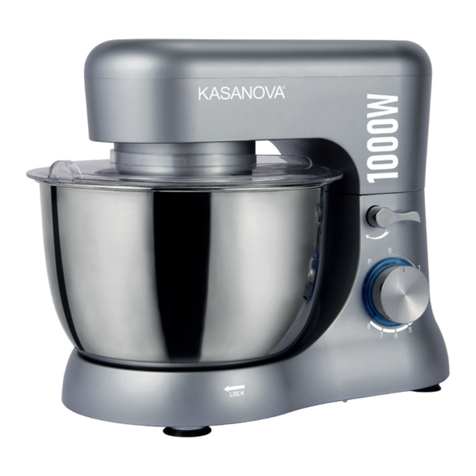
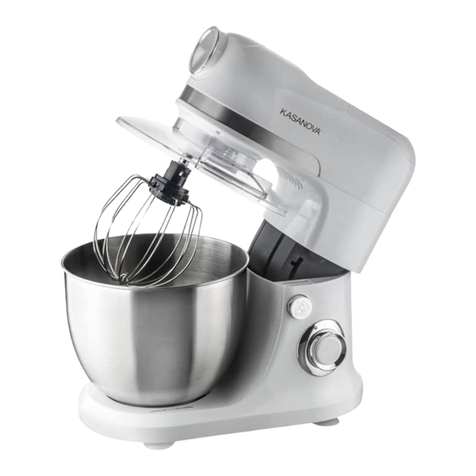
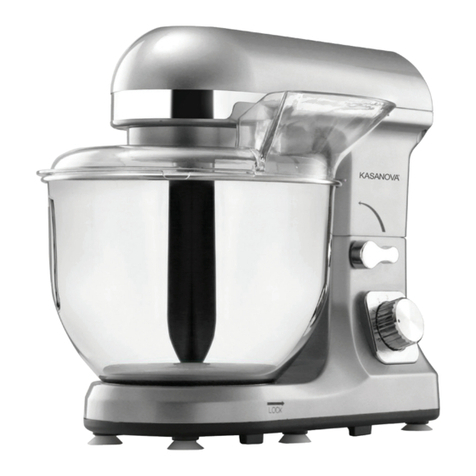
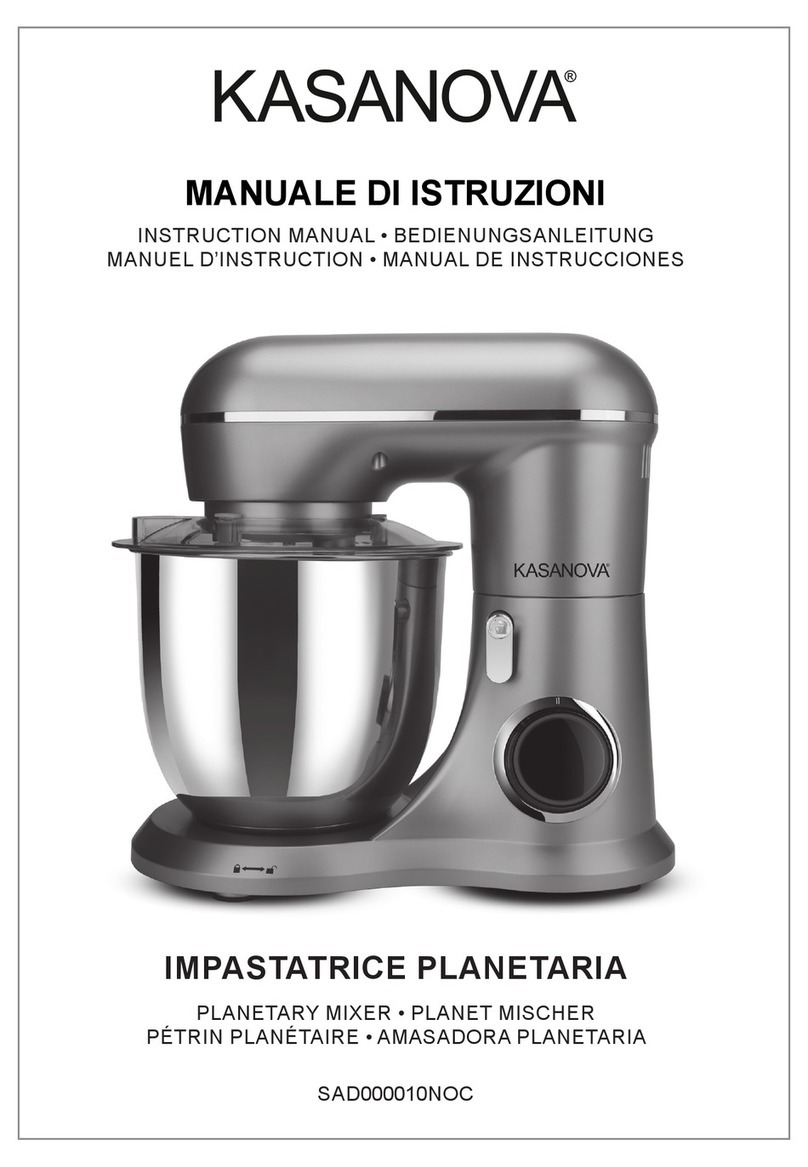
Kasanova IMP000005NOC User manual

IMPASTATORE DIGITALE
DIGITAL DOUGH MIXER • ROBOT PÂTISSIER NUMÉRIQUE
AMASADORA DIGITAL • DIGITAL KNETMASCHINE
INSTRUCTION MANUAL • BEDIENUNGSANLEITUNG
MANUEL D’INSTRUCTION • MANUAL DE INSTRUCCIONES
MANUALE DI ISTRUZIONI
IMP000005NOC

2IMPASTATORE DIGITALE
Leggere attentamente le istruzioni prima dell’uso e conservarle per eventuali
consultazioni future. Cedere il manuale di istruzioni a qualsiasi altra persona che
potrebbe utilizzare l’apparecchio in un secondo momento.
AVVERTENZE DI SICUREZZA
Durante l’uso di apparecchi elettronici, è importante seguire basilari precauzioni per la
sicurezza, incluse le seguenti:
• Leggere attentamente il manuale prima dell’uso.
• Prima di collegare l’apparecchio, vericare che la tensione riportata sull’apparecchio
corrisponda alla tensione di rete disponibile.
• Non lasciare mai l’apparecchio in luoghi raggiungibili da bambini senza supervisione.
• L’apparecchio è solo per uso domestico.
• Scollegare l’apparecchio quando non è in uso e prima della pulizia.
• Non usare l’apparecchio se il cavo o la spina sono danneggiati o se l’elettrodomestico
o parti di esso sono cadute, non funzionano correttamente o se sono danneggiare.
Contattare l’assistenza o altro personale tecnico qualicato.
• Assicurarsi che l’interruttore di accensione sia posizionato su OFF prima di collegare
l’apparecchio e prima di staccare la spina.
• L’uso di accessori non raccomandati o non venduti dal fornitore può provocare il
rischio di incendio, scosse elettriche o lesioni.
• Non posizionare l’apparecchio vicino a fornelli o piani cottura elettrici accesi,
all’interno di un forno o vicino ad altre fonti di calore.
• Tenere sempre il cavo di alimentazione lontano dai componenti caldi dell’apparecchio,
da fonti di calore o da spigoli.
• Prima di utilizzare l’apparecchio per la prima volta, pulire i vari accessori
accuratamente.
• Per evitare il rischio di shock elettrico, non immergere l’impastatore in acqua o
qualsiasi altro liquido.
• Non toccare le parti in movimento. Non avvicinare parti del corpo quali capelli e mani,
vestiti, così come spatole o altri utensili diversi dalla frusta durante l’uso per ridurre il
rischio di lesioni o persone o danni all’impastatore stesso.
• Non far funzionare l’apparecchio per più di 5 minuti consecutivi quando l’impastatore
sta miscelando alle velocità dalla 1 alla 5. Non superare 1 minuto di funzionamento
continuo quando l’apparecchio miscela a velocità 6 o in modalità PULSE. Spegnere
l’apparecchio e aspettare un minuto prima di farlo ripartire.
• Spegnere sempre l’apparecchio e scollegarlo dalla presa di corrente quando si
cambiano gli accessori o ci si avvicina a parti in movimento.
• Non usare la frusta a lo per miscelare ingredienti duri.
• Per un uso normale dell’impastatore, un solo accessorio può essere in funzione, gli
altri non possono funzionare allo stesso tempo.
• Non riempire il recipiente in modo eccessivo.
• Scollegare l’apparecchio senza tirare il cavo, ma aerrando la spina.
• Utilizzare l’apparecchio solo per l’uso domestico per cui è stato realizzato. È
responsabilità dell’utente qualsiasi malfunzionamento dovuto a operazioni non riportate
in questo manuale.
3
IMPASTATORE DIGITALE
• Prestare la massima attenzione quando si maneggiano delle lame molto alate,
quando si svuota la ciotola o durante la pulizia. Prestare la massima attenzione quando
si mescolano cibi caldi o liquidi.
• Questo apparecchio non è destinato all’uso da parte di persone (inclusi i bambini)
con ridotte capacità siche, sensoriali o mentali, o con mancanza di esperienza e
conoscenza, a meno che non siano sorvegliate o non ricevano istruzioni relative all’uso
sicuro dell’apparecchio da parte di una persona responsabile della loro sicurezza. I
bambini vanno supervisionati anché non giochino con l’apparecchio.
• Le operazioni di pulizia e di manutenzione non possono essere eettuate da bambini
di età inferiore a 8 anni se non sono sorvegliati.
• Tenere l’apparecchio e il relativo cavo fuori dalla portata dei bambini.
• Questo apparecchio è destinato all’uso in applicazioni domestiche e simili quali
zone dedicate alla cucina all’interno di negozi, uci e altri ambienti di lavoro. Può
essere utilizzato dagli ospiti di alberghi, motel, bed and breakfast e in altri ambienti
residenziali.
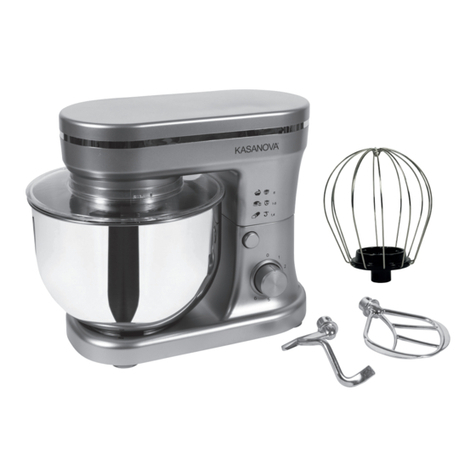
DESCRIZIONE DELLE PARTI
1. Interruttore/Regolatore di velocità
2. Leva di sblocco
3. Braccio orientabile
4. Pannello di controllo LED
5. Gancio per impastare (alluminio)
6. Frusta a foglia (alluminio)
7. Frusta a lo (acciaio inox)
8. Ciotola per impastare 7L (acciaio inox)
ISTRUZIONI PER L’USO
1. Prima dell’utilizzo, lavare tutti i componenti come descritto nel
paragrafo “Pulizia e cura dell’impastatrice”.
2. Posizionare l’apparecchio su una supercie piana ed asciutta
(FIG 1).
3. Premere la leva di sblocco e sollevare il braccio orientabile no
a bloccarlo in posizione verticale (FIG 2).
4. Montare la ciotola per impastare sulla base e ruotarla no a
quando non si blocca in posizione. Inserire gli accessori (FIG 3).
5. Per inserire l’accessorio appropriato (gancio per impastare,
frusta a foglia, frusta a lo), incastrarlo nel perno spingendolo
verso l’alto, ruotarlo in senso orario nché non si blocca in

4IMPASTATORE DIGITALE
posizione (FIG 4 e FIG 5).
6. Premere la leva di sblocco e abbassare il braccio orientabile
no a bloccarlo in posizione.
11. RISPARMIO ENERGETICO – solo luce rossa
Dopo 3 minuti di inattività in qualsiasi modalità, l’apparecchio entra in modalità
risparmio energetico automaticamente. Tutte le luci sono spente, ad eccezione del
tasto POWER che rimane rosso.
7. Inserire la spina nella presa di corrente, accendere l’impastatrice girando
l’interruttore (FIG 6).
8. Durante l’utilizzo si possono aggiungere ingredienti all’interno del recipiente.
9. Spegnere l’apparecchio girando l’interruttore no alla posizione “0”.
10. ACCENSIONE
Si accendono tutte le luci sul pannello per 3 secondi (tasto POWER colore rosso, gli
altri due colore blu). L’apparecchio entra in modalità risparmio energetico dopo un
segnale acustico di 1 secondo.
12. STAND BY – luce rossa lampeggiante, pannello acceso
In modalità risparmio energetico premere il tasto POWER: il tasto diventa di colore
blu e lampeggia, gli altri tasti sono spenti. Il pannello si accende: l’icona del tempo
lampeggia e mostra “00:00”, l’icona della velocità mostra “0”. Successivamente
l’apparecchio torna in modalità stand by.

5
IMPASTATORE DIGITALE
13. MODALITA’ DEFINITA DAL CLIENTE – tutte le luci accese
a. Premere i tasti +/- per aumentare o diminuire il tempo di lavorazione. Girare la
manopola di regolazione della velocità in senso orario: il tasto POWER diventa di
colore blu, gli altri tasti si accendono, l’icona del tempo si accende e mostra il tempo
impostato che diminuisce secondo per secondo.
Alla ne della lavorazione l’apparecchio emette un suono acustico per tre volte: il tasto
POWER diventa di colore blu e lampeggia, gli altri tasti sono spenti e l’apparecchio
entra in modalità stand by
b. In modalità stand by e con il tempo di lavorazione non impostato, girare
la manopola di regolazione della velocità in senso orario per impostare la
velocità desiderata. L’apparecchio comincia la lavorazione: il tasto POWER
diventa di colore blu, i tasti +/- sono accesi, l’icona del tempo è accesa e
mostra il tempo che aumenta secondo per secondo no ad arrivare a un
massimo di 10 minuti, dopodiché l’apparecchio arresta la lavorazione in
automatico.
Alla ne della lavorazione l’apparecchio emette un suono acustico per tre
volte: il tasto POWER diventa di colore blu e lampeggia, gli altri tasti sono
spenti e l’apparecchio entra in modalità stand by.
14. In modalità denita dal cliente è possibile modicare il tempo di
lavorazione, se questo è impostato su conto alla rovescia. Il tempo
visualizzato sullo schermo aumenta o diminuisce dopo ogni clic.
Ruotare la manopola di regolazione della velocità in senso orario per
aumentare la velocità, in senso antiorario per diminuirla.

6IMPASTATORE DIGITALE
15. L’apparecchio non si accende quando il braccio orientabile è in posizione
verticale.
16. L’apparecchio smette di funzionare quando viene impostata la velocità “0”.
17. L’apparecchio smette di funzionare automaticamente quando viene
premuto il tasto POWER durante la lavorazione. Le icone del tempo e della
velocità lampeggiano: il tempo visualizzato è quello rimasto prima di aver
premuto il tasto POWER, mentre la velocità è “0”. L’apparecchio riprende la
lavorazione se si preme nuovamente il tasto POWER.
18. MODALITA’ TURBO
Dopo aver ruotato in senso antiorario la manopola di regolazione della velocità
dalla posizione “0” alla posizione “P”, il tempo sullo schermo comincia ad
aumentare secondo per secondo, l’icona della velocità è accesa e mostra “P”,
si accende l’icona gialla di un razzo.
Quando si rilascia la manopola di regolazione della velocità, l’icona del tempo
lampeggia e mostra “00:00”, l’icona della velocità lampeggia e mostra “0”.
Successivamente l’apparecchio entra automaticamente in modalità stand by.
Per un nuovo ciclo di lavorazione, spostare nuovamente la manopola di
regolazione della velocità su 0 e reimpostare la velocità desiderata per
ricominciare a impastare.
ATTENZIONE!
• Quando si lavorano ingredienti duri, come impasti per il pane, è normale che
il braccio orientabile si sposti.
• Utilizzare solo la frusta a lo per montare uova o panna.
• Lavare gli accessori in alluminio solo a mano.
SUGGERIMENTI:
• Se necessario spegnere l’apparecchio e raschiare la ciotola con una spatola.
• Per montare le uova è meglio utilizzare uova a temperatura ambiente.
• Prima di montare gli albumi, assicurarsi che la frusta a lo o la ciotola per
impastare non siano unti o sporchi di tuorlo.

7
IMPASTATORE DIGITALE
GUIDA ALL’USO DEGLI ACCESSORI
Accessori Ingredienti Max Tempo Velocità
Frusta a lo
Panna 250 ml 10 min 5-6
Uova 12 pz 3 min 6
Gancio per
impastare
Farina 1350 g
5 min 1-2
Sale 15 g
Lievito 20 g
Zucchero 10 g
Acqua 936 g
Strutto 20 g
Frusta a foglia
Farina 100 g
5 min 1-4
Zucchero di canna 100 g
Margarina 100 g
Uova 2 pz
GUIDA PER IMPOSTARE LA VELOCITÀ
Velocità Utilizzo
1Velocità iniziale per ingredienti come farina, burro e patate
2 ideale per mescolare ingredienti liquidi o condimenti per le insalate
3ideale per mescolare impasti per torte, biscotti o impasti semplici e rapidi
4ideale per montare il burro con lo zucchero, mescolare impasti per cara-
melle o dolci, etc
5ideale per sbattere o montare le uova, panna, glasse, etc
6ideale per sbattere o montare le uova, panna, glasse, etc ma a una velo-
cità superiore e in piccole quantità
PULSE ideale per un massimo controllo ad alta velocità

8IMPASTATORE DIGITALE
ATTENZIONE!
• Non superare mai le capacità massime indicate, altrimenti si sovraccarica
l’apparecchio.
• Quando si lavorano ingredienti duri come impasti per il pane, è normale che il braccio
orientabile si muova.
• Per amalgamare meglio gli ingredienti, spegnere la macchina e riportare il composto
al centro della ciotola aiutandosi con una spatola in silicone.
• Gli ingredienti si mescolano meglio se si versano prima i liquidi.
• Di tanto in tanto fermare l’apparecchio e pulire il gancio per impastare dall’impasto.
• Partite di farina diverse richiedono quantità di liquido notevolmente diverse e la
viscosità dell’impasto può avere eetti marcati sul carico imposto all’apparecchio. Si
consiglia di tenere l’apparecchio sotto controllo mentre si prepara l’impasto, questa
operazione dovrebbe richiedere non più di 5 minuti
PULIZIA E CURA DELL’IMPASTATRICE
1. Prima delle operazioni di pulizia, spegnere l’apparecchio e togliere la spina dalla
presa elettrica.
2. Rimuovere tutti gli accessori e la ciotola dall’unità.
3. Lavare a mano con poco sapone tutti gli accessori e la ciotola, NON introdurli in
lavastoviglie.
4. Pulire il corpo dell’apparecchio con un panno umido e asciugare subito. Non
immergere l’unità del motore in alcun tipo di liquido.
5. Per la pulizia, non usare detergenti aggressivi o prodotti abrasivi (come pagliette o
spazzole di metallo).
6. Pulire gli accessori immediatamente dopo l’uso, per evitare lo sviluppo dei batteri.
7. Riporre l’apparecchio in un ambiente fresco e asciutto.
SPECIFICHE TECNICHE
Potenza massima 1500W
Alimentazione 220-240V~, 50/60Hz
6 Velocità + funzione Pulse
Ciotola in acciaio inox da 7,0l (max 1,35kg di farina)
Display LED con timer
3 utensili di miscelazione ed impasto non lavabili in lavastoviglie
Piedini antiscivolo
Prodotto in Cina
CONSERVARE QUESTE ISTRUZIONI. ARTICOLO SOLO PER USO DOMESTICO.
RIPARAZIONI:
Attenzione: l’apparecchio può essere riparato solo da specialisti autorizzati, perché le
riparazioni non autorizzate possono causare danni.
In caso di guasto, contattare il negozio in cui è stato acquistato il prodotto.

9
IMPASTATORE DIGITALE
Questo simbolo indica che questo prodotto non deve essere smaltito con altri riuti domestici in ogni parte dell’UE. Per prevenire
un possibile danno all’ambiente o alla salute umana dal non controllato smaltimento dei riuti, riciclate responsabilmente per
promuovere il riutilizzo sostenibile delle risorse materiali. Per restituire il vostro prodotto usato, chiediamo di utilizzare il sistema
di restituzione e raccolta oppure contattare il negozio di vendita al dettaglio dove avete acquistato il prodotto. Gli addetti possono
prendere il prodotto per un sicuro riciclaggio.
Apparecchio conforme alle direttive
LVD – EMC – RoHS
L’azienda si riserva il diritto di apportare piccole modiche o cambiamenti nei colori.

10 IMPASTATORE DIGITALE
Please carefully read the instruction manual before rst use and retain for future
reference. Pass the manual on to whomsoever might acquire the appliance at a later
date.
SAFETY ADVICE
When using your stand mixer, basic safety precautions should always be followed:
• Carefully read the instructions before using your appliance.
• Always operate your stand mixer from a power source of the same voltage and
frequency rating as indicated on the rating label.
• Never leave the appliance unattended during operation.
• Only for domestic use.
• Always disconnect the appliance when not in use and before cleaning.
• Do not operate the mixer with a damaged cord or plug or after the appliance
malfunctions or is dropped or damaged in any manner. If the mixer becomes damaged,
please contact after service or technician for help.
• Make sure that the switch of the stand mixer is turned to OFF before plugging and
unplugging cord from the outlet.
• Do not use or replace accessories of the stand mixer other than the ones originally
provided.
• Do not place the mixer above or near lit hob burners or electric rings, inside an oven
or near other heat sources.
• Always keep the cord away from hot components of the appliance, heat sources or
sharp edges.
• Before using the appliance for the rst time, clean thoroughly all attachments.
• To reduce the risk of electric shock, do not immerse or expose the stand mixer to rain,
moisture, or any other liquid.
• Avoid touching moving parts. Keep hands, hair, clothing, as well as spatulas and other
utensils away from beaters during operation to reduce the risk of injury to persons and/
or damage to the mixer.
• Do not operate the stand mixer for 5 minutes at a stretch when using 1-5 mixer
controls. Do not exceed 1 minute operating time while mixing at level 6 or pulse speed.
Turn OFF and allow unit to rest for a minute before turning ON again.
• Switch o the appliance and disconnect from supply before changing accessories or
approaching parts that move during use.
• Do not use the wire whisk to mix harsh ingredients.
• In normal work, the mixer can only have one attachment working. Other attachments
cannot work at the same time.
• Do not overll the mixing bowl.
• Always unplug the appliance without pulling the cable.
• Use the appliance only for its intended use. Our company does not bear any
responsibility with respect to breakdowns or damages caused by using the product in a
manner other than described in the manual.
• Care shall be taken when handling the sharp cutting blades, emptying the bowl and
during cleaning. Always keep maximum attention when mixing hot food or liquid.
• This appliance is not intended for use by persons (including children aged less than

11
IMPASTATORE DIGITALE
8 years) with reduced physical, sensory, or mental capabilities, or lack of experience
and knowledge, unless they have been given supervision or instruction concerning
the use of the appliance in a safe way by a person responsible for their safety or they
understand the hazards involved. Children should be supervised to ensure that they do
not play with the appliance.
• Cleaning and user maintenance shall not be made by children unless they are aged
from 8 years and above and supervised.
• Keep the appliance and its cord out of reach of children aged less than 8 years.
• This appliance is intended for normal household use. It can be used in environments
such as sta kitchens of shops, oces, farms or other work environments. It is
intended to be used by clients in hotels, motels, bed and breakfasts and other
residential environments.
PARTS DESCRIPTION
1. Switch/Speed control
2. Lock lever
3. Mixer head
4. LED control panel
5. Dough hook (aluminium)
6. Flat beater (aluminium)
7. Wire whisk (stainless steel)
8. 7L mixing bowl (stainless steel)
ISTRUZIONI PER L’USO
1. Before rst use, wash all attachments as described in
section “Cleaning and maintenance”.
2. Place the appliance on a at and dry surface (FIG 1).
3. Press the lock lever and tilt the mixer head until it locks into
place (FIG 2).
4. Fix the mixing bowl on the slot and rotate until it locks into
place. Insert the attachments. (FIG 3).
5. Choose the right attachment (dough hook, at beater or
wire whisk), push it into the shaft then rotate clockwise until it
locks into place (FIG 4 and FIG 5).
6. Push the lock lever down and turn the head down until it
locks into place.
7. Plug in the appliance, turn the switch to light up the
appliance (FIG 6).

12 IMPASTATORE DIGITALE
8. During preparation, you can add ingredients into the mixing bowl.
9. Turn the switch to “0” position to switch o the appliance.
11. POWER SAVING MODE – only one red light on
After 3 minutes of non-operation, the appliance turns automatically to power saving
mode. All lights are o, except for the POWER button that remains red.
10. POWER ON
All lights on the panel light up for 3 seconds (the POWER button is red, the rest is
blue). The appliance turns to power saving mode after a beep sounds for 1 second.
12. STAND BY MODE – one red light ashing, the control panel is on
In power saving mode, press the POWER button: the button turns blue and starts
ashing, the other lights are o. The control panel lights up: the icon of the time ashes
and displays “00:00”, while the icon of the speed is on and displays “0”. Later, the
appliance turns to standby mode.
13. USER-DEFINED MODE – all lights on
a. Press +/- buttons to increase or decrease the working time. Turn clockwise the
speed control knob: the POWER button is blue, the other lights are on, the icon of the
time turns on and displays the set time that decreases second by second.
Finally, at the end of working time, the appliance beeps for three times: the blue light of
the POWER button ashes, the rest of the buttons are o, and the appliance turns to
standby mode.

13
IMPASTATORE DIGITALE
b. In standby mode, with the working time not set, turn clockwise the speed control
knob to set working speed. The appliance starts working: the blue light of the POWER
button is on, the indicator lights of +/- are on, the icon of the time is on and displays the
time that increases second by second up to 10 minutes. Finally, the appliance stops
automatically working.
At the end of working time, the appliance beeps for three times: the blue light of the
POWER button ashes, the rest of lights are o and the appliance turns to standby
mode.
14. In user-dened mode, you can change the working time if it is set in counting down
condition. Meanwhile, the time displayed on the screen increases or decreases after
every press.
Turn clockwise the speed control switch to increase the speed, turn it counterclockwise
to decrease the speed.
15. The appliance does not work when the mixer head is tilted up.
16. The appliance stops working when the speed control switch is set to “0”.
17. The appliance stops working after press the POWER button during operation.
The icons of time and speed ash: the displayed time is the time when the appliance
stopped, while the speed displayed on the screen is “0”. The appliance resumes
working when pressing the POWER button.
18. TURBO MODE
After turning counterclockwise the speed control switch from 0 to P, the time displayed
on the screen starts increasing second by second, the icon of the speed is on and
displays “P”, the yellow icon of a rocket turns on.

14 IMPASTATORE DIGITALE
When releasing the speed control switch, the icon of the time ashes and displays
“00:00”, the icon of the speed ashes and displays “0”. Later, the appliance turns
automatically to standby mode.
At the end of one working mode, turn the speed control switch to 0 and set a new
working speed if you want to start a new working mode.
WARNING!
• When mixing harsh ingredients, such as bread doughs, it is normal that the
mixer head is not perfectly steady.
• Only use wire whisk to beat the eggs and whip the cream.
• Wash aluminium attachments only by hand.
TIPS:
• Switch o the appliance and scrape down the sides of the bowl as needed.
• To beat the eggs, it is better to use eggs to room temperature.
• Before beating the egg whites, keep the yolks separate from the whites. Any
residue of fat or yolk will prevent egg whites from beating up properly.
Accessory Ingredient Max Operating time Speed
Wire whisk
Cream 250 ml 10 min 5-6
Eggs 12 pz 3 min 6
Dough hook
Flour 1350 g
5 min 1-2
Salt 15 g
Yeast 20 g
Sugar 10 g
Water 936 g
Lard 20 g
Flat beater
Flour 100 g
5 min 1-4
Brown sugar 100 g
Margarine 100 g
Eggs 2 pz
ACCESSORY OPERATION GUIDE

15
IMPASTATORE DIGITALE
Speed Description
1Starting speed for bulk and dry ingredients such as our, butter and potatoes
2 for mixing liquid ingredients or salad dressings
3for mixing doughs for cakes, cookies and quick breads
4for creaming butter and sugar, beating uncooked candies, desserts, etc.
5for beating or whipping eggs, cooked icings, whipping cream, potatoes, etc.
6for beating or whipping eggs, cooked icings, at much higher speed – especially for mixtures
at small amounts
PULSE for high-speed controlled mixing cycle
SPEED GUIDE
WARNING!
• Never exceed the maximum capacities indicated in the manual, to avoid overloading
the appliance.
• When mixing harsh ingredients, such as bread doughs, it is normal that the mixer
head is not perfectly steady.
• To better mix ingredients, switch o the appliance and put the mixture in the middle of
the mixing bowl using a silicone spatula.
• First pour liquid ingredients for better mixing.
• Stop the device from time to time and clean the dough hook.
• Dierent brands and types of our absorb dierent amounts of water; the dough
viscosity can have a marked eect on the load of the appliance. We advise you to
keep an eye on the appliance during dough preparation. This operation should not take
longer than 5 minutes.
CLEANING AND MAINTENANCE
1. Before cleaning, switch o and unplug the appliance.
2. Remove all attachments and the mixing bowl from the unit.
3. Wash all attachments and mixing bowl only by hand with warm and soapy water.
They are not dishwasher safe.
4. Wipe motor housing using a soft and damp cloth. Never allow mixer motor to get
penetrated by water. Immediately dry the unit.
5. Do not use harsh cleaning agents or abrasive objects (e.g. scrubbing pads or metal
brushes) for cleaning.
6. Clean all attachments immediately after use, to avoid the development of bacteria.
7. Store the appliance in a cool and dry place.

16 IMPASTATORE DIGITALE
TECHNICAL INFORMATION
1500W maximum power
Power supply 220-240V~, 50/60Hz
6 speeds + Pulse function
7L stainless steel mixing bowl (max. 1.35 kg of our)
LED display with timer
3 mixing attachments: not dishwasher safe
Non-slip feet
Made in China
KEEP THESE INSTRUCTIONS. APPLIANCE INTENDED FOR DOMESTIC USE
ONLY.

17
IMPASTATORE DIGITALE
This marking indicates that this product should not be disposed with other household wastes throughout the EU. To prevent
possible harm to the environment or human health from uncontrolled waste disposal, recycle it responsibly to promote the
sustainable reuse of material resources. To return your used device, please use the return and collection systems or contact the
retailer where
This appliance complies with the following directives:
LVD – EMC – RoHS
The company reserves the right to make small adjustments or changes in the colour of the appliance.

18 IMPASTATORE DIGITALE
Bitte lesen Sie diese Anleitung vor der ersten Verwendung aufmerksam durch und
bewahren Sie sie zum späteren Nachschlagen auf.
ALLGEMEINE SICHERHEITSHINWEISE
Bei der Verwendung elektronischer Geräte sind grundlegende Sicherheitsregeln zu
beachten, darunter die Folgenden:
• Lesen Sie die Anleitung vor dem Gebrauch aufmerksam durch.
• Stellen Sie sicher, dass die Spannung des örtlichen Stromnetzes den Angaben auf
dem Typenschild des Geräts entspricht.
• Lassen Sie das Gerät niemals an Orten, wo es von Kindern ohne Aufsicht erreicht
werden kann.
• Das Gerät ist für den Hausgebrauch bestimmt.
• Trennen Sie das Gerät vom Strom, wenn es nicht verwendet wird, und bevor Sie es
reinigen.
• Gerät nur in unbeschädigtem Zustand verwenden. Bitte wenden Sie sich an einen
zugelassenen Reparaturdienst.
• Verwenden Sie das Gerät nicht, wenn Netzkabel oder Stecker beschädigt sind. Um
jede Gefahr zu vermeiden, lassen sie diese von einer qualizierten Reparaturstelle
ersetzen.
• Überprüfen Sie, dass der Netzschalter ausgeschaltet ist, bevor Sie das Gerät
anschließen.
• Verwenden Sie nur das vom Hersteller empfohlene Zubehör.
• Stellen Sie das Gerät niemals neben eine Wärmequelle.
• Halten Sie das Netzkabel stets von heißen Komponenten, Wärmequellen oder
Kanten fern.
• Reinigen Sie die verschiedenen Zubehörteile gründlich, bevor Sie das Gerät zum
ersten Mal verwenden. Gerätemotor nicht in Wasser oder andere Flüssigkeiten
eintauchen.
• Verwenden Sie zu Ihrer Sicherheit ausschließlich Zubehör und Komponenten, die für
das Modell des gekauften Geräts geeignet sind.
• Schalten Sie das Gerät immer aus, und ziehen Sie den Stecker aus der Steckdose,
wenn Sie Zubehör wechseln oder sich bewegenden Teilen nähern.
• Verwenden Sie den Schneebesen nicht zum Rühren zäher Zutaten.
• Stets nur eine Funktion zur Zeit verwenden.
• Füllen Sie die Schüssel nicht übermäßig.
• Während Gerät und Zubehör in Betrieb sind, dürfen Sie sich diesen nicht mit langen,
losen Haaren, Schals, Krawatten usw. nähern, die sich darin verfangen können.
• Ziehen Sie das Gerät am Stecker und nicht am Kabel aus der Steckdose.
• Das Gerät ist nur für den vorgesehenen Hausgebrauch bestimmt. Der Benutzer haftet
für alle Fehlfunktionen, die auf einen nicht in dieser Anleitung beschriebenen Umgang
zurückzuführen sind.
• Achten Sie beim Ausleeren der Schüssel oder bei der Reinigung auf die sehr scharfen
Klingen der Schüssel. Seien Sie vorsichtig, wenn sich kochendes Wasser in der
Schüssel bendet, das herausspritzen kann.

19
IMPASTATORE DIGITALE
• Dieses Gerät darf von Personen mit eingeschränkten körperlichen oder geistigen
Fähigkeiten oder Mangel an notwendiger Erfahrung und Kenntnis (einschließlich
Kinder) nur unter Aufsicht verwendet werden, oder nachdem sie durch eine für ihre
Sicherheit verantwortliche Person in den sicheren Gebrauch des Geräts eingewiesen
wurden. Kinder müssen beaufsichtigt werden, damit sie nicht mit dem Gerät spielen.
• Bewahren Sie Gerät und Kabel außerhalb der Reichweite von Kindern auf.
• Dieses Gerät ist für den Hausgebrauch und ähnliche Anwendungen bestimmt
darunter Personalküchen in Geschäften, Büros und anderen Arbeitsbereichen. Es kann
auch von Gästen von Hotels, Motels, Pensionen oder anderen Gastgewerbebetrieben
benutzt werden.
BESCHREIBUNG DER TEILE
1. Drehschalter/Drehzahlregler
2. Entriegelungstaste
3. Schwenkarm
4. LED-Bedienfeld
5. Knethaken (Aluminium)
6. Flachrührer (Aluminium)
7. Schneebesen (Edelstahl)
8. 7 l Rührschüssel (Edelstahl)
BEDIENUNGSANLEITUNG
1. Vor dem Gebrauch alle Teile abspülen, sie Beschreibung in
Abschnitt „Pege und Reinigung der Rührmaschine“.
2. Stellen Sie das Gerät auf eine ebene und trockene Fläche
(ABB. 1).
3. Drücken Sie die Entriegelungstaste, und heben Sie den
Schwenkarm an, bis er in der angehobenen Position einrastet
(ABB. 2).
4. Rührschüssel auf den Sockel setzen und drehen, bis sie in
Betriebsposition einrastet. Zubehör einsetzen (ABB. 3).
5. Um das geeignete Zubehör (Knethaken, Flachrührer,
Schneebesen) einzusetzen, stecken Sie es auf den Zapfen und
drücken sie es nach oben, wobei sie es im Uhrzeigersinn drehen,
bis es einrastet (ABB. 4 und ABB. 5).
6. Drücken Sie die Entriegelungstaste und senken Sie den
Schwenkarm bis er in Betriebsposition einrastet (ABB. 2).
7. Stecken Sie den Stecker in die Steckdose, und schalten Sie die
Rührmaschine durch Drehen des Schalters ein (ABB. 6).
8. Während des Betriebs können Zutaten in die Schüssel
gegeben werden.
9. Schalten Sie das Gerät aus, indem Sie den Schalter auf die „0“
drehen.

20 IMPASTATORE DIGITALE
10. EINSCHALTEN
Alle Lampen des Bedienfelds leuchten 3 Sekunden lang auf (die POWER-Taste rot,
die beiden anderen blau). Das Gerät schaltet nach einem Signalton von 1 Sekunde in
den Energiesparmodus.
11. ENERGIESPARMODUS – nur rote Lampe
Wenn 3 Minuten lang keine Tätigkeit am Gerät erfolgt, schaltet es automatisch in den
Energiesparmodus. Alle Lampen erlöschen, nur die POWER-Taste leuchtet weiter rot .
12. BETRIEBSBEREITSCHAFT – rotes Blinklicht, Bedienfeld eingeschaltet
Im Energiesparmodus die POWER-Taste drücken: Diese Taste leuchtet nun blau und
blinkt, die anderen Tasten erlöschen. Das Bedienfeld leuchtet auf: Das Zeitsymbol
blinkt und zeigt „00:00“ an, das Drehzahlsymbol zeigt „0“ an. Anschließend kehrt das
Gerät in die Betriebsbereitschaft zurück.
13. BENUTZERDEFINIERTER BETRIEB– alle Lampen leuchten
a. Drücken Sie die Tasten +/-, um die Arbeitszeit zu erhöhen oder zu verringern.
Drehzahlregler im Uhrzeigersinn drehen: die POWER-Taste leuchtet blau, die anderen
Tasten leuchten auf, das Zeitsymbol leuchtet auf und zeigt die eingestellte Restzeit an,
die in Sekundenschritten abnimmt.
Am Ende der Bearbeitung wird dreimal ein Signalton abgegeben: Die POWER-Taste
leuchtet blau und blinkt, die anderen Tasten erlöschen und das Gerät geht in die
Betriebsbereitschaft über.
Table of contents
Languages:
Other Kasanova Mixer manuals

Kasanova
Kasanova MRN000008NOC User manual

Kasanova
Kasanova SM-1533 User manual

Kasanova
Kasanova LAN000003 User manual

Kasanova
Kasanova Girmi GIR000071NOC User manual

Kasanova
Kasanova MIXER BULLET User manual

Kasanova
Kasanova MRN000007NOC-10NOC-11NOC User manual

Kasanova
Kasanova SAD000001-2 User manual

Kasanova
Kasanova MRN000007 User manual

Kasanova
Kasanova GLI005051 User manual

Kasanova
Kasanova HWK000010NOC User manual