manuals.online logo
Brands
  1. Home
  2. •
  3. Brands
  4. •
  5. Kenwood
  6. •
  7. Kitchen Appliance
  8. •
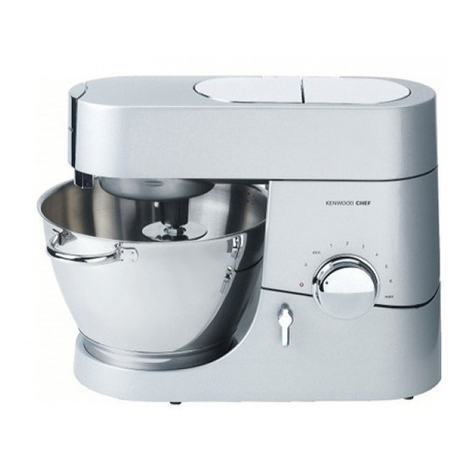
  9. Kenwood Chef KM330 series User manual

Kenwood Chef KM330 series User manual

Other manuals for Chef KM330 series

3

This manual suits for next models

1

Other Kenwood Kitchen Appliance manuals

Kenwood KVC50 Chef User manual

Kenwood

Kenwood KVC50 Chef User manual

Kenwood Chef KM330 series User manual

Kenwood

Kenwood Chef KM330 series User manual

Kenwood CH580 series User manual

Kenwood

Kenwood CH580 series User manual
Kenwood DeLonghi Cooking Chef KM070 Operating manual

Kenwood

Kenwood DeLonghi Cooking Chef KM070 Operating manual

Kenwood CL420 series User manual

Kenwood

Kenwood CL420 series User manual

Kenwood KN400 User manual

Kenwood

Kenwood KN400 User manual

Kenwood suprema ES516 User manual

Kenwood

Kenwood suprema ES516 User manual

Kenwood KQC51 User manual

Kenwood

Kenwood KQC51 User manual

Kenwood HB720 series User manual

Kenwood

Kenwood HB720 series User manual

Kenwood KM240 series User manual

Kenwood

Kenwood KM240 series User manual

Kenwood JE560 User manual

Kenwood

Kenwood JE560 User manual

Kenwood AT312 User manual

Kenwood

Kenwood AT312 User manual

Kenwood AT644 User manual

Kenwood

Kenwood AT644 User manual

Kenwood Chef XL KVL40 User manual

Kenwood

Kenwood Chef XL KVL40 User manual

Kenwood kMix HMX750 User manual

Kenwood

Kenwood kMix HMX750 User manual

Kenwood AT340 User manual

Kenwood

Kenwood AT340 User manual

Kenwood FP110 series User manual

Kenwood

Kenwood FP110 series User manual

Kenwood KVC65 User manual

Kenwood

Kenwood KVC65 User manual

Kenwood KAX941PL User manual

Kenwood

Kenwood KAX941PL User manual

Kenwood Type MG35 User manual

Kenwood

Kenwood Type MG35 User manual

Kenwood HDP30 User manual

Kenwood

Kenwood HDP30 User manual

Kenwood AT643 User manual

Kenwood

Kenwood AT643 User manual
Kenwood BM350 Multilingual User manual

Kenwood

Kenwood BM350 Multilingual User manual

Kenwood SD100 series User manual

Kenwood

Kenwood SD100 series User manual

Popular Kitchen Appliance manuals by other brands

Saturn ST-EK8037 manual

Saturn

Saturn ST-EK8037 manual

BOSKA Pro 853560 instruction manual

BOSKA

BOSKA Pro 853560 instruction manual

Enders 7909 instruction manual

Enders

Enders 7909 instruction manual

Kalorik USK PPG 37241 operating instructions

Kalorik

Kalorik USK PPG 37241 operating instructions

Scarlett SC-FD421001 instruction manual

Scarlett

Scarlett SC-FD421001 instruction manual

FoodSaver V4925 owner's manual

FoodSaver

FoodSaver V4925 owner's manual

Course	Housewares B416144 quick start guide

Course Housewares

Course Housewares B416144 quick start guide

AEG SANTO Series operating instructions

AEG

AEG SANTO Series operating instructions

Melissa 643-036 instruction manual

Melissa

Melissa 643-036 instruction manual

cecotec ROCK'NTOAST 3IN1 instruction manual

cecotec

cecotec ROCK'NTOAST 3IN1 instruction manual

Gourmia GMF225 instructions

Gourmia

Gourmia GMF225 instructions

Electrolux EKM7 Series Instruction book

Electrolux

Electrolux EKM7 Series Instruction book

Magio MG-965 instruction manual

Magio

Magio MG-965 instruction manual

Keimling Naturkost Excalibur 56301WH Operation manual

Keimling Naturkost

Keimling Naturkost Excalibur 56301WH Operation manual

Beper 90.071 use instructions

Beper

Beper 90.071 use instructions

Geryon E2900-M user manual

Geryon

Geryon E2900-M user manual

Morphy Richards 46718 owner's manual

Morphy Richards

Morphy Richards 46718 owner's manual

Klarstein 10030266 manual

Klarstein

Klarstein 10030266 manual

manuals.online logo
manuals.online logoBrands
  • About & Mission
  • Contact us
  • Privacy Policy
  • Terms and Conditions

Copyright 2025 Manuals.Online. All Rights Reserved.

KM330 series Chef / KM630 series Major - (Pinto)
The following procedures are aimed to help with dismantling and service repairs.
Always disconnect the appliance from mains supply prior to removal of the covers and suitably protect the finish on the
casings.
Click on the pictures to open a larger version in a seperate window.
To access the gearbox:
Remove the high speed outlet cover.
Pull back the slow speed lever to
unlock and remove the slow speed
outlet cover.
Please note the correct position of the
spigot prior to removal.
* The positioning of the spigot
determines the position of the
attachments, when fitted.
Remove the top cover.
Page 1 of 15Spares - KM330 / KM630 series - Disassembly & re-assembly instructions
30/04/2009http://www.kenwoodservice.co.uk/product-files-kar/
g
uide-KM330.htm
Remove the plastic washer and drive
belt.
Dismantling the gearbox involves
removal of the large pulley. Either of
the following methods will assist:
Use a stall plug:
Fit the stall plug in the slow speed
outlet. If necessary, use a screwdriver
to rotate it into position. Undo the
gearbox pulley by hand anti-
clockwise.
Page 2 of 15Spares - KM330 / KM630 series - Disassembly & re-assembly instructions
30/04/2009http://www.kenwoodservice.co.uk/product-files-kar/
g
uide-KM330.htm
Use a mincer.
Attach the mincer and position a
screwdriver between the cutter blades
and close to the scroll to stop it
rotating. Please note, it is advisable to
use the coarse screen as this allows
room for a larger diameter
screwdriver. Undo the gearbox pulley
by hand anti-clockwise.
The pulley is a tight fit on the pinion
shaft. Use two screwdrivers to prise it
off.
Re-assemble using the stall plug /
mincer, turning pulley clockwise to
tighten.
Page 3 of 15Spares - KM330 / KM630 series - Disassembly & re-assembly instructions
30/04/2009http://www.kenwoodservice.co.uk/product-files-kar/
g
uide-KM330.htm
Removing / replacing the planet hub assembly:
The hub nut is secured by an
engineering adhesive, and may prove
difficult to remove. Use an 8mm
socket, and position a tool between
the hub spout and the hub nut, as
shown, taking care not to damage the
finish. Turn anti clockwise to remove.
* If the hub proves difficult to remove,
stand the appliance upright and tap
the end of the screw (vertical drive
shaft) with a mallet, whilst at the same
time pulling down on the hub spout.
Apply grease sparingly to the planet
gear, this will then transfer to the ring
gear.
Page 4 of 15Spares - KM330 / KM630 series - Disassembly & re-assembly instructions
30/04/2009http://www.kenwoodservice.co.uk/product-files-kar/
g
uide-KM330.htm
Apply threadlock 60026 to the hub nut
prior to re-assembly.
Regreasing the gearbox:
With the machine upside down,
remove the slow speed lever knob as
shown, and undo the two gearbox
cover screws and remove the cover.
Page 5 of 15Spares - KM330 / KM630 series - Disassembly & re-assembly instructions
30/04/2009http://www.kenwoodservice.co.uk/product-files-kar/
g
uide-KM330.htm
Remove the red plug, then re-grease
with the appliance running on the
lowest speed setting.
* The special food-grade grease is a
stock item.
To remove the motor & control module:
Remove all top covers as detailed above.
Remove the three motor retaining
screws and cams.
* Please note, the motor retaining
screws should never be
overtightened, as this can cause them
to eventually work loose.
Page 6 of 15Spares - KM330 / KM630 series - Disassembly & re-assembly instructions
30/04/2009http://www.kenwoodservice.co.uk/product-files-kar/
g
uide-KM330.htm
Loosely refit the top cover and the
liquidiser outlet cover to serve as a
stand. Use a mat to protect the
casing, and turn the appliance upside
down.
Loosen the two cord grip screws and
pull the mains lead through as shown.
Page 7 of 15Spares - KM330 / KM630 series - Disassembly & re-assembly instructions
30/04/2009http://www.kenwoodservice.co.uk/product-files-kar/
g
uide-KM330.htm
Operate the head lift lever, restrain the
pedestal at the same time, and allow
the machine to open slowly. Remove
the two screws securing the quadrant
bracket.
Remove the bracket and screws,
operate the head lift lever, then slide
the quadrant into the pedestal.
Page 8 of 15Spares - KM330 / KM630 series - Disassembly & re-assembly instructions
30/04/2009http://www.kenwoodservice.co.uk/product-files-kar/
g
uide-KM330.htm
The motor assembly, control module
and body cover can now be lifted out
of the body.
The date code can be found on the flat
face of the motor housing.
Please note, only the four upper
characters make up the date code. In
this example the date code reads
6M42, which translates as, 2006-
October-week 42. Click here for more
details on Product Date Codes.
Page 9 of 15Spares - KM330 / KM630 series - Disassembly & re-assembly instructions
30/04/2009http://www.kenwoodservice.co.uk/product-files-kar/
g
uide-KM330.htm
Control module dismantled.
To remove the pedestal:
With the machine upside down, and
the quadrant screws removed, move
the body cover out of position to
expose the hinge pin, then remove the
circlip.
Page 10 of 15Spares - KM330 / KM630 series - Disassembly & re-assembly instructions
30/04/2009http://www.kenwoodservice.co.uk/product-files-kar/
g
uide-KM330.htm