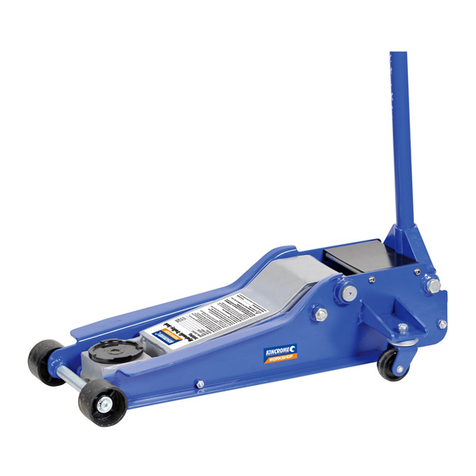
kincrome K12066 User manual

Owner’s Assembly and Operating Manual
SPECIFICATIONS..................................................................................................................2
IMPORTANT SAFETY INFORMATION ..................................................................................3
UNPACKING AND ASSEMBLING JACK................................................................................3
Unpacking Carton ...............................................................................................................3
Assembling Handle.............................................................................................................3
Testing Handle Operation....................................................................................................3
OPERATING JACK.................................................................................................................4
Preparing Work Area...........................................................................................................4
Lifting Vehicle......................................................................................................................5
Working on Vehicle .............................................................................................................5
Lowering Vehicle.................................................................................................................5
MAINTENANCE AND STORAGE...........................................................................................6
Lubricating...........................................................................................................................6
Maintaining Oil Level...........................................................................................................6
Important Note: ...................................................................................................................6
Adding Oil:...........................................................................................................................6
Replacing Oil:......................................................................................................................6
Cleaning..............................................................................................................................6
Storage................................................................................................................................6
Repairing Jack ....................................................................................................................6
SPECIFICATIONS
Working Load limit 10000 KG
Height lowered 170 mm
Height raised 570 mm
Handle Length 1150 mm
Total Weight: 135 KG
Part Number K12066

IMPORTANT SAFETY INFORMATION
The use of a vehicle jack has inherent dangers to avoid risk of personal injury or property damage make sure
you are fully aware of the operating instructions for this product, the recommendations in the vehicle owners
manual for jacking of your vehicle prior to lifting the vehicle. Do not exceed maximum lifting capacity of this
jack. This jack is intended for automotive use only. Be aware that large or heavy vehicles may exceed
jack’s stated capacity check vehicle owners manual or contact the vehicle manufacturer. Do not use for any
other purpose accept the raising and lowering of vehicles never use to raise any structure or building, do not
lift any human load and never ride on jack.
UNPACKING AND ASSEMBLING JACK
Unpacking Carton
Place carton in a clear, open area such as garage floor. Remove
jack and two handle pieces from carton.
Assembling Handle
Insert handle piece (A) into handle piece (B) making sure holes line
up for retaining screw. With the jack sitting on its wheels on a flat
surface, slide assembled handle into handle base, rotate until the
hex-shaped hole slips over shaft in handle base. Check again to
be sure handle is fitted properly using finger pressure only. Loosen
1/2 turn handle should rotate easily.
Testing Handle Operation
Briefly test jack operation as follows BEFORE using to lift any
Load. Twisting the handle knob tightens or releases a valve which allows jack to be raised and lowered. To
raise jack, twist handle knob completely clockwise until firm. Do not force or tighten beyond this point.
Pump handle a few times to raise jack about halfway. If jack does not begin to rise after a few pumps, check
to be sure handle is correctly inserted into handle base and is fitted over hex shaft. When jack is raised,
twist handle knob slowly counterclockwise to lower jack. A normal hissing sound may be heard as jack
lowers and pressure in hydraulic cylinder is released.

Handle Knob
Lifting Saddle Lifting Arm
Foot lever
Front Wheels
Rear Castors
OPERATING JACK
Preparing Work Area
Before using jack to life vehicle, it is important to prepare work area properly. Follow this procedure each time
the jack is used to help prevent property damage and or serious injury.
1.) Thoroughly inspect jack for damage or wear before each use. Briefly test operation of unloaded jack
before using to lift any load. If jack is damaged or is malfunctioning DO NOT LIFT ANY LOAD until the
problem is corrected.
2.) Consult vehicle owner’s manual for safety precautions, jacking procedure, vehicle weight, recommended
jack type, and location of jack support areas on vehicle. The working load limit of the jack is 10000 kg.
NEVER EXCEED WORKING LOAD LIMIT OF JACK.
3.) Clear children and others from work area before moving or lifting vehicle. Another adult should be
nearby for extra safety and assistance but must be clear of vehicle as it is moved or lifted.
4.) No person should remain in a vehicle that is being lifted by a jack, No person should enter a vehicle which
is supported by a jack or by vehicle support stands. No person should lean into a vehicle which is
supported by a jack or by vehicle support stands.
5.) Clear obstructions from work area. Working in tight or cluttered work areas is dangerous.
6.) Be sure jack and vehicle are on solid, level ground such as paved or concrete driveway or garage floor so
the jack is free to roll during lifting and lowering. Uneven or sloped surfaces create hazardous working
conditions and dangerously impeded the function of the jack.
7.) With vehicle in proper position, set vehicle’s parking brake or emergency brake and put gearshift in park
(manual transmissions should be placed in lowest gear). TURN VEHICLE IGNITION OFF AND TO THE
“LOCK” POSITION making sure steering wheel locks.
8.) Do not rely on vehicle transmission or brakes to hold vehicle in position. Chock all wheels of vehicle not

being lifted off the ground to prevent vehicle rolling. Using wedge-shaped blocks that tire cannot roll over,
position one chock tight against the tyre in both forward and reverse rolling paths.
9.) Jack stands, Vehicle support stands (not included) will be needed to support vehicle once it is in raised
position. Have jack stands, vehicle support stands capable of supporting vehicle weight ready nearby for
use. Read and understand jack stand manufacturer’s instructions and safety information before use and
before lifting the vehicle with this jack.
10.) Plan location of jack beneath vehicle, making sure jack will be contacting only a jack support area of
vehicle. Consult vehicle owner’s manual for location of jack support areas.
Lifting Vehicle
Lifting a vehicle using a jack can be dangerous. Follow all instructions and precautions below. Do not lift any
vehicle with its engine running or start any vehicle that is supported by jack or jack stands.
1.) With lifting arm completely lowered, roll jack into position beneath jack support area of vehicle.
2.) Twist jack handle knob completely clockwise. Slowly pump handle or use the foot pedal until lifting
saddle just begins to contact support area on underside of vehicle.
3.) Inspect position of lifting saddle beneath support area, making sure it is centered and properly engaging
support area.
4.) Continue pumping handle until vehicle is lifted to desired height. Pay attention to lifting saddle position as
vehicle is being raised to be sure there is no danger of support area slipping off or lifting from the saddle.
5.) Place jack stands under additional vehicle support areas.
6.) SLOWLY twist jack handle knob counterclockwise to ease vehicle down onto jack stands.
Working on Vehicle
Any vehicle being lifted by a jack or supported by jack stands creates a potentially hazardous working
environment. Do not attempt to move or roll a jack that is lifting a vehicle. Never place any part of your
body beneath a vehicle that is lifted by a jack. Be careful of forces applied to vehicle such as torque on a nut
or bolt. These forces could cause vehicle to become unstable on jack stands if jack stands are not properly
placed. Do not turn vehicle ignition or attempt to start any vehicle lifted by a jack or supported by jack
stands.
Lowering Vehicle
Before lowering vehicle, be sure area under and near vehicle is clear of all persons and obstructions.
1.) Re-position jack under same support area used to lift vehicle.
2.) Twists handle completely clockwise. Pump handle until lifting saddle just makes contact with support
area under vehicle.
3.) Check to be sure lifting saddle is centered under support area. Slowly pump handle to lift vehicle off from
jack stands.
4.) Remove jack stands, setting them aside, well clear of vehicle.
5.) With firm grip on jack handle, SLOWLY twist handle knob counterclockwise until jack just begins to lower.
6.) Carefully control speed of descending vehicle. Lowering a vehicle too fast can cause property damage
or injury.

MAINTENANCE AND STORAGE
Lubricating
Moving parts on jack should be lubricated occasionally with a light machine oil to maintain efficient
operation. Apply oil to joints on lift arm hinges, push rods, handle base, rear caster wheels, front roller,
etc.(refer to pages 6-7 for location of these parts).wipe away excess oil with soft cloth.
Maintaining Oil Level
Important Note:
When adding or replacing oil, always use a good grade Hydraulic Jack Oil. Avoid mixing types of oil. DO
NOT use Brake Fluid, Alcohol, Glycerin, Detergent, Motor Oil or Dirty Oil, Improper fluid can cause serious
internal damage to Jack.
Adding Oil:
With saddle fully lowered & jack on level ground, remove Air Vent Valve. Oil level should be approx 12 mm
below valve hole. If low, add oil as needed then close air vent valve.
Replacing Oil:
For better performance & longevity, replace oil supply once a year. To drain oil, open Air Vent Valve and
loosen the release Valve by turning handle counterclockwise. BE VERY CAREFUL not to permit dirt or
foreign matter to get into the system. Close release valve by turning handle clockwise, fill with good grade
Hydraulic Jack Oil close Air Vent Valve wipe away any spilt fluid. Test jack before lifting a load.
Cleaning
Jack should be wiped clean with soft cloth only. Do not use gasoline, kerosene, or other such solvents or any
abrasive cleanser as cleaning agents and solvents will cause deterioration of the hydraulic seals.
Storage
Before storage, twist handle knob 1-1/2 turns counterclockwise to release pressure in hydraulic cylinder.
Leave handle in this position. Store jack level, in a clean environment preferably indoors, in a dry area to
protect jack from moisture.
Repairing Jack
There are no user serviceable parts except as outlined above. Only trained, licensed and certified repair
personnel should attempt any repairs or replacing of parts. Any modifications to this jack, except those
performed by the manufacturer, or their designee, will void all warranties both written an implied.

REF QTY DESCRIPTION REF QTY DESCRIPTION
1 2 RING SNAP 59 1 PACKING RUBBER
2 4 WASHER , FRONT WHEEL 60 1 TANK OIL
3 22 GB6 ROLLER 61 1 DIAPHRAGM, OIL, TANK
4 2 ROLLER RETAINER 62 1 COVER, OIL, TANK
5 2 NIPPLE , GREASE 63 1 BOLT
6 2 WHEEL FRONT 64 1 PACKING , FIBER
7 2 NUT 65 4 BOLT
8 2 SHAFT , FRONT WHEEL 66 1 PACKING , FIBER
9 2 SIDE PLATE 67 1 SET SCREW , HANDLE
10 2 NUT 68 1 FORK
11 2 WASHER SPRING 69 1 PIN , COTTER
12 2 ROD LINK 70 1 CONNECTING BAR RELEASE VALVE
13 1 PIN , ROD LINK 71 1 O-RING
14 1 SPINDLE , LINK ROD 72 1 RING , BACK-UP
15 2 NUT 73 1 SEAL , OIL
16 2 WASHER 74 1 PACKING , RUBBER
17 1 PIN , ARM 75 1 NUT , LOCK
18 1 PIN , PISTON 76 1 FORK , HANDLE

19 1 ARM (1 PIECE) 77 1 SET SCREW , HANDLE
20 1 NIPPLE, GREASE 78 1 COLLAR
21 1 BASE , SADDLE 79 1 BRACKET , HANDLE FORK
22 1 SADDLE 80 1 SPRING
23 1 PIN , ARM 81 1 FORK , HANDLE
24 4 BLOT 82 1 SET SCREW , HANDLE
25 2 SPRING 83 1 COLLAR
26 2 HANGER(rear) ,SPRING 84 1 BRACKET , HANDLE FORK
27 1 SHAFT , HANDLE 85 1 SPRING
28 1 CONNECTING JOINT ,PISTON 86 1 STEP , CAM
29 1 BOLT 87 1 PIN
30 2 SEAL OIL 88 1 WASHER
31 1 NUT TANK 89 2 CAP (2 PIECES)
32 2 GASKET 90 2 NIPPLE GREASE
33 1 RING 91 2 BRACKET , CASTOR (2 PIECES)
34 1 JOINT OIL HOSE 92 4 WASHER , SPRING
35 1 OIL HOSE 93 4 BOLT
36 1 CORK 94 2 RING , RACE , UPPER (2 PIECES)
37 1 ROD PISTON ,PACKING 95 38 BALL , STEEL (38 PIECES)
38 1 RETAINER ,PISTON ,PACKING 96 2 RING RACE LOWER
39 1 PACKING COPPER 97 2 FORK CASTOR (2 PIECES)
40 1 SPRING BY-PASS 98 2 SHAFT , REAR , WHEEL (2 PIECES)
41 1 BALL ,STEEL 99 2 WHEEL , REAR (2 PIECES)
42 1 ROD BY – PASS 100 1 HANDLE (1 PIECE)
43 1 HOUSING ,BY-PASS ,VALVE 101 1 CONTROL LEVER VALVE (1 PIECE)
44 1 CASING U TYPE 102 1 SPRING (1 PIECE)
45 1 CYLINDER(1 PIECE) 103 1 CAP , HANDLE (1 PIECE)
46 1 BALL ,STEEL 104 1 COVER
47 1 SEPARATOR 105 1 CONTROL , ROD , VALVE (1 PIECE)
48 1 BALL ,STEEL 106 4 BOLT
49 1 SEPARATOR 107 4 WASHER SPRING
50 1 PACKING COPPER 108 1 STRAINER , OIL
51 1 BOLT 109 1 PACKING , COPPER
52 1 PACKING COPPER 110 1 CYLINDER , PUMP
53 1 HOUSING ,RELEASE VALVE 111 1 BOX , OIL (1 PIECE)
54 1 VALVE ,RELEASE 112 1 BALL , STEEL
55 3 NUT LOCK 113 1 POST , RELEASE
56 1 SPRING 114 1 SPRING
57 1 CONNECTING ROD RELEASE VALVE 115 1 SLOTTED SCREW CHAMFERED
58 1 O – RING 116 1 SLOTTED PAN HEAD SCREW

Table of contents
Other kincrome Jack manuals

kincrome
kincrome K12076 User manual

kincrome
kincrome K12130 User manual

kincrome
kincrome K12134 User manual

kincrome
kincrome K12060 User manual

kincrome
kincrome K12110 User manual

kincrome
kincrome Workshop K12059 User manual

kincrome
kincrome K12058 User manual

kincrome
kincrome K12162 User manual

kincrome
kincrome K12150 User manual

kincrome
kincrome K12190 User manual