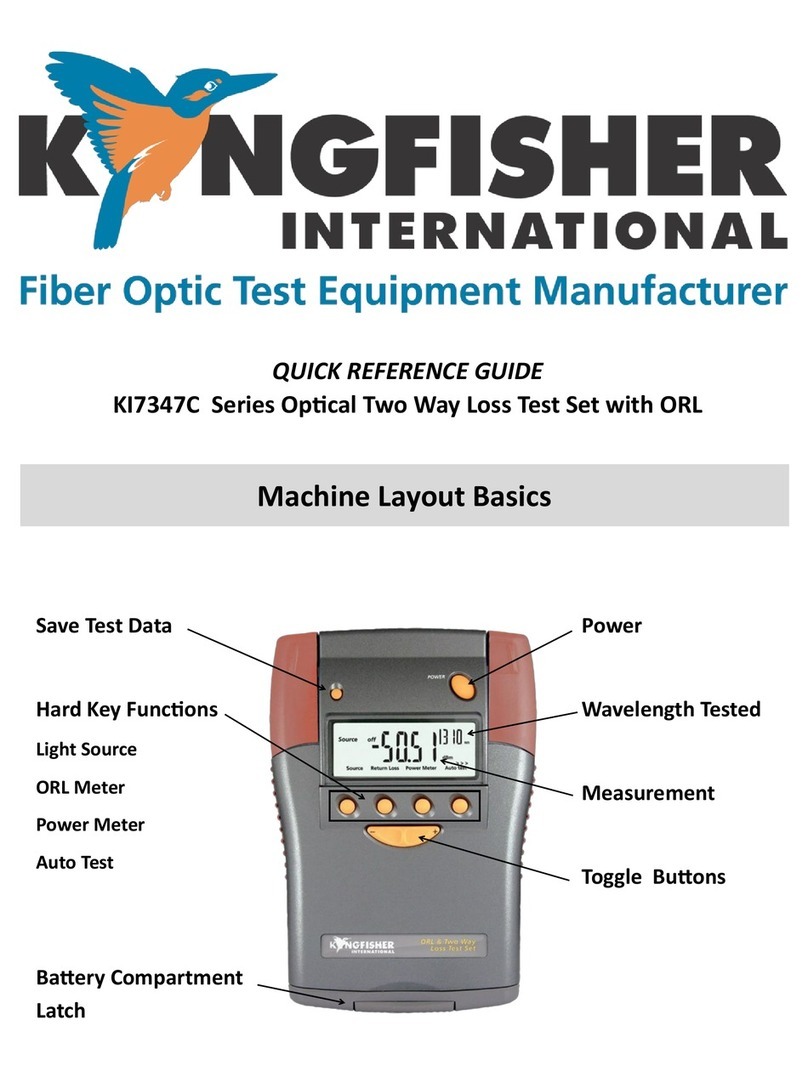
Kingfisher KI7300 Series Instruction Manual


DECLARATION OF CONFORMITY
IN ACCORDANCE WITH ISO/IEC 17050:2004
Manufacturer’s Name: Kingfisher International Pty. Ltd.
Manufacturer’s Address: 30 Rocco Drive, Scoresby, Victoria 3179, Australia
hereby declares, that the products listed below
Product Name: Optical Loss Test Set, Light Source, Power Meter
Model Number: KI7300/7700 Series, KI7400/7800 Series, KI7600 Series
Product Options: This declaration covers all options of the above product(s)
comply with the essential requirements of the applicable European Directives:
•Low Voltage Directive 73/23/EEC and the EMC Directive 89/336/EEC, amended by 93/68/EEC, and carries the CE marking accordingly
•Directive 2002/95/EC on restriction of the use of certain hazardous substances in electrical and electronic equipment (RoHS)
•Directive 2002/96/EC on waste electrical and electronic equipment (WEEE)
and conform to the following standards and specifications:
MIL-PRF-28800F: 1996 Performance specification-Test equipment for use with electrical and electronic equipment, general specification
IEC 60529: 2001/ EN 60529:1993+A1:2003 Degrees of protection provided by enclosures
Optical Loss Test Set and Power Meter conform to:
IEC 61315:2005 Calibration of fibre-optic power meters
EMC Limit
IEC 61326:2002 / EN 61326-1:1997+A1:1998+A2:2001+A3:2003
IEC CISPR 11: 2004/ EN 55011:1998+A1:1999 Limits applicable to Group 1 Class B equipment
IEC CISPR 16-1:1999 Limits applicable to Class B equipment
IEC CISPR 16-2:1999 Limits applicable to Class B equipment
IEC 61000-3-2: 2005/EN 61000-3-2:2006
IEN 61000-3-3:2002/EN 61000-3-3:1995
IEC 61000-4-2:2001 / EN 61000-4-2:1995+A1:1998+A2:2001 4kV CD, 8kV AD
IEC 61000-4-3:2002/ EN 61000-4-3:2002 3V/m, 80-1000MHz
IEC 61000-4-4:2004/EN 61000-4-4:2004 1kV signal lines, 2kV power lines
IEC 61000-4-5:2005/EN 61000-4-5:2006 1kV line-line, 2kV line-ground
IEC 61000-4-6:2004/EN 61000-4-6:1996+A1:2001 3V, 0.15-80 MHz
IEC 61000-4-11:2004/EN 61000-4-11:2004 0.5 cycle/100%/each polarity
ICES-001: 2006 (Canada)
CFR 47 FCC Part 15, Subpart B (Class B) (USA)
FCC registration number: 90891
Safety
Laser/LED products conform to:
IEC 60825-1:2001 Safety of laser products-Equipment classification, requirements and user’s guide
IEC 60825-2:2005 Safety of laser products-Safety of optical fibre communication systems (OFCS)
CFR 21 part 1040.10 (USA) Performance standards for light-emitting products- Laser products
Supplemental Information:
The product was tested in a typical configuration with Kingfisher International test systems.
2007-September -14
Date
Bruce Robertson
Name
Technical Director
Title
For further information, please contact your local Kingfisher International sales office, agent or distributor.
Revision: E Issue Date: 2007- September -17
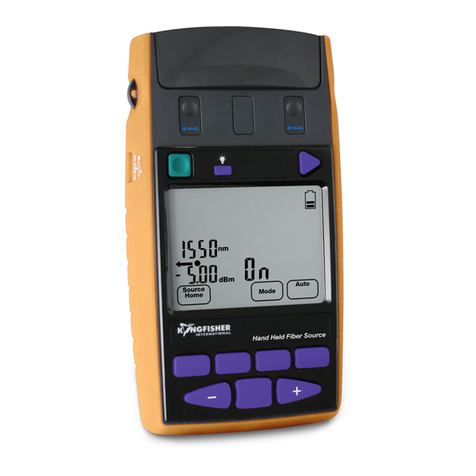

OPERATION MANUAL
KI7000 UM-5
- 1 -
KI7400C/7800C Series Optical Light Source
KI7600C Series Optical Power Meter
KI7300C/7700C Series Optical Loss Test Set
Congratulations on your purchase of this equipment, engineered to provide
excellent performance, convenience and reliability. To get the best use from
your instrument and to ensure its safe operation, please spend a few
minutes to read this manual.
Made in Australia. International Patents Granted
© Copyright Kingfisher International Pty Ltd
5th Edition, September 2008

CONTENTS
KI7000 UM-5
- 2 -
Service and Support 4
Introduction and Applications 5
General Safety Summary 7
Light Source Safety Summary 9
Battery and External Power 10
Optical Connector 11
Getting Started and Turning On 13
Autotest Overview 14
Local and Remote Reference Methods 15
Measuring One Way Loss in Autotest 17
Power Meter Manual Operation 18
Light Source Manual Operation 19
Recording, Storing, Recalling Readings and Clearing Memory 20
PC Interface and External Software 22
Care of your Instrument 23
Accuracy Considerations 24
Definition of Terms 27
Specifications 28
Ordering Information 34
Calibration and Maintenance 38
Performance Verification Tests 42
Quick Reference Guide 54
Disclaimer and Warranty 61
User Notes 62
PLEASE REFER TO THE CONTROL PANEL PICTURE IN THE QUICK REFERENCE GUIDE SECTION OF THIS MANUAL

KI7000 UM-5
- 3 -
KI7600C SERIES KI7400C/7800C SERIES KI7300C/7700C SERIES
OPTICAL POWER METER OPTICAL LIGHT SOURCE OPTICAL LOSS TEST SET

SERVICE AND SUPPORT
KI7000 UM-5
- 4 -
Applications Support
Please visit www.kingfisher.com.au to see our comprehensive
Application Notes written to support instrument users.
Look at www.kingfisher.com.au to find distributor details from the
Contact Us section.
Our local agents are able to offer excellent applications advice in
your language and time zone.
Please visit our website on www.kingfisher.com.au for a current list
of regional service centres.
Otherwise if you are having difficulties, please feel free to contact
sales@kingfisher.com.au for applications support.
Instrument Service
Qualified personnel must perform adjustment, maintenance or repair
of this product. To obtain service, please contact your local
Kingfisher International distributor or our office in Australia:
Tel: (61) 3-9757-4100
Fax: (61) 3-9757-4193
Email: sales@kingfisher.com.au
If returning equipment to us for service or calibration, please
download and complete the Return Material Authorization Form
located on the Support page on our web site.
To avoid delays and minimise disruption for our customers, we offer
a fixed price repair service.
For the staff at our fully equipped service and calibration centre, it is
their pleasure to keep your equipment performing at its very best.

INTRODUCTION AND APPLICATIONS
KI7000 UM-5
- 5 -
The KI7000C Series Optical Power Meter, Optical Light Source and
Optical Loss Test Set are used to test all types of fiber optic systems,
offering exceptional level of convenience and productivity. Compact,
robust, reliable and simple to operate, this is the ideal equipment for
field or laboratory use by installers, technicians and engineers.
Typical applications:
•Attenuation testing
•System power testing
•Continuity testing with the test tone features
•Quality assurance and acceptance testing
•Telecom construction and maintenance, CATV, LAN and
R&D applications
•Full CWDM, DWDM and out of band testing capability
All instruments are compatible with other equipment with Autotest
mode. All series have options for high performance single mode fiber
testing, while KI7800C Series Optical Light Source and KI7700C
Series Optical Loss Test Set have options for multimode.
A convenient menu-driven interface guides the user through
operational sequences with hidden keypad access to advanced
functions.
The interchangeable optical connectors are protected by a snap on
cover and are easily disassembled for cleaning. A wide variety of
connector styles are available as an option.
The design of the instrument includes shock absorbing corners for
drop protection and tough polycarbonate housing. The latest
materials and methods have been used to produce an elegant, yet
rugged instrument.
These instruments feature very long battery life of 360 hours for the
meter, and 190 hours for the source. Alternatively, instruments can
be used with optional external power supply OPT103B or powered
via USB cable.
Automated testing using external PC software
KITS™ reporting software allows real-time instrument control and
data download, and is easily customised to suit most languages and
reporting requirements. Real time display, data logging and label
printing functions are included. KITS™ enables merging of test
results from multiple instruments and supports bi-directional testing
for one way equipment using successive measurements.

INTRODUCTION AND APPLICATIONS
KI7000 UM-5
- 6 -
Optical Power Meter:
Superior measurement confidence is achieved with a unique Total
Uncertainty Specification, which covers the full temperature,
measurement and connector range. NATA (ILAC) traceable
calibration certificate is supplied.
Warm up period, range-changing delays and user dark current
zeroing are eliminated.
The sensitive optical tone detector displays the actual measured tone
frequency in Hz. If a standard tone is detected, the buzzer sounds,
which is useful for fiber identification and continuity testing.
Power stability testing can be performed using the max/min recording
function. The display can show dBm, dB and linear units, and can be
put on hold for convenient data recording.
Standard power meters work with fiber core diameter up to 200
micron, with both PC and APC polish connectors.
Various detector options include Indium Gallium Arsenide (InGaAs),
Silicon (Si) and its attenuated versions.
The InGaAs detector is the most common detector for general use.
Power meter calibration options are available from 635 nm to 1650
nm, which cover all popular application wavelengths, including
CWDM calibrations from 1270nm to 1610nm in 20 nm increments.
Power range is from +27dBm to -70dBm.
The KI7601C power meter range includes a 635 nm visible laser for
extra convenience when locating faults.
Optical Light Source:
Multi- wavelength sources have switchable wavelengths through one
port, which makes operation faster.
Laser sources at 1310/1390/1490/1550/1610/1625 are used for
testing single mode fiber systems.
LED sources at 850 / 1300 nm are used for testing multimode fiber
systems.
The 1300 nm LED can also perform short distance single mode
testing. Light source features re-connection repeatability of 0.1dB.
Combined with their excellent stability, this provides more accurate
measurement results.
Optical Loss Test Set:
These instruments incorporate traceable Optical Power Meter and
multi wavelength Optical Light Source in one convenient package,
thus reducing operational and equipment inventory costs for larger
work groups.

GENERAL SAFETY SUMMARY
KI7000 UM-5
- 7 -
The following safety signs and symbols specify general safety
precautions which must be observed during all phases of operation,
service and repair of this instrument. Failure to comply with these
precautions or with specific warnings elsewhere in this manual
violates safety standards of design, manufacture and intended use of
the instrument. Kingfisher International assumes no liability for the
customer’s failure to comply with these requirements.
Before operation, review the instrument and user manual for safety
instructions. You must follow these to ensure safe operation and to
maintain the instrument in safe condition.
WARNING!
The WARNING! sign denotes a hazard. It calls attention to a
procedure, practice or the like, which, if not correctly performed or
adhered to, could result in injury. Do not proceed beyond a
WARNING! sign until the indicated safety conditions are fully
understood and met.
CAUTION!
The CAUTION! sign denotes a hazard. It calls attention to an
operating procedure, or the like, which, if not correctly performed or
adhered to, could result in damage to or destruction of part, or all, of
the product. Do not proceed beyond a CAUTION! sign until the
indicated conditions are fully understood and met.
The apparatus will be marked with this symbol when it is necessary
for the user to refer to the instruction manual in order to protect the
apparatus against damage.
Initial Inspection
Inspect the shipping container for damage. If there is damage to the
container or cushioning, keep them until you have checked the
contents of the shipment for completeness and verified the
instrument both mechanically and electrically. If the contents are
incomplete, mechanical damage or defect is apparent, or if an
instrument does not pass the operator’s checks, notify the nearest
Sales/Service Office.
To check instrument performance, please refer to Performance
Verification Tests section of this manual.
WARNING! You must return malfunctioning instrument to an
authorised Service Centre for repair and calibration.
!

GENERAL SAFETY SUMMARY
KI7000 UM-5
- 8 -
Operating Environment
The range of Kingfisher equipment covered by this manual can be
operated at temperatures between -15 °C and +55 °C and at relative
humidity of <95 %.
Storage & Shipment
The range of Kingfisher equipment covered by this manual can be
stored or shipped at temperatures between -25 °C and +70 °C and at
relative humidity of less than 95 %. Protect the units from
temperature extremes that may cause condensation within it.
Safety
Power Meter contains no hazardous optical or electrical items. When
using this equipment, optical safety precautions should be observed
commensurate with the maximum available source power, since
most of this power can also be coupled out of the instrument.
WARNING! Observe optical safety when using high power.
Optical safety requirements at high power levels MUST be observed
or eye damage is likely. Organisations and users operating optical
equipment with these power levels MUST determine and observe
relevant safety precautions, which are beyond the scope of this
manual.
Line Power Requirements
This equipment operates at line power, when applied to the optional
external power supply OPT103B.

LIGHT SOURCE SAFETY SUMMARY
KI7000 UM-5
- 9 -
Laser and LED Safety Information
Laser Fabry-Perot or DFB semiconductor laser
Wavelength Part number specific
LED Surface emitting semiconductor LED
Wavelength Part number specific
Max CW output power¹ 1mW
Beam waist diameter 9 µm
Numerical aperture 0.1
Laser Class according to
IEC 60825-1 (2001) – International
21 CFR 1040.10 (1995) – USA
635 nm Class 2
850-1625 nm Class 1
Maximum permissible CW output power²
IEC 60825-1 (2001) – International
635nm, class 2 1mW
1310nm, class 1 15.6mW
1550nm, class 1 10 mW
21 CFR 1040.10 (1995) – USA
635nm, class 2 1mW
1310nm, class 1 2mW
1550nm, class 1 8.1mW
Note 1: Maximum CW output power is defined as the highest possible optical power
that the source can produce at its output connector. Refer to specification
sheet for actual operating power
Note 2: Maximum permissible CW output power is the highest optical power that is
permitted within the appropriate laser class. Refer to specification sheet for
actual operating power
In the USA, laser / LED sources specified by this data sheet are
classified as Class 1 and 2 according to 21 CFR 1040.10 (1995).
Internationally, the same laser sources are classified as Class 1 and
2 according to IEC 60825-1 (2001).
WARNING!
Optical power levels in fiber optic systems can cause permanent eye
injury and damage to eyesight.
Never look into the end of an optical cable or connector, which might
be attached to an active source.
Do not enable a laser when there is no fiber attached to the optical
output connector.
Optical magnifying instruments (eg microscope) increase eye
hazard.
Disconnect the source before using an optical magnifier.
The laser module has a built-in safety circuitry which will disable the
optical output in the case of a fault condition, however, this cannot be
guaranteed. An equipment assurance program is recommended to
check for safe laser operation.

BATTERY AND EXTERNAL POWER
KI7000 UM-5
- 10 -
These instruments are powered by two 1.5 V dry Alkaline ‘C’ size
batteries.
About 30 % capacity is obtained when using two 1.5V ‘AA’ alkaline
batteries and supplied ‘AA’ to ‘C’ size battery adaptors or 50%
capacity when using two 1.2 V rechargeable NiMH ‘C’ size batteries.
Instrument Function Battery run time in hours:
Optical Power Meter 360
Optical Light Source 190 in Autotest
When the batteries are low, the low-battery indicator is shown on the
display. At this stage, there is approximately enough energy for
another 10 hours of use.
To save energy, the instrument automatically turns off after 10
minutes without operation.
To change the batteries, open the cover of the battery compartment
at the base of the instrument, remove the batteries, insert new ones
(check polarity) and close the cover again.
For operation of the instrument by external power, use AC adaptor
OPT103B or connect to computer via USB cable.
Suitable external power packs are easily available and must meet
the following requirements:
•Comply with safety regulations and rated for local mains
supply voltage
•Regulated or unregulated DC output 6-12V at 300mA max
•Connection polarity:+ ve pin
Use of the external power supply disconnects the batteries as a
safety precaution, since accidental charging of alkaline cells is
hazardous. Rechargeable batteries must be removed for charging by
an external charger.
CAUTION!
Do not use lithium batteries or other batteries with a nominal voltage
greater than 1.8 V. The instrument may be damaged.
Protect our environment! Some batteries contain toxic heavy metals,
so please dispose of them by returning to a re-cycling centre.
Batteries purchased from Kingfisher agents can be returned to them
for appropriate disposal.

OPTICAL CONNECTOR
KI7000 UM-5
- 11 -
To access the optical connectors, grasp a top corner(s) of the
instrument, and pull off the cover(s).
Each optical port is mounted on a swivel, which allows the connector
to be angled outwards for accessibility, and then pushed back and
covered with the snap cover to provide dirt and drop protection.
Different styles of standard and optional connector adaptors can be
easily fitted by the user.
The supplied standard connector adaptors have ceramic sleeves to
avoid connector metal dust contamination.
CAUTION! Do not use damaged or incompatible connector adaptors.
When not in use, keep the test ports and connectors covered. To
minimize connectors wear, instrument can be stored without
removing the test leads. Never touch connector tips with your fingers,
since body oils and dirt can impair its performance.
WARNING! Remove batteries before using a microscope to inspect
instrument connectors.
Power Meter:
This port can be used with both PC and APC connector styles.
Bare fiber adaptors must achieve fiber eccentricity of ± 100 microns,
and an end tolerance of ± 300 microns relative to the ferrule end.
Preferred bare fiber adaptors consist of a connector with fiber
retention device or other end stop.
For regular work with bare fibers, it is preferable to use an alternative
arrangement such as a multimode pigtail with a v-groove or
mechanical splice.
CAUTION! Do not scratch the detector lens with glass fiber end
when using bare fiber adaptors, or the instrument will be permanently
damaged
Light Source:
A Light Source is either PC or APC connector-specific. This is
determined when ordering the instrument, and can only be changed
at the factory.
CAUTION! The use of bare fiber adaptors with the source is not
recommended as permanent instrument damage will occur, and very
unstable measurements are likely.

OPTICAL CONNECTOR
KI7000 UM-5
- 12 -
How to clean the optical connectors
Always clean the mating connector tip and ferrule before mating,
using approved materials.
CAUTION! Never use abrasive cleaners or permanent connectors
damage may occur.
Power Meter:
The glass power meter interface does not make contact with the
inserted connector-there is a slight air gap. Therefore, it will not wear,
and only needs occasional cleaning.
First remove interchangeable connector adaptor, then use a soft
brush, alcohol, air can or ‘Blu Tac‘ to clean glass interface.
Light Source:
WARNING! Disable source when cleaning optical interfaces.
To clean the interface without removing the adaptor, use a “stick”
style connector cleaner. This cleans both the adaptor and end face in
one operation.
Alternatively, first remove the interchangeable adaptor to access the
glass interface. Then blow away any dust or dirt with compressed air.
If this is not sufficient, then clean the interface by rubbing a lint-free
lens cloth over the surface using small circular movements.

GETTING STARTED AND TURNING ON
KI7000 UM-5
- 13 -
Pull off instrument connector cover(s). To install a connector adaptor,
align the locating slot on the side of the through adaptor with that on
the instrument connector, and press it on.
To remove an adaptor, press the release button on the back of the
instrument and then pull off the adaptor. It is easier to pull off the
adaptor with a test lead in place, since this gives better grip.
Install the batteries, or plug in external power into the socket at the
top of the instrument or connect instrument to the computer.
To switch on the instrument for permanent operation, press and hold
[POWER] for 3 seconds until ‘Perm’ is displayed. The display will
briefly show firmware version. To view all display segments during
instrument turn-on, hold down the first button on the left at the bottom
of the display. To turn the instrument off, press [POWER] again for 2
seconds. If the battery is low, this will be indicated with a battery
symbol on the display.
Should the instrument fail to turn on, the microprocessor may need
re-booting. To do this, remove the batteries and any other external
power for at least 40 seconds.
Note that hidden keypad is accessed by lifting up the hinged display
cover.
To backlight the display temporarily, press light button •(second on
the right, bottom row on the hidden keypad). To illuminate
continuously, press and hold down light button for 3 seconds.
To disable or enable a buzzer, press and hold down [
] on hidden
keypad for 3 seconds.
To add the carry strap, slip the end of the strap through the slit on the
curved section at the back of the instrument, and secure the buckle.
Power Meter:
After turn-on, Power Meter will perform a self-calibration sequence,
and then display absolute power in dBm at the previously set
wavelength. If ‘HI’ or ‘LO’ are displayed, the input is out of range.
The Power Meter requires no warm up, and no user adjustment of
dark current to achieve its specified performance.
Light Source:
After instrument turn-on, press [Source] to enable Light Source.
On the KI7700C and KI7800C Series instruments, the light source
requires a warm up period at the set wavelength for 15 min to
achieve specified stability.
For KI7300C and KI7400C series instruments, the light source
achieves specified stability without any warm up period.

AUTOTEST OVERVIEW
KI7000 UM-5
- 14 -
Autotest performs automated loss measurement and wavelength
detection by data exchange between the Light source and Optical
Power meter.
Autotest remains synchronised for about 8 seconds after
disconnection, so the user can change optical connections without
re-starting Autotest each time thus achieving productivity gains.
Autotest reduces source warm up drift and battery consumption
compared to manual operation.
To realise the full benefit of Autotest, please use the KITS™ software
to achieve real-time data acquisition to facilitate acceptance testing
and reporting in the field. Free KITS™ software available on our
website includes a comprehensive on-line manual with full operating
sequences.
Instruments compatibility
Any Kingfisher equipment featuring Autotest is compatible, eg. any
Autotest source / loss test set can be used with any Autotest meter
for one direction loss testing as long as both instruments have
matching wavelengths.
Initiating Autotest operation
Connect Light source to the Power meter with test lead and turn on
the instruments. On Light source, press [AUTOTEST]. The meter
automatically sets to the correct wavelength and displays the
absolute power in dBm, with the operating wavelength shown at the
top right.
In Autotest, the display rotates through all source wavelengths. To
lock a display, press – side on [-/+]. In this mode, “nm” will be
flashing to show that the selected wavelength is locked. The nominal
source power transmitted from the source is on the left hand side of
the power meter display. Pressing [Abs/Rel] will make meter to
display measured optical power in dB R with the reference value
shown on the left side.
To exit Autotest, press [MENU] on Light source or disconnect patch
lead for more than 8 seconds.
Wavelength selection mode
If the required regular testing uses fewer wavelengths than the Light
source has available, then it may be convenient to reduce the
number of active Autotest wavelengths. For example, instead of the
source rotating through 1310 / 1490 / 1550 / 1610 nm, it can be set
to test at 1310/1550 nm only.
To switch wavelengths on/off:
•press [SOURCE] and then [-/+] to select wavelength.
•to check whether selected wavelength is switched on/off,
press right hand button below the screen, its status will be
indicated as ‘IN’ or ‘OUT’.
•on hidden keypad, press [
] till ‘Shift’ comes on LCD, then
right hand button below the screen to change status of
selected wavelength.
Autotest operates only with wavelengths selected as ‘IN’.
Selected settings will be retained at the next turn on.

LOCAL AND REMOTE REFERENCE METHODS
KI7000 UM-5
- 15 -
Local and Remote Reference methods.
Instruments should be referenced prior to making loss
measurements, both local and remote reference methods are
supported.
The remote reference method is useful for long distance testing.
Although this method has slightly lower accuracy compared to local
referencing, it is quite adequate for general link loss testing.
The local reference method provides high accuracy and is very
efficient for short distance loss testing, where both ends of the
system can be accessed readily by one meter, eg. patch leads
testing.
Note: when setting the reference value, use test leads with a similar
fiber type to the system under test. This is particularly important for
multimode systems. Also, connector loss between the patch lead and
source port will be added to the final loss measurement, so care
should be taken to use test leads in good condition with clean
connectors.
Note: the number of test leads used when taking reference is a
function of test requirements
Remote Reference method
•Connect Light Source port to the Power Meter port.
•Select [POWER], [Autotest], [Abs/Rel] and [Set Ref] for 3
seconds. Meters will briefly display ‘BUSY’ and then 0.00
dB R.
Figure 1. Remote reference set up-two Loss Test Sets

LOCAL AND REMOTE REFERENCE METHODS
KI7000 UM-5
- 16 -
Local Reference method
•Connect the Light Source to the Power Meter.
•Select [POWER] on both instruments
•On Light source, press [Auto test]
•On Power meter, press [Abs/Rel] and [Set Ref] for 3 seconds.
Meter will briefly display ‘BUSY’ and then 0.00 dB R.
Figure 2. Local reference set up – Light Source and Power Meter

MEASURING ONE WAY LOSS IN AUTOTEST
KI7000 UM-5
- 17 -
This method is applicable for loss measurements in the set up where
data communication is one way only. Testing on one fiber can be
achieved with:
•single Loss Test set
•Light Source and Power Meter
Alternatively, two Loss Test Sets used for simultaneous loss testing
on two fibers will ensure higher productivity.
After instruments have been referenced:
•connect the device under test (DUT) to the Light Source and
Power Meter
•press [Autotest]
Power Meter will now display insertion loss in dB R at all available
source wavelengths.
Simultaneous loss measurements on two fibers.
Two Loss Test Sets will support simultaneous loss testing on two
fibers in the set up as below:
Figure 3. Set up for simultaneous loss testing on two fibers
Note: the results will be stored on both instruments and then merged
later, so records management needs extra care.

POWER METER MANUAL OPERATION
KI7000 UM-5
- 18 -
This section refers to manual operation of KI7600C Series Power
Meter and KI7300C/7700CSeries, Power Meter section. In the Loss
Test Set, Power meter section can be operated with external light
source or in combination with Light source section of the instrument
to measure Tx / Rx absolute power levels, to perform continuity or
loss testing.
The instrument will link Light Source and Power Meter wavelengths
when both sections used in combination.
To measure the operational power level in a fiber optic system, the
Power meter is used in dBm or linear modes. To measure optical
loss or attenuation, the Power meter is used in dB mode, and the
source power is taken as a reference.
•To use Power meter section of Loss Test set as individual
instrument, turn on Loss Test Set and select [Power Meter].
Power meter will be operational at the last used wavelength.
•To scroll wavelengths, press [-/+]. The display will show
nominal wavelength in nm.
•To toggle absolute / relative display mode, press [Abs/Rel].
Measured optical power will be displayed in ‘dBm’ or ‘dB R’.
•To set reference, press [Abs/Rel] and then [Set Ref] for 3
seconds.
•When in relative mode, the reference value is displayed on
the left hand side of the display.
•To stop / start display update, press [Hold]. The symbol will
flash when the display is on hold.
•To toggle log / linear display mode, press [dB/W] on the
hidden keypad.
•To display minimum and maximum recorded power for
selected wavelength, press [
] and then [Max/Min] on the
hidden keypad. Press [
], then [Max/Min] and hold for 3
seconds to re-start the recording process. This function re-
sets automatically when instrument parameters are altered,
making it handy data logging function for the field use.
•If the meter detects a test tone between 150 and 9999 Hz,
the display will change to show the actual measured
modulation frequency in Hz.
•If a standard tone is detected (eg 270 Hz, 1 KHz, 2 KHz), a
buzzer will sound. This is useful for fiber identification and
signalling. The meter can be used to check the actual
modulation frequency of test sources (between 150 and 9999
Hz).
This manual suits for next models
79
Table of contents
Other Kingfisher Test Equipment manuals

Kingfisher
Kingfisher KI 2300 Series User manual

Kingfisher
Kingfisher KI7343C-InGaAs User manual

Kingfisher
Kingfisher KI 2400 Series Installation guide

Kingfisher
Kingfisher KI 2400 Series User manual

Kingfisher
Kingfisher KI7347C Series User manual

Kingfisher
Kingfisher KI021-1 User manual

Kingfisher
Kingfisher KI2000 Series Operating manual

Kingfisher
Kingfisher KI2000 Series User manual

Kingfisher
Kingfisher KI 7340 Series Operating manual

Kingfisher
Kingfisher KI7400 Series Installation guide