manuals.online logo
Brands
  1. Home
  2. •
  3. Brands
  4. •
  5. Kingfisher
  6. •
  7. Test Equipment
  8. •
  9. Kingfisher KI9800 User manual

Kingfisher KI9800 User manual

Other manuals for KI9800

1

This manual suits for next models

1

Other Kingfisher Test Equipment manuals

Kingfisher KI 7340 Series Operating manual

Kingfisher

Kingfisher KI 7340 Series Operating manual

Kingfisher KI 2400 Series User manual

Kingfisher

Kingfisher KI 2400 Series User manual

Kingfisher KI7400 Series Installation guide

Kingfisher

Kingfisher KI7400 Series Installation guide

Kingfisher KI7347C Series User manual

Kingfisher

Kingfisher KI7347C Series User manual

Kingfisher KI021-1 User manual

Kingfisher

Kingfisher KI021-1 User manual

Kingfisher KI2000 Series Operating manual

Kingfisher

Kingfisher KI2000 Series Operating manual

Kingfisher KI2000 Series User manual

Kingfisher

Kingfisher KI2000 Series User manual

Kingfisher KI7343C-InGaAs User manual

Kingfisher

Kingfisher KI7343C-InGaAs User manual

Kingfisher KI7343C-InGaAs User manual

Kingfisher

Kingfisher KI7343C-InGaAs User manual

Kingfisher KI7300 Series Instruction Manual

Kingfisher

Kingfisher KI7300 Series Instruction Manual

Kingfisher KI 2400 Series Installation guide

Kingfisher

Kingfisher KI 2400 Series Installation guide

Kingfisher KI23400 Series User manual

Kingfisher

Kingfisher KI23400 Series User manual

Kingfisher KI 2300 Series User manual

Kingfisher

Kingfisher KI 2300 Series User manual

Popular Test Equipment manuals by other brands

Ambit P.F. Series instruction manual

Ambit

Ambit P.F. Series instruction manual

Megger BMM500 Series user guide

Megger

Megger BMM500 Series user guide

RJG Lynx Sensor Tester operating instructions

RJG

RJG Lynx Sensor Tester operating instructions

Mark-10 TT02 Series user guide

Mark-10

Mark-10 TT02 Series user guide

Martel 3001 Operator's manual

Martel

Martel 3001 Operator's manual

ElproSys DiagProg4 instruction manual

ElproSys

ElproSys DiagProg4 instruction manual

Redtech TRAILERteck T05 user manual

Redtech

Redtech TRAILERteck T05 user manual

Venmar AVS Constructo 1.0 HRV user guide

Venmar

Venmar AVS Constructo 1.0 HRV user guide

Test Instrument Solutions SafetyPAT operating manual

Test Instrument Solutions

Test Instrument Solutions SafetyPAT operating manual

Hanna Instruments HI 38078 instruction manual

Hanna Instruments

Hanna Instruments HI 38078 instruction manual

Kistler 5495C Series instruction manual

Kistler

Kistler 5495C Series instruction manual

Waygate Technologies DM5E Basic quick start guide

Waygate Technologies

Waygate Technologies DM5E Basic quick start guide

StoneL DeviceNet CK464002A manual

StoneL

StoneL DeviceNet CK464002A manual

Seica RAPID 220 Site preparation guide

Seica

Seica RAPID 220 Site preparation guide

Kurth Electronic CCTS-03 operating manual

Kurth Electronic

Kurth Electronic CCTS-03 operating manual

SMART KANAAD SBT XTREME 3G Series user manual

SMART

SMART KANAAD SBT XTREME 3G Series user manual

Agilent Technologies BERT Serial Getting started

Agilent Technologies

Agilent Technologies BERT Serial Getting started

Agilent Technologies N3280A user guide

Agilent Technologies

Agilent Technologies N3280A user guide

manuals.online logo
manuals.online logoBrands
  • About & Mission
  • Contact us
  • Privacy Policy
  • Terms and Conditions

Copyright 2025 Manuals.Online. All Rights Reserved.

KI 9000 UM-10 45
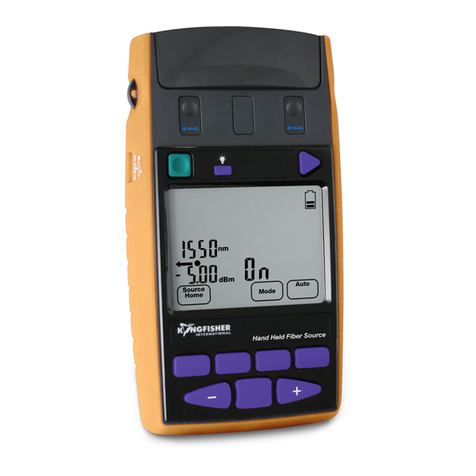
QUICK REFERENCE GUIDE –KI 9800 Series Optical Light Source
To remove interchangeable connector adaptor, press
the button on the front of the instrument and pull off
adaptor.
To defeat auto power-off, press and hold [POWER] for
3 seconds during turn on. ‘Perm’ is displayed on the top
right of the LCD.
Low battery is indicated with a battery symbol.
During instrument turn on:
-to view all display segments, press and hold [].
-to display firmware version, press and hold
[LEVEL].
-to turn buzzer off, press and hold [].
To enable source emitter, press [] or [] after
turning on instrument. Operating wavelengths will be
shown in the top corner on the right hand side and
source power level on the left hand side. Do not enable
a laser when there is no fibre attached to the optical
output connector.
To scroll wavelength, press [] or [].
ToneMode:
Modulation is active only while the source emitter is
enabled. To select a modulation tone, press [MOD] to
scroll through available settings.
Press and hold [MOD], then press [] to step down
or [] to step up the modulation tone or fiber ID
number.
Press and hold [MOD], then press [] for 3 seconds
to turn off modulation.
Press and hold [MOD], then press [] for 3 seconds
to advance to ID12.
To exit, press [MOD] for 3 seconds. Alternatively, press
[POWER] while holding [MOD].
Laser Output Power Adjustment (not available on LED source)
To decrease the laser output power, turn the laser ‘on’,
then press [LEVEL].
Press and hold [LEVEL], then press [] to step down
or [] to step up the output power.
Press and hold [LEVEL], then press [] for 3
seconds to set output power to the lowest level.
KI 9000 UM-10 46
QUICK REFERENCE GUIDE –KI 9800 Series Optical Light Source
Press and hold [LEVEL], then press [] for 3
seconds to set output power to factory default.
Alternatively, press [POWER].
AutoTest:
To start AutoTest, press [POWER] then press [AUTO].
To end, press [AUTO] again or turn the instrument off.
TamperLock Mode:
While in TamperLock Mode, user is prevented from
changing wavelength or laser output power.
Press [POWER], turn the emitter on, then press and
hold [] while pressing [LEVEL] for 5 seconds.
Display will show “codE’.
Enter 6 key sequence using any keys except
[POWER]. Triple beep and “LOut” on display will
indicate completion. To cancel your entry before
completion, press [POWER].
While TamperLock is active, “<<<”and “>>>” symbols
will be displayed.
To clear TamperLock Mode, turn off instrument then
press [POWER] while holding down [] and
[LEVEL]. When display show “codE”, enter six key
sequence.
If the correct sequence had been entered, “PASS” will
be displayed indicating that TamperLock had been
cleared.
In case where entered sequence was not correct,
“FAIL x” will be displayed (where x is attempt count).
TamperLock will be cleared after three unsuccessful
attempts.