Sivu 5 / 8
Päivitetty 24.3.2013 Käyttöohje - TUBE XL m rk II
FI
K miin edessä pitää huomioid myös pesän edust n p loturv llisuus, eli tulipesän edessä ei s
oll helposti syttyvää m teri li , käytännössä edessä tulee oll kuv n muk inen lue p l m tont
m teri li , kuten betoni , hiekk t i met llilevy. P ik lliselt p lovir nom iselt voi kysyä
lisätietoj iheest .
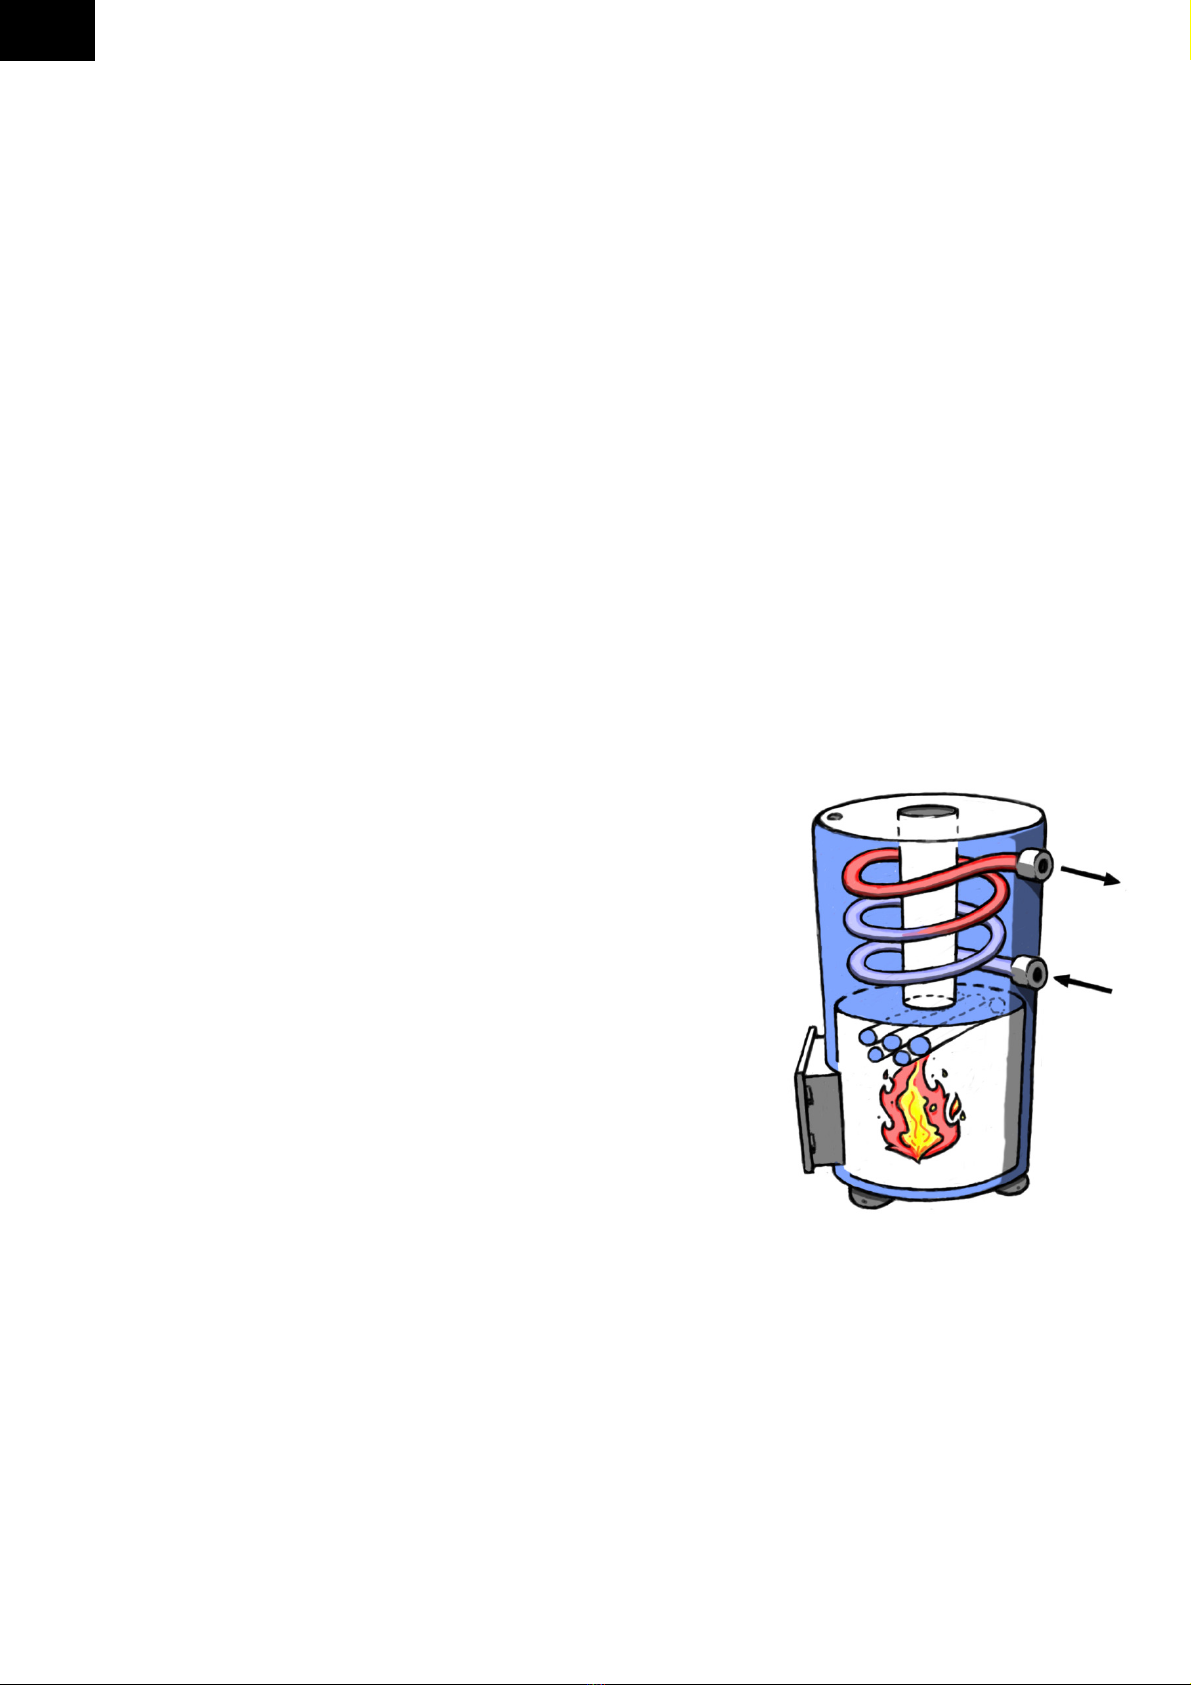
Arinat
K miin n pesään tulee k ksi k pp lett ritilä rinoit j yksi umpin inen L-r ut . Ne setet n
k miin n k nn tt mille kuv n osoitt m ll t v ll . L-r ut on t rkoitettu pesässä etumm iseksi
t itettu reun ylöspäin, näin se toimii ilm nohj imen j s m ll pitää
polttopuut p remmin pesässä.
Kamiinan käyttö
K miin on t rkoitus käyttää uim - lt n suod tinjärjestelmän
yhteydessä lt n veden lämmittämiseen. Kun k miin on täytetty vedellä, lämmönv ihdin
kytketty vesikiertoon j vesi kiertää, void n k miin n sytyttää tuli. Veden kiertonopeus tulee oll
vähintään 2m3 / tunti, jott lämmönv ihdin siirtää riittävästi lämpöä lt n veteen. Poltto ineeksi
tulee käyttää kuivi polttopuit . Lämmityksen aikana järjestelmää tulee tarkkailla 10
minuutin välein jotta veden kierto kamiinassa voidaan varmistaa ja kamiinan vesitilassa
on riittävästi vettä.
Lämmitystä void n j tk t rpeen muk n veden kiertäessä. Tulee kuitenkin huomioid , että
lt n vettä ei k nn t kosk n lämmittää yli 37 °C. Uintikäytössä huom tt v sti viileämpikin vesi
riittää. Huom myös, että vesikierron muovios t s tt v t lk pehmentyä viimeistään 50°C,
joten vältä lii llist lämmitystä.
Suod ttimen t k huuhtelu tulee suoritt vähintään kerr n viikoss , jott vesikierto pysyy
riittävänä. Isommill suod ttimill on yleensä m hdollisuus pelkästään kierrättää vettä ilm n
suod tust . Tämän on suositelt v t p kierrättää vettä lämmityksen ik n . Seur tähän liittyen
p luuveden lämpötil , se ei s isi ylittää 50 °C.
Kylmä vesi j lämmin ilm (lämpötil ero/ilm nkosteus) iheutt v t kondenssivettä tuhk til n,
joten k miin ei todennäköisesti ole vuot v v ikk pesään tulisi hiem n vettä käytön ik n .
Sopiviss olosuhteiss kondenssin määrä s tt oll suurikin.
HUOM!!!!
Pumppukiertoon liitettyä kamiinaa ei saa koskaan sytyttää
altaan ollessa tyhjä tai vajaasti täytetty tai niin ettei pumppu
ole käynnissä! Vajaan altaan tai kiertämättömän veden
lämmittäminen johtaa kamiinan sulamiseen! Varmista että
vesi kiertää kamiinassa ennen sytytystä!