Kirisun V688-02 User manual

V688-02
Instruction Manual
service@kirisun.com
400-700-9995
专线:
5 6
Professional Wireless Communication System Solution Supplier
DIGITAL
RADIO

INSTRUCTION MANUAL
V688-02
Commercial Digital Portable Two-way Radio
We are very grateful for your purchasing brand two-way
radios produced by Shenzhen Kirisun Electronics Co., Ltd.
We believe two-way radio, which always incorporates the
latest technology, can bring great convenience to your life and work.
We also believe that the quality and function of two-way radio can
meet your demands for reliable communication.
7PIZ-4009-C01A
Causes and Solutions
A. The antenna is in poor contact.
Please fasten the antenna head.
B. The HF amplifier is broken, please
change it.
C. The squelch level is so high that the
squelch cannot be opened. Please reset
the squelch level.
D. The mixer tube is broken, please
change it.
E. The FM processing IC is broken,
please change it.
A. The power module is broken, so there
is no power output. Please change it.
B. The microphone is broken, please
change it.
A. The speaker is broken, please
change it.
B. the audio amplifier is broken, please
change it.
Problem
No signal
The transmi-
tting red light
is on, but no
voice is heard.
The receiving
green light is
on, but no
voice is
No.
4
5
6
NOTE

Notice to the User:
Please read this manual carefully before any
operation to this product. When you start to
use the product, we deem that you have read
carefully about this manual.
◆The use of the radio must comply with the
de al e r of th e lo cal go v er nme nt . Il leg al
operation is subject to punishment by fine
and/or imprisonment.
◆In order to avoid the problems caused by
electromagnetic interference or electromagn-
etic compatibility, please turn off the radio in
the areas where the sign of “Please turn off
two-way radio” is posted, such as hospital and
other health care centers.
◆For vehicles with an air bag, do not place the
radio in the area over an air bag or in the air
bag deployment area.
◆Please turn off the radio before entering
i n to t h e p o t en t i al l y f la m m a b l e a nd
explosive atmosphere.
◆Please do not change the radio’s battery
or charging into the potentially flammable
and explosive atmosphere.
◆Ple a se turn off the r adio ne ar by
explosive and thunder area.
◆Please do not use the radio with damaged
antenna, which will make light burning in
contacting with the skin.
◆Please make sure the antenna is well
installed when using the radio, the radio is
easy to damage when transmission without

1
1
1
1
1
1
1
antenna.
◆Please make sure the radio is vertically
during the transmission, and keep mouth
away about 5cm from the microphone.
◆If you are wearing the radio on the body,
please confirm that the antenna is 2.5 cm far
away from your body in transmission.
CONTENTS
■
◆Supplied accessories
■Preparation
◆Charging the Battery
◆Installing/Removing the Battery
◆Installing the Antenna
◆Installing the External Speaker/Microphone
◆Installing the Belt Clip
■Radio Overview
■Programmable key
■LCD display screen
■LED indicator
■Basic Operation
◆Turn on/off radio
◆Adjust the channel
◆Adjust the volume
◆Transmitting
◆Receiving
◆Answering a call
■Menu
Unpacking and Checking ◆Menu in Digital channel
Call log
Contacts
Scan
SMS
District
Setting
Radio Own Information
◆Menu in Analog Channel
■Functions and Operations
◆Keypad Lock
◆Channel Lock
◆Overtime Forbidden
◆Channel Scanning
◆SMS
◆VOX function
◆Squelch Off/ Lone Worker Reset
◆Emergency Alarm
◆Working Specialty Setting
■Troubleshooting
■
Unpack the radio carefully. We recommend that you check the
radio and the supplied accessories listed in the following table
before discarding the packing material. If any damage or loss
has occurred during shipment, please contact the dealer
without delay.
Unpacking and Checking
Item Quantity
Antenna
Battery
Belt Clip
Charger
Power Adapter
Hand Strap
Instruction Manual
1
2
2
3
3
4
4
5
6
7
8
9
9
9
9
9
9
10
10
10
10
11
11
12
12
13
14
16
16
16
16
17
17
17
17
18
18
19
19
1

1
Antenna Power Adapter
Battery Charger
Belt Clip Hand Strap
◆Supplied Accessories ■ Preparation
◆ Battery Information
Charging Notice
※ The radio’s battery is not fully charged before
shipment. Before the initial use, please charge the
battery. Charging/discharging twice or triple can let the
battery volume in the best status. When the battery is in
low power, it’s need to be charged or change another
battery.
※ Please do not let the terminal of battery in short
circuit or throw the battery into fire.
※ To make sure the battery can be full charged, please
turn off the radio while charging.
※ Please do not put the radio in the charger when it’s
not need to, charging in cycle will shorten the battery’s
life time and performance.
※ Do not recharge the battery if it has been fully
charged or the radio is not in the low battery alarm state;
otherwise, it will shorten the battery’s life time and
performance.
※ The batt er y is better t o be stayed i n room
environment about 25℃. The battery is easy to lose
efficiency if long stayed under -10℃ environment.
※ If the temperature is higher than 35℃ or lower than -
10℃, the electro-discharge will be reduced by the Li
battery’s physics characters.
◆ Charging the battery
● Battery Charging
Plug the power adapter into an applicable AC outlet and
connect the power adapter to the battery charger. The
green LED will light up.
Insert the battery or the radio into the charger slot.
Make sure the battery is well connected with the
charger. Then the red LED will light up, it indicates that
the charging starts. When the LED light green, it
indicates the battery has been full charged.
◆ Accessories Installation
●Installing/Removing the Battery
Turn off the radio, install the battery pack with the two
slots on the back of the radio, and push forward the
battery along the slots until a click is heard. Then the
battery is installed. Before moving the battery pack,
please check the radio has been turned off and then
push the battery latch upwards, and then remove the
23

45
1
2
battery away from the radio.
Installation:
① Install the two
bulges at the bottom
of the battery pack
w i t h t h e c o r r e s p-
onding slots at the
rea r bot to m of th e
radio.
② Push the top part
of the battery towards
the radio to lock it
until a click is heard.
Removing:
①Make sure the radio
has been turned off,
and the n pus h the
b a t t e r y l a t c h
upwards.
②Pull up the top of the battery, and then
remove it away from the radio.
◆ Installing/Removing the Antenna
Hold the base of the antenna and turn
the antenna clockwise into the connector
on the top of the radio until secure.
Ot her wi s e, tu rn th e a nte nn a a nti -
clockwise and remove it.
Installation:
Hold the base of the antenna and turn
the antenna clockwise into the connector
on the top of the radio until secure.
Removing:
Hold the base of the antenna and turn
the antenna anti-clockwise and remove
it
◆ Installing/Removing the Belt Clip
Put the grooves of the belt clip correspond to the rear
top of the battery. Then press the belt clip downwards
until it’s tightened.
Note:
The belt clip can be only installed before the battery
installed.
To remove the belt clip, use your fingernail or a tool to
press the belt clip tab away from the battery. Then slide
the belt clip upwards to remove it
2
1
◆ Installing the External Speaker/MIC
Open the cover for external speaker/MIC jacks, and
then insert the external speaker/MIC plug into the jacks
on the radio.
When the radio is need to be programmed, insert the
plug of the programming line into the USB port which is
under the MIC.
.
2
1

67
■ Radio overview
① Volume Knob
Rotate the knob to adjust the volume.
② ON/OFF Key
Long press the key to turn on/off the radio.
③ PTT
Press the key and speak to send a call; release the key
to receive the call.
④ Programmable Key
The button can be assigned different functions through
PC software by dealer. Detailed information refers to 13
12
11
14
2
1
3
4
5
6
78
9
10
11
12
13
14
15
17
16
th e f o llo wing p a rt “ Pro gram mab l e K ey” in t h is
instruction. It’s set as keypad lock shortcut key before
shipment.
⑤ Key
Page up
⑥ Menu
Press to go into the menu, and confirm the current item.
⑦ Digit Keys
Used to dial numbers, input the messages.
⑧ Speaker
⑨ Key
Page down
⑩ Clear Key
Press to clear operation or go back to previous menu.
LCD Display Screen
Display and indicate the operation status.
External Speaker/Earphone Jack
Used to connect speaker/Earphone, programmable
wire connector
Microphone
Voice input
LED Indicator
Indicate the operation status, refers to the following
“LED Indicator” in this instruction.
Antenna
Battery Lock
Battery Park
■ Programmable keys
The dealer can reprogram the following keys as function
shortcut keys:
Long press or short press are both available: PF key
Short press: ON/OFF key
Long press: Menu key, Cancel key
Remark:
Short press: press the key and release it soon;
Long press: press and hold the key for at least 2
seconds.
Programmable functions:
● None: There’s no reaction of the radio for press the
key.
● Standby Mode: Return to the standby mode in menu
status.
● Powder Level adjust: High/Low power change.
● Call Log: Enter the call log directly
●Monitor: If there’s CTCSS in analog mode, the
CTCSS will be canceled and switch to carrier squelch
mode when press the key.
● Emergency Alarm: Turn on/off the emergency alarm.
● Keypad Lock: Lock/Unlock the keyboard to avoid
disoperation. In keypad lock states, only press “PTT”
or “Emergency Alarm” key, the radio will has
reaction.
● Squelch Turn on/off: Turn on/off the squelch function.
●Squelch Level adjust: Adjust the receipt signal
intensity.
● Contacts: Enter to Contacts interface directly to
select the contact number.
17
15
16

8 9
Signal Intensity
Indication
Message
Scan
Power
Keypad Lock
Squelch Turn
off
Emergency
Alarm
VOX
Dump Power
Private Call
Group Call
All Call
No signal
More bars, stronger signal.
There is unread message in the inbox.
The inbox is full.
The radio is in scanning status.
Low power
High power
The Keypad is locked.
It’s appeared when “Squelch Turn
on/off”.
The radio is in emergency alarm status,
or receives emergency alarm.
Turn on Voice Induction Transmitting
function
Indicates the dump power of the battery
Indicates the number is private number
Indicates the number is group’s
number
Indicates the number is all contacts’
number
● Scanning: Turn on/off scanning function.
●Spurious Channel Delete: Delete all the none-
selected channels in the scanning list.
● Radio Kill: Kill the target radio
● Radio Revive: Activate the killed radio
● Whisper: Turn on/off whisper function
● VOX: Activate transmitting through voice induction,
avoid pressing “PTT”.
●Battery monitor: Display the dump power of the
battery.
● Upturning: Switch to the precious interface.
● Down turning: Switch to the next interface
■ LCD display screen
Call Out
Call In
Call on hold
Signal transmitting
Signal receipting
Call on hold
■ LED Indicator
Red LED lights on: the radio is transmitting
Green LED lights on: the radio is receiving
Red LED flashes: low battery, the battery need to be charged
■ Basic Operation
◆ Turn on/off radio
Press the ON/OFF key to turn on or off the radio.
◆ Adjust the channel
Press the Key or Key to select the channel, if the
“Channel Lock” function is open, the channel can’t be
switched over.
◆ Adjust the volume
Rotate Volume Knob to adjust the volume.
◆ Transmitting
In digital channel, the transmitting methods are as
below:
1.Go into the “Contacts” menu, choose one contact,
then press and hold the “PTT”, mouth to the MIC and
talking.
2.Go into the “Call Log”, then go into “Call Out” or “Call
In”, choose one contact, press and hold the “PTT”,
mouth to then MIC and talking.
3.In standby mode, press and hold the “PTT”, mouth to
the MIC and talking, the call out number is the default
contact’s, which the number can be programmed
dealer, or set through menu.
4.In standby mode, input the number manually, then
press and hold “PTT”, mouth to the MIC and talking.
In analog channel, press and hold on the “PTT” directly,
then mouth to MIC and talking.
◆ Receiving
The receiving strength will be indicated in the LCD

10 11
Menu
Call Log
Contacts
Scanning
SMS
Zone select
Settings
Apps
Channel info
when the radio is receiving. When it's in digital channel,
the radio receives the same channel’s Private call,
Group call and All call, then the radio will output the
voice; when it’s in analog channel, the radio receives
the current channel’s call-in analog signal, and the
CTCSS of the call-in analog signal matches with the
CTCSS set in the receiving radio, or there’s no CTCSS
set in the receiving radio, then the radio will output the
voice.
◆ Answering a call
In digital channel, when the radio receives a call, press
and hold on the “PTT”, the call can be answered in Call
Holding Time. If the call is not answered in Call Holding
Time, it’s need to recall. The Call Holding Time can be
set by dealer.
In analog channel, when the radio receives a call, press
and hold on the “PTT” to answer the call directly.
■ Menu
Press “Menu” to go into. The menu items in digital are
different form in analog. And the items can be chosen by
dealer while reprogramming.
◆Menu in Digital Channel
In digital channel, the items as below:
The main menu’s frame diagram
Call log
Press “Menu”, choose and press “Call log”. Or, press
the shortcut key to go into “Call log”
Call Log
Dialed
Received
Delete All
The radio can record the call in and call out log, if the call
log volume is full, the earliest log will be covered and
disappeared.
Go into “Dialed” or “Received”, choose one contact
and act as follows: send a call, check the detailed
information, add the contact, send a Radio check, set as
the default contact, delete.
If the radio’s “Radio Kill”, “Radio Revive” is set
open by dealer, user can also send “Radio Kill” and
“Radio Revive” to the contact.
Press “Delete All” and delete all the call logs.
● Detailed information:
User can check and review and detailed information of log.
● Add a contact:
User can choose a number in call log and add it into
contact’s list.
● Radio check:
User can check the contact’s status (only private call
contact) to make sure if the contact’s radio is power on or
in the current channel without bothering that person.
● Radio Kill:
User can send a Radio Kill to the contact (only private call
contact), let that radio useless.
● Radio Revive:
User can send a Radio Revive to the contact (only private
call contact), let the radio returns to normal function.
● Set as default contact:
The default contact can be called directly by press “PTT”.
Each channel can set one default contact. The number can
be set by dealer through programming or set in the menu.

13
12
● Delete:
Delete the call logs.
Contacts
Press “Menu”, choose and then press “Contact” to
go into. There are “Found Contact” and “Contacts
List” submenu.
● Contacts List:
User can go into the “Contact List” through “Contact”
menu or the shortcut key. The “Contact list” can be
edited by dealer’s programming or input manually.
Manual input can only operated in private contact list.
Go into “Contact List”, choose one contact, it can be
acted as follows: press and hold on “PTT” to send a
call, check the detailed information, send a Radio check,
set as defaulted contact, edit, delete.
If that radio’s “Radio Kill”, “Radio Revive” is set
open by dealer, user can also send “Radio Kill” and
“Radio Revive” to the contact.
About Radio check, set as default contact, Radio Kill,
Radio Revive these functions’ operation, it can refer to the
statement of “Call Log”. And the other’ functions as below:
Detailed information:
User can check the contact’s name, number, and calling
type.
Edit:
User can edit the contact’s name, number, and calling
type.
Delete:
Delete this contact’s log.
● Found a contact:
You can found a contact into the “Contact List”, the largest
contact number can be input seven digits.
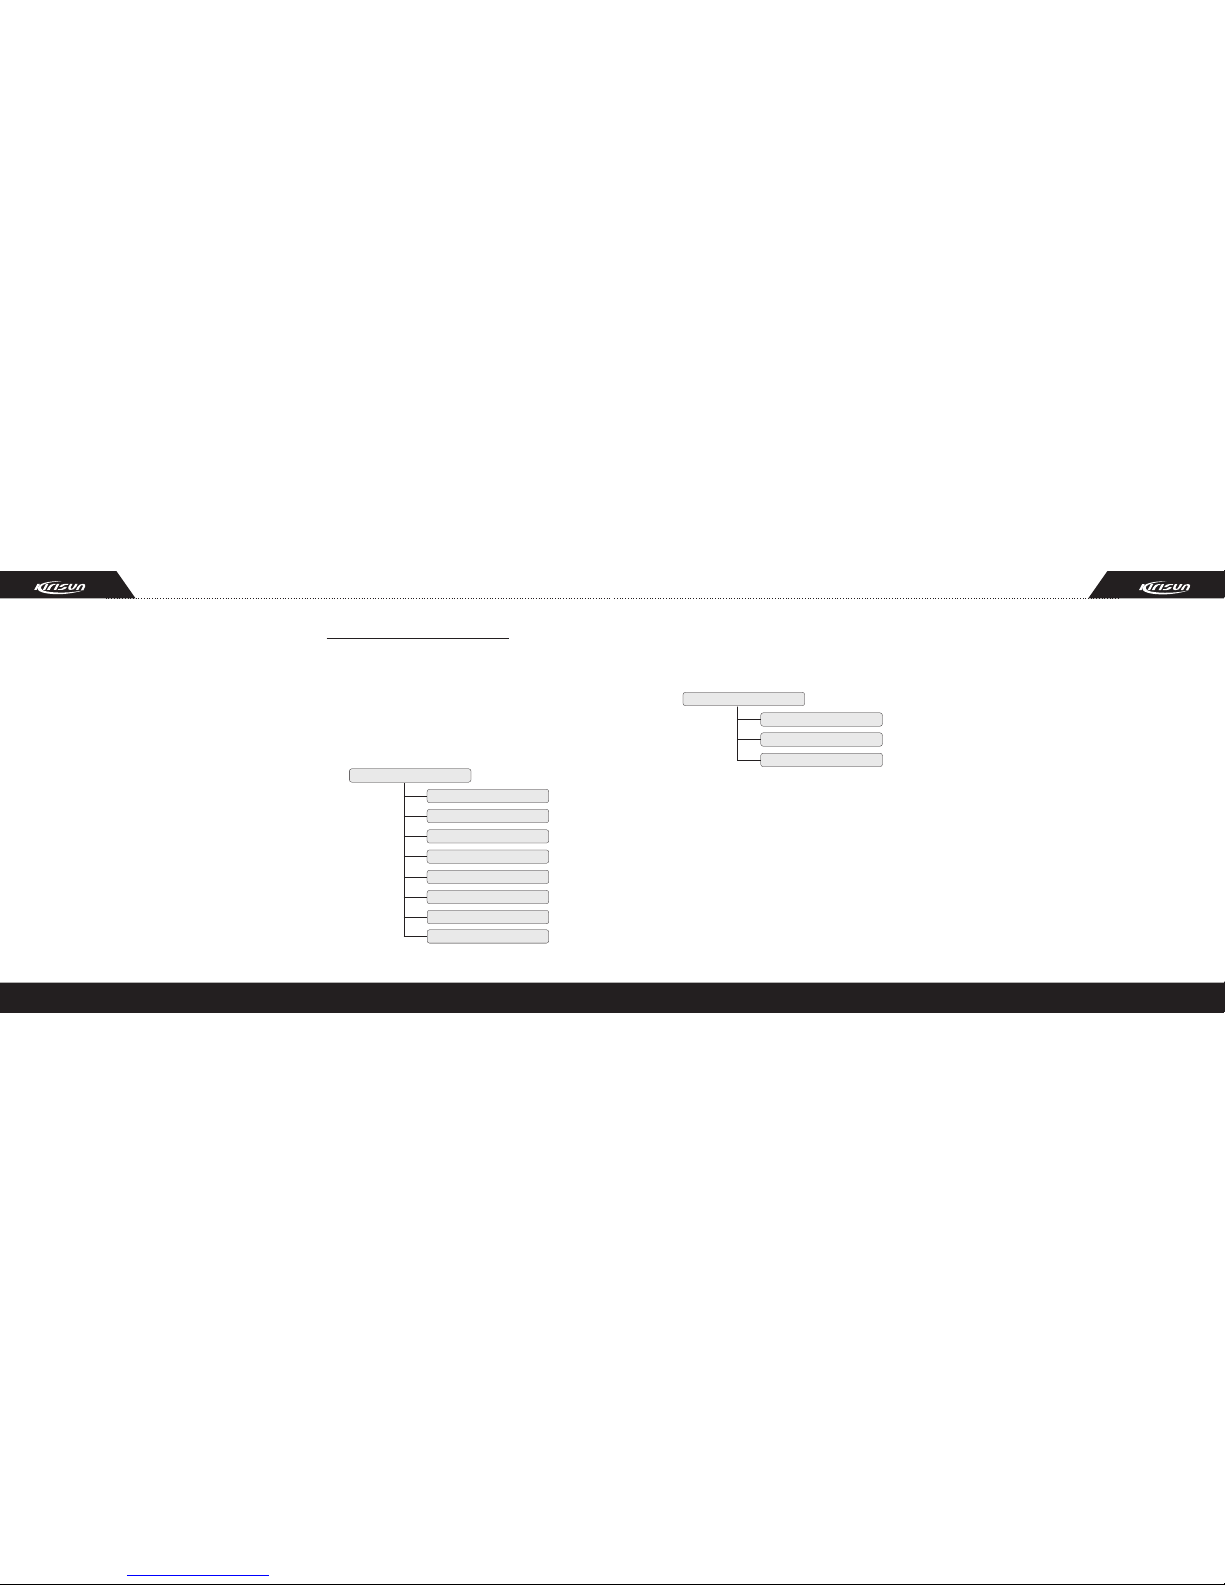
Scanning
Press “Menu”, choose and press “Scan” to go into.
Scanning
Turn on
Scan List
● Turn on:
In order to receive calls from different channels, the radio
can be programmed to scan these channels. Press the
button to start scanning, and press “Clear” key to stop
scanning.
● Scan List:
Each channel can be related to a “Scan List” by dealer’s
programming. Only the channel which is related to a
“Scan List” can start scanning. And each “Scan List”
includes 16 channels the most, with both digital and
analog channel. With this function, the channel included in
the “Scan List” of the current used channel can be
checked, added or delete. Attention: if the channel
included in the “Scan List” is changed, the other channels
which related to the “Scan List” will be influenced.
In scanning status, press “Menu” key, the following will be
displayed:
Scanning
Scan List
Add Temp Channel
Delete Temp Channel
● Add/Delete Temp Channel
During scanning, if it’s stopped at a non-necessary
channel, such as: channels interference, the non-
necessary channel can be deleted by “Delete Temp
Channel” function, and then scanning continues. And
also, customer can add a channel by “Add Temp Channel”
function.
After quit scanning mode, the temporarily added or
deleted channel is invalid.
SMS
Press “Menu”, choose and press “SMS” to go into.
Dialed
Received
Delete All
SMS
New SMS
Shortcut SMS
Inbox
Outbox
Drafts

14 15
● New SMS:
You can write a new message to send, the contact can be
chosen from “Contact List”. It can also be saved into
Drafts, and the shortcut message can be inserted while
writing a new message.
● Shortcut SMS:
There are several shortcut messages edited by dealer,
you can send out anyone if you like.
● Inbox:
The inbox stores the received messages. If there’s a new
message, will be displayed in the standby interface; if
the inbox is full, will be displayed. If the inbox is full, the
earlies t received messages wi ll be c overed and
disappeared. Any message can be operated as
followings: check the detailed information, reply, forward
and delete. Delete all messages in the inbox steps: Inbox
->inbox list->delete all.
● Outbox:
The outbox stores the sent messages. If the outbox is full,
the earliest sent messages will be covered and
disappeared. Delete all messages in the outbox steps:
Outbox ->outbox list->delete all.
● Draft-box
The draft-box stores the draft messages. If the draft-box is
full, the earliest draft messages will be covered and
disappeared. Any message can be operated as
followings: send, edit and delete. Delete all messages in
the draft-box steps: SMS ->Draft-box->delete all.
Zone Select
A group of communication channels makes up a zone. You
can choose the zone you want through this menu.
Settings
The radio’s working parameter can be set by customer’s
demand, which include power, Noise level, Voice control,
whisper, Key lock, Channel lock, Alert tone set, backlight,
display main menu, sleep mode and language.
Settings
Power
Noise Level
Voice Control
Whisper
Key Lock
Channel Lock
Alert tone set
Back light
Main Window
Sleep Mode
Language
● Power:
The current used channel’s power can be set High Power
or Low Power. High power is useful for long distance
communication, but the battery’s working time will be less.
means high power, means low power. Each channel’s
power level can be set separately.
● Noise Level:
The radio’s noise level can be set from 0 to 9. If the noise
level is higher, the radio is affected less by noise or other
signal, but harder to receive weak signal. If the noise level
is lower, the radio is easier to receive weak signal, but
also easier affected by noise or other signal.
● Voice control:
Voice control means that the radio starts transmitting by
voice induction. User can set the voice control on/off, and
the voice sensitivity can be set from 1 to 5. The sensitivity
is higher, the demand voice volume is lower, but easier
affected by noise.
● Whisper:
User can set whisper on/off here. Whisper function can let
the other side heard clearly even if speak in a low voice to
MIC. It can also be set by “whisper” shortcut key.
● Key Lock
User can set key lock on/off here. If the function has been
turn on, the keypad will be locked automatically. And only
“PTT”, Emergency Alarm button and Key Lock have
reaction.
● Channel Lock:
User can set Channel lock on/off here. If the Channel Lock

16 17
has been turned on, the channel can’t be switched.
● Alert tone set:
User can turn on/off the alert tone.
● Backlight:
User can set backlight status: Open, Close and Delay the
closure. Open: the backlight light all the time; Close: the
backlight shut off all the time; Delay the closure: the
backlight light while pressing the keys and shut off after no
action for some seconds.
● Display main-menu
User can set the display of main-menu which include
channel number, channel frequency, channel name,
district number and district name.
● Sleep mode
User can set sleep mode on/off here. This function can
extend the battery’s working time.
● Language:
There are “Chinese” and “English” can be chosen.
Radio’s Own Information
The radio’s following information can be checked: the
radio’s number, model name, firmware version, data
version and frequency range.
● Menu in Analog channel
If it’s in analog channel, there are scanning, channel
information, setting, and the radio’s own information in
main-menu. In which scanning, setting and the radio’s
own information are the same in digital channel. (Refers
to: Menu in digital channel)
The current channel’s frequency and CTCSS can be
checked through checking channel’s information function.
■ Functions and Operations
◆ Keypad Lock
If the keypad is locked, the keys have no reaction except
“PTT”, “Emergency Alarm” shortcut key and “Key Lock”.
Thus, it can avoid changing the current channel and
working status unconsciously.
Long press “Key Lock” to lock the keypad, and also long
press “Key Lock” or “*” to clear it. User can turn on this
fu nct i on f oll o win g the se st ops : “Se tti ng” – ›”K ey
Lock”–›”On”.
◆ Channel Lock
To avoid changing the current channel unconsciously,
user can follow this step to open channel lock:
“Setting”–›”Channel Lock”–›”On”. Thus, there’s no
reaction for pressing “Up” and “Down” keys, the other
keys are effective.
◆ Overtime Forbidden
This function forbids user to occupy the channel for a long
time. If the continuous transmitting time exceeds the
setting time by dealer, then, the radio will be warned and
transmitting stopped. Release “PTT” to stop the warning
tone. It’s need to wait for sometime, the time can set by
dealer, and transmitting can be sent again. And dealer can
set alert function before warning tone.
◆ Channel Scanning
Press the button set as “Scan” to start scanning. While in
scanning, the radio checks every channel in the scan list and
stops on which a signal is detected. There are time-
controlled and carrier-controlled scanning, dealer can set
one to start scanning again.
● Time-controlled scanning
While in scanning, the radio checks and stops on a channel
for sometime, which the time can be set by dealer. Then, the
radio will star scanning again no matter the channel is busy
or not.
● Carrier-controlled scanning
While in scanning, the radio checks and stops on a channel
for sometime, which the time can be set by dealer. The radio
will start scanning again until the channel is not busy.
● Press “scan” –› “Open scan” to start, the radio scans
according the current “Scanning List”, press “Clear” or
“Scan” to stop.
• Carrier-controlled scanning
While in scanning, press “PTT” can let the radio to transmit
in a defaulted channel. The channel can be programmed by
dealer.
◆ SMS:
Go into “SMS”, there are edit, send, receive, answer,
forward, delete functions.

18 19
● Shortcut SMS
Go into “SMS” –›” Shortcut SMS”, there are some shortcut
SMS can be sent. The operation of shortcut SMS are the
same with normal SMS. The shortcut SMS are edit by
dealer.
● VOX function
VOX function means the radio can auto- transmit by gaining
the voice signal. Go into VOX function through
“Setting”–›”VOX”, you can set the Gain Level, and then,
will be displayed on LCD. At this moment, you can talk
without press “PTT”, and the radio returns back to receiving
status automatically.
● Kill Off/Kill Revive
If dealer release this function, users can send out Kill Off
signal to one radio, then the radio can’t transmit or receive
other signal except receiving Kill Revive signal. Kill Revive
function can let the radio returns to normal function. Sending
out Kill Off/Kill Revive signal steps refers to the above
chapter: “Menu in Digital Mode”–› ”Call Log” and “Menu in
Digital Mode” –› “Contact”.
◆ Emergency Alarm
If enabled and the user is in danger, the user can send out a
confirmed emergency alarm signal and an emergency voice
to the administrator user.
The radio alarm method supports the following two parts:
alarm type, which defines the voice and light reaction when
the radio gives an alarm; alarm mode, which defines the
content sent to the other members when the radio gives an
alarm. The above parameters can be programmed by
dealer.
◆ Alarm Type:
● None: No alarm function (Default);
● Whistle: Only whistling on the radio itself;
● Routine: Voice and light alert in alarm status, the radio
can receive the signal from others;
● Confidential: No alerting voice and light, the radio can’t
receive the signal from others;
● Confidential with voice alert: No alerting light, the radio
can receive the signal from others.
◆ Alarm Mode:
●Emergency Alarm: Emergency alarm starts, the radio
send out an emergency alarm, then, exit the emergency
alarm status automatically.
●Emergency Alarm + Emergency Call: The radio sends out
an emergency alarm, press”PTT” to send out emergency
call.
●Emergency Alarm + Sending out background sound
automatically: the radio send out an emergency alarm, then
send out emergency call with background sound periodicity
and automatically.
Remark:
Emergency Alarm: The radio sends out a signal to alert other
member’s radio.
Emergency Call: Emergency Call has priority in the channel,
to make sure the transmitting successfully at emergency
status.
● Working Specialty Setting
Users can set the radio’s working specialty parameter,
please refers to the chapter “Menu in Digital Mode”–›
“Setting”.
■ Troubleshooting
No.
1
2
3
Problem
The radio
cannot be
switched
on or no
display
after being
switched
on.
Phase
lock loop
unlocked
(Beeping)
Cannot
transmit
Causes and Solutions
A. The battery and the radio are not reliably
connected. Please reinstall the battery.
B. The fuse of the power supply is burnt out.
Please change it.
C. The power switch is in failure. Please
change it.
D. The battery is out of power, please
recharge it or change it.
E. The CPU is broken, please change it.
A. The channel frequency setting is out of
range, please reset the channel data.
B. The crystal oscillator of phase lock loop is
broken, please change it.
C. The oscillating tube is broken, please
change it.
D. The phase lock loop IC is broken, please
change it.
A. The frequencies of both users are not the
same. Please select the same frequency
channel again.
B. The CTCSS/DCS signals of both users are
not the same. Please reset it.
C. The radio is out of effective communica-
tion range.
Table of contents
Other Kirisun Radio manuals

Kirisun
Kirisun TM840 Instruction manual

Kirisun
Kirisun TM840 User manual

Kirisun
Kirisun PT8200 User manual

Kirisun
Kirisun DM588-02 User manual

Kirisun
Kirisun DP770 User manual

Kirisun
Kirisun DM588 User manual

Kirisun
Kirisun FP460 User manual

Kirisun
Kirisun FM540 User manual

Kirisun
Kirisun PT6808-02 User manual

Kirisun
Kirisun DM588-01 User manual

Kirisun
Kirisun M50 User manual

Kirisun
Kirisun PT8100 -01 User manual

Kirisun
Kirisun PT4208 User manual

Kirisun
Kirisun DP990 User manual

Kirisun
Kirisun PT810001 User manual

Kirisun
Kirisun TM840 User manual

Kirisun
Kirisun PT8100 User manual

Kirisun
Kirisun FM540 User manual

Kirisun
Kirisun DP405 User manual

Kirisun
Kirisun PT8000 User manual