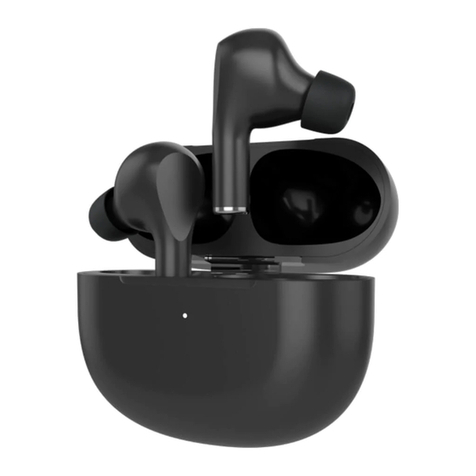
Klip Xtreme Xtremebuds User manual

Xtremebuds KTE-500

English
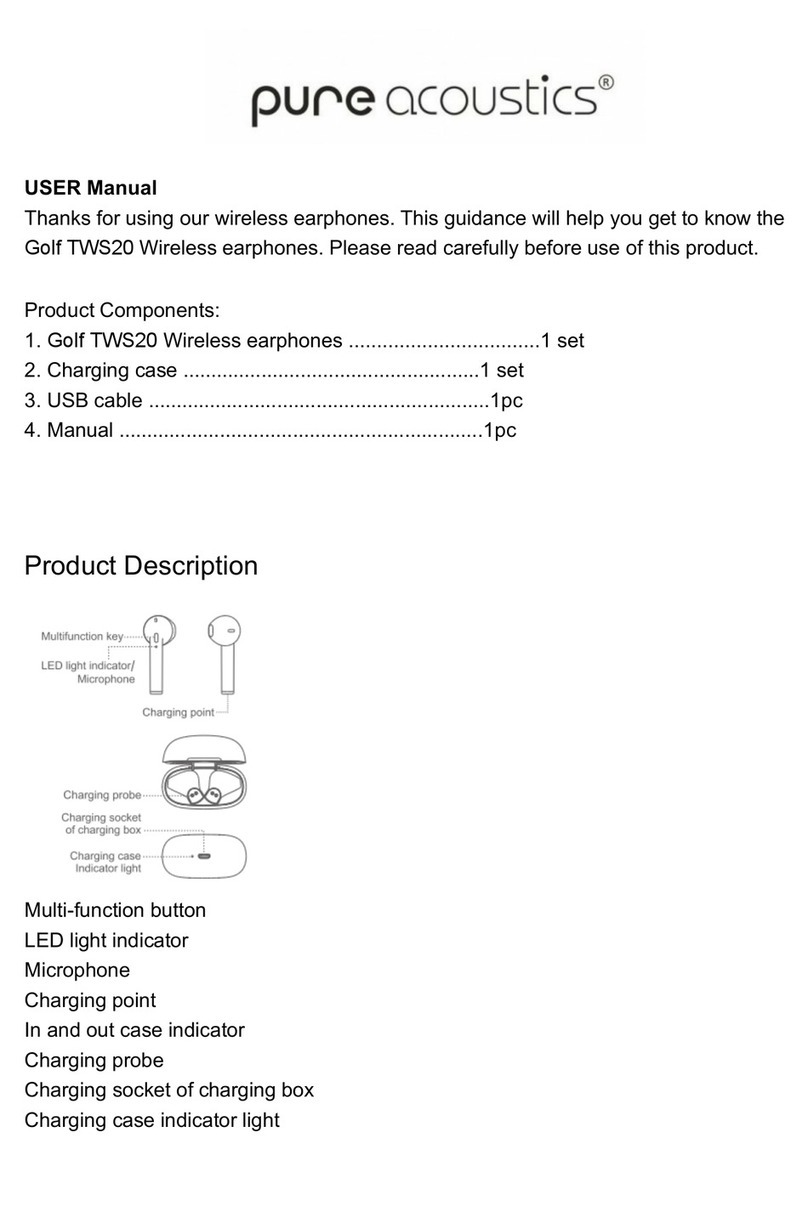
I. Introduction
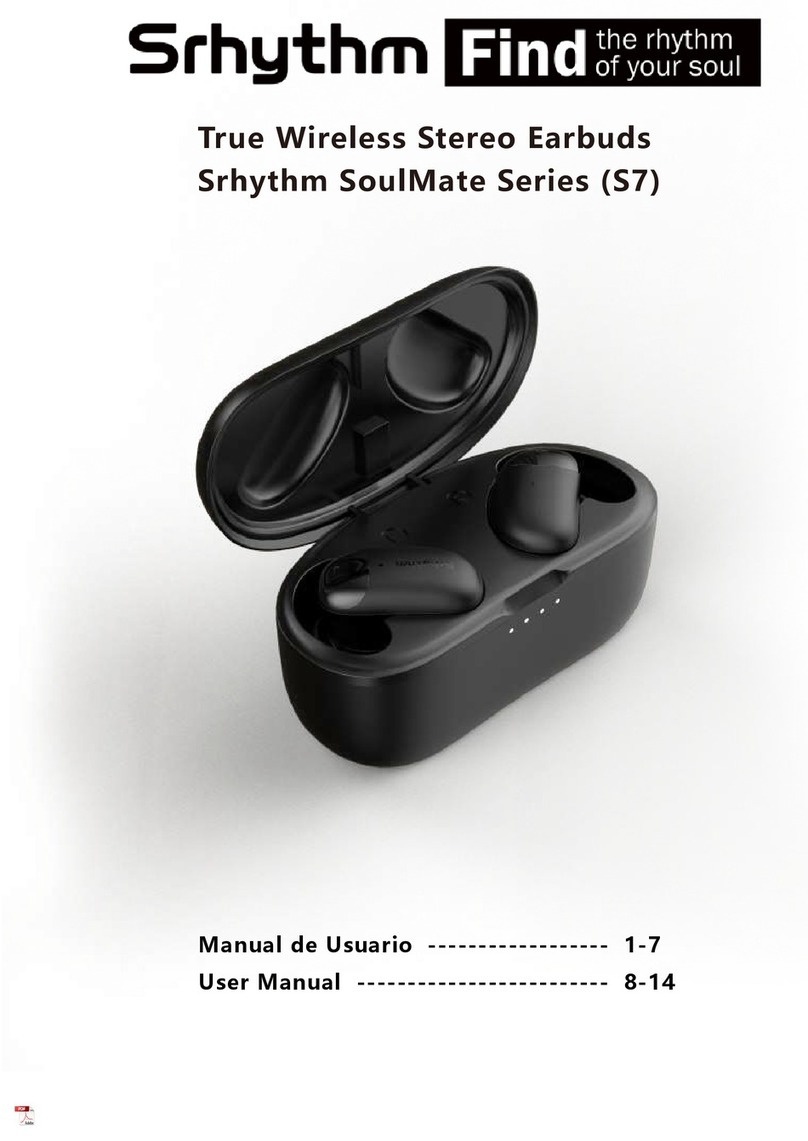
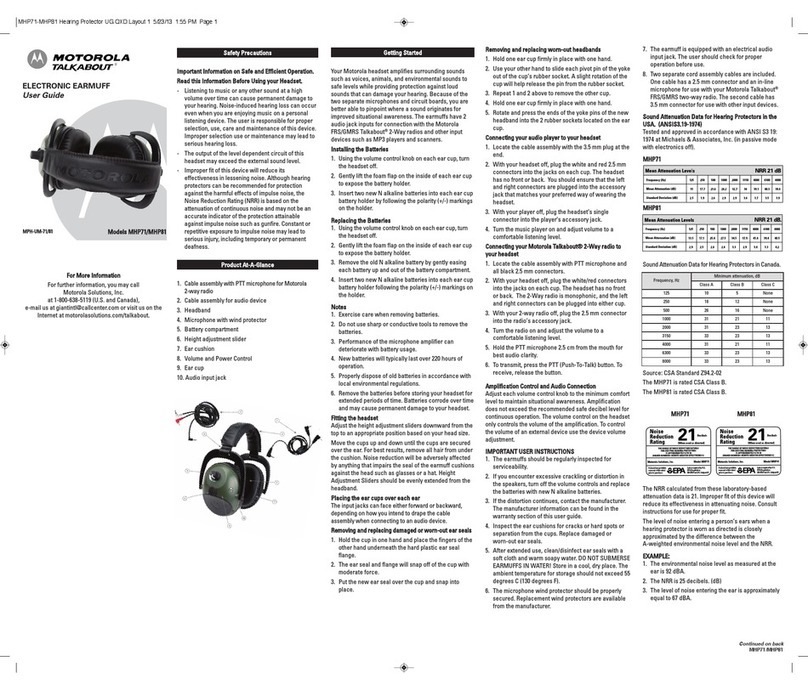
Thank you for purchasing the KlipXtreme
KTE-500 True Wireless Stereo (TWS) earbuds
with Bluetooth®wireless technology. We
encourage you to read this quick installation guide
thoroughly to get the most out of this wireless
device.
Main features
• True Wireless Stereo, designed to stream audio
wirelessly through two separate units
simultaneously from the same audio source
• Bluetooth®v5.0 earbuds with hooks for
maximum stability while working out
• Longer lasting battery playback of 108 hours
total and 12 hours for each cycle
• Powerbank functionality with USB-A port for
smartphone charging
• Smart touch design to play, pause, skip tracks,
and answer or hang up calls with a simple tap
• Charging case with battery LED indicators that
showcase battery status of the charging case
and each earbuds
• IPX7 waterproof and sweatproof protection
• Ergonomic hooks that keep the earbuds in
place during extreme sport activities
• USB-C port for swift internal charging
• Modern and sleek design
• Microphone with noise reduction technology
for hands-free conversations
Package content
• Wireless earbuds (2)
• Charging case (1)
• Type C charging cable (1)
• Ear tips (S, M, L) (3 pairs)
• Quick installation guide (1)
2. Product overview
1
2
8
3
5
6
7
4

3. Basic operation
3.1 Charging the case and earbuds
1. To charge the case, plug the supplied USB
cable into a power source and the Type C
end into the case’s charging port. The case
starts charging automatically.
2. Charging the case battery to its full capacity
may take 3 hours.
3. Once the LED indicator shows 100, the
charging case is fully charged.
4. Unplug the case from the power source and
place the earbuds on the sockets of the
charging case.
5. While the earbuds are being charged, the
LED indicator will show the power status of
both earbuds. When fully charged, the LED
will show four lines on each side. This
process takes 2 hours. Meanwhile, the
charging case indicates the remaining
capacity of the battery.
6. The fully charged earbuds have up to 12
hours of battery runtime at 50% volume or
about 80 hours of standby time.
7. A low battery prompt will be heard to let
you know that the battery is below the
acceptable level to continue operating
properly.
3.2 Turning your earbuds on or o
1.The earbuds automatically turn on when
removed from the charging case or press
and hold the multifunction button on each
one for about 3 seconds, you will hear the
prompt “powered on” and a beep.
1 Earbud LED indicator: the LED is white
when the earbud is on, when it is charging, and
when it pairs
2 Power/multifunction button: press the
multifunction button to power the earbuds
on and off. Also press this button to start and
pause media, and to answer or end an
incoming call
3 Microphone
4 USB output port: use this port as a
powerbank to charge your smartphone
5 Right earbud battery LED indicator:
indicates the charge of the right earbud
6 Charging case battery LED indicator:
Showcases the battery status of the charging case
7 Left earbud battery LED indicator:
indicates the charge of the left earbud
8 Type C charging port: insert the Type C
cable in this port to charge the battery

2. As both earbuds synchronize, a prompt will
be heard indicating that they are connected.
3. To turn the earbuds off press and hold the
multifunction button on both earbuds for
about 3 seconds.
4. Advanced operation
4.1 TWS pairing
Simply take the earbuds out of the charging
case, or turn them on as it has been
instructed previously. The earbuds LED
indicator will blink white as they sync with
each other automatically, and then enter into
mobile pairing mode.
Note: Before installing this product, please
make sure your device is Bluetooth®compatible.
4.2 Pairing the earbuds with your
mobile device
1. Turn both earbuds on by removing them
from the charging case or pressing the
multifunction button for about 3 seconds.
Both earbuds will automatically pair.
2. Set your Bluetooth®mobile device to
“discover” the wireless earbuds.
3. Place the earbuds and your phone not more
than three feet from each other.
4. After both earbuds have synchronized with
each other, the earbud LED indicator in one
of them will turn off and the LED indicator
in the other will blink white to indicate that
it has entered into pairing mode.
5. On your mobile phone, tap the newly
discovered audio device KTE-500 being
displayed in the Bluetooth®list.
6. When the mobile device asks if you want to
pair with it, click Yes or OK to accept.
7. If you have a lower Bluetooth®version, you
may be prompted to enter the passkey
0000 (4 zeros).
8. If pairing is successful the “Your device is
connected” prompt will be heard and the
earbud LED indicator will turn off.
9. If after 60 seconds the pairing process fails,
please repeat steps 1 through 6 as described
above.
10. The earbuds will automatically go into
standby mode after a short period of
inactivity to save battery life.
11. You only need to pair the earbuds with
your mobile phone once, as they will
reconnect with memorized devices
automatically.

4.3 Pairing your earbuds in Mono mode
1. If earbuds were previously paired to your
mobile device, unpair/forget the earbuds from
your mobile device.
2. Remove one earbud from the charging case,
you will hear a voice prompt “powered on”
and a beep, then the earbud LED indicator
will blink white every 0.5 seconds.
3. Press the multifunction button three times to
clear previous pairing memory. The earbud
LED indicator will blink twice, turn solid white
for 1 second and finally turning off. Press the
multifunction button for 3 seconds to
manually turn on the earbud, you will hear
the prompt “powered on” and a beep. The
earbud LED indicator will blink white every
0.5 seconds.
4. Double click the multifunction button, the
earbud LED indicator will illuminate, then
blink slowly, that means the earbud has
entered into mono mode.
5. Place the mobile phone and earbud within
three feet of each other. Select the KTE-500
earbud from the list of newly discovered
devices in your phone.
Note: The KTE-500 will appear twice in the
Bluetooth®devices list.
6. Accept by pressing Yes or OK on the
device. If prompted, enter the passkey 0000
(4 zeros). Your device will confirm when
pairing is complete.
7. The “Your device is connected” prompt will
be heard when the devices are able to
establish the wireless connection. To pair
them back together they must not be paired
to a device but simply double press one of
the units – this allows one to pair with the
other making them a single unit.
4.4 Using the wireless earbuds
1. Answering and ending a call
• When there is an incoming call, your phone
will ring along with a tone through your
earbuds.
• Press the multifunction button once on any
earbud to pick it up. You may also press the
answer button on your mobile phone to
receive the incoming communication in your
earbuds.
• To end a call, press the multifunction button
once during the call on any earbud. Likewise,
you may also finish the call directly using the
end key on your smartphone.
• To ignore an incoming call and send the

caller to voicemail, press and hold the
multifunction button on any earbud for
about two seconds.
2. Music playback and voice commands using
your earbuds.
• Press the multifunction button once on
either one of the earbuds to play and stop
audio playback.
• Press and hold the left button to go to the
previous track.
• Press and hold the right button to go to the
next track.
• Press the left button twice to lower the volume.
• Press the right button twice to increase the
volume.
• When audio is being played or paused, press
the multifunction button 3 times on one of
the earbuds to enable the voice assistant for
Siri or Google. Press again 3 times the
multifunction button to turn it off.
5. Troubleshooting
If you can’t connect the earbuds to your
mobile phone, try the following:
• Make sure that the earbuds are charged,
turned on, paired with, and connected to
your mobile phone.
• Make sure the Bluetooth®feature is activated
on your phone.
Precautions
• Your earbuds are powered by a
rechargeable battery. The battery can be
charged and discharged hundreds of times,
but it will eventually wear out. Recharge
your battery only with compatible chargers.
• Unplug the USB charger from the source
when not in use.
• Parts of the earbuds are magnetic. Metallic
materials may be attracted to the earbuds.
Do not place credit cards or other magnetic
storage media near the earbuds, as
information stored on them may be erased.
• Do NOT drop, hit or shake the device.
• Do NOT disassemble, repair or modify the
earbuds yourself.
• Do NOT use strong chemicals, solvents, or
detergents to clean the device.

1 Range estimate is based on an area free and clear of obstacles and
interference, and within the line of sight between devices.
2 Depending on the volume level and type of music file being played.
3 Battery runtime can last 12 hours per charging cycle (9) for an
estimated total of 108 hours combined.
Technical specifications
MPN KTE-500
TWS sport earbuds with powerbank
In ear with hooks
JL6983
IPX7 waterproof
Yes, smart touch
Yes, LED display
Siri and Google assistant compatible
Yes, 2000mAh USB-A type
Yes
15mW x2
20Hz-20kHz
32Ωat 1kHz
110dB±3dB at 1kHz
Built-in. HD Silicon MIC
Omnidirectional
59dB
400Ω
-42dB
Bluetooth®V5.0 + EDR1
HSP/HFP/A2DP/ACRCP
2.4GHz
Up to 10m1
Device
Type
Form factor
Chipset
Special features
IP rating
Touch button
Charging case battery
LED indicator
Voice assistant
Powerbank
Built-in microphone
Speaker
Maximum power
output (RMS)
Frequency
Impedance
Sensitivity
Microphone
Form factor
Directivity
Frequency
Impedance
Sensitivity
Connectivity
Connection type
Profiles supported
Wireless RF frequency
Wireless range
3.7VDC, 75mAh polymer battery
3.7VDC, 2000mAh polymer battery
Type C
3 hours
2 hours
3 hours
9 cycles
Up to 12 hours (50% volume)2
Up to 108 hours3
About 80 hours
Charging case: 2.4x4.1x1.5in
Earphone: 1.4x2x1.1in x2
5.2oz
39.3in
Earbuds, charging case, quick
installation guide, Type C charging
cable, ear tips
Battery
Single earbud battery
Charging case battery
Charging connection type
Charging case + earbud
charging total time
Earbud only battery
charging time
Charging case only battery
charging time
Number of charging case
cycles before battery runs out
Earbud only battery
runtime
Earbuds total run time
(including cycles)
Battery standby time
Specifications
Dimensions (LxWxH)
Weight
Cable length
Package contents

1. Introducción
Gracias por preferir los audífonos KlipXtreme
KTE-500 con Verdadera Conexión Inalámbrica
(TWS) y tecnología Bluetooth®. Te recomendamos
que leas detenidamente esta guía de instalación
rápida para aprovechar al máximo este dispositivo
inalámbrico.
Características
• Verdadera conexión inalámbrica (TWS)
diseñada para transmitir audio inalámbricamente
mediante dos unidades separadas
simultáneamente desde la misma fuente de
audio
• Audífonos Bluetooth®v5.0 con ganchos para
máxima estabilidad mientras te ejercitas1
• Reproducción extensa de la batería con un
total de 108 horas y 12 horas para cada ciclo3
• Funcionalidad de batería portátil con un puerto
USB-A para cargar el teléfono
• Diseño de botón táctil para reproducir, pausar,
saltar pistas y contestar o colgar llamadas con
un simple toque
• Estuche de carga con indicadores LED de
batería que muestran el estatus del estuche de
carga y de cada audífono
• Clasificación IPX7 a prueba de agua y sudor
• Ganchos ergonómicos que mantienen los
audífonos en su lugar durante actividades
extremas
• Compatible con el asistente de voz de Google
Español
FCC statement
This equipment has been tested and found to
comply with the limits for a Class B digital
device, pursuant to part 15 of the FCC Rules.
These limits are designed to provide
reasonable protection against harmful
interference in a residential installation. This
equipment generates, uses, and can radiate
radio frequency energy and, if not installed and
used in accordance with the instructions, may
cause harmful interference to radio
communications. However, there is no
guarantee that interference will not occur in a
particular installation. If this equipment does
cause harmful interference to radio or
television reception, which can be determined
by turning the equipment off and on, the user
is encouraged to try to correct the interference
by one or more of the following measures:
• Reorient or relocate the receiving antenna.
• Increase the separation between the
equipment and receiver.
• Connect the equipment into an outlet on a
circuit different from that to which the
receiver is connected.
• Consult the dealer or an experienced
radio/TV technician for help.
1 Indicador LED de los audífonos: el LED
es blanco cuando se encienden los audífonos,
se cargan y cuando se emparejan
2 Botón de encendido/apagado/multifun-
ción: presiona el botón multifunción para
encender y apagar los audífonos. También
presiona este botón para iniciar y colocar en
pausa el audio, para contestar o colgar una
llamada
3 Micrófono
4 Indicador LED de batería del audífono
izquierdo: indica la carga en el audífono
izquierdo
5 Puerto para carga Tipo C: conecta el
cable Tipo C en este puerto para cargar la
batería
6 Puerto de salida USB: utiliza este puerto
como batería portátil para cargar tu teléfono
7 Indicador LED de batería del audífono
derecho: indica la carga del audífono
derecho
8 Indicador LED de batería del estuche de
carga: muestra el estatus de batería del
estuche de carga
3. Operación básica
3.1Cómo cargar el estuche y los audífonos
1
2
5
3
7
8
4
y Siri; soporta la funcionalidad de reconocimiento
de voz para verdadero control con manos
libres y acceso a tu dispositivo vinculado con
el toque de un botón
• Puerto USB-C para carga interna veloz
• Diseño moderno y elegante
• Micrófono con tecnología de reducción de
ruido para conversaciones con manos libres
Contenido del empaque
• Audífonos inalámbricos (2)
• Estuche de carga magnético (1)
• Cable Tipo C para carga (1)
• Puntas para los oídos (P, M, G) (3 pares)
• Guía de instalación rápida (1)
2. Descripción del producto
6

1. Para cargar el estuche, conecta el cable USB
suministrado a una fuente de alimentación e
inserta el extremo Tipo C del cable en el
puerto de carga del estuche. El estuche
empieza a cargarse automáticamente.
2. La batería del estuche puede tomar 3 horas
en alcanzar el nivel de carga plena.
3. Una vez el indicador LED muestra 100 el
estuche de carga queda completamente
cargado.
4. Desconecta el estuche de carga de la fuente
de alimentación y coloca los audífonos en los
orificios de éste.
5. Mientras se cargan los audífonos el indicador
LED mostrará el estatus de batería de ambos
audífonos. Cuando se cargan plenamente el
LED mostrará cuatro líneas en cada lado.
Este proceso toma 2 horas. Mientras tanto,
el estuche de carga indica la capacidad
restante de la batería de éste.
6. Los audífonos completamente cargados
tienen hasta 12 horas de autonomía a 50%
de volumen o cerca de 80 horas en modo
de espera.
7. Se escuchará un mensaje avisando que la
batería está por debajo del nivel aceptable
para continuar operando apropiadamente.
3.2 Conexión y desconexión de los
audífonos
1. Los audífonos se encienden automática-
mente al removerse del estuche de carga o
presiona firmemente el botón multifunción
en cada uno por cerca de 3 segundos,
escucharás el mensaje “encendido” y un
tono.
2. A medida que ambos audífonos se
sincronizan escucharás un mensaje indicando
que están conectados.
3. Para apagar los audífonos presiona
firmemente el botón multifunción en ambos
audífonos por cerca de 3 segundos.
4. Funcionamiento avanzado
4.1 Emparejamiento TWS
Solo saca los audífonos del estuche de carga
o enciéndelos como se indicó previamente.
La luz LED de los audífonos parpadeará en
blanco a medida que se sincronizan
automáticamente y a continuación entrarán
en el modo de emparejamiento.
Nota: antes de instalar este producto
asegúrate de que tu dispositivo es
compatible con Bluetooth®

4.2 Cómo emparejar los audífonos con
el teléfono móvil
1. Enciende los audífonos removiéndolos del
estuche de carga o presionando el botón
multifunción por cerca de 3 segundos. Los
audífonos se emparejarán automáticamente.
2. Configura la función Bluetooth®en el
teléfono para “detectar” los audífonos.
3. Ubica ambos dispositivos a no más de un
metro de distancia entre sí.
4. Luego de que los audífonos se sincronicen
el indicador LED en uno de ellos se apagará
y el indicador LED en el otro parpadeará en
blanco para indicar que entró en modo de
emparejamiento.
5. Escoge los audífonos KTE-500 de la lista de
dispositivos recientemente detectados por el
teléfono móvil.
6. Para aceptar el emparejamiento, oprime Sí u
OK en el dispositivo móvil.
7. Si cuentas con una versión inferior de
Bluetooth®puede que te solicite ingresar la
clave 0000 (4 ceros).
8. Si se realiza el emparejamiento con éxito se
escuchará el mensaje “Tu dispositivo está
conectado” y el indicador LED de los
audífonos se apagará.
9. Si después de 60 segundos no logras
emparejar el dispositivo repite los pasos del
1 al 6 del procedimiento anterior.
10. Tras un breve período de inactividad, los
audífonos pasan automáticamente al modo
de pausa para conservar energía de la
batería.
11. Solamente necesitas emparejar los
audífonos con tu teléfono móvil una vez ya
que se reconectarán automáticamente con
dispositivos memorizados.
4.3 Cómo emparejar los audífonos en
modo Mono
1. Si los audífonos se emparejaron
previamente con tu dispositivo móvil,
desemparéjalos del dispositivo.
2. Remueve un audífono del estuche de carga,
escucharás el mensaje “encendido” y un
tono, el indicador LED del audífono
parpadeará en blanco cada 0,5 segundos.
3. Oprime tres veces el botón multifunción
para eliminar la memoria de emparejamien-
to. El indicador LED del audífono parpadeará
dos veces, se iluminará por 1 segundo y
finalmente se apagará. Presiona el botón
multifunción por 3 segundos para encender
el audífono manualmente, escucharás el
mensaje “encendido” y un tono. El indicador
LED del audífono parpadeará en blanco cada
0,5 segundos.

4. Presiona dos veces el botón multifunción, el
indicador LED del audífono se iluminará,
luego parpadeará lentamente, eso indicará
que el audífono está en modo Mono.
5. Coloca el teléfono inteligente y el audífono
dentro de un metro de distancia. Selecciona
el audífono KTE-500 de la lista de
dispositivos descubiertos en tu teléfono
inteligente.
Nota: Los audífonos KTE-500 aparecerán
dos veces en la lista de dispositivos
Bluetooth®.
6. Acepta oprimiendo Sí u OK en el dispositivo.
Si te pide una contraseña ingresa la clave
0000 (4 ceros). Tu aparato confirmará
cuando se complete el emparejamiento.
7. Escucharás la indicación “tu dispositivo está
conectado” cuando los dispositivos puedan
establecer la conexión inalámbrica. Para
emparejar los audífonos de nuevo no se
deben emparejar a un aparato sino
simplemente oprimir dos veces uno de los
audífonos – esto permite que un audífono se
empareje con el otro formando una sola
unidad.
4.4 Cómo utilizar los audífonos
inalámbricos
1. Contestar y colgar una llamada
• Al recibir una llamada entrante, el teléfono
móvil sonará junto con un tono proveniente
de los audífonos.
• Oprime el botón multifunción una vez en
cualquiera de los audífonos para contestar.
También puedes presionar el botón de
contestar en tu celular para recibir la
comunicación mediante los audífonos.
• Para finalizar una llamada oprime el botón
multifunción una vez nuevamente en
cualquiera de los audífonos. Igualmente,
puedes concluir la llamada directamente
presionando el botón de colgar en tu
teléfono inteligente.
• Para rechazar una llamada y enviarla a la
casilla de mensajes mantén presionado el
botón multifunción en cualquiera de los
audífonos por dos segundos.
2. Reproducción de música y comandos de
voz mediante los audífonos inalámbricos
• Oprime el botón multifunción una vez en
cualquiera de los audífonos para reproducir
o detener el audio.
• Mantén presionado el botón izquierdo para
ir a la pista anterior.

Especificaciones técnicas
MPN KTE-500
Audífonos deportivos TWS con batería
portátil
Intraaural con ganchos para los oídos
JL6983
IPX7 a prueba de agua
Sí, toque inteligente
Sí, pantalla LED
Compatible con Siri y Google
Sí, 2000mAh tipo USB-A
Sí
Dispositivo
Tipo
Factor de forma
Chip
Características
Clasificación IP
Botón táctil
Indicador LED de batería
en el estuche de carga
Asistente de voz
Batería portátil
Micrófono integrado
• Mantén oprimido el botón derecho para ir a
la siguiente pista.
• Presiona el botón izquierdo dos veces para
reducir el volumen.
• Oprime el botón derecho dos veces para
subir el volumen.
• Cuando el audio está sonando o está en
pausa, oprime el botón multifunción 3 veces
en uno de los audífonos para activar la
función del asistente de voz Siri o Google.
Presiona el botón multifunción 3 veces de
nuevo para desactivarla.
5. Solución de problemas
Si no consigues conectar los audífonos a tu
teléfono inteligente intenta lo siguiente:
• Asegúrate de que los audífonos están
cargados, encendidos, emparejados y
conectados a tu teléfono inteligente.
• Verifica que la función Bluetooth®esté
activada en tu teléfono móvil.
Precauciones
• Tus audífonos son alimentados por una
batería recargable. La batería puede cargarse
y descargarse cientos de veces pero
terminará desgastándose. Recarga la batería
solo con cargadores compatibles.
• Desconecta el cargador USB de la fuente de
alimentación cuando no se utilice.
• Partes de los audífonos son magnéticas. Los
materiales metálicos pueden ser atraídos por
los audífonos. No coloques tarjetas de
crédito u otros medios magnéticos de
almacenamiento cerca a los audífonos, pues
las informaciones grabadas en éstos se
pueden borrar.
• NO dejes caer, golpees o sacudas el
dispositivo.
• NO desarmes, repares o modifiques los
audífonos por tu cuenta.
• NO uses productos químicos, solventes o
detergentes fuertes para limpiar el
dispositivo.

1 El cálculo de alcance se basa en un área libre de obstáculos e
interferencias y dentro de la línea de visión entre los dispositivos.
2 Depende del nivel de volumen y del tipo de música que se
reproduce.
3 El tiempo de reproducción de la batería puede durar 12 horas
por ciclo de carga (9) para un estimado total de 108 horas
combinadas.
15mW x2
20Hz-20kHz
32Ωa 1kHz
110dB±3dB a 1kHz
Integrado. Micrófono HD de silicona
Omnidireccional
59dB
400Ω
-42dB
Bluetooth®v5.0 + EDR
HSP/HFP/A2DP/ACRCP
2.4GHz
Hasta 10m1
Polímero de 3,7VDC, 75mAh
Polímero de 3,7VDC, 2000mAh
Tipo C
3 horas
2 horas
3 horas
9
Hasta 12 horas al 50% de la
capacidad del volumen2
Parlante
Máxima potencia de salida
(RMS)
Frecuencia
Impedancia
Sensibilidad
Micrófono
Factor de forma
Directividad
Frecuencia
Impedancia
Sensibilidad
Conectividad
Tipo de conexión
Perfiles soportados
Frecuencia de RF
inalámbrica
Alcance inalámbrico
Batería
Batería del audífono
Batería del estuche de carga
Tipo de conexión de carga
Tiempo total de carga del
estuche y de los audífonos
Tiempo de carga de la
batería (solo los audífonos)
Tiempo de carga de la batería
(solo el estuche de carga)
Ciclos del estuche de carga
antes de que se agote la batería
Tiempo de reproducción de
la batería (solo los audífonos)
Hasta 108 horas3
Alrededor de 80 horas
Estuche de carga: 6,3x10,6x3,9cm
Audífono: 3,8x5,1x3cm x2
148g
1m
Audífonos, estuche de carga, guía
de instalación rápida, cable de
carga Tipo C, puntas para los oídos
Batería
Tiempo total de repro-
ducción de los audífonos
(incluyendo los ciclos)
Tiempo en modo de espera
Dimensiones
Dimensiones (LaxAnxAl)
Peso
Longitud del cable
Contenido del empaque

Declaración relativa a interferencias de la
Comisión Federal de Comunicaciones
Tras haber sido sometido a todas las pruebas
pertinentes, se ha comprobado que este
equipo cumple con los límites establecidos
para dispositivos digitales Clase B, conforme a
la Sección 15 del Reglamento de la Comisión
Federal de Comunicaciones (FCC). Tales
límites definen los niveles máximos permisibles
a las interferencias nocivas de la energía
radioeléctrica en instalaciones residenciales.
Puesto que el actual equipo genera, utiliza y
puede radiar energía radioeléctrica, si no
observa las instrucciones relativas a la
instalación y operación del dispositivo, puede
provocar interferencias nocivas a las
comunicaciones por radio. Sin embargo, no es
posible garantizar que no se producirá
interferencia alguna en una instalación
determinada. Dado el caso de que el equipo
interfiriera en la recepción de aparatos de radio
o televisión, lo cual se puede determinar al
apagar y volver a encender el dispositivo, le
recomendamos al usuario que intente una o
más de las siguientes medidas con el objeto de
corregir la situación:
• Vuelva a orientar o cambie la ubicación de la
antena receptora.
• Aumente la distancia que separa el equipo y
el aparato receptor
• Conecte el equipo en una toma de corriente
situada en un circuito distinto al cual está
conectado el receptor.
• Solicite asistencia al distribuidor o a un
técnico experimentado en radio o aparatos
de TV.

Notes/NotasNotes/Notas

KlipXtreme®is a registered trademark. All rights reserved. The
Bluetooth®brand is a registered trademark owned by Bluetooth
SIG, Inc. Siri and all related logos are trademarks of Apple.com,
Inc. Google Assistant is a trademark of Google LLC. All other
brand names and trademarks are the property of their respective
owners. Any mention of such is only intended for identification
purposes, and therefore shall not be construed as a claim to any
or all rights pertaining to those brands. Made in China.
KlipXtreme®es una marca registrada. Todos los derechos
reservados. La marca Bluetooth®es una marca registrada de
Bluetooth SIG, Inc. Siri y todos los logotipos relacionados son
marcas comerciales de Apple.com, Inc. Google Assistant es una
marca comercial de Google LLC. Todos los otros nombres de
marcas y marcas comerciales son propiedad de sus respectivos
dueños. Cualquier mención de los mismos es por motivo de
identificación solamente y, por ende, no constituye reclamo
alguno a uno o a todos los derechos pertenecientes a tales
marcas. Fabricado en China.
www.klipXtreme.com.
This manual suits for next models
1
Table of contents
Languages:
Other Klip Xtreme Headphones manuals

Klip Xtreme
Klip Xtreme LiteTouch KTE-005 User manual

Klip Xtreme
Klip Xtreme Oasis User manual

Klip Xtreme
Klip Xtreme SportX KSM-700 Series User manual

Klip Xtreme
Klip Xtreme TwinBuds User manual

Klip Xtreme
Klip Xtreme Imperious KWH-251 v2 User manual

Klip Xtreme
Klip Xtreme TwinBuds II User manual

Klip Xtreme
Klip Xtreme TwinBuds II User manual

Klip Xtreme
Klip Xtreme Melodik User manual

Klip Xtreme
Klip Xtreme EdgebudsPro User manual

Klip Xtreme
Klip Xtreme JogBudz User manual