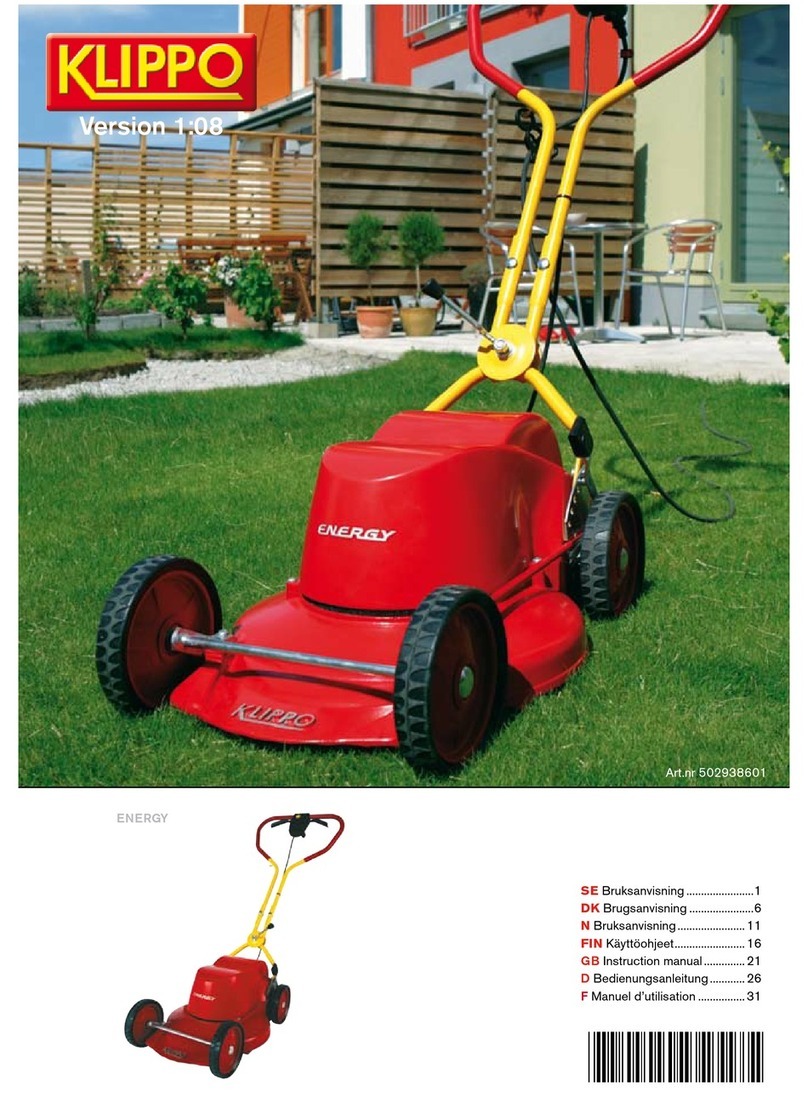
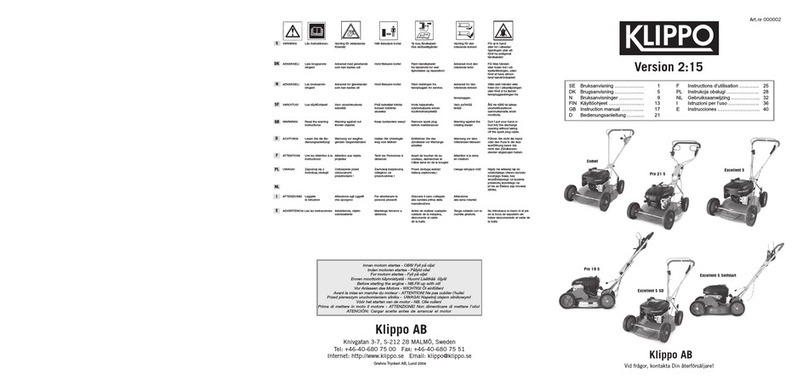
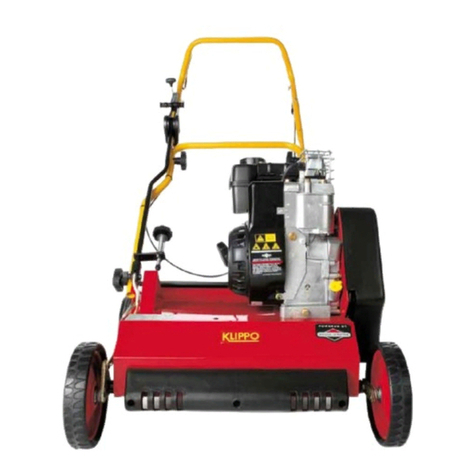
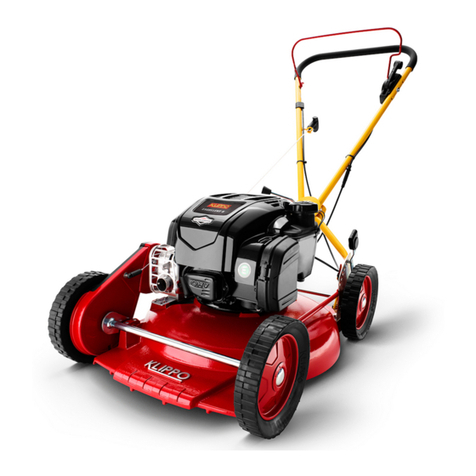
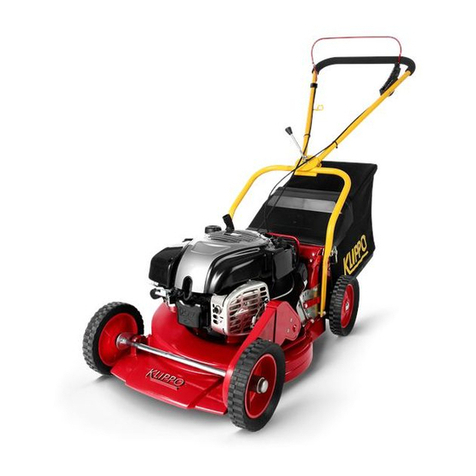
KLIPPO PRO 17 H User manual

GB - Operator´s manual
Please read the operator’s manual carefully
and make sure you understand the instruc-
tions before using the machine.
FR - Manuel d’utilisation
Lire attentivement et bien assimiler le ma-
nuel d’utilisation avant d’utiliser la machine.
NL - Gebruiksaanwijzing
Neem de gebruiksaanwijzing grondig door
en gebruik de machine niet voor u alles
duidelijk heeft begrepen.
ES - Manual de instrucciones
Lea detenidamente el manual de instruc-
ciones y asegúrese de entender su con-
tenido antes de utilizar la máquina.
IT - Istruzioni per l’uso
Prima di usare la macchina, leggere per
intero le istruzioni per l’uso e accertarsi di
averne compreso il contenuto.
DE - Bedienungsanweisung
Lesen Sie die Bedienungsanweisung
sorgfältig durch und machen Sie sich mit
dem Inhalt vertraut, bevor Sie das Gerät
benutzen.
PL - Instrukcja obsługi
Przed przystàpieniem do pracy maszynà pro-
simy dok∏adnie i ze zrozumieniem zapoznaç
si´ z treÊcià niniejszej instrukcji.
TRIUMPH
CHAMPION
PRO 17 H
EXCELLENT
EXCELLENT H
PRO 19 H

KEY
T
O SYMBOLS
2
–
English
Symbols on the mac
hine:
W
ARNING! The machine can be a
dangerous tool if used incorrectly or
carelessly, which can cause serious or
fatal injury to the operator or others.
Please read the operator’s manual
carefully and make sure you
understand the instructions before
using the machine.
Watch out for thrown objects and
ricochets.
Keep people and animals well away
from the working area.
Prevent unintentional starting by
removing the ignition cable from the
spark plug.
Warning: rotating cutter. Keep hands
and feet clear.
Make sure that your hands and feet do
not come near the cutting attachment
when the engine is running.
This product is in accordance with
applicable EC directives.
Eco-labelled with the Nordic Ecolabel
Noise emission to the environment
according to the European
Community’s Directive. The machine’s
emission is specified in chapter
Technical data and on label.
Explanation of warning le
vels
The w
arnings are graded in three levels.
W
ARNING!
CAUTION!
NOTICE!
!
W
ARNING! Used if there is a risk of
serious injury or death for the operator
or damage to the surroundings if the
instructions in the manual are not
followed.
!
CA
UTION! Used if there is a risk of injury
to the operator or damage to the
surroundings if the instructions in the
manual are not followed.
NO
TICE! Used if there is a risk of damage to materials
or the machine if the instructions in the manual are not
followed.

CONTENTS
English
–
3
Contents
KEY
TO SYMBOLS
Symbols on the machine:
..................................... 2
Explanation of warning levels ............................... 2
CONTENTS
Contents
............................................................... 3
PRESENT
ATION
Dear Customer
, .................................................... 4
Features ............................................................... 4
PRESENT
ATION
What is what on the la
wn mower - Triumph,
Champion, Excellent? .......................................... 5
PRESENT
ATION
What is what on the la
wn mower - Excellent H, Pro
17 H, Pro 19 H? .................................................... 6
MA
CHINE´S SAFETY EQUIPMENT
Gener
al ................................................................. 7
ASSEMBLING AND ADJUSTMENTS
Gener
al ................................................................. 8
Handle ................................................................. 8
Cutting height ....................................................... 8
Mulcher insert ....................................................... 8
Filling with oil ........................................................ 8
FUEL HANDLING
Gener
al ................................................................. 9
Fuel ...................................................................... 9
Fuelling ................................................................. 9
Transport and storage .......................................... 9
OPERA
TING
P
ersonal protective equipment ............................. 10
General safety precautions ................................... 10
Basic working techniques ..................................... 11
Transport and storage .......................................... 11
Starting and stopping ........................................... 12
MAINTENANCE
Gener
al ................................................................. 13
Maintenance schedule ......................................... 13
General inspection ............................................... 13
External cleaning .................................................. 13
Oil level ................................................................. 13
Cutting equipment ................................................ 13
Spark plug ............................................................ 14
Air filter ................................................................. 14
Oil change ............................................................ 14
Fuel system .......................................................... 14
Recycling .............................................................. 14
TECHNICAL D
ATA
T
echnical data ...................................................... 15
EC-declaration of conformity ................................ 17

PRESENT
A
TION
4
–
English
Dear Customer
,
Thanks f
or choosing a Klippo® machine!
It is our wish that you will be satisfied with your product
and that it will be your companion for a long time. A
purchase of one of our products gives you access to
professional help with repairs and services. If the retailer
who sells your machine is not one of our authorised
dealers, ask him for the address of your nearest service
workshop.
We hope you will find this operator’s manual very useful.
By following its´ content (using, service, maintenance etc)
the life span and the second-hand value of the machine
can be extended. If you will sell this machine, make sure
that the buyer will get the operator´s manual.
Swedish quality
Klippo is a Sw
edish company with a long tradition.The
company was founded 1954 in Malmö, Sweden, by Karl
Dahlman and has since been developing, manufacturing
and marketing lawn mowers. Already back in 1954, the
foundation was laid for the quality awareness and the
innovative spirit that has made it possible for Klippo to
develop some of Sweden's best lawn mowers and
gardening products.
Klippo's products are made for both professional users
and regular consumers. Today, Klippo is available in 20
European countries, with the Nordic area as its biggest
market.
The man
ufacturer’s reservation
All inf
ormation and all data in the Operator’s Manual were
applicable at the time the Operator’s Manual was sent to
print.
Klippo has a policy of continuous product development
and therefore reserves the right to modify the design and
appearance of products without prior notice.
Features
V
alues such as high performance, reliability, innovative
technology, advanced technical solutions and
environmental considerations distinguish Klippo’s
products.
Some of the unique features of your product are
described below.
Mulc
hing
Eff
ective cutting system which shreds the grass finely and
spreads it into the lawn.
Cutting e
xtremely tall grass
When the m
ulcher insert is dismantled, the machine
switches into a back discharge mower which cuts
effectively when the grass is very tall.
Easy-to-star
t engines
Engines constr
ucted to be as simple and easy to start as
possible.
Cr
oss-cut blade
(Excellent, Excellent H)
A m
ulcher blade that shreds the grass using four cutting
edges which gives an extraordinary cutting result.
Vibration damping handle
(Pro 17 H, Pro 19 H)
Vibr
ation damping handles to prevent vibration injuries for
those who mow often and for long periods of time.
Fuel-effi
cient and quiet
Eff
ective, fuel-efficient and quiet mowers that will not
disturb you or your neighbours.
Eco-labelled with the Nor
dic Ecolabel
(Excellent H, Pro 17 H, Pro 19 H)
The Nordic Ecolabel of mo
wers means tough
requirements regarding noise and exhaust emissions and
the manufacturing of the machine.

English
–
5
PRESENT
A
TION
What is what on the la
wn mower - Triumph, Champion, Excellent?
1
Handle
2 Engine brake handle
3 Throttle control/choke control
4 Dipstick/oil filling
5 Cutting height control
6 Wheel cleaner
7 Cutting cover
8 Muffler
9 Spark plug
10 Primer diaphragm
11 Air filter
12 Fuel tank
13 Starter handle
14 Angle adjustment handle
15 Bracket, starter handle
16 Cutter bracket
17 Cutter, Mulcher
18 Cutter bolt
19 Cutter, Cross cut
20 Mulcher insert
21 Operator
′
s manual

6
–
English
PRESENT
A
TION
What is what on the la
wn mower - Excellent H, Pro 17 H, Pro 19 H?
21
23
20
19
17
6
3
1
2
5
15 4
9
8
10
12
14
7
7
18
11
22
Excellent H
Pro 17 H
Pro 19 H
1
1
2
2
3
3
4
13
14
6
6
9
9
10
10
11
11
12
12
5
5
14
15
15 16
16
16
17
17
13
13
1
Handle
2 Engine brake handle
3 Throttle control/choke control
4 Vibration damper
5 Fuel tank
6 Cutting height control
7 Wheel cleaner
8 Side protection
9 Cutting cover
10 Air filter
11 Spark plug
12 Muffler
13 Dipstick/oil filling
14 Starter handle
15 Angle adjustment handle
16 Bracket, starter handle
17 Fuel tap
18 Cutter bracket
19 Cutter, Mulcher
20 Cutter bolt
21 Cutter, Cross cut
22 Mulcher insert
23 Operator
′
s manual

MA
CHINE´S SAFETY EQ
UIPMENT
English
–
7
General
This section descr
ibes the machine´s safety equipment,
its purpose, and how checks and maintenance should be
carried out to ensure that it operates correctly.
Cutting co
ver
•
The cutting cover is designed to reduce vibration and
to reduce the risk of cuts.
Chec
king the cutting cover
•
Make sure the cutting cover is not damaged and that
there are no visible defects such as cracks.
Engine brake handle
•
The engine brake is designed to stop the engine.
When the grip on the engine brake handle is released
the engine should stop.
Chec
king the engine brake handle
•
Apply full throttle and then release the brake handle.
The engine brake should always be adjusted so that
the engine stops within 3 seconds.
Vibration damping system
•Your machine is equipped with a vibration damping
system that is designed to minimize vibration and
make operation easier.
• The handlebar system's steel tube and the cutting
cover are designed to minimise the vibrations from the
engine.
•Pro 17 H, Pro 19 H This model also has 4 vibration
dampers fitted on the handlebar unit to further reduce
vibrations.
Checking the vibration damping system
•Check that the handles and vibration damping
elements are not damaged.
Muffler
•The muffler is designed to keep noise levels to a
minimum and to direct exhaust fumes away from the
user.
Inspecting the muffler
•Check regularly that the muffler is complete and
secured correctly.
!
WARNING! Never use a machine that has
faulty safety equipment! If your machine
fails any of these checks contact your
service agent to get it repaired.
Prevent unintentional starting by
removing the ignition cable from the
spark plug.
!
WARNING! Overexposure to vibration
can lead to circulatory damage or nerve
damage in people who have impaired
circulation. Contact your doctor if you
experience symptoms of overexposure
to vibration. Such symptoms include
numbness, loss of feeling, tingling,
pricking, pain, loss of strength, changes
in skin colour or condition.These
symptoms normally appear in the
fingers, hands or wrists.These
symptoms may be increased in cold
temperatures.
!
WARNING! Never use a machine without
a muffler, or with a faulty muffler. A
damaged muffler may substantially
increase the noise level and the fire
hazard. Keep fire fighting equipment
handy.
The muffler gets very hot during and
after use. This also applies during idling.
Be aware of the fire hazard, especially
when working near flammable
substances and/or vapours.

ASSEMBLING AND ADJUSTMENTS
8– English
General
Handle
Assembly
•Assemble the upper handle using the handle nut on
the guide plate. Don’t forget the washer between the
plate and the handle nut. No tools are needed for the
assembly.
Settings
•If necessary, the handle can be turned slightly
sideways with the handle joint. The handle can be set
to different positions to achieve the best driving
position, e.g. when mowing next to hedges or house
walls.
•Champion, Excellent, Excellent H, Pro 19 H The
handle can also be adjusted vertically by turning the
wheels by the attachment fitting on the chassis
•Triumph, Pro 17 H Loosen the nut. Adjust the height.
Tighten the nut.
Cutting height
NB! Do not set the cutting height too low as there is a risk
that the cutters might hit ground with unevenness.
The cutting height adjustment is spring assisted.
Champion, Excellent, Excellent H, Pro 19 HThe cutting
height can be adjusted in 6 different steps.
Triumph, Pro 17 H The cutting height can be adjusted in
five different steps.
• To raise the cutting height move the lever to the left
and then forward.
• To lower the cutting height move the lever to the left
and then backward.
Mulcher insert
(Champion, Excellent, Excellent H,
Pro 19 H)
On the models Champion, Excellent anf Excellent H the
mulcher insert is assembled before delivery. For Pro 19 H
the mulcher insert is supplied unassembled.
• Fit the leader pins into the holes on the cutting cover.
• Fasten the mulcher plugs from the top of the cutting
cover.
Filling with oil
•The oil tank is empty at delivery. Fill the tank with the
supplied engine oil up to the mark. The engine oil
should be changed the first time after 5 hours running
time.
!
IMPORTANT! Prevent unintentional
starting by removing the ignition cable
from the spark plug.

FUEL HANDLING
English – 9
General
Fuel
Petrol
•Use good quality unleaded or leaded petrol.
• The lowest octane recommended is 90 (RON). If you
run the engine on a lower octane grade than 90 so-
called knocking can occur. This gives rise to a high
engine temperature, which can result in serious
engine damage.
• Use low-emission petrol, also known as alkylate
petrol, if it is available.
Engine oil
•See instructions in the section "Maintenance".
• The engine oil should be changed the first time after 5
hours running time. Refer to Technical Data for
recommendations on which oil type to use. Never use
oil intended for two-stroke engines.
Fuelling
Never start the machine:
• If you have spilt fuel or engine oil on the machine.
Wipe off the spill and allow the remaining fuel to
evaporate.
• If you have spilt fuel on yourself or your clothes,
change your clothes.Wash any part of your body that
has come in contact with fuel. Use soap and water.
• If the machine is leaking fuel. Check regularly for
leaks from the fuel cap and fuel lines.
Transport and storage
•Store and transport the machine and fuel so that there
is no risk of any leakage or fumes coming into contact
with sparks or naked flames, for example, from
electrical machinery, electric motors, electrical relays/
switches or boilers.
• When storing and transporting fuel always use
approved containers intended for this purpose.
Long-term storage
•When storing the machine for long periods the fuel
tank must be emptied. Contact your local petrol
station to find out where to dispose of excess fuel.
!
WARNING! Running an engine in a
confined or badly ventilated area can
result in death due to asphyxiation or
carbon monoxide poisoning.
Fuel and fuel fumes are highly
inflammable and can cause serious
injury when inhaled or allowed to come
in contact with the skin. For this reason
observe caution when handling fuel and
make sure there is adequate ventilation.
The exhaust fumes from the engine are
hot and may contain sparks which can
start a fire. Never start the machine
indoors or near combustible material!
Do not smoke and do not place any hot
objects in the vicinity of fuel.
NOTICE! The machine is equipped with a four-stroke
engine. Make sure that there is always sufficient oil in
the oil tank.
NOTICE! Check the oil level before starting the lawn
mower. A too low oil level can cause serious damage to
the engine.
!
WARNING! Always stop the engine and
let it cool for a few minutes before
refuelling.The engine should be
switched off, and the stop switch in
STOP position.
Use a petrol can at all times to avoid
spillage.
When refuelling, open the fuel cap slowly
so that any excess pressure is released
gently.
Clean the area around the fuel cap.
Tighten the fuel cap carefully after
refuelling. Negligence may lead to the
start of a fire.
Move the machine at least 3 m from the
refuelling point before starting it.

OPERATING
10 – English
Personal protective equipment
You must use approved personal protective equipment
whenever you use the machine. Personal protective
equipment cannot eliminate the risk of injury but it will
reduce the degree of injury if an accident does happen.
Ask your dealer for help in choosing the right equipment.
Always wear:
• Use ear muffs if the noise level exceeds 85 db.
• Sturdy, non-slip boots or shoes.
• Heavy, long pants. Do not wear shorts, sandals or go
barefoot.
• Gloves must be worn when required, for example
when fitting, inspecting or cleaning cutting
attachments.
General safety precautions
This section describes basic safety directions for using
the machine. This information is never a substitute for
professional skills and experience.
• Please read the operator’s manual carefully and make
sure you understand the instructions before using the
machine.
• Keep in mind that the operator is responsible for
accidents or hazards occuring to other people or their
property.
• The machine must be kept clean. Signs and stickers
must be fully legible.
Always use common sense
It is not possible to cover every conceivable situation you
can face. Always exercise care and use your common
sense. If you get into a situation where you feel unsafe,
stop and seek expert advice. Contact your dealer, service
agent or an experienced user. Do not attempt any task
that you feel unsure of!
!
WARNING! This machine produces an
electromagnetic field during operation.
This field may under some
circumstances interfere with active or
passive medical implants.To reduce the
risk of serious or fatal injury, we
recommend persons with medical
implants to consult their physician and
the medical implant manufacturer before
operating this machine.
!
WARNING! The machine can be a
dangerous tool if used incorrectly or
carelessly, which can cause serious or
fatal injury to the operator or others.
Never allow children or other persons
not trained in the use of the machine to
use or service it.
The machine should not be used by
people with reduced physical or mental
capacities or people who are unsuitable
for health reasons to operate the
machine, without supervision of a
person responsible for their safety.
Never allow anyone else to use the
machine without first ensuring that they
have understood the contents of the
operator’s manual.
Never use the machine if you are
fatigued, while under the influence of
alcohol or drugs, medication or anything
that could affect your vision, alertness,
coordination or judgement.
!
WARNING! Unauthorized modifications
and/or accessories may lead to serious
injury or death to the user or others.
Under no circumstances may the design
of the machine be modified without the
permission of the manufacturer.
Do not modify this product or use it if it
appears to have been modified by others.
Never use a machine that is faulty. Carry
out the checks, maintenance and service
instructions described in this manual.
Some maintenance and service
measures must be carried out by trained
and qualified specialists. See
instructions under the heading
Maintenance.
Always use genuine accessories.
OPERATING
English – 11
Work area safety
•Branches, twigs, stones, etc. should be removed from
the lawn before you start to mow.
• Objects hitting against the cutting attachment could
be thrown and cause damage to people and objects.
Keep people and animals well away.
• Do not use the machine in bad weather, such as
dense fog, heavy rain, strong wind, intense cold, etc.
Working in bad weather is tiring and can lead to
dangerous conditions, e.g. slippery surfaces.
• Observe your surroundings to ensure that nothing can
affect your control of the machine.
• Beware of roots, stones, twigs, pits, ditches etc.Tall
grass can hide obstacles.
• Mowing slopes can be dangerous. Do not use the
lawn mower on very steep slopes. The lawn mower
should not be used on inclines greater than 15
degrees.
• On sloping ground you should work along the slope.It
is much easier to work along a slope than it is to work
up and down it.
• Be careful when you are approaching hidden corners
and objects that could block your view.
Work safety
•A lawn mower is only designed to mow lawns. All
other use is forbidden.
• Wear personal protective equipment. See instructions
under the heading ”Personal protective equipment”.
• Do not start a lawn mower unless the cutter and all
covers are fitted correctly. Otherwise the cutter could
come loose and cause personal injuries.
• Make sure the cutter does not hit foreign objects such
as stones, roots or the like. This can make the cutter
dull and bend the engine shaft. A bent axle gives
imbalance and heavy vibration, which results in a
great risk of the cutter becoming loose.
• The brake handle must never be permanently
anchored in handle when the machine is running.
• Place the lawn mower on firm, flat surface and start it.
Make sure that the cutter cannot come into contact
with the ground or other objects.
• Always place yourself behind the machine. Allow all
the wheels to remain on the ground and keep both
hands on the handle when mowing. Keep your hands
and feet away from the rotating blades.
• Do not tilt the machine when the engine is running.
Never run with the machine when it is running.You
should always walk with the lawn mower.
• Pay particular attention when pulling the machine
towards you during work.
• Never lift up the lawn mower or carry it around when
the engine is running. If you must lift the lawn mower,
first switch off the engine and disconnect the ignition
lead from the spark plug.
• The engine should be switched off when moving over
ground that is not to be mowed. For example, gravel
paths, stone, shingle, asphalt, etc.
• Never run with the machine when it is running.You
should always walk with the lawn mower.
• Shut down the engine before changing the cutting
height. Never make adjustments with the engine
running.
• Never leave the machine unsupervised with the motor
running. Turn off the engine. Ensure the cutting
attachment has stopped rotating.
• If any foreign object is hit or if vibrations occur stop the
machine immediately. Disconnect the HT lead from
the spark plug. Check that the machine is not
damaged. Repair any damage.
Basic working techniques
•Always cut with a sharp blade for optimal results. A
dull blade gives an uneven cut and the grass becomes
yellow on the surface of the cut.
• Never mow more than 1/3 of the length of the grass.
This especially applies during dry periods. Mow first
with the cutting height set high. Then check the result
and lower to an appropriate height. If the grass is
really long, drive slowly and mow twice if necessary.
• Cut in different directions each time in order to avoid
stripes in the lawn.
Transport and storage
•Secure the equipment during transportation in order
to avoid transport damage and accidents.
• Store the equipment in a lockable area so that it is out
of reach of children and unauthorized persons.
• Store the machine and its equipment in a dry and frost
proof place.
• For transport and storage of fuel, see the section
"Fuel handling".

OPERATING
12 – English
Starting and stopping
Before starting
•Keep people and animals well away from the working
area.
• Perform daily maintenance. See instructions in the
section "Maintenance".
• Ensure the ignition lead sits correctly on the spark
plug.
Starting
Cold engine
•Triumph, Champion Press the air purge diaphragm
repeatedly until fuel fills the diaphragm (at least 3
times). The diaphragm need not be completely filled.
•Excellent H, Pro 17 H, Pro 19 H Set the throttle
control in the choke position.
Start the engine
•Excellent Set the throttle control to full throttle.
•Excellent H, Pro 17 H, Pro 19 H Open the fuel tap.
• The engine brake handle must be held against the
handlebar when the engine is started.
• Position yourself behind the machine.
• Grip the starter handle, slowly pull out the cord with
your right hand until you feel some resistance (the
starter pawls grip). Pull with force to start the engine.
Never twist the starter cord around your hand.
Stopping
•Stop the engine by releasing the engine brake handle.
!
WARNING! Please read the operator’s
manual carefully and make sure you
understand the instructions before using
the machine.
Wear personal protective equipment. See
instructions under the heading ”Personal
protective equipment”.

MAINTENANCE
English – 13
General
•Let your Klippo dealer regularly check the machine
and make essential adjustments and repairs.
• Always use genuine accessories.
Maintenance schedule
In the maintenance schedule you can see which parts of
your machine that require maintenance, and with which
intervals it should take place.The intervals are calculated
based on daily use of the machine, and may differ
depending on the rate of usage.
*See instructions in the section "Machine’s safety
equipment".
General inspection
•Check that nuts and screws are tight.
External cleaning
•Brush leaves, grass and the like off of the lawn mower.
• Do not use a high pressure washer to clean the
machine.
• Never flush water directly on the engine.
• Clean the air intake on the starter. Check the starter
and starter cord.
• When cleaning under the cutting hood, turn the
machine with the spark plug upwards. Empty the fuel
tank.
Oil level
The lawn mower should stand on flat ground when you
check the oil level. Check the oil level with the dipstick on
the oil filler cap.
• Remove the oil cap and wipe the dipstick clean.
• Put the dipstick back in.
•Triumph, Champion, Excellent The oil filler cap must
be completely screwed down to give a correct picture
of the oil level.
• If the oil level is low, fill using engine oil up to the upper
level on the dipstick.
Cutting equipment
•Check the cutting attachment for damage or cracks.A
damaged cutting attachment should always be
replaced.
• Always ensure the cutter is well ground and balanced
correctly.
Replacing the blades
Dismantling
•Unscrew the bolt holding the cutter.
• Remove the old blade. Make sure the blade bracket is
free of damage. Also check that the cutter bolt is
undamaged and that the engine shaft is not bent.
!
WARNING! The user must only carry out
the maintenance and service work
described in this Operator’s Manual.
More extensive work must be carried out
by an authorized service workshop.
Prevent unintentional starting by
removing the ignition cable from the
spark plug.
The life span of the machine can be
reduced and the risk of accidents can
increase if machine maintenance is not
carried out correctly and if service and/or
repairs are not carried out professionally.
If you need further information please
contact your nearest service workshop.
Daily
maintenance
Weekly
maintenance
Monthly
maintenance
General inspection Spark plug Air filter
External cleaning
Vibration
damping
system*
Oil change
Oil level Muffler* Fuel system
Cutting equipment
Cutting cover and
protective cover*
Engine brake
handle*
!
WARNING! Always wear heavy-duty
gloves when servicing and maintaining
the cutting equipment.The cutters are
very sharp and cuts can occur very
easily.

MAINTENANCE
14 – English
Assembly
•Place the cutter with the friction washer against the
cutter bracket. Make sure the cutter centres correctly
on the shaft. To avoid vibrations, place the mower
cutter so that the cutter bracket marking can be seen
on the sides of the cutter.
Fit the washer and tighten the bolt correctly. The bolt
should be tightened with a torque of 45-60 Nm.
• Pull the blade around by hand and make sure it
rotates freely. Test run the machine.
Spark plug
•If the machine is low on power, difficult to start or runs
poorly at idle speed: always check the spark plug first
before taking other steps.
•Excellent H, Pro 17 H, Pro 19 H If the spark plug is
dirty, clean it and check that the electrode gap is 0.7-
0.8 mm.
•Triumph, Champion, Excellent If the spark plug is
dirty, clean it and check that the electrode gap is 0.5
mm. Replace if necessary.
Air filter
•Remove the air filter cover and take out the filter.
•Champion, Excellent, Excellent H, Pro 17 H, Pro 19
HClean the filter by knocking the filter against a flat
surface. Never use solvent with petroleum, for
example, kerosene, or compressed air to clean the
filter.
•Triumph Remove the foam plastic filter. Wash the
filter well in tepid soapy water. After cleaning, rinse the
filter well in clean water. Squeeze out and allow the
filter to dry. NOTE! High pressure compressed air can
damage the foam. After cleaning the filter should be
oiled using engine oil. Wipe away excess oil by
pressing a clean cloth against the filter.
• An air filter that has been in use for a long time cannot
be cleaned completely. The filter must therefore be
replaced with a new one at regular intervals. A
damaged air filter must always be replaced.
•When reassembling, make sure that the filter
completely seals against the filter holder.
Oil change
•Empty the fuel tank.
•Excellent H, Pro 17 H, Pro 19 H Close the fuel tap.
• Unscrew the oil filler cap.
• Place a suitable vessel to collect the oil in.
• Drain the oil by tipping the engine so that the oil runs
out through the filler pipe. Ask where you can dispose
of surplus engine oil at your local petrol station.
• Fill with new engine oil of a good quality. See
instructions in the section "Technical data".
Fuel system
•Check that the fuel cap and its seal are not damaged.
Excellent H, Pro 17 H, Pro 19 H Inside the tank cap
you will find a clock-shaped screen and a rubber
membrane to prevent evaporation losses. The
threaded spiral functions as a vent. If the tank cap
breaks, it is important to replace it with an original cap
appropriate for that particular engine.
• Check the fuel hose. Replace if necessary.
Recycling
This machine has the prerequisites to last for many years.
This minimizes the machine's environmental impact.
Perform service and maintenance according to the
instructions in this manual. This way the engine will last
longer and the hazardous emissions are minimized.
When the machine is worn out it should be disposed of for
recycling, either to the dealer or directly to Klippo. The
machine is dismantled and the parts are divided up in
different materials for recycling. Most parts of this
machine are recyclable.
NOTICE! Always use the recommended spark plug
type! Use of the wrong spark plug can damage the
piston/cylinder.

English – 15
TECHNICAL DATA
Technical data
Note 1:The power rating of the engine indicated is the average net output (at specified rpm) of a typical production engine
for the engine model measured to SAE standard J1349/ISO1585. Mass production engines may differ from this value.
Actual power output for the engine installed on the final machine will depend on the operating speed, environmental
conditions and other values.
Note 2: Noise emissions in the environment measured as sound power (LWA) in conformity with EC directive 2000/14/EC.
Note 3: Noise pressure level according to EN 836. Reported data for noise pressure level has a typical statistical
dispersion (standard deviation) of 1.2 dB(A).
Note 4: Vibration level according to EN 836. Reported data for vibration level has a typical statistical dispersion (standard
deviation) of 0.2 m/s2.
Triumph Champion Excellent
Engine
Engine manufacturer Briggs & Stratton Briggs & Stratton Briggs & Stratton
Cylinder displacement, cm3158 190 190
Speed, rpm 2900 3000 2800
Nominal engine output, kW (see note 1) 2,1 2,4 2,3
Ignition system
Spark plug Champion BS19LM Champion BS19LM Champion BS19LM
Electrode gap, mm 0,5 0,5 0,5
Fuel and lubrication system
Fuel tank capacity, litre 0,85 0,95 0,95
Oil tank capacity, litre 0,6 0,6 0,6
Engine oil SAE 30/SAE 10W-30 SAE 30/SAE 10W-30 SAE 30/SAE 10W-30
Weight
Machine with empty tanks, kg 25 29 30
Noise emissions (see note 2)
Sound power level, measured dB(A) 92 92 92
Sound power level, guaranteed LWA dB(A) 96 96 96
Sound levels (see note 3)
Sound pressure level at the operators ear,
dB(A) 78 79 82
Vibration levels, a hveq (see note 4)
Handle, m/s25,0 5,1 6,2
Cutting system
Cutting height, mm 25-50 30-60 30-60
Cutting width, cm 42 48 48
Cutter Mulcher, 42 cm Mulcher, 48 cm Mulcher - 48 cm,
Cross cut

16 – English
TECHNICAL DATA
*Of medium height according to criteria document for Nordic Ecolabelling ver 4.1.
Note 1: The power rating of the engine indicated is the average net output (at specified rpm) of a typical production
engine for the engine model measured to SAE standard J1349/ISO1585. Mass production engines may differ from this
value. Actual power output for the engine installed on the final machine will depend on the operating speed,
environmental conditions and other values.
Note 2: Noise emissions in the environment measured as sound power (LWA) in conformity with EC directive 2000/14/
EC.
Note 3: Noise pressure level according to EN 836. Reported data for noise pressure level has a typical statistical
dispersion (standard deviation) of 1.2 dB(A).
Note 4:Vibration level according to EN 836. Reported data for vibration level has a typical statistical dispersion (standard
deviation) of 0.2 m/s2.
Excellent H Pro 17 H Pro 19 H
Engine
Engine manufacturer Honda Honda Honda
Cylinder displacement, cm3135 135 135
Speed, rpm 2900 2900 2900
Nominal engine output, kW (see note 1) 2,1 2,1 2,1
Ignition system
Spark plug NGK BPR6ES NGK BPR6ES NGK BPR6ES
Electrode gap, mm 0,7-0,8 0,7-0,8 0,7-0,8
Fuel and lubrication system
Fuel tank capacity, litre 0,77 0,77 0,77
Oil tank capacity, litre 0,55 0,55 0,55
Engine oil SAE 30/SAE 10W-30 SAE 30/SAE 10W-30 SAE 30/SAE 10W-30
Specific fuel consumption at 50% load,
g/kWh 455* 455* 455*
Weight
Machine with empty tanks, kg 28 27 31
Noise emissions (see note 2)
Sound power level, measured dB(A) 89 89 89
Sound power level, guaranteed LWA dB(A) 96 96 96
Sound levels (see note 3)
Sound pressure level at the operators ear,
dB(A) 77 79 78
Vibration levels, a hveq (see note 4)
Handle, m/s25,0 3,4 3,7
Cutting system
Cutting height, mm 30-60 30-60 30-60
Cutting width, cm 48 42 48
Cutter Mulcher - 48 cm,
Cross cut Mulcher, 42 cm Mulcher, 48 cm

English – 17
TECHNICAL DATA
EC-declaration of conformity
(Applies to Europe only)
Husqvarna AB, SE-561 82 Huskvarna, Sweden, tel: +46-36-146500, declares under sole responsibility that the lawn
mowers KlippoTriumph, Champion, Excellent, Excellent H, Pro 17 H, Pro 19 H from the serial numbers 09XXXXXXX
and onwards comply with the requirements of the COUNCIL’S DIRECTIVE:
• of May 17, 2006 "relating to machinery" 2006/42/EC
•of December 15, 2004 ”relating to electromagnetic compatibility” 2004/108/EC.
• of May 8, 2000 ”relating to the noise emissions in the environment” 2000/14/EC.
For information relating to noise emissions, see the chapter Technical data.
The following standards have been applied: EN 836, ISO 11094, EN 55012.
Notified body: 0404, SMP Svensk Maskinprovning AB, Fyrisborgsgatan 3, SE-754 50 Uppsala, has issued reports
regarding the assessment of conformity according to annex VI of the COUNCIL’S DIRECTIVE of May 8, 2000 ”relating
to the noise emissions in the environment” 2000/14/EC.
The certificates have the numbers: Triumph - 17/901/005, Champion - 17/901/001, Excellent - 17/901/017,
Excellent H 01/901/152, Pro 17 H - 01/901/154, Pro 19 H - 01/901/155.
Huskvarna November 23, 2011
Bengt Ahlund, Development manager
(Authorized representative for Husqvarna AB and responsible for technical documentation.)

EXPLICATION DES SYMBOLES
18 – French
Symboles sur la machine:
AVERTISSEMENT! La machine
utilisée de manière imprudente ou
inadéquate peut devenir un outil
dangereux, pouvant causer des
blessures graves voire mortelles à
l’utilisateur et aux autres personnes
présentes.
Lire attentivement et bien assimiler le
manuel d’utilisation avant d’utiliser la
machine.
Attention: projections et ricochets.
Veiller à ce qu’aucune personne non
autorisée ne se trouve dans la zone la
travail.
Évitez un démarrage accidentel en
retirant le câble d'allumage de la
bougie.
Attention au couteau en rotation.
Attention aux pieds et aux mains.
Veiller à ce que ni les mains ni les
pieds ne soient en contact avec
l’équipement de coupe quand le
moteur tourne.
Ce produit est conforme aux
directives CE en vigueur.
Porte le label écologique Nordic
Ecolabel
Émissions sonores dans
l’environnement selon la directive de la
Communauté européenne. Les
émissions de la machine sont
indiquées au chapitre Caractéristiques
techniques et sur les autocollants.
Explication des niveaux
d'avertissement
Il existe trois niveaux d'avertissement.
AVERTISSEMENT!
REMARQUE !
ATTENTION !
!
AVERTISSEMENT! Symbole utilisé en
cas de risque de blessures très graves
ou de mort pour l'utilisateur ou de
dommages pour les environs si les
instructions du manuel ne sont pas
suivies.
!
REMARQUE ! Symbole utilisé en cas de
risque de blessures pour l'utilisateur ou
de dommages pour les environs si les
instructions du manuel ne sont pas
suivies.
ATTENTION ! Symbole utilisé en cas de risque de
dommages pour les matériaux ou la machine si les
instructions du manuel ne sont pas suivies.

SOMMAIRE
French – 19
Sommaire
EXPLICATION DES SYMBOLES
Symboles sur la machine: .................................... 18
Explication des niveaux d'avertissement .............. 18
SOMMAIRE
Sommaire ............................................................. 19
PRÉSENTATION
Cher client, ........................................................... 20
Fonctions .............................................................. 20
PRÉSENTATION
Quels sont les composants de la tondeuse -
Triumph, Champion, Excellent? ............................ 21
PRÉSENTATION
Quels sont les composants de la tondeuse -
Excellent H, Pro 17 H, Pro 19 H? ......................... 22
ÉQUIPEMENT DE SÉCURITÉ DE LA MACHINE
Généralités ........................................................... 23
MONTAGE ET RÉGLAGES
Généralités ........................................................... 24
Poignée ................................................................ 24
Hauteur de coupe ................................................. 24
Pièce de broyage .................................................. 24
Remplissage d’huile ............................................. 24
MANIPULATION DU CARBURANT
Généralités ........................................................... 25
Carburant .............................................................. 25
Remplissage de carburant .................................... 25
Transport et rangement ........................................ 25
COMMANDE
Équipement de protection personnelle ................. 26
Instructions générales de sécurité ........................ 26
Techniques de travail de base .............................. 27
Transport et rangement ........................................ 27
Démarrage et arrêt ............................................... 28
ENTRETIEN
Généralités ........................................................... 29
Schéma d’entretien .............................................. 29
Inspection générale .............................................. 29
Nettoyage extérieur .............................................. 29
Niveau d’huile ....................................................... 29
Équipement de coupe .......................................... 29
Bougie .................................................................. 30
Filtre à air ............................................................. 30
Changement d'huile .............................................. 30
Système de carburant .......................................... 30
Recyclage ............................................................. 30
CARACTÉRISTIQUES TECHNIQUES
Caractéristiques techniques ................................. 31
Assurance de conformité UE ................................ 33

PRÉSENTATION
20 – French
Cher client,
Merci d’avoir choisi une machine Klippo® !
Nous espérons que cette machine vous donnera toute
satisfaction et qu’elle vous accompagnera pendant de
longues années. L’achat de l’un des nos produits garantit
une assistance professionnelle pour l’entretien et les
réparations. Si la machine n’a pas été achetée chez l’un
de nos revendeurs autorisés, demandez l’adresse de
l’atelier d’entretien le plus proche.
Ce mode d’emploi est précieux. En suivant les
instructions qu’il contient (utilisation, révision, entretien,
etc.), il est possible d’allonger considérablement la durée
de vie de la machine et d’augmenter sa valeur sur le
marché de l’occasion. En cas de vente de la machine, ne
pas oublier de remettre le manuel d’utilisation au nouveau
propriétaire.
La qualité suédoise
Klippo est une entreprise suédoise riche d'une longue
tradition. L'entreprise fut créée en 1954 à Malmö, en
Suède, par Karl Dahlman, et s'est depuis développée
dans la fabrication et la commercialisation de tondeuses.
Dès 1954, les bases de l'importance accordée à la qualité
et à l'esprit d'innovation qui ont permis à Klippo de
développer certaines des meilleurs tondeuses et produits
de jardinage de Suède étaient déjà solides.
Les produits Klippo sont destinés à la fois aux
professionnels et aux particuliers. Aujourd'hui, la marque
Klippo est disponible dans 20 pays d'Europe, la région
nordique étant le plus grand marché.
Droit de réserve du fabricant
Toutes les informations et toutes les données indiquées
dans ce manuel d'utilisation étaient valables à la date à
laquelle ce manuel a été porté à l'impression.
Klippo travaille continuellement au développement de ses
produits et se réserve le droit d’en modifier, entre autres,
la conception et l’aspect sans préavis.
Fonctions
Les produits Klippo se distinguent par des valeurs telles
que la haute performance, la fiabilité, la technologie
innovante, les solutions techniques de pointe et les
considérations environnementales.
Certaines des caractéristiques uniques de votre produit
sont décrites ci-dessous.
Broyage
Système de découpe efficace qui déchiquète finement
l'herbe et la disperse dans la pelouse
Coupe de l'herbe extrêmement haute
Lorsque la pièce de broyage est démontée, l'herbe
coupée est déchargée à l'arrière de la machine, pour
couper efficacement l'herbe très haute.
Moteurs faciles à démarrer
Moteurs construits de façon à démarrer de la façon la plus
simple possible.
Lame de coupe transversale
(Excellent, Excellent H)
Une lame de broyage qui hache l'herbe avec quatre bords
coupants, pour un résultat de coupe extraordinaire.
Poignée anti-vibrations
(Pro 17 H, Pro 19 H)
Poignées anti-vibrations pour éviter des blessures liées
aux vibrations chez les personnes tondant souvent et
longtemps.
Bon rendement énergétique et peu de
bruit
Tondeuses efficaces, peu consommatrices en énergie et
silencieuses, qui ne causeront de gêne ni pour vous ni
pour vos voisins.
Porte le label écologique Nordic Ecolabel
(Excellent H, Pro 17 H, Pro 19 H)
Le Nordic Ecolabel attribué aux tondeuses signifie le
respect d'exigences strictes en matière de bruit et
d'émissions d'échappement et lors de la fabrication de la
machine.
This manual suits for next models
5
Table of contents
Languages:
Other KLIPPO Lawn Mower manuals

KLIPPO
KLIPPO Excellent User manual

KLIPPO
KLIPPO Comet S User manual

KLIPPO
KLIPPO Brilliant S User manual

KLIPPO
KLIPPO Triumph User manual

KLIPPO
KLIPPO COBRA S User manual

KLIPPO
KLIPPO Brilliant S User manual

KLIPPO
KLIPPO Triumph User manual

KLIPPO
KLIPPO Excellent User manual

KLIPPO
KLIPPO Comet S User manual

KLIPPO
KLIPPO S400B User manual
Popular Lawn Mower manuals by other brands

Toro
Toro 3206 Operator's manual

Grizzly Tools
Grizzly Tools ARM 2432 Lion Set Translation of the original instructions for use

Scag Power Equipment
Scag Power Equipment SCR Operator's manual

Craftsman
Craftsman 917.270712 owner's manual

Bosch
Bosch EasyRotak 36-550 Original instructions

Craftsman
Craftsman 917.255891 owner's manual