2
Contents
Contents ................................................................................................................ 02
Components .......................................................................................................... 03
Overview ................................................................................................................ 04
Stand Assembly ..................................................................................................... 05
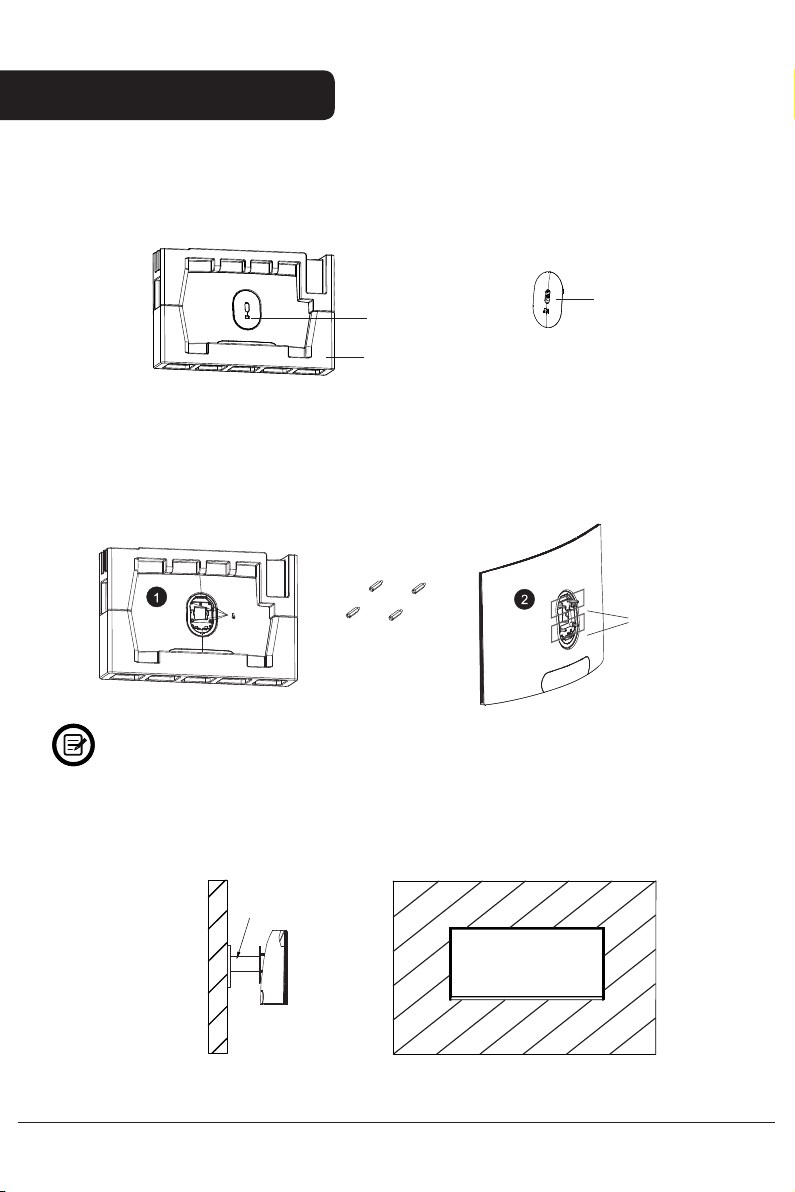
....................................................................................................... 06Wall Mounting
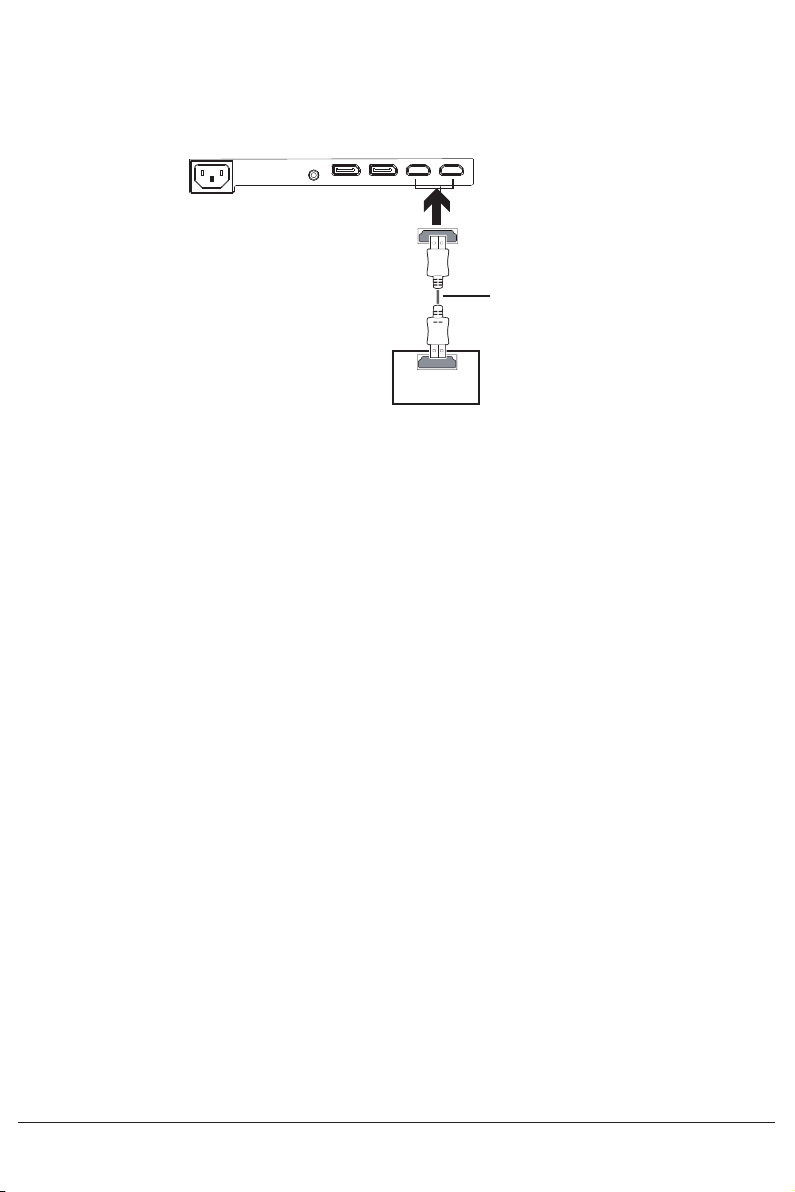
Connectivity ........................................................................................................... 07
Basic Operation ..................................................................................................... 09
Indicator Light ....................................................................................................... 09
Operation ............................................................................................................... 10
ECO Modes and Gameplus Switching ................................................................. 13
Specifications ........................................................................................................ 14
Notes ...................................................................................................................... 15
Safety and warnings
Read all instructions before using the appliance and retain for reference.
1. Unplug the monitor before cleaning it with a slightly damp, clean cloth.
2. Wiping the screen once it has been turned off with a dry microfibre cloth is
recommended.
3. Do not use cleaning alcohol, ammonia-based liquids or other harsh cleaners.
4. This monitor is designed with ventilation holes on the back of the casing. Do not
cover or block them.
5. Avoid placing the monitor near heaters, stoves, fireplaces or other sources of
heat,as well as in rooms lacking in adequate ventilation.
6. Do not insert any objects or spray any liquids into the vents.
7. Do not position the monitor in unsafe locations. If the monitor falls, it may be
damaged and may injure nearby people.
8. Unplug the monitor if it is not going to be used for an extended period.
9. Do not place heavy objects on the monitor, its power cord or any connected
cables.
10. Do not open the back panel of the monitor, as it contains a high-voltage current
even when not plugged in.
The terms HDMI and HDMI High-Definition Multimedia Interface,
and the HDMI Logo are trademarks or registered trademarks of
HDMI Licensing Administrator, Inc. in the United States and other
countries.