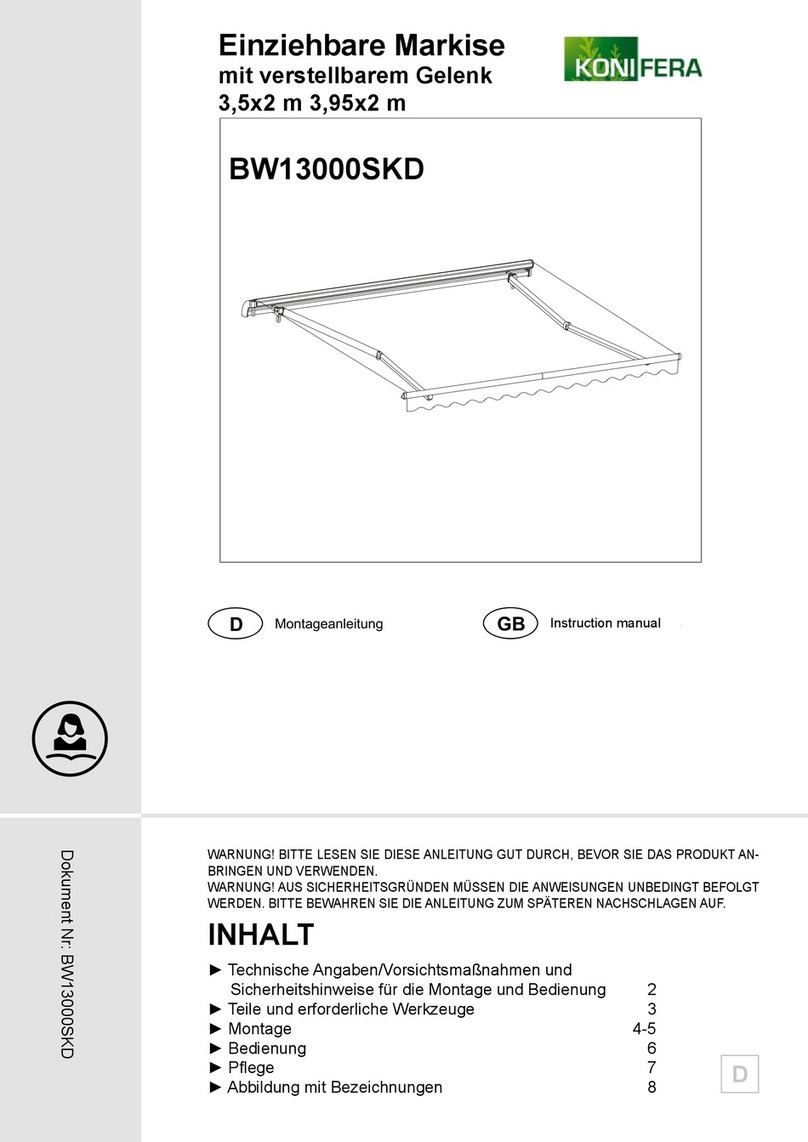
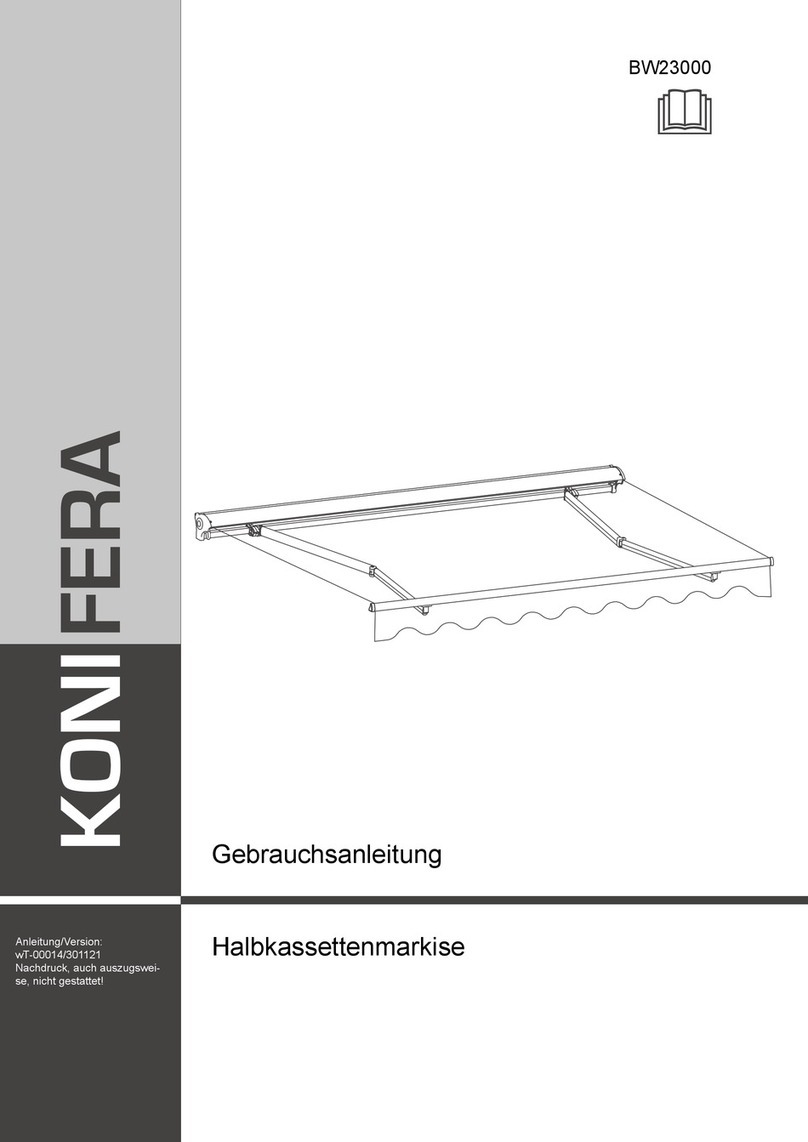
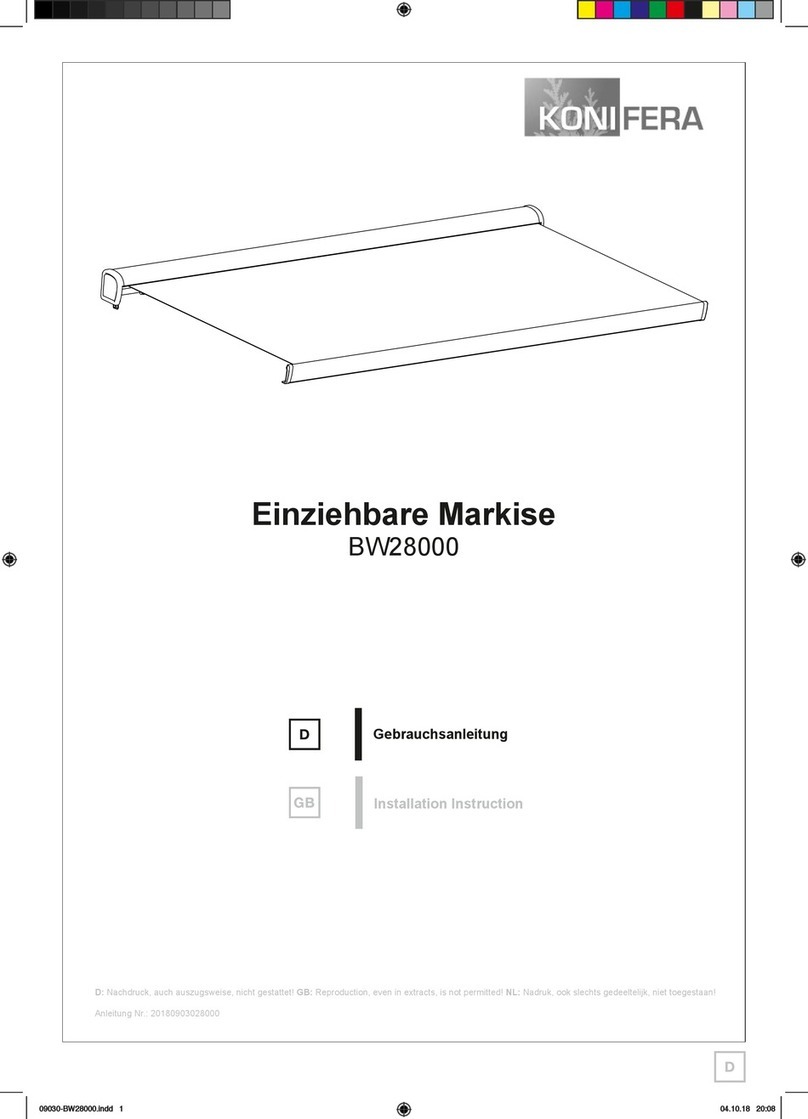
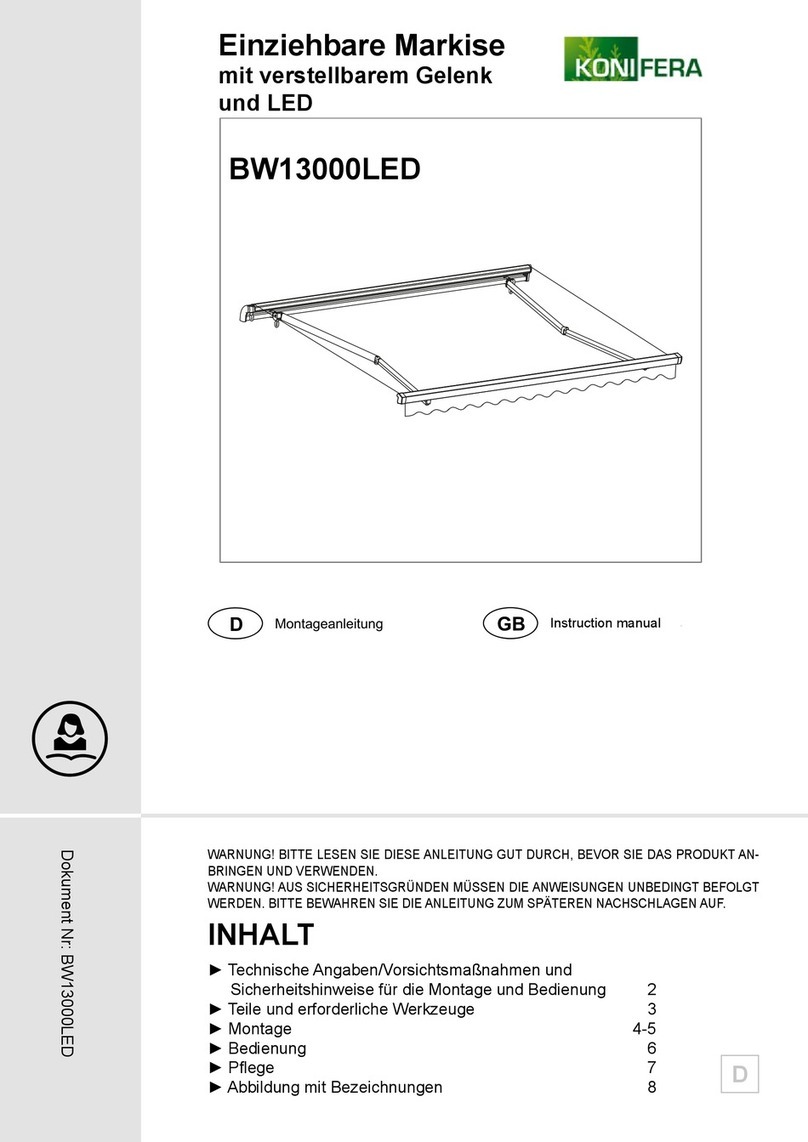
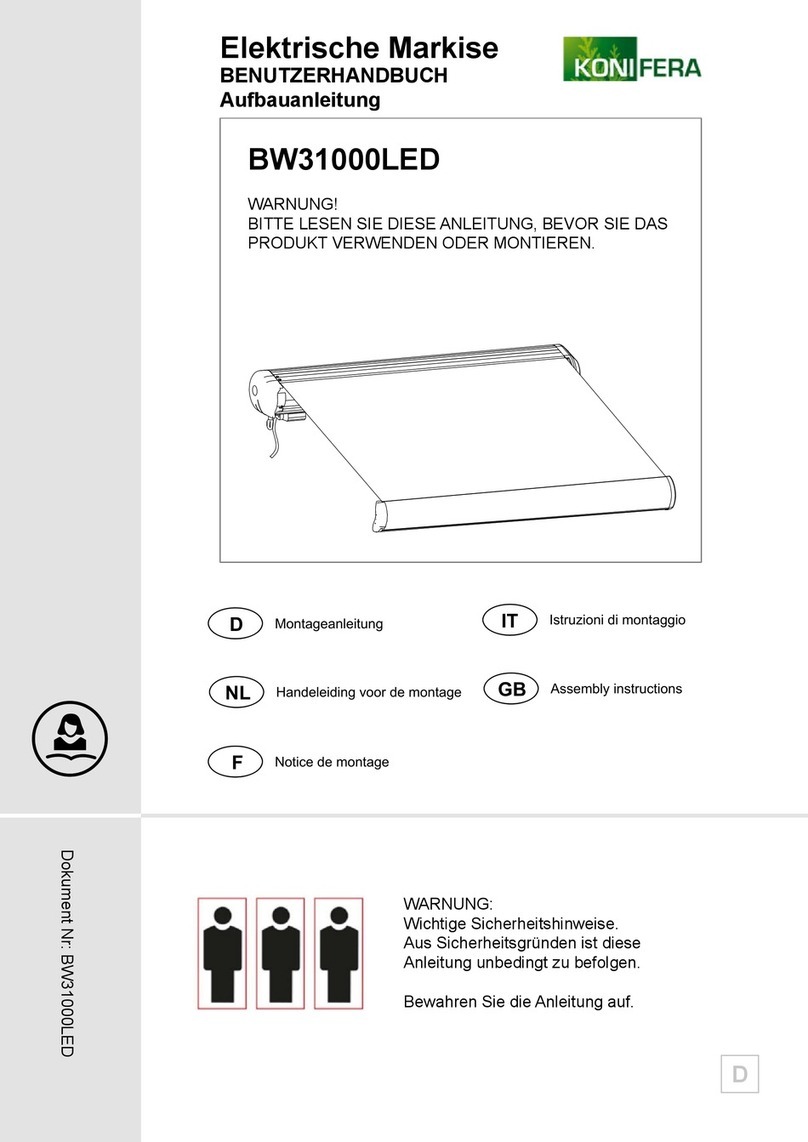
Konifera BW31000 User guide

- 1 -
Montageanleitung
D
Istruzioni di montaggio
IT
Handeleiding voor de montage
NL
Notice de montage
F
Assembly instructions
GB
Docment No: xxxx
Product name
D
BW31000
Dokument Nr: BW31000
Contents
►Specifications
►Safe installation and operation
►Parts list
►Installation procedure
►Description of mistake
►Adjustmentfor angle
►Namelist of parts
BW31000 Series Retractable
Awning
Instructions for Installation
and Operation
Einziehbare Markise
BENUTZERHANDBUCH
Montage- und Betriebsanleitung

- 2 -
TECHNISCHE DATEN
Specification / Safety operation 1
Specification
Product name Material and
surface treatment
Applicable wall
type
Recommended
installation height
BW31000 W×L
retractable awning
framework
Reinforced
concrete walls,
brick walls and
wooden walls 2.5m - 3.5m
Applicable
weather
The products are
used to shield
sunshine, so it is
applicable when
the wind is under
level 5 and it is not
raining as well.
W: Product
length
L: Arm length
(Please see
details on the
package)
Materials: Steel tube,
aluminum alloy, plastic
parts, dacron cloth
Servicetreatment:
Tubes: plastic spraying
(painting) and
oxidation.
Cloth surface:
waterproof treatment
Never install it in high and windy places, as the sunshade may drop and hurt
people.
Don't use it in places that have vibrations or impulsions.
Don't use it in places of high temperature such as walls nearfurnaces.
Don't put heavy stuff on the frame as it may fall down and cause damages.
Never use it in rainy and windy days.
Never use it for other purposes.
Be careful with your finger during installation.
Two adults are needed to move and install the sunshade as the product is big
and heavy.
Please use all the screws and nuts correctly during installation as it is very
dangerous if you leave it loose.
Please close the sunshade in windy and rainy days.
Do not allow children to play with the control device of the blind.Keep remote
control away from children;Frequently examine the installation for signs of wear
or damage to cables.
Symbol explanation:
IMPORTANT SAFTEY INSTRUCTIONS
WARNING - IT IS IMPORTANT FOR SAFETY OF PERSONS TO FOLLOW THESE INSTRUCTIONS SAVE THIS INSTRUCTIONS.
Means it is forbidden
Precautions and safety warning for installation and operation
READ THE INSTRUCTION BEFORE USING
THE PRODUCT
Means important
Attention!
Before opening the awning, make sure all the fixing bolts and security devices are properly installed
and tightened.
Always close the awning during rainy days, windy days or the awning is not in use.
Failed to observe the instrution may lead to material and constructional damage of the awning.
The folding arms of the awning are under tension and can cause damage and injury when they are
open up suddenly.
Never try to disassemble the awning or repair the awning by yourself. Consult a competent
technician for help.
Attention:Well finish the setting program already for all electric items,final
client no need adjust the motor again.
Produktname Material / Oberä-
chenbehandlung Geeignete Wände Empfohlene
Montagehöhe
Geeignetes
Wetter
BW31000 B x L
Einziehbare Markise
B: Produktbreite
L: Armlänge (siehe
Details auf der Ver-
packung)
Materialien: Stahl-
rohr, Aluminiumlegie-
rung, Plastikbauteile,
Dacron-Tuch
Oberächenbehand-
lung:
Rohre: Plastik-Sprüh-
farbe und Oxidation
Tuch-Oberäche:
Imprägnierung
Stahlbetonwände,
Ziegel- und Holz-
wände
2,5 m – 3,5 m Das Produkt wird
dazu verwendet,
vor Sonnenlicht zu
schützen. Es kann
bei trockenem Wetter
verwendet werden,
wenn der Wind
schwächer als Stufe
5 weht.
Vorsichtsmaßnahmen für die Montage und den Betrieb
Specification / Safety operation 1
Specification
Product name Material and
surface treatment
Applicable wall
type
Recommended
installation height
BW31000 W×L
retractable awning
framework
Reinforced
concrete walls,
brick walls and
wooden walls 2.5m - 3.5m
Applicable
weather
The products are
used to shield
sunshine, so it is
applicable when
the wind is under
level 5 and it is not
raining as well.
W: Product
length
L: Arm length
(Please see
details on the
package)
Materials: Steel tube,
aluminum alloy, plastic
parts, dacron cloth
Servicetreatment:
Tubes: plastic spraying
(painting) and
oxidation.
Cloth surface:
waterproof treatment
Never install it in high and windy places, as the sunshade may drop and hurt
people.
Don't use it in places that have vibrations or impulsions.
Don't use it in places of high temperature such as walls nearfurnaces.
Don't put heavy stuff on the frame as it may fall down and cause damages.
Never use it in rainy and windy days.
Never use it for other purposes.
Be careful with your finger during installation.
Two adults are needed to move and install the sunshade as the product is big
and heavy.
Please use all the screws and nuts correctly during installation as it is very
dangerous if you leave it loose.
Please close the sunshade in windy and rainy days.
Do not allow children to play with the control device of the blind.Keep remote
control away from children;Frequently examine the installation for signs of wear
or damage to cables.
Symbol explanation:
IMPORTANT SAFTEY INSTRUCTIONS
WARNING - IT IS IMPORTANT FOR SAFETY OF PERSONS TO FOLLOW THESE INSTRUCTIONS SAVE THIS INSTRUCTIONS.
Means it is forbidden
Precautions and safety warning for installation and operation
READ THE INSTRUCTION BEFORE USING
THE PRODUCT
Means important
Attention!
Before opening the awning, make sure all the fixing bolts and security devices are properly installed
and tightened.
Always close the awning during rainy days, windy days or the awning is not in use.
Failed to observe the instrution may lead to material and constructional damage of the awning.
The folding arms of the awning are under tension and can cause damage and injury when they are
open up suddenly.
Never try to disassemble the awning or repair the awning by yourself. Consult a competent
technician for help.
Attention:Well finish the setting program already for all electric items,final
client no need adjust the motor again.
LESEN SIE DIE BEDIENUNGS-
ANLEITUNG, BEVOR SIE DAS
GERÄT BENUTZEN.
Achtung!
Stellen Sie sicher, dass alle Befestigungsschrauben und Sicherheitsvor-
richtungen ordnungsgemäß eingebaut und festgezogen sind, bevor Sie die
Markise öffnen. Schließen Sie die Markise an Regen- oder windigen Tagen
oder wenn die Markise nicht verwendet wird. Die Nichteinhaltung dieser An-
weisungen kann dazu führen, dass die Markise beschädigt wird. Die Mar-
kisenarme benden sich unter Spannung und können Schäden oder Ver-
letzungen verursachen, wenn sie zu plötzlich geöffnet werden. Versuchen
Sie niemals, die Markise auseinanderzunehmen oder sie selber zu repa-
rieren. Kontaktieren Sie einen kompetenten Techniker, damit er Ihnen hilft.
Erklärung der Symbole:
WICHTIGE SICHERHEITSHINWEISE
WARNUNG – BEFOLGEN SIE DIESE ANWEISUNGEN UND BEWAHREN SIE DIE ANLEITUNG
AUF, UM SICHERHEIT ZU GARANTIEREN.
Nicht gestattet Wichtig
Specification / Safety operation 1
Specification
Product name Material and
surface treatment
Applicable wall
type
Recommended
installation height
BW31000 W×L
retractable awning
framework
Reinforced
concrete walls,
brick walls and
wooden walls 2.5m - 3.5m
Applicable
weather
The products are
used to shield
sunshine, so it is
applicable when
the wind is under
level 5 and it is not
raining as well.
W: Product
length
L: Arm length
(Please see
details on the
package)
Materials: Steel tube,
aluminum alloy, plastic
parts, dacron cloth
Servicetreatment:
Tubes: plastic spraying
(painting) and
oxidation.
Cloth surface:
waterproof treatment
Never install it in high and windy places, as the sunshade may drop and hurt
people.
Don't use it in places that have vibrations or impulsions.
Don't use it in places of high temperature such as walls nearfurnaces.
Don't put heavy stuff on the frame as it may fall down and cause damages.
Never use it in rainy and windy days.
Never use it for other purposes.
Be careful with your finger during installation.
Two adults are needed to move and install the sunshade as the product is big
and heavy.
Please use all the screws and nuts correctly during installation as it is very
dangerous if you leave it loose.
Please close the sunshade in windy and rainy days.
Do not allow children to play with the control device of the blind.Keep remote
control away from children;Frequently examine the installation for signs of wear
or damage to cables.
Symbol explanation:
IMPORTANT SAFTEY INSTRUCTIONS
WARNING - IT IS IMPORTANT FOR SAFETY OF PERSONS TO FOLLOW THESE INSTRUCTIONS SAVE THIS INSTRUCTIONS.
Means it is forbidden
Precautions and safety warning for installation and operation
READ THE INSTRUCTION BEFORE USING
THE PRODUCT
Means important
Attention!
Before opening the awning, make sure all the fixing bolts and security devices are properly installed
and tightened.
Always close the awning during rainy days, windy days or the awning is not in use.
Failed to observe the instrution may lead to material and constructional damage of the awning.
The folding arms of the awning are under tension and can cause damage and injury when they are
open up suddenly.
Never try to disassemble the awning or repair the awning by yourself. Consult a competent
technician for help.
Attention:Well finish the setting program already for all electric items,final
client no need adjust the motor again.
Montieren Sie die Markise niemals an einem hoch gelegenen oder windigen Ort, da sie herabfallen und
Verletzungen verursachen könnte.
Montieren Sie die Markise nicht an einem Ort, der Vibrationen oder Erschütterungen ausgesetzt ist.
Montieren Sie die Markise nicht an einem Ort, der hohen Temperaturen ausgesetzt ist oder sich in der Nähe eines
Ofens bendet.
Platzieren Sie keine schweren Gegenstände auf dem Rahmen, da diese herunterfallen und Schäden verursachen
können.
Niemals an regnerischen und windigen Tagen verwenden.
Niemals für etwas anderes als den Bestimmungszweck verwenden.
Achten Sie bei der Montage auf Ihre Finger.
Da das Produkt groß und schwer ist, sind zwei Erwachsene nötig, um es zu bewegen und zu montieren.
Vergewissern Sie sich, dass alle Schrauben und Muttern während der Montage korrekt verwendet werden, da es
sehr gefährlich ist, wenn die Markise nicht fest angebracht ist.
Ziehen Sie die Markise an windigen oder regnerischen Tagen ein.
Lassen Sie nicht zu, dass Kinder mit der Fernbedienung der Markise spielen. Halten Sie Fernbedienungen von
Kindern fern. Überprüfen Sie die Markise regelmäßig auf Anzeichen von Abnutzung und Schäden an Kabeln.
D
- 3 -
D
Please prepare the following tools before installation
(they are not included in the products)
Power drill with
drilling bit of φ12 Wrench (wrenches of M10 )
Tape
Awning (amount: 1)
Instruction (amount: 1)
Wall bracket
Expansion bolt:
Swing hand hook
(amount: 1)
Parts list 2
Attention!
The expansion bolts provided inthe product is
for concrete or brick wall. If you are installing
the awning on support other than for concrete
or brick wall, please make sure the wall is of
sufficient support and use the correct hardware
to secure the awning on the support.
Number of Wall
brackets
Number of
Expansion bolt
Product model
3.95×2.5m
2.95×2m 2 8
312
TEILLISTE
Markise (1x)
Anleitung (1x)
Handkurbel (1x)
Wandhalterung
Drehschraube
Schlagbohrmaschine mit
einer Bohrspitze φ12 Klebeband Schraubenschlüssel
(Schraubenschlüssel M10)
Legen Sie vor der Montage die folgenden
Werkzeuge bereit (nicht enthalten):
Achtung!
Die im Lieferumfang enthaltenen Dehn-
schrauben sind für Beton- oder Ziegel-
wände gedacht. Falls Sie die Markise an
einer anderen Art Wand montieren, müs-
sen Sie sich vergewissern, dass die Wand
stabil genug ist, und die richtigen Geräte
verwenden, um die Markise anzubringen.
Produktmodell Anzahl der Wand-
halterungen
Anzahl der
Dehnschrauben

- 4 -
D
3
Installation procedure
Mounting of wall brackets
②
Picture 2 is the installation distance from awning to wall or ceiling.
Remove the plate and the retaining screw of each wall
bracket. Turning adjusting screw with a hex key 6 mm in
otherwise clockwise. Measure the distance in Figure-3.
This distance must be greater than 40 mm, (when the
distance equal to 45 mm, the angle of inclination of
awning is 80 °). Must be the same distance for all wall
brakcets. Pressing block
Hex key
Adjusting bolt
③
Wall
Wall
Ceiling
L
α°
Installation height : C
Height of front line : H
α°
75°
80°
60°
65°
70°
C
H+650mm
H+450mm
H+850mm
H+1050mm
H+1250mm
Pls make sure the heigth before installation according to
the height of front bar (H) and the angle of
sunshine(α°). After open the awning, the height must up
to human so it can protect your head from hitting the
awning.
Pls make sure the height and position before installation
L=2.5M L=3M
H+780mm
H+520mm
H+1030mm
H+1270mm
H+1500mm
H+520mm
H+350mm
H+680mm
H+850mm
H+1000mm
L=2M
Carefully unpack and release the bindings. Need two persons to handle the product.
Remove and store the hardware in a safe place to avoid losing.
Beware of the sudden unfolding of any parts, especially the folding arms.
Read the assembly instructions carefully before installation.
Check for missing components and damaged parts. Do not install the product if any
parts are missing or damaged. Return to the store for free replacement.
Never modify the construction or the design of the awning. Fail to follow the instruction
can lead to personal injury or death.
The awning can be installed by non-profession provided the instructions are followed.
Make sure the wall is strong enough and is suitable for the installation of the awning.We
will not be responsible for any damage to the property and the awning due to the weak
support of installation wall.
Prior to installation
1
EINBAU
Packen Sie die Artikel vorsichtig aus und lösen Sie Verschnürungen. Dies erfordert zwei Personen.
Entnehmen Sie die Zubehörteile und verwahren Sie diese an einem sicheren Ort auf.
Achten Sie auf sich möglicherweise plötzlich ausklappende Teile, vor allem auf die Markisenarme.
Lesen Sie sich die Montageanweisungen sorgfältig durch, bevor Sie mit der Montage beginnen.
Überprüfen Sie, ob Komponenten fehlen oder beschädigt sind. Beginnen Sie nicht mit der Montage,
falls Teile fehlen oder beschädigt sind. Wenden Sie sich an Ihren Händler, um kostenfrei Ersatz zu
erhalten. Verändern Sie niemals die Konstruktion oder das Design der Markise. Die Nichteinhaltung
der Anweisungen kann zu Verletzungen oder zum Tod führen. Die Markise kann von Laien montiert
werden, sofern die Anweisungen befolgt werden. Vergewissern Sie sich, dass die Wand stabil ge-
nug ist und sich für die Montage der Markise eignet. Wir übernehmen keine Haftung für Schäden am
Gebäude und der Markise, die aufgrund mangelnder Tragfähigkeit der Wand entstehen.
Vor der Montage
Überprüfen Sie vor der Montage die Höhe und Position der Markise.
Überprüfen Sie vor der Montage die Höhe der
Fallstange (H) und den Winkel des Sonnenein-
falls (α°). Öffnen Sie die Markise und vergewis-
sern Sie sich, dass diese höher als Menschenhoch
hängt, um ein Anstoßen am Kopf zu verhindern.
3
Installation procedure
Mounting of wall brackets
②
Picture 2 is the installation distance from awning to wall or ceiling.
Remove the plate and the retaining screw of each wall
bracket. Turning adjusting screw with a hex key 6 mm in
otherwise clockwise. Measure the distance in Figure-3.
This distance must be greater than 40 mm, (when the
distance equal to 45 mm, the angle of inclination of
awning is 80 °). Must be the same distance for all wall
brakcets. Pressing block
Hex key
Adjusting bolt
③
Wall
Wall
Ceiling
L
α°
Installation height : C
Height of front line : H
α°
75°
80°
60°
65°
70°
C
H+650mm
H+450mm
H+850mm
H+1050mm
H+1250mm
Pls make sure the heigth before installation according to
the height of front bar (H) and the angle of
sunshine(α°). After open the awning, the height must up
to human so it can protect your head from hitting the
awning.
Pls make sure the height and position before installation
L=2.5M L=3M
H+780mm
H+520mm
H+1030mm
H+1270mm
H+1500mm
H+520mm
H+350mm
H+680mm
H+850mm
H+1000mm
L=2M
Carefully unpack and release the bindings. Need two persons to handle the product.
Remove and store the hardware in a safe place to avoid losing.
Beware of the sudden unfolding of any parts, especially the folding arms.
Read the assembly instructions carefully before installation.
Check for missing components and damaged parts. Do not install the product if any
parts are missing or damaged. Return to the store for free replacement.
Never modify the construction or the design of the awning. Fail to follow the instruction
can lead to personal injury or death.
The awning can be installed by non-profession provided the instructions are followed.
Make sure the wall is strong enough and is suitable for the installation of the awning.We
will not be responsible for any damage to the property and the awning due to the weak
support of installation wall.
Prior to installation
1
Abb. 2 zeigt die Distanz von der Markise zu den Wänden und der Decke.
Höhe der Fallstange: H
Einbauhöhe: C
Anbringen der Wandhalterungen
Entfernen Sie die Platte und die Halteschraube
von jeder Wandhalterung. Ziehen Sie die Feststell-
schraube mit einem 6-mm-Sechskantschlüssel ge-
gen den Uhrzeigersinn fest. Messen Sie die in Ab-
bildung 3 gezeigte Entfernung ab. Die Entfernung
muss größer als 40 mm sein (wenn die Entfernung
45 mm beträgt, ist der Neigungswinkel der Marki-
se 80 °). Sie muss für alle Wandhalterungen gleich
sein.
Decke
Wand
Wand
Sechskantschlüssel
Pressing Block
Einstellschraube

- 5 -
D
4
Installation procedure
Note: the 3 wall brackets are used to hold the
awning in place. Warning : The arm shoulder on
both side must be installed on top of the wall
bracket. Failureto do so can leadtothe deformation
of the awning and reduce the service life of the
products.
④
⑥
⑤
⑦⑧
Expansion
bolt
Washer
Nut
Bolt
⑨
Arm
shoulder
Wall bracket
2,100
120 Ø12 120
1,230
120 Ø12 120
1,230
120
3.95×2.5m:
2.95×2m:
Make sure all the wall brackets are
on the same horizontal line
EINBAU
Mutter
Dehn-
schraube
Unterleg-
scheibe Schraube
Vergewissern Sie sich, dass sich alle
Wandhalterungen auf gleicher Höhe benden.
Zur Beachtung: die 3 Wandhalterungen werden
verwendet, um die Markise an Ort und Stelle zu
halten. Warnung: Die Arm-Schulter muss auf bei-
den Seiten auf der Wandhalterung angebracht
werden. Ein Nichteinhalten kann zu einer Beschä-
digung der Markise führen und den Produktlebens-
zyklus verringern.
Arm-
schulter
Wandhalterung

- 6 -
D
Hex key : 5mm
5
Installation procedure / Description of mistake
You can use hand crank to open or close the awning.
Warning: Whenthe front bar touches
the end cap shown in the image, do
not try to bring them closer.
Otherwise, the product may be
damaged.
Use incorrect
Use correct
The fabric should be tight when open,the risk that water will accumulate and damage the
product (see diagram above).
MONTAGE
FEHLERBEHEBUNG
Sechskantschlüssel: 5 mm
Sie können Sie Markise mithilfe der Handkur-
bel öffnen oder schließen.
Fallstange
Öffnen
Schließen Warnung: Wenn die Fall-
stange die Endkappe be-
rührt, wie in der Abbildung
gezeigt, versuchen Sie
nicht, sie näher zueinan-
der zu bringen. Andern-
falls kann das Produkt be-
schädigt werden.
Falsch
Richtig
Der Stoff sollte im geöffneten Zustand straff sein, da sonst das Risiko besteht,
dass sich Wasser sammelt und das Produkt beschädigt (siehe Darstellung oben).

- 7 -
D
Adjustment for angle 6
Min:60°
Max.90°
JACK BOLT
Hex key : 6mm
Instructions for inclination adjustment
1. Loosen the locking nut.
2. Turn the jack bolt to adjust the picth tothe desired
inclination.
3. Tighten the locking nut.
4. Adjust the inclination of the remaining wall brackets.
5. Fine tone the pitch of individual bracket and adjust the level
of the front cover.
LOCKING NUTS
LOCKING NUTS
ANPASSUNG DES NEIGUNGSWINKELS
NIVELLIERSCHRAUBEN
SICHERUNGS-
MUTTERN
Sechskant-
schlüssel: 6 mm
NIVELLIERSCHRAUBEN
Anweisungen für die Anpassung des
Neigungswinkels:
1. Lockern der Sicherungsmuttern.
2. Drehen Sie die Nivellierschraube, um
die gewünschte Neigung einzustellen.
3. Drehen Sie die Sicherungsmutter fest.
4. Passen Sie die Neigung der verblei-
benden Wandhalterungen an.
5. Justieren Sie die einzelnen Wandhal-
terungen und passen Sie die Höhe der
Fallstange an.

- 8 -
D
Names of the parts 7
◆end cap
◆roller
◆motor
◆wal
l bracket
◆front bar
fabric
Note:When the parts with ◆are damaged, don't use the product before they are replaced.
◆arm stand
swing
handhook
• Endkappe
•Wandhalterung
• Motor • Rollkasten
• Handkurbel
• Schwenkarm
•Stoff
•Fallstange
Hinweis: Falls mit • gekennzeichnete Teile beschädigt sind, darf das Produkt nicht
verwendet werden, bis die Teile repariert wurden.
TEILE

- 9 -
- 79 -
Name • Nome • Nom • Naam
Nr. • No. • n°
Typ • Type • Tipo
Service • Servizio
Imported by baumarkt direkt GmbH & Co KG
Alter Teichweg 25, 22081 Hamburg, Germany
Produktberatung: 01806/ 63 06 30 Festnetz 20 Cent/Anruf, Mobilfunk max. 60 Cent/Anruf
Quelle D Fachberatung: 01806/111 100 Festnetz 20 Cent/Anruf, Mobilfunk max. 60 Cent/Anruf
D
CH
F
I
A
Bei Problemen oder Fragen wenden Sie sich bitte an unsere Servicehotline!
Quelle CH: 0848 85 85 00 Ackermann CH: 0848 85 85 11, Jelmoli Technik: 0848 858 530
Si vous avez des problèmes ou des ques
In caso di problemi o ulteriori domande, chiamate il nostro servizio clienti!
Quelle CH: 0848 85 85 02 Ackermann CH: 0848 85 85 31, Jelmoli Technik: 0848 858 530
tions, contactez notre service en ligne!
Quelle CH: 0848 85 85 01 Ackermann CH: 0848 85 85 21, Jelmoli Technik: 0848 858 530
Universal: 0043/662/4485 59 Fachberatung Heimwerken (zum Festnetztarif – je nach Betreiber)
Otto: 0043/316/606 159 Beratung Heimwerken (zum Festnetztarif – je nach Betreiber)
Quelle: 0043/662/9005 59 Fachberatung Heimwerken (zum Festnetztarif – je nach Betreiber)
NL call center telefoonnummer 0900-1901 15 ct/min
SERRE
SS1300
Importé par baumarkt direct GmbH & Co KG
Alter Teichweg 25, D-22081 Hamburg, Allemagne
Service
Einziehbare Markise
BW31000
Importiert von baumarkt direkt GmbH & Co KG
Alter Teichweg 25, D-22081 Hamburg, Deutschland
D

- 10 -

- 11 -
IT
Montageanleitung
D
Istruzioni di montaggio
IT
Handeleiding voor de montage
NL
Notice de montage
F
Assembly instructions
GB
Docment No: xxxx
Product name
BW31000
Documento N° BW31000
Contents
►Specifications
►Safe installation and operation
►Parts list
►Installation procedure
►Description of mistake
►Adjustmentfor angle
►Namelist of parts
BW31000 Series Retractable
Awning
Instructions for Installation
and Operation
Tenda da sole retrattile
Istruzioni di montaggio e d’uso

- 12 -
IT
DATI TECNICI
Specification / Safety operation 1
Specification
Product name Material and
surface treatment
Applicable wall
type
Recommended
installation height
BW31000 W×L
retractable awning
framework
Reinforced
concrete walls,
brick walls and
wooden walls 2.5m - 3.5m
Applicable
weather
The products are
used to shield
sunshine, so it is
applicable when
the wind is under
level 5 and it is not
raining as well.
W: Product
length
L: Arm length
(Please see
details on the
package)
Materials: Steel tube,
aluminum alloy, plastic
parts, dacron cloth
Servicetreatment:
Tubes: plastic spraying
(painting) and
oxidation.
Cloth surface:
waterproof treatment
Never install it in high and windy places, as the sunshade may drop and hurt
people.
Don't use it in places that have vibrations or impulsions.
Don't use it in places of high temperature such as walls nearfurnaces.
Don't put heavy stuff on the frame as it may fall down and cause damages.
Never use it in rainy and windy days.
Never use it for other purposes.
Be careful with your finger during installation.
Two adults are needed to move and install the sunshade as the product is big
and heavy.
Please use all the screws and nuts correctly during installation as it is very
dangerous if you leave it loose.
Please close the sunshade in windy and rainy days.
Do not allow children to play with the control device of the blind.Keep remote
control away from children;Frequently examine the installation for signs of wear
or damage to cables.
Symbol explanation:
IMPORTANT SAFTEY INSTRUCTIONS
WARNING - IT IS IMPORTANT FOR SAFETY OF PERSONS TO FOLLOW THESE INSTRUCTIONS SAVE THIS INSTRUCTIONS.
Means it is forbidden
Precautions and safety warning for installation and operation
READ THE INSTRUCTION BEFORE USING
THE PRODUCT
Means important
Attention!
Before opening the awning, make sure all the fixing bolts and security devices are properly installed
and tightened.
Always close the awning during rainy days, windy days or the awning is not in use.
Failed to observe the instrution may lead to material and constructional damage of the awning.
The folding arms of the awning are under tension and can cause damage and injury when they are
open up suddenly.
Never try to disassemble the awning or repair the awning by yourself. Consult a competent
technician for help.
Attention:Well finish the setting program already for all electric items,final
client no need adjust the motor again.
Nome del prodotto
Materiale e
trattamento della
supercie
Pareti adatte Altezza di montaggio
consigliata
Condizioni climatiche
adatte
BW31000 L x B
Tenda da sole
retrattile
L: Larghezza del
prodotto
B: Lunghezza braccio
(vedi dettagli sulla
confezione)
Materiali: Tubo in
acciaio, lega di
alluminio, parti in
plastica, telo in
Dacron
Trattamento della
supercie:
Tubi: Vernice a
spruzzo per plastica
e ossidazione
Supercie telo:
Impregnata
Pareti in cemento
armato, in mattoni e
in legno
2,5 m – 3,5 m Il prodotto viene
utilizzato per
proteggere dalla luce
del sole.
Si può utilizzare in
condizioni climatiche
asciutte, quando il
vento sofa a una
forza a 5.
Misure precauzionali per il montaggio e per l’uso
Specification / Safety operation 1
Specification
Product name Material and
surface treatment
Applicable wall
type
Recommended
installation height
BW31000 W×L
retractable awning
framework
Reinforced
concrete walls,
brick walls and
wooden walls 2.5m - 3.5m
Applicable
weather
The products are
used to shield
sunshine, so it is
applicable when
the wind is under
level 5 and it is not
raining as well.
W: Product
length
L: Arm length
(Please see
details on the
package)
Materials: Steel tube,
aluminum alloy, plastic
parts, dacron cloth
Servicetreatment:
Tubes: plastic spraying
(painting) and
oxidation.
Cloth surface:
waterproof treatment
Never install it in high and windy places, as the sunshade may drop and hurt
people.
Don't use it in places that have vibrations or impulsions.
Don't use it in places of high temperature such as walls nearfurnaces.
Don't put heavy stuff on the frame as it may fall down and cause damages.
Never use it in rainy and windy days.
Never use it for other purposes.
Be careful with your finger during installation.
Two adults are needed to move and install the sunshade as the product is big
and heavy.
Please use all the screws and nuts correctly during installation as it is very
dangerous if you leave it loose.
Please close the sunshade in windy and rainy days.
Do not allow children to play with the control device of the blind.Keep remote
control away from children;Frequently examine the installation for signs of wear
or damage to cables.
Symbol explanation:
IMPORTANT SAFTEY INSTRUCTIONS
WARNING - IT IS IMPORTANT FOR SAFETY OF PERSONS TO FOLLOW THESE INSTRUCTIONS SAVE THIS INSTRUCTIONS.
Means it is forbidden
Precautions and safety warning for installation and operation
READ THE INSTRUCTION BEFORE USING
THE PRODUCT
Means important
Attention!
Before opening the awning, make sure all the fixing bolts and security devices are properly installed
and tightened.
Always close the awning during rainy days, windy days or the awning is not in use.
Failed to observe the instrution may lead to material and constructional damage of the awning.
The folding arms of the awning are under tension and can cause damage and injury when they are
open up suddenly.
Never try to disassemble the awning or repair the awning by yourself. Consult a competent
technician for help.
Attention:Well finish the setting program already for all electric items,final
client no need adjust the motor again.
LEGGERE LE ISTRUZIONI
D’USO PRIMA DI UTILIZZARE
IL PRODOTTO.
Attenzione!
Prima di aprire la tenda da sole, assicurarsi che tutte le viti di ssaggio e i
dispositivi di sicurezza siano stati montati e serrati correttamente.
Chiudere la tenda da sole nei giorni di pioggia, in presenza del vento o
quando questa non viene utilizzata.
L’inosservanza di tali precauzioni può causare danni alla tenda da sole.
I bracci della tenda da sole sono sotto tensione e possono causare danni o
lesioni se vengono aperti in modo troppo improvviso.
Non cercare mai di smontare la tenda da sole o di ripararla da soli.
Contattare un tecnico competente per ricevere assistenza.
Spiegazione dei simboli:
AVVERTENZE IMPORTANTI PER LA SICUREZZA
ATTENZIONE – RISPETTARE QUESTE ISTRUZIONI E CONSERVARLE IN MODO DA
GARANTIRE LA SICUREZZA.
Non permesso Importante
Specification / Safety operation 1
Specification
Product name Material and
surface treatment
Applicable wall
type
Recommended
installation height
BW31000 W×L
retractable awning
framework
Reinforced
concrete walls,
brick walls and
wooden walls 2.5m - 3.5m
Applicable
weather
The products are
used to shield
sunshine, so it is
applicable when
the wind is under
level 5 and it is not
raining as well.
W: Product
length
L: Arm length
(Please see
details on the
package)
Materials: Steel tube,
aluminum alloy, plastic
parts, dacron cloth
Servicetreatment:
Tubes: plastic spraying
(painting) and
oxidation.
Cloth surface:
waterproof treatment
Never install it in high and windy places, as the sunshade may drop and hurt
people.
Don't use it in places that have vibrations or impulsions.
Don't use it in places of high temperature such as walls nearfurnaces.
Don't put heavy stuff on the frame as it may fall down and cause damages.
Never use it in rainy and windy days.
Never use it for other purposes.
Be careful with your finger during installation.
Two adults are needed to move and install the sunshade as the product is big
and heavy.
Please use all the screws and nuts correctly during installation as it is very
dangerous if you leave it loose.
Please close the sunshade in windy and rainy days.
Do not allow children to play with the control device of the blind.Keep remote
control away from children;Frequently examine the installation for signs of wear
or damage to cables.
Symbol explanation:
IMPORTANT SAFTEY INSTRUCTIONS
WARNING - IT IS IMPORTANT FOR SAFETY OF PERSONS TO FOLLOW THESE INSTRUCTIONS SAVE THIS INSTRUCTIONS.
Means it is forbidden
Precautions and safety warning for installation and operation
READ THE INSTRUCTION BEFORE USING
THE PRODUCT
Means important
Attention!
Before opening the awning, make sure all the fixing bolts and security devices are properly installed
and tightened.
Always close the awning during rainy days, windy days or the awning is not in use.
Failed to observe the instrution may lead to material and constructional damage of the awning.
The folding arms of the awning are under tension and can cause damage and injury when they are
open up suddenly.
Never try to disassemble the awning or repair the awning by yourself. Consult a competent
technician for help.
Attention:Well finish the setting program already for all electric items,final
client no need adjust the motor again.
Non montare mai la tenda da sole in un punto troppo alto o ventoso perché potrebbe cadere e causare lesioni.
Non montare la tenda da sole in un punto in cui potrebbe essere esposta a vibrazioni e scosse.
Non montare la tenda da sole in un punto in cui potrebbe essere esposta ad alte temperature o nelle vicinanze di
una stufa.
Non mettere oggetti pesanti sull’intelaiatura, dato che potrebbero cadere e causare lesioni.
Non utilizzare mai quando piove o c’è vento.
Non utilizzarla mai per altri scopi.
Durante il montaggio fare attenzione alle dita.
Siccome il prodotto è grande e pesante, per sollevarlo sono necessarie due persone adulte.
Durante il montaggio assicurarsi che tutte le viti e i dadi siamo stati inseriti correttamente. La tenda da sole non
ssata correttamente rappresenta un pericolo.
Avvolgere la tenda da sole nei giorni di pioggia o di vento.
Non fare giocare i bambini con il telecomando della tenda da sole. Tenere lontano il telecomando dalla portata dei
bambini. Controllare periodicamente la tenda da sole per rilevare eventuali segni di usura o danni ai cavi.

- 13 -
IT
Please prepare the following tools before installation
(they are not included in the products)
Power drill with
drilling bit of φ12 Wrench (wrenches of M10 )
Tape
Awning (amount: 1)
Instruction (amount: 1)
Wall bracket
Expansion bolt:
Swing hand hook
(amount: 1)
Parts list 2
Attention!
The expansion bolts provided inthe product is
for concrete or brick wall. If you are installing
the awning on support other than for concrete
or brick wall, please make sure the wall is of
sufficient support and use the correct hardware
to secure the awning on the support.
Number of Wall
brackets
Number of
Expansion bolt
Product model
3.95×2.5m
2.95×2m 2 8
312
ELENCO DEI PEZZI
Tenda da sole (1x)
Istruzioni (1x)
Manovella (1x)
Supporto a
parete
Trapano a percussione
con punta da φ12 Nastro adesivo Chiave inglese
(chiave inglese M10)
Prima del montaggio preparare i seguenti
attrezzi (non in dotazione):
Attenzione!
Le viti a espansione comprese nella
fornitura del prodotto sono per pareti in
calcestruzzo o mattoni. Nel caso si volesse
montare la tenda da sole in altro punto, è
necessario assicurarsi che la parete sia
solida ed è importante utilizzare i dispositivi
di montaggio corretti.
Modello del
prodotto
Numero dei
supporti a parete
Numero delle viti
ad espansione
Vite a
espansione

- 14 -
IT
3
Installation procedure
Mounting of wall brackets
②
Picture 2 is the installation distance from awning to wall or ceiling.
Remove the plate and the retaining screw of each wall
bracket. Turning adjusting screw with a hex key 6 mm in
otherwise clockwise. Measure the distance in Figure-3.
This distance must be greater than 40 mm, (when the
distance equal to 45 mm, the angle of inclination of
awning is 80 °). Must be the same distance for all wall
brakcets. Pressing block
Hex key
Adjusting bolt
③
Wall
Wall
Ceiling
L
α°
Installation height : C
Height of front line : H
α°
75°
80°
60°
65°
70°
C
H+650mm
H+450mm
H+850mm
H+1050mm
H+1250mm
Pls make sure the heigth before installation according to
the height of front bar (H) and the angle of
sunshine(α°). After open the awning, the height must up
to human so it can protect your head from hitting the
awning.
Pls make sure the height and position before installation
L=2.5M L=3M
H+780mm
H+520mm
H+1030mm
H+1270mm
H+1500mm
H+520mm
H+350mm
H+680mm
H+850mm
H+1000mm
L=2M
Carefully unpack and release the bindings. Need two persons to handle the product.
Remove and store the hardware in a safe place to avoid losing.
Beware of the sudden unfolding of any parts, especially the folding arms.
Read the assembly instructions carefully before installation.
Check for missing components and damaged parts. Do not install the product if any
parts are missing or damaged. Return to the store for free replacement.
Never modify the construction or the design of the awning. Fail to follow the instruction
can lead to personal injury or death.
The awning can be installed by non-profession provided the instructions are followed.
Make sure the wall is strong enough and is suitable for the installation of the awning.We
will not be responsible for any damage to the property and the awning due to the weak
support of installation wall.
Prior to installation
1
INSTALLAZIONE
Estrarre con cautela l’articolo dall’imballaggio e allentare le cinghie. Questa operazione richiede due
persone. Estrarre gli accessori e riporli in un luogo sicuro. Fare attenzione ai pezzi che si possono
improvvisamente aprire, soprattutto i bracci della tenda da sole. Prima di iniziare il montaggio della
tenda da sole, leggere attentamente le presenti istruzioni. Controllare se mancano alcuni compo-
nenti o se sono danneggiati. Non iniziare a montare la tenda se alcuni pezzi mancano o sono dan-
neggiati. Rivolgersi al rivenditore per ottenere i ricambi gratis. Non modicare mai né la costruzione
né il design della tenda da sole. L’inosservanza di queste indicazioni può causare lesioni o anche la
morte. La tenda da sole può essere montata da persone non specializzate, solo se queste si atten-
gono scrupolosamente alle istruzioni. Assicurarsi che la parete sia sufcientemente solida e adatta
al montaggio della tenda da sole. Non ci assumiamo alcuna responsabilità per i danni all‘edicio e
alla tenda da sole che siano dovuti alla scarsa capacità portante della parete di montaggio.
Preparazione del montaggio
Prima del montaggio si prega di controllare l‘altezza e la posizione della tenda da sole.
Prima del montaggio si prega di controllare l‘altezza
della barra di sicurezza anticaduta (H) e l’angolo dei
raggi solari (α°). Aprire la tenda da sole e
assicurarsi che sia stata montata sufcientemente in
alto, in modo da evitare di sbattervi con la testa.
3
Installation procedure
Mounting of wall brackets
②
Picture 2 is the installation distance from awning to wall or ceiling.
Remove the plate and the retaining screw of each wall
bracket. Turning adjusting screw with a hex key 6 mm in
otherwise clockwise. Measure the distance in Figure-3.
This distance must be greater than 40 mm, (when the
distance equal to 45 mm, the angle of inclination of
awning is 80 °). Must be the same distance for all wall
brakcets. Pressing block
Hex key
Adjusting bolt
③
Wall
Wall
Ceiling
L
α°
Installation height : C
Height of front line : H
α°
75°
80°
60°
65°
70°
C
H+650mm
H+450mm
H+850mm
H+1050mm
H+1250mm
Pls make sure the heigth before installation according to
the height of front bar (H) and the angle of
sunshine(α°). After open the awning, the height must up
to human so it can protect your head from hitting the
awning.
Pls make sure the height and position before installation
L=2.5M L=3M
H+780mm
H+520mm
H+1030mm
H+1270mm
H+1500mm
H+520mm
H+350mm
H+680mm
H+850mm
H+1000mm
L=2M
Carefully unpack and release the bindings. Need two persons to handle the product.
Remove and store the hardware in a safe place to avoid losing.
Beware of the sudden unfolding of any parts, especially the folding arms.
Read the assembly instructions carefully before installation.
Check for missing components and damaged parts. Do not install the product if any
parts are missing or damaged. Return to the store for free replacement.
Never modify the construction or the design of the awning. Fail to follow the instruction
can lead to personal injury or death.
The awning can be installed by non-profession provided the instructions are followed.
Make sure the wall is strong enough and is suitable for the installation of the awning.We
will not be responsible for any damage to the property and the awning due to the weak
support of installation wall.
Prior to installation
1
La g. 2 illustra la distanza della tenda da sole dalle pareti e dal softto.
Altezza della barra di
sicurezza anticaduta: A
Altezza di installazione: C
Montaggio dei supporti a parete
Rimuovere la piastra e la vite di arresto da
ciascun supporto a parete. Serrare in senso
antiorario la vite di ssaggio con una chiave a
brugola da 6-mm. Misurare la distanza indicata
nella gura 3. La distanza deve essere maggiore
di 40 mm (se la distanza è di 45 mm, l‘angolo di
inclinazione della tenda da sole è 80°). La distanza
deve essere uguale per tutti i supporti a parete.
Softto
Parete
Chiave a brugola
Blocco di pressatura
Vite di regolazione
Parete

- 15 -
IT
4
Installation procedure
Note: the 3 wall brackets are used to hold the
awning in place. Warning : The arm shoulder on
both side must be installed on top of the wall
bracket. Failureto do so can leadtothe deformation
of the awning and reduce the service life of the
products.
④
⑥
⑤
⑦⑧
Expansion
bolt
Washer
Nut
Bolt
⑨
Arm
shoulder
Wall bracket
2,100
120 Ø12 120
1,230
120 Ø12 120
1,230
120
3.95×2.5m:
2.95×2m:
Make sure all the wall brackets are
on the same horizontal line
INSTALLAZIONE
Dado
Vite a
espansione
Rondella Vite
Assicurarsi che tutti i supporti a
parete si trovino alla stessa altezza.
Attenzione: i 3 supporti a parete servono per
tenere ferma al suo posto la tenda da sole.
Avvertenza: Lo spallamento del braccio deve
essere ssato su entrambi i lati del supporto a
parete. Il mancato rispetto di ciò può comportare la
deformazione della tenda da sole e ridurre il ciclo
di vita del prodotto.
Spallamento
del braccio
Supporto a parete

- 16 -
IT
Hex key : 5mm
5
Installation procedure / Description of mistake
You can use hand crank to open or close the awning.
Warning: Whenthe front bar touches
the end cap shown in the image, do
not try to bring them closer.
Otherwise, the product may be
damaged.
Use incorrect
Use correct
The fabric should be tight when open,the risk that water will accumulate and damage the
product (see diagram above).
MONTAGGIO
RISOLUZIONE PROBLEMI
Chiave a brugola: 5 mm
La tenda da sole si apre e si chiude con la
manovella.
Barra di
sicurezza
anticaduta
Apertura
Chiusura Avvertenza: se la barra
di sicurezza anticaduta
tocca il tappo terminale,
come mostrato nella
gura, non cercare di
avvicinarli. In caso
contrario il prodotto può
subire dei danni.
Errato
Corretto
Con la tenda aperta la stoffa deve essere ben tesa, altrimenti si corre il rischio che
vi si accumuli dell’acqua e quindi il prodotto si danneggi (vedi gura qui sopra).

- 17 -
IT
Adjustment for angle 6
Min:60°
Max.90°
JACK BOLT
Hex key : 6mm
Instructions for inclination adjustment
1. Loosen the locking nut.
2. Turn the jack bolt to adjust the picth tothe desired
inclination.
3. Tighten the locking nut.
4. Adjust the inclination of the remaining wall brackets.
5. Fine tone the pitch of individual bracket and adjust the level
of the front cover.
LOCKING NUTS
LOCKING NUTS
MODIFICA DELL’ANGOLO DI INCLINAZIONE
VITI LIVELLANTI
DADI DI
FISSAGGIO
Chiave a
brugola: 6 mm
DADI DI FISSAGGIO
Indicazioni per modicare l’angolo di in-
clinazione:
1. Allentare i dadi di ssaggio.
2. Girare la vite livellante per regolare
l‘inclinazione desiderata.
3. Serrare il dado di ssaggio.
4. Adattare l‘inclinazione dei restanti
supporti a parete.
5. Regolare i singoli supporti a parete e
adattare l’altezza della barra di
sicurezza anticaduta.

- 18 -
IT
Names of the parts 7
◆end cap
◆roller
◆motor
◆wal
l bracket
◆front bar
fabric
Note:When the parts with ◆are damaged, don't use the product before they are replaced.
◆arm stand
swing
handhook
• Tappo terminale
•Supporto a parete
• Motore • Cassetta
• Manovella
• Braccio orientabile
•Tessuto
•Barra di sicurezza
anticaduta
Avviso: Nel caso che i pezzi contrassegnati con •siano danneggiati,
il prodotto non deve essere utilizzato per nessun motivo no a che tali
pezzi non siano stati riparati.
PEZZI

- 19 -
IT
- 79 -
Name • Nome • Nom • Naam
Nr. • No. • n°
Typ • Type • Tipo
Service • Servizio
Imported by baumarkt direkt GmbH & Co KG
Alter Teichweg 25, 22081 Hamburg, Germany
Produktberatung: 01806/ 63 06 30 Festnetz 20 Cent/Anruf, Mobilfunk max. 60 Cent/Anruf
Quelle D Fachberatung: 01806/111 100 Festnetz 20 Cent/Anruf, Mobilfunk max. 60 Cent/Anruf
D
CH
F
I
A
Bei Problemen oder Fragen wenden Sie sich bitte an unsere Servicehotline!
Quelle CH: 0848 85 85 00 Ackermann CH: 0848 85 85 11, Jelmoli Technik: 0848 858 530
Si vous avez des problèmes ou des ques
In caso di problemi o ulteriori domande, chiamate il nostro servizio clienti!
Quelle CH: 0848 85 85 02 Ackermann CH: 0848 85 85 31, Jelmoli Technik: 0848 858 530
tions, contactez notre service en ligne!
Quelle CH: 0848 85 85 01 Ackermann CH: 0848 85 85 21, Jelmoli Technik: 0848 858 530
Universal: 0043/662/4485 59 Fachberatung Heimwerken (zum Festnetztarif – je nach Betreiber)
Otto: 0043/316/606 159 Beratung Heimwerken (zum Festnetztarif – je nach Betreiber)
Quelle: 0043/662/9005 59 Fachberatung Heimwerken (zum Festnetztarif – je nach Betreiber)
NL call center telefoonnummer 0900-1901 15 ct/min
SERRE
SS1300
Importé par baumarkt direct GmbH & Co KG
Alter Teichweg 25, D-22081 Hamburg, Allemagne
Assistenza
Tenda da sole
retrattile
BW31000
Importato da baumarkt direkt GmbH & Co KG
Alter Teichweg 25, D-22081 Amburgo, Germania

- 20 -
Other manuals for BW31000
2
Table of contents
Other Konifera Accessories manuals

Konifera
Konifera BW92001 User manual

Konifera
Konifera BW31000 User manual

Konifera
Konifera BW92300 User manual

Konifera
Konifera BW23000 User manual

Konifera
Konifera BW92000 User manual

Konifera
Konifera BW13000LED User manual

Konifera
Konifera BW28000 User manual

Konifera
Konifera BW31000LED User manual

Konifera
Konifera BW73002 User manual

Konifera
Konifera BW73000SKD 2 x 1,2 m User manual