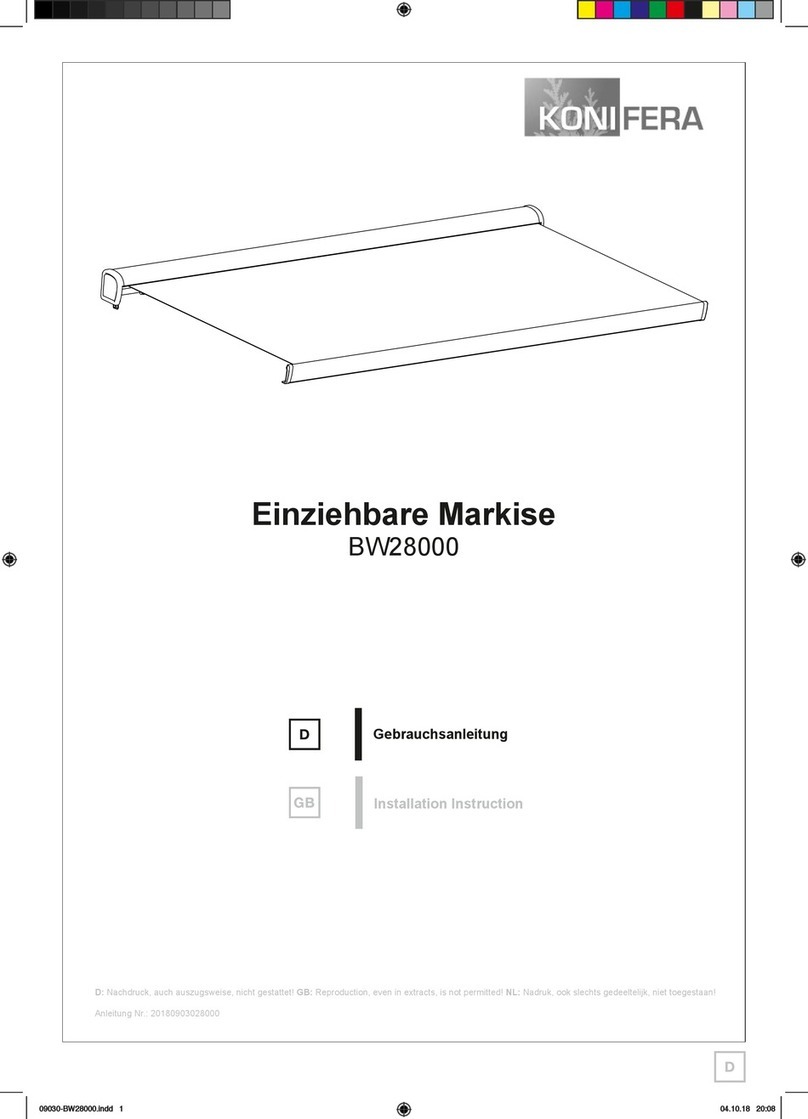
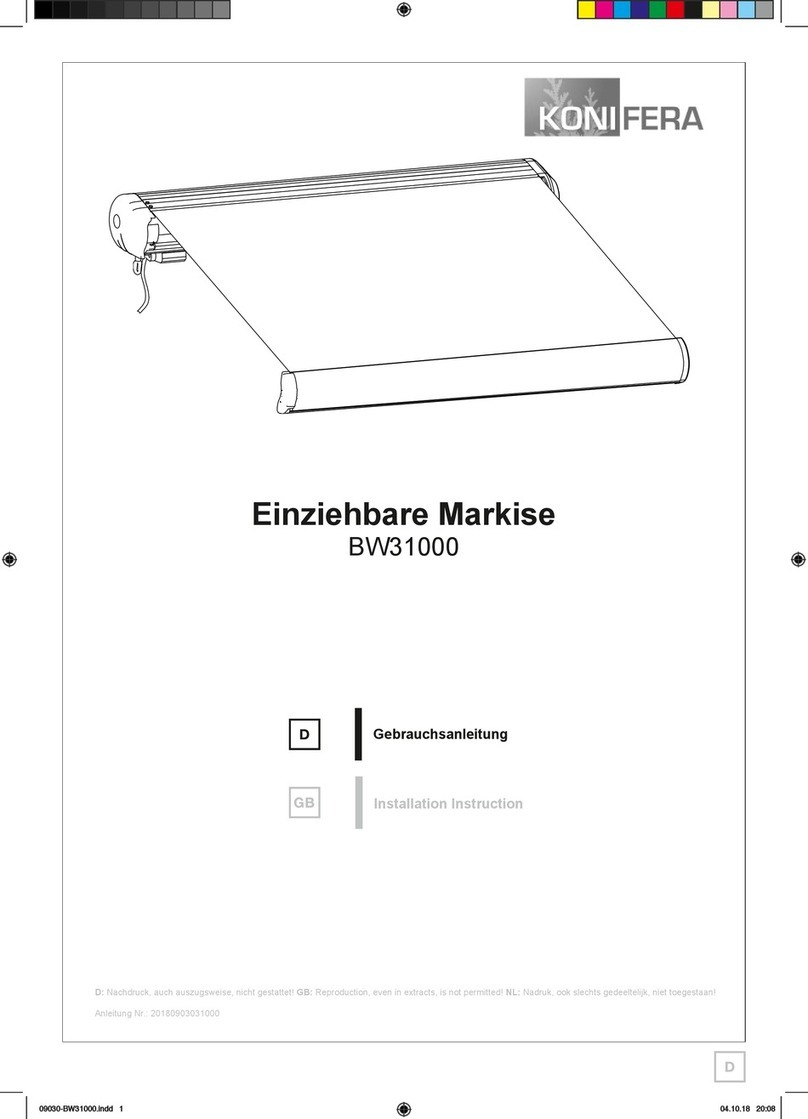
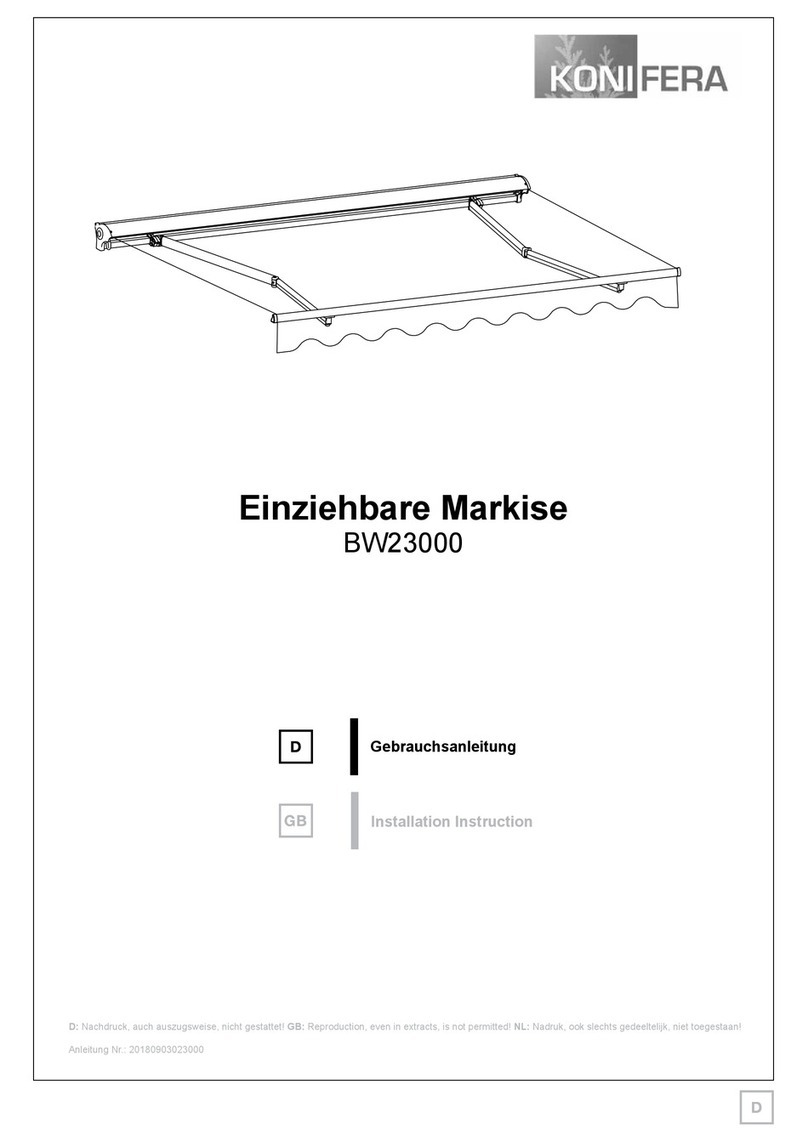
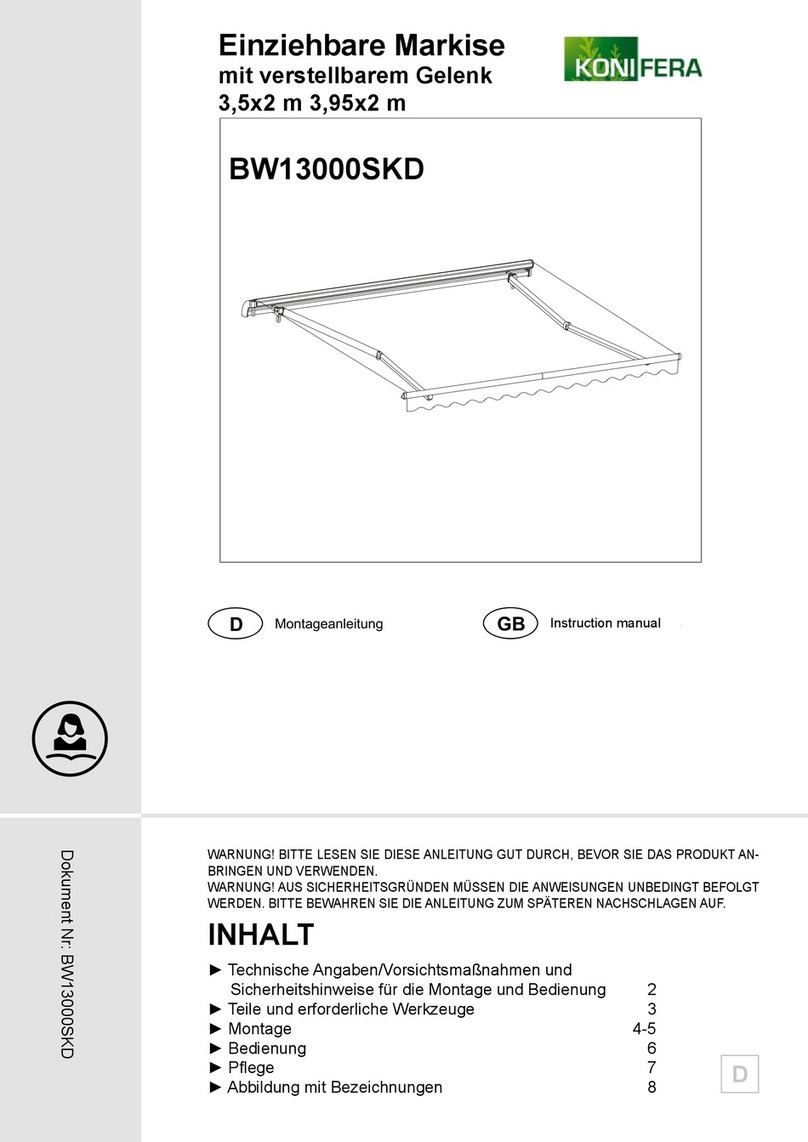
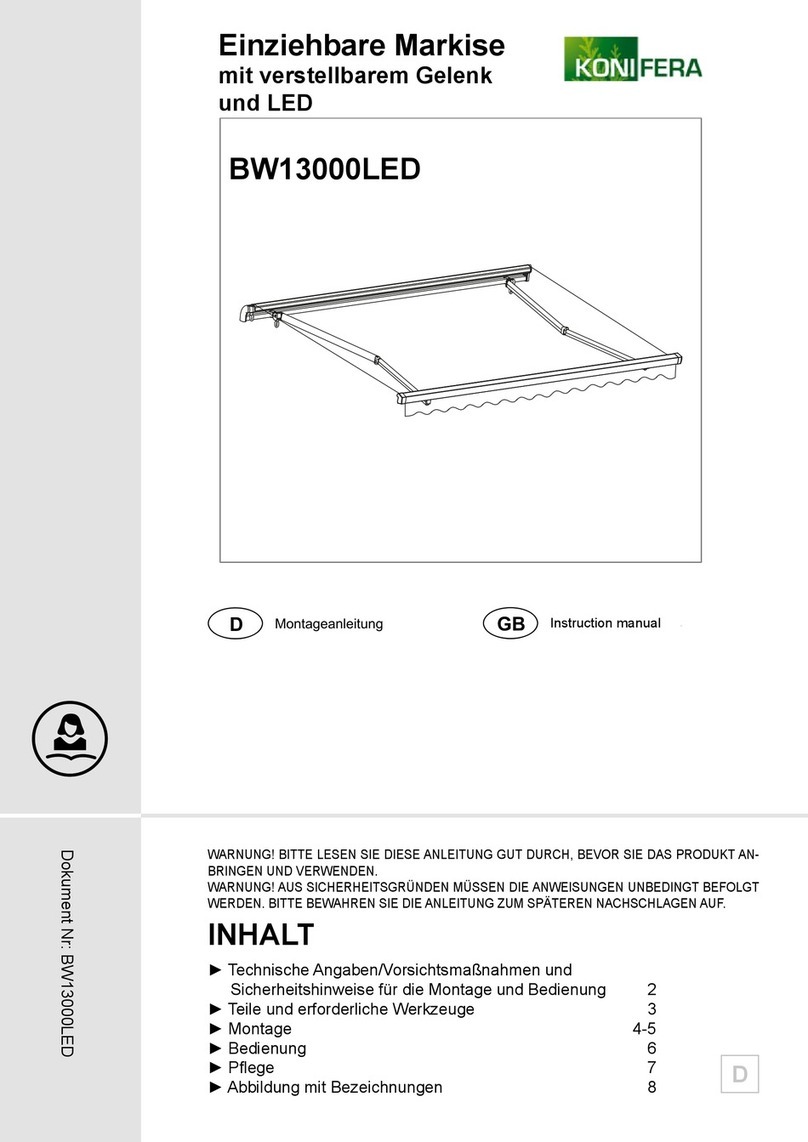
Konifera BW31000LED User manual

- 1 -
Montageanleitung
DIstruzioni di montaggio
IT
Handeleiding voor de montage
NL
Notice de montage
F
Assembly instructions
GB
Docment No: xxxx
Product name
Elektrische Markise
BENUTZERHANDBUCH
Aufbauanleitung
D
Contents
►Intended use
►Precautions and safety warnings for
installation and operation
►Accessories and required tools
►Name listof the parts
►Installation procedure
►Connection
►Operation instructions
►Maintenance
►Awning repair
WARNING! THIS INSTRUCTION MANUALSHALL BE
READBEFORE THE USE AND THE INSTALLATION OF
THE PRODUCT
WARNING: Important safety instructions. It is important
for the safety of persons to follow these instructions. Save
these instructions.
BW31000 STORE BANNE
MOTORISE
BW31000LED
Dokument Nr: BW31000LED
WARNUNG!
BITTE LESEN SIE DIESE ANLEITUNG, BEVOR SIE DAS
PRODUKT VERWENDEN ODER MONTIEREN.
WARNUNG:
Wichtige Sicherheitshinweise.
Aus Sicherheitsgründen ist diese
Anleitung unbedingt zu befolgen.
Bewahren Sie die Anleitung auf.

- 2 -
Spezikation
Markisenmodell: BW31000
Inhaltsverzeichnis
Bestimmungsgemäßer Gebrauch..................................................2
Vorsichtsmaßnahmen und Sicherheitshinweise
zum Einbau und zur Bedienung..................................................3-5
Zubehörteile und erforderliche Werkzeuge....................................6
Auistung der Bauteilbezeichnungen.............................................7
Aufbau.........................................................................................8-9
Anschluss.....................................................................................10
Bedienungsanweisungen........................................................10-13
Instandhaltung..............................................................................13
Markisenreparatur........................................................................14
Service..........................................................................................15
Tatsächliche Maße 3,95x 3 m
Schattengröße 379x 300 cm
Produktnettogewicht
Neigungswinkel:
Tuch:
Windwiderstand:
Motormodell:
Nennspannung:
Nennstrom:
Nennleistung:
Drehzahl:
Drehmoment:
Schutzklasse:
maximaler Dauerbetriebszyklus:
0 ° 30 °
Polyester
Klasse 2
Dooya DM45RD-50/12
230V-50Hz
0.89A
205W
12 rpm
50Nm
IPX4
2
Betriebstemperatur:
Fernbedienung:
Batteriebetrieb:
Kanal des Senders:
Betriebsbereich:
Ausgangsleistung:
Ausgangsspannung:
LED:
LED VF:
LED Leistung:
Lärm:
-10°C bis +40°C
DC1600A
3 V
433 MHz
Offen 200m, zwei Wände 30m
30W
DC12V
Teilenr.: SK-S5050W30F1W110
DC12V
7.2W/M
65 dB
2
Precautions and safety warning for installation and operation
Before opening the awning, make sure all the fixing bolts and security devices are properly installed
Always close the awning during rainy days, windy days or the awning is not in use.
rve the instrution may lead to material and constructional damage of the awning.
lding arms of the awning are under tension and can cause damage and injury when theyare
Never try to disassemble the awning or repair the awning by yourself. Consult a competent
dy for all electric items,final
-S5050W30F1W110
Full cassette awning
Factory: Birchwoods(lin'an)Leisure Products Co., Ltd
ADD: Lin 'an Economic Development Zone,Hangzhou,
Zhejiang,China
Date of production: 2013
Standard: EN 13561:2004+A1:2008
The shutters for outdoor use
Awning modle: BW31000LED 5x3m motorisiert
Rated Power:205W Rated Voltage: 230V~50Hz
Torque: 50Nm
Protection against electric shock:Class 1
Protection class: IPX4
Wind resistance: Class 2
Maximum continuous operation cycle: 2
Importer :
ADD:
Kassettenmarkise
Hersteller: Birchwoods(lin‘an) Leisure Products Co., Ltd
Anschrift: Lin 'an Economic Development Zone, Hangzhou, Zhejiang, China
Produktionsjahr: 2019
Norm: EN 13561:2004 + A1:2008
Markise für den Außenbereich
Markisenmodell: BW31000LED 5x3m motorisiert
Nennleistung: 205 W Nennspannung: 230V-50Hz
Drehmoment: 50Nm
Schutz gegen Stromschläge: Klasse 1
Schutzklasse: IPX4
Windwiderstand: Klasse 2
maximaler Dauerbetriebszyklus: 2
Importeur: Baumarktdirekt GmbH & Co.KG
Anschrift: Alter Teichweg 25, 22081 Hamburg
Achtung: Alle elektrischen Produkte sind fertig eingestellt, der Endkunde muss den Motor
nicht nachjustieren.
5x3m
484x 300 cm

- 3 -
Vorsichtsmaßnahmen und Sicherheitshinweise
zum Einbau und zur Bedienung
LESEN SIE ZUERST
DIE BEDIENUNGS-
ANLEITUNG, BEVOR
SIE DAS GERÄT
BENUTZEN.
Symbol explanation:
IMPORTANT SAFTEY INSTRUCTIONS
WARNING - IT IS IMPORTANT FOR SAFETY OF PERSONS TO FOLLOW THESE INSTRUCTIONS SAVE THIS INSTRUCTIONS.
Means it is forbidden
Precautions and safety warning for installation and operation
READ THE INSTRUCTION BEFORE USING
THE PRODUCT
Rotational speed: 12rpm
Torque: 50Nm
Protection class: IPX4
Maximum continuous
operation cycle: 2
Means important
General
Read this instruction manual carefully before using the appliance. It contains important
information for your safety as well operating and maintenance advice.
Follow all safety instructions to avoid damage through improper use! Follow all warning
notices on the appliance.
Keep this instruction manual for future use. Should this appliance be passed on toathird
party, this instruction manual must be included.
Use this appliance only for its intended use.
No responsibility is accepted for damage resulting from improper use or non-compliance
with these instructions.
Assembly
Means for disconnection having a contact separation in all poles mustbe incorporated in
the fixed wiring in accordance with the wiring rules.
When you are ready to unpack and assemble the awning, make sure thatyou have the
appropriate tools, sufficient operators (3 persons are suggested) and space,and a clean
and dry area to perform the installation.
Switch the power off before cable installation.
Before installing the product, remove the unnecessary cord and disable any equipmentnot
needed for power operation.
Choosing a safe location
Never install it in high and windy places, as the sunshade may drop and hurtpeople.
Attention!
Before opening the awning, make sure all the fixing bolts and security devices are properly installed
and tightened.
Always close the awning during rainy days, windy days or the awning is not in use.
Failed to observe the instrution may lead to material and constructional damage of the awning.
The folding arms of the awning are under tension and can cause damage and injury when theyare
open up suddenly.
Never try to disassemble the awning or repair the awning by yourself. Consult a competent
technician for help.
Attention:Well finish the setting program already for all electric items,final
client no need adjust the motor again.
Output voltage: DC12V
LED: P/N:SK-S5050W30F1W110
LED VF: DC12V
LED power:7.2W/M
Noise: 65 dB
Protection class: IPX4
Wind resistance: Class 2
Maximum continuous operation cycle: 2
Importer :
ADD:
ACHTUNG!
Bevor Sie die Markise öffnen, stellen Sie sicher, dass alle Befes-
tigungsschrauben und Sicherheitsvorrichtungen ordnungsgemäß
eingebaut und festgezogen sind.Schließen Sie die Markise an
Regentagen, windigen Tagen oder wenn die Markise nicht ver-
wendet wird. Nichtbeachtung des Sicherheitshinweises kann zu
Material- und Konstruktionsschaden der Markise führen. Die Marki-
senarme benden sich unter Spannung und können Schaden oder
Verletzungen verursachen, wenn sie zu plötzlich geöffnet werden.
Versuchen Sie niemals, die Markise auseinanderzunehmen oder
sie selber zu reparieren. Kontaktieren Sie einen kompetenten Tech-
niker, damit er Ihnen hilft.
Symbolerklärung
WICHTIGE SICHERHEITSHINWEISE
WARNUNG - FÜR DIE SICHERHEIT VON PERSONEN IST ES WICHTIG, DASS SIE DIESE
HINWEISE BEFOLGEN.
[\] Bedeutet, es ist verboten
[!] Bedeutet, es ist wichtig
WICHTIGE SICHERHEITSHINWEISE
WARNUNG - FÜR DIE SICHERHEIT VON PERSONEN IST ES WICHTIG, DASS SIE DIESE
HINWEISE BEFOLGEN.
[\] Bedeutet, es ist verboten
[!] Bedeutet, es ist wichtig
Allgemeines
[!] Lesen Sie diese Anleitung sorgfältig durch, bevor Sie das Gerät benutzen. Es enthält wichtige
informationen für Ihre Sicherheit und Bedienungs- und Wartungshinweise.
[!] Beachten Sie alle Sicherheitshinweise, um Beschädigungen durch nicht ordnungsgemäße Be-
nutzung zu vermeiden! Befolgen Sie sämtliche Warnhinweise auf dem Gerät.
[!] Bewahren Sie diese Anleitung für die spätere Verwendung auf. Sollte dieses Gerät an Dritte
weitergereicht werden, dann unbedingt einschließlich der Bedienungsanleitung.
[!] Verwenden Sie das Produkt ausschließlich für den vorgesehenen Zweck.
[!] Wir übernehmen keine Verantwortung für Schäden, die durch unsachgemäße Verwendung oder
Nichtbeachtung dieser Anleitung entstehen.
Montage
[!] In der festen Verkabelung müssen Vorrichtungen zur elektrischen Trennung mit Kontakttren-
nung an allen Polen gemäß der Verkabelungsvorschriften eingebaut werden.
[!] Wenn Sie die Markise auspacken und zusammenbauen möchten, sollten Sie sicherstellen, dass
Sie die benötigten Werkzeuge und Personen (es werden 3 Personen empfohlen) und ausreichend
Platz in einem sauberen und trockenen Bereich zur Verfügung haben, um die Montage durchfüh-
ren zu können.
[!] Schalten Sie den Strom aus, bevor Sie die Kabel anschließen.
[!] Bevor Sie das Produkt installieren, sollten Sie unnötige Kabel entfernen und alle für den Betrieb
nicht benötigten Teile außer Betrieb setzen.

- 4 -
D
Auswahl eines sicheren Ortes
[\] Installieren Sie die Markise nicht an einer sehr hohen oder windreichen Stelle, da sie sonst her-
abstürzen und Menschen verletzen könnte.
[\] Verwenden Sie die Markise nicht an Orten, die Erschütterungen oder Stößen ausgesetzt sind.
[!] Die Montage kann von Laien durchgeführt werden, wenn diese die Anleitung korrekt befolgen.
Sollten Sie während des Aufbaus Probleme bekommen, holen Sie sich bitte eine qualizierte Per-
son zur Hilfe.
[!] Verwenden Sie für die Montage bitte alle Schrauben und Muttern, da es sehr gefährlich ist,
wenn die Markise nicht korrekt befestigt ist.
[!] Achten Sie während der Montage auf Ihre Finger.
[\] Die Markise ist nicht für Stellen geeignet an denen es heiß wird, wie zum Beispiel eine Wand in
der Nähe eines Ofens.
[\] Hängen Sie nichts an das Gestell oder die Schwenkarme, da die Markise herunterfallen und
Personenschäden hervorrufen könnte.
Elektrische Sicherheit
[!] Vor dem Anschluss des Geräts an die Stromzufuhr muss überprüft werden, ob die Versorgungs-
spannung und der Nennstrom mit den Angaben auf dem Geräteetikett übereinstimmen.
[\] Stromschlaggefahr! Versuchen Sie nicht, das Gerät selber zu reparieren. Bei Fehlfunktionen
sind Reparaturen ausschließlich durch qualiziertes Personal durchzuführen.
[!] Das Stromkabel muss bei Beschädigungen durch den Hersteller, dessen Kundendienst oder
ähnlich qualizierte Personen ersetzt werden, um Gefahren zu vermeiden.
[!] Bei Inspektionen oder Wartungsarbeiten an den elektrischen Teilen muss die Markise zuverläs-
sig von der Stromversorgung getrennt werden.
Verwendung
[\] Das Produkt darf in keiner Weise verändert werden!
[\] Verwenden Sie kein Zubehör, das nicht vom Hersteller empfohlen wird. Sie könnten ein Sicher-
heitsrisiko für den Benutzer darstellen und könnten das Gerät beschädigen. Verwenden Sie nur
Originalteile und -zubehör.
[\] Verwenden Sie das Produkt nicht bei ungünstigen Witterungsbedingungen. Bei Windgeschwin-
digkeiten von stärker als Stufe 4 auf der Beaufort-Skala ist die Markise einzuziehen.
[\] Benutzen Sie das Produkt niemals an Regentagen.
[\] Die Verwendung bei Frost kann zu Beschädigungen an der Markise führen.
[!] Sorgen Sie für ausreichend Platz rund um die Markise, wenn Sie sie aus- oder einrollen.
[\] Grillen Sie nicht unterhalb der Markise und entzünden Sie kein Feuer in der Nähe der Markise.
[\] Überprüfen Sie die Markise alle 3 Monate um sicherzustellen, dass alle Befestigungen fest an-
gezogen sind und das Produkt keine Schäden aufweist.
[!] Überprüfen Sie die Installation regelmäßig auf Ungleichgewicht und Anzeichen von Abnutzung
sowie Schäden an Kabeln und Federn. Nicht benutzen, falls eine Reparatur oder Einstellung not-
wendig ist.
[\] Das Produkt darf nicht verwendet werden, wenn es Beschädigungen aufweist! Bei Beschädi-
gung nehmen Sie das Gerät von der Stromzufuhr und kontaktieren Sie Ihren Lieferanten.
[!] Beim manuellen Ausfahren der Markise ist Vorsicht geboten, da sie schnell herabfallen kann,
wenn Federn schwach oder beschädigt sind.
[!] Trennen Sie die Markise von der Stromzufuhr, wenn in ihrer Nähe Wartungstätigkeiten (wie z.B.
Fenster putzen) stattnden.

- 5 -
D
Schutz von Kindern
[!] Die eingebauten Schalter sind kein Kinderspielzeug. Halten Sie Fernbedienungen fern von Kin-
dern.
[!] Die Markise ist nicht für den Gebrauch durch Personen (einschließlich Kindern) mit einge-
schränkten physischen, sensorischen oder geistigen Fähigkeiten bzw. mit einem Mangel an Erfah-
rung und Wissen geeignet, soweit diese nicht durch eine für ihre Sicherheit verantwortliche Person
beaufsichtigt werden oder sinnsichtlich des Gebrauchs der Markise entsprechend unterwiesen
wurden.
[!] Kinder sollten beaufsichtigt werden, um zu gewährleisten, dass sie nicht mit dem Produkt oder
der Fernbedienung spielen.
Batterien
[\] Explosionsgefahr! Die Batterien dürfen nicht geladen oder auf andere Weise reaktiviert wer-
den, auseinandergebaut, ins Feuer geworfen oder kurzgeschlossen werden.
[\] Die Batterien dürfen keinen extremen Temperaturen ausgesetzt werden. Legen Sie die Fernbe-
dienung nicht auf Heizgeräte. Ausgelaufene Batteriesäure kann Schäden verursachen.
[!] Ersetzen Sie leere Batterien ausschließlich mit Batterien des gleichen Typs.
[\] Achtung! Explosionsgefahr! Setzen Sie Batterien niemals umgekehrt ein.
[!] Sollten Batterien auslaufen, entfernen Sie sie mit einem Lappen aus dem Batteriefach.
[!] Entsorgen Sie Batterien gemäß der Vorschriften. Bei Austritt von Batteriesäure vermeiden Sie
Hautkontakt, Kontakt mit Augen und Schleimhäuten. Spülen Sie betroffene Bereiche sofort nach
Säurenkontakt und waschen Sie sie mit reichlich Wasser ab. Suchen Sie einen Arzt auf.
[!] Verschluckte Batterien sind tödlich. Halten Sie Batterien ausser Reichweite von Kindern und
Haustieren.
[!] Fordern Sie unverzüglich ärztliche Hilfe an, wenn eine Batterie verschluckt wurde.
[!] Entfernen Sie leere Batterien aus der Fernbedienung. Entfernen Sie die Batterien aus der Fern-
bedienung, wenn Sie sie für einen längeren Zeitraum nicht verwenden werden.

- 6 -
D
Zubehörteile und erforderliche Werkzeuge
Accessories and required tools
Please prepare the following tools before installation
Awning : 1
Instruction manual
booklet:1
Expansion bolts:
12pcs
Wall brackets:
3pcs
Remote control with
wall mount base: 1
●Drill (hammer drill for
bricklayer or cement)
●Masonry drill bit 12 mm
●Tape measure
●Chalk or pencil
●Mallet
●Level
●2 ladders
●Adjustable spanner
Swing hand hook : 1
Attention!
The expansion bolts provided inthe product is
for concrete or brick wall. If you are installing
the awning on support other than for concrete
or brick wall, please make sure the wall is of
sufficient support and use the correct hardware
to secure the awning on the support.
Adjustable hex
key:1
Swallowed batteries are lethal. Keep batteries out of reach of children and pets.
Immediately ask for medical assistance if a battery is swallowed.
Remove exhausted batteries from the remote control. Remove the batteries from the remote control, if you will not use it for an extended period of
time.
Markise: 1
Bedienungs-
anleitungsheft: 1
Verstellbarer
Sechskantschlüssel: 1
Wand-
halterungen: 3 pcs
Schwenkbarer
Handhaken: 1
Fernbedienung mit
Wandbasiseinheit: 1
Dehnschrauben: 12 pcs
Achtung!
Die Dehnschrauben, die im Lieferumfang des Produkts
enthalten sind, sind für Beton- oder Ziegelwände. Falls
Sie die Markise auf einer anderen Unterlage verbauen
als einer Beton- oder Ziegelwand, vergewissern Sie
sich, dass die Wand ausreichend Unterstützung bietet
und nutzen Sie die angemessenen Geräte, um die Mar-
kise an der Unterlage zu befestigen.
● Bohrer (Schlagbohrmaschine für Mauerwerk oder Betnon)
● Steinbohrerspitzen 12 mm
● Maßband
● Kreide oder Bleistift
● Holzhammer
● Wasserwaage
● 2 Leitern
● Verstellbarer Schraubenschlüssel

- 7 -
D
Bezeichnungen der Teile
5
Names of the parts
12 3
4
5
6
7
8
9
1. End cap
2. Cassette
3. Motor (built-in)
4. Arm stand
5. Fabric
6. Front cover
Remote control
13. button
14. Stop button
15. button
16. P2 button (Users do not operate)
17. Wall mount base
18. Indicator light
13
14
15
18
17
16
19
7. Arm shoulder
8. Wall bracket
9. Power cable
10. Expansion bolts for wall bracket (ill. ⑦)
11. Sticker with drill hole markings (ill.④)
12. LED light
20
12
Not illustrated (battery compartment):
19. Button battery (3V)
20. The switch of LED light
Not illustrated:
21. Screw with dowel (not supplied)
Not illustrated :
22. Connection cables
1. Abschlusskappe
2. Kassette
3. Motor (eingebaut)
4. Schwenkarm
5. Tuch
6. Vordere Abdeckung
7. Arm Schulter
8. Wandhalterung
9. Stromkabel
10. Dehnschrauben für die Wandhalterung (Abb. 7)
11. Etikett mit Bohrlochmarkierungen (Abb. 7)
12. LED-Lampe
5
Names of the parts
12 3
4
5
6
7
8
9
1. End cap
2. Cassette
3. Motor (built-in)
4. Arm stand
5. Fabric
6. Front cover
Remote control
13. button
14. Stop button
15. button
16. P2 button (Users do not operate)
17. Wall mount base
18. Indicator light
13
14
15
18
17
16
19
7. Arm shoulder
8. Wall bracket
9. Power cable
10. Expansion bolts for wall bracket (ill. ⑦)
11. Sticker with drill hole markings (ill.④)
12. LED light
20
12
Not illustrated (battery compartment):
19. Button battery (3V)
20. The switch of LED light
Not illustrated:
21. Screw with dowel (not supplied)
Not illustrated :
22. Connection cables
13. Taste
14. Stopptaste
15. Taste
16. P2-Taste (nicht durch den
Benutzer zu betätigen)
17. Wandhalterung
18. Leuchtanzeige
Nicht abgebildet (Batteriefach):
19. Knopfzelle (3V)
20. Schalter der LED-Lampe
Nicht abgebildet:
21. Schraube mit Dübel (nicht im
Lieferumfang enthalten)
22. Anschlusskabel (nicht abgebildet)
Fernbedienung

- 8 -
Anbringen der Wandhalterungen
Entfernen Sie die Platte und die Halteschraube von jeder Wandhalterung. Die Stellschraube wird
mit einen Sechskantschlüssel 6mm entgegen des Uhrzeigersinns gedreht. Messen Sie die Entfer-
nung in Abbildung 3. Die Entfernung muss grösser als 40 mm sein (wenn die Entfernung
45 mm beträgt, ist der Neigungswinkel der Markise 80°). Der Abstand muss für
alle Wandhalterungen gleich sein.
Mounting of wall brackets
②
Picture 2 is the installation distance from awning to wall or ceiling.
Remove the plate and the retaining screw of each wall
bracket.Turning adjusting screw with a hex key 6 mm in
otherwise clockwise. Measure the distance in Figure-3.
This distance must be greater than 40 mm,(when the
distance equal to 45 mm, the angle of inclination of
awning is 80 °). Must be the same distance for all wall Pressing block
Hex key
③
Wall
Wall
Ceiling
L
α°
Installation height : C
Height of front line : H
α°
75°
80°
60°
65°
70°
C
H+650mm
H+450mm
H+850mm
H+1050mm
H+1250mm
Pls make sure the heigth before installation according to
the height of frontbar (H) and the angle of
sunshine(α°). Afteropen the awning, the height must up
to human so it can protect yourhead from hitting the
awning.
Pls make sure the height and position before installation
WARNING: Important safety instructions. Follow all instructions, since incorrectinstallation can lead to severe injury.
Before installing the drive, remove anyunnecessary cordsand disable anyequipmentnotneeded for powered
operation.
Install the actuating member of a manual release at a height less than 1.8 m.
A horizontal distance of at least 0.4 m is to be maintained between the fully unrolled driven part and any permanent
object.
Priorto installation
●Carefully unpack the awning and dispose of the packaging materials by environmentally-friendly means.
●Beware of the sudden unfolding of any parts, especially the folding arms.
Installation procedure
Choosing the rightlocation
Suitable wall types: reinforced concrete walls, brick walls. The chosen wall mustbe suitable
to hold and maintain the awning. We will not be responsible for any damage to persons, to
the property and to the awning due to weak support of installation wall.
6
L=2.5M L=3M
H+780mm
H+520mm
H+1030mm
H+1270mm
H+1500mm
L=3.5M
H+900mm
H+600mm
H+1200mm
H+1480mm
H+1750mm
D
Einbauvorgang
WARNUNG: Wichtige Sicherheitshinweise. Befolgen Sie sämtliche Hinweise, da falscher Einbau
zu schweren Verletzungen führen kann. Bevor Sie den Antrieb installieren, entfernen Sie unnötige
Kabel und machen Sie jegliche für den Betrieb nicht benötigten Teile unwirksam.
Installieren Sie das auslösende Teil einer manuellen Steuerung auf eine Höhe niedriger als 1,80m.
Zwischen dem vollständig ausgerollten Teil und jedem feststehenden Objekt ist ein Abstand von
mindestens 0,4 m einzuhalten.
Vor dem Einbau
● Die Markise ist vorsichtig auszupacken und das Verpackungsmaterial ist durch
umweltfreundliche Art und Weise zu entsorgen.
● Vermeiden Sie das plötzliche Ausklappen von Teilen, vor allem der Schwenkarme.
Auswahl des richtigen Ortes
Geeignete Mauerarten: verstärkte Betonwände, Backsteinmauer. Die ausgewählte Wand muss
geeignet sein, die Markise zu halten. Wir übernehmen keine Haftung für Schäden am Gebäude
und der Markise, die aufgrund mangelnder Tragfähigkeit der Einbauwand entstehen.
Bitte überprüfen Sie vor der Montage die Höhe und Position der Markise
Höhe der Vorderlinie: H
Einbauhöhe: C
Bei Abbildung 2 handelt es sich um die Ein-
bauentfernung zwischen Markise und
Wand oder Decke.
Mounting of wall brackets
②
Picture 2 is the installation distance from awning to wall or ceiling.
Remove the plate and the retaining screw of each wall
bracket.Turning adjusting screw with a hex key 6 mm in
otherwise clockwise. Measure the distance in Figure-3.
This distance must be greater than 40 mm,(when the
distance equal to 45 mm, the angle of inclination of
awning is 80 °). Must be the same distance for all wall
brakcets. Pressing block
Hex key
Adjusting bolt
③
Wall
Wall
Ceiling
L
α°
Installation height : C
Height of front line : H
α°
75°
80°
60°
65°
70°
C
H+650mm
H+450mm
H+850mm
H+1050mm
H+1250mm
Pls make sure the heigth before installation according to
the height of frontbar (H) and the angle of
sunshine(α°). Afteropen the awning, the height must up
to human so it can protect yourhead from hitting the
awning.
Pls make sure the height and position before installation
WARNING: Important safety instructions. Follow all instructions, since incorrectinstallation can lead to severe injury.
Before installing the drive, remove anyunnecessary cordsand disable anyequipmentnotneeded for powered
operation.
Install the actuating member of a manual release at a height less than 1.8 m.
A horizontal distance of at least 0.4 m is to be maintained between the fully unrolled driven part and any permanent
object.
Priorto installation
●Carefully unpack the awning and dispose of the packaging materials by environmentally-friendly means.
●Beware of the sudden unfolding of any parts, especially the folding arms.
nstallation procedure
Choosing the rightlocation
Suitable wall types: reinforced concrete walls, brick walls. The chosen wall mustbe suitable
to hold and maintain the awning. We will not be responsible for any damage to persons, to
the property and to the awning due to weak support of installation wall.
6
L=2.5M L=3M
H+780mm
H+520mm
H+1030mm
H+1270mm
H+1500mm
L=3.5M
H+900mm
H+600mm
H+1200mm
H+1480mm
H+1750mm
nting of wall brackets
②
ure 2 is the installation distance from awning to wall or ceiling.
emove the plate and the retaining screw of each wall
cket.Turning adjusting screw with a hex key 6 mm in
otherwise clockwise. Measure the distance in Figure-3.
This distance must be greater than 40 mm,(when the
distance equal to 45 mm, the angle of inclination of
awning is 80 °). Must be the same distance for all wall
brakcets. Pressing block
Hex key
Adjusting bolt
③
Wall
Wall
Ceiling
L
α°
Installation height : C
Height of front line : H
α°
75°
80°
60°
65°
70°
C
H+650mm
H+450mm
H+850mm
H+1050mm
H+1250mm
Pls make sure the heigth before installation according to
the height of frontbar (H) and the angle of
sunshine(α°). Afteropen the awning, the height must up
to human so it can protect yourhead from hitting the
awning.
make sure the height and position before installation
WARNING: Important safety instructions. Follow all instructions, since incorrectinstallation can lead to severe injury.
ore installing the drive, remove anyunnecessarycordsand disable anyequipmentnotneeded for powered
operation.
all the actuating member of a manual release at a height less than 1.8 m.
A horizontal distance of at least 0.4 m is to be maintained between the fully unrolled driven part and any permanent
ct.
to installation
Carefully unpack the awning and dispose of the packaging materials by environmentally-friendly means.
Beware of the sudden unfolding of any parts, especially the folding arms.
tallation procedure
Choosing the rightlocation
Suitable wall types: reinforced concrete walls, brick walls. The chosen wall mustbe suitable
to hold and maintain the awning. We will not be responsible for any damage to persons, to
the property and to the awning due to weak support of installation wall.
6
L=2.5M L=3M
H+780mm
H+520mm
H+1030mm
H+1270mm
H+1500mm
L=3.5M
H+900mm
H+600mm
H+1200mm
H+1480mm
H+1750mm
Decke
Wand
Wand
Mounting of wall brackets
②
Picture 2 is the installation distance from awning to wall or ceiling.
Remove the plate and the retaining screw of each wall
bracket.Turning adjusting screw with a hex key 6 mm in
otherwise clockwise. Measure the distance in Figure-3.
This distance must be greater than 40 mm,(when the
distance equal to 45 mm, the angle of inclination of
awning is 80 °). Must be the same distance for all wall
brakcets.
Pressing blo
ck
Hex key
Adjusting bolt
③
Wall
Wall
Ceiling
L
α°
Installation height : C
Height of front line : H
α°
75°
80°
60°
65°
70°
C
H+650mm
H+450mm
H+850mm
H+1050mm
H+1250mm
Pls make sure the heigth before installation according to
the height of frontbar (H) and the angle of
sunshine(α°). Afteropen the awning, the height must up
to human so it can protect yourhead from hitting the
awning.
Pls make sure the height and position before installation
operation.
Install the actuating member of a manual release at a height less than 1.8 m.
A horizontal distance of at least 0.4 m is to be maintained between the fully unrolled driven part and any permanent
object.
Priorto installation
●Carefully unpack the awning and dispose of the packaging materials by environmentally-friendly means.
●Beware of the sudden unfolding of any parts, especially the folding arms.
Choosing the rightlocation
Suitable wall types: reinforced concrete walls, brick walls. The chosen wall mustbe suitable
to hold and maintain the awning. We will not be responsible for any damage to persons, to
the property and to the awning due to weak support of installation wall.
L=2.5M L=3M
H+780mm
H+520mm
H+1030mm
H+1270mm
H+1500mm
L=3.5M
H+900mm
H+600mm
H+1200mm
H+1480mm
H+1750mm
Sechskantschlüssel
Einstellschraube
Pressing Block
Mounting of wall brackets
②
Picture 2 is the installation distance from awning to wall or ceiling.
Remove the plate and the retaining screw of each wall
bracket.Turning adjusting screw with a hex key 6 mm in
otherwise clockwise. Measure the distance in Figure-3.
This distance must be greater than 40 mm,(when the
distance equal to 45 mm, the angle of inclination of
awning is 80 °). Must be the same distance for all wall
brakcets. Pressing block
Hex key
Adjusting bolt
③
Wall
Wall
Ceiling
L
α°
Installation height : C
Height of front line : H
α°
75°
80°
60°
65°
70°
C
H+650mm
H+450mm
H+850mm
H+1050mm
H+1250mm
Pls make sure the heigth before installation according to
the height of frontbar (H) and the angle of
sunshine(α°). Afteropen the awning, the height must up
to human so it can protect yourhead from hitting the
awning.
Pls make sure the height and position before installation
WARNING: Important safety instructions. Follow all instructions, since incorrectinstallation can lead to severe injury.
Before installing the drive, remove anyunnecessary cordsand disable anyequipmentnotneeded for powered
operation.
Install the actuating member of a manual release at a height less than 1.8 m.
A horizontal distance of at least 0.4 m is to be maintained between the fully unrolled driven part and any permanent
object.
Priorto installation
●Carefully unpack the awning and dispose of the packaging materials by environmentally-friendly means.
●Beware of the sudden unfolding of any parts, especially the folding arms.
nstallation procedure
Choosing the rightlocation
Suitable wall types: reinforced concrete walls, brick walls. The chosen wall mustbe suitable
to hold and maintain the awning. We will not be responsible for any damage to persons, to
the property and to the awning due to weak support of installation wall.
6
L=2.5M L=3M
H+780mm
H+520mm
H+1030mm
H+1270mm
H+1500mm
L=3.5M
H+900mm
H+600mm
H+1200mm
H+1480mm
H+1750mm

- 9 -
D
Note: the 3 wall brackets are used to hold the
awning in place. Warning : The arm shoulder on
both side (7) must be installed on top of the wall
bracket (8). Failure to do so can lead tothe
deformation of the awning and reduce the service
life of the products.
⑥
⑤
⑦⑧
7
Expansion
bolt
Washer
Nut
Bolt
⑨
7
8
Hex key : 5mm
Mutter
Dehn-
schraube
Unterlegscheibe Schraube
Zur Beachtung: die 3 Wandhalterungen werden
verwendet, um die Markise an Ort und Stelle zu
halten. Warnung: Die Arm Schulter auf beiden
Seiten (7) muss auf der Wandhalterung (8)
angebracht werden. Nichteinhaltung kann zu einer
Deformierung der Markise führen und den
Produktlebenszyklus verringern.
Sechskantschlüssel: 5 mm

- 10 -
D
Connection
CAUTION, risk of electric shock. The power connection of the awning shall
be performed by a qualified technician only. To be installed undereffective
regulation.
●Make sure that the power supply corresponds to the appliance's specifications(Technical
data).Interrupt power supply.Connect the cables in the terminal as follows.
Colour of cable
Yellow/green
Blue
Brown
From To
Awning
Earth
Neutral
Live
Operation instructions
Remote control
Instructions of use of the motor with the remote control.
The Dooya motor, with integrated radio receiver (433MHz) must be programmed with the
DC90 transmitter. Range of this transmitter: Open 200m, two walls 30m
Up
Stop
Down
P2
●Mounting the remote control's wall mount base: Locate a suitable place indoors and drill two holes for
attaching the base (23). Use a cable detector prior to drilling to prevent damaging electric cables or water
pipes.
Insert the two small dowels into the drill holes. Insert the two screws into the dowels and mount the base to
the wall.
FunctionPress button
Stop
Up
Down
Retract /close the awing
stop opening/closing process
extract/open the awning
An indicator light (24) is flashing when one of the buttons is pressed.When power off, you
can use hand crank to open or close the awning.
Awning users are notallowed to operate the product more than2rounds,in that case,
motor overheatprotection status will be automatically started. In thatcase,pressing on the
remote control cannot runthe awning. Users need to waitfor about halfan hour for any
manipulation.
Pressing “stop”button on remote control when the awning completely opened or closed.
P2 P2
LED light
Switch Turn on or turn off the LED light
Neutre
Phase
C
onnection at
t
he motor
Motor Power source
88
Anschluß
ACHTUNG, Gefahr eines Stromschlags! Der Stromanschluß der Markise soll nur durch einen
qualizierten Techniker ausgeführt werden. Einbau gemäß der gültigen Bestimmungen.
• Vergewissern Sie sich, dass die Stromversorgung den Spezikationen des Geräts (Technische
Daten) entspricht. Unterbrechen der Stromversorgung. Schließen Sie die Kabel im Terminal an,
wie folgt:
Anschluss des Motors
an die Phase
Blau
Braun
Gelb/Grün
N = Neutral
L = Phase
PE
Stromquelle
Farbe des Kabels
Gelb/Grün
Blau
Braun
Markise
Von An
Erde
Neutral
Live
Connection
CAUTION, risk of electric shock. The power connection of the awning shall
be performed by a qualified technician only. To be installed undereffective
regulation.
Make sure that the power supply corresponds to the appliance's specifications(Technical
data).Interrupt power supply.Connect the cables in the terminal as follows.
Colour of cable
Yellow/green
Blue
Brown
From To
Awning
Earth
Neutral
Live
Operation instructions
Remote control
Instructions of use of the motor with the remote control.
The Dooya motor, with integrated radio receiver (433MHz) must be programmed with the
DC90 transmitter. Range of this transmitter: Open 200m, two walls 30m
●Mounting the remote control's wall mount base: Locate a suitable place indoors and drill two holes for
attaching the base (23). Use a cable detector prior to drilling to prevent damaging electric cables or water
pipes.
Insert the two small dowels into the drill holes. Insert the two screws into the dowels and mount the base to
the wall.
FunctionPress button
Stop
Up
Down
Retract / close the awing
stop opening/closing process
extract / open the awning
An indicator light (24) is flashing when one of the buttons is pressed.When power off, you
can use hand crank to open or close the awning.
Awning users are notallowed to operate the product more than2rounds,in that case,
motor overheatprotection status will be automatically started. In thatcase,pressing on the
emote control cannot runthe awning. Users need to waitfor about halfan hour for any
manipulation.
Pressing “stop”button on remote control when the awning completely opened or closed.
Switch Turn on or turn off the LED light
Neutre
Phase
Connection at
the motor
Motor Power source
88
Markisenanwendern ist es nicht erlaubt, das Produkt mehr als zwei Runden lang zu bedienen,
andernfalls schaltet sich die Überhitzungsschutzfunktion automatisch ein. In diesem Fall kann
drücken auf der Fernbedienung den Betrieb der Markise nicht auslösen. Anwender müssen eine
halbe Stunde warten, bevor sie irgendeine Bearbeitung vornehmen können.
Wenn die Markise vollständig aus- oder eingefahren wird, die Stopp-Taste auf der Fernbedienung
drücken.
Bedienungsanweisungen
Fernbedienung
Hinweise für die Benutzung des Motors mit der Fernbedienung.
Der Dooya-Motor mit integriertem Radioempfänger (433 MHz) muss mit dem DC90-Transmitter
programmiert werden. Sendebereich des Transmitters: Offen 200m, zwei Wände 30m
● Anbringen der Fernbedienung mit Wandbasiseinheit: Wählen Sie den geeigneten Platz im
Rauminneren und bohren Sie zwei Löcher, um die Basis anzubringen (23). Verwenden Sie vor
dem Bohren einen Kabeldetektor, um die Schädigung von elektrischen Kabeln oder Wasserrohren
zu vermeiden.
Fügen Sie die zwei kleinen Dübel in die Bohrlöcher ein. Fügen Sie die zwei Schrauben in die Dü-
bel ein und montieren Sie die Basis an der Wand.
Drücken Sie die Taste
Nach oben
Stopp
Nach unten
Schalter
Funktion
Einrollen / Einfahren der Markise
Stopp Ausfahren-/Einfahren-Vorgang
Ausrollen / Ausfahren der Markise
Ein- und Ausschalten der LED-Lampe

- 11 -
D
Min:60°
Max.90°
JACK BOLT
Hex key : 6mm
Adjustment for angle
9
Instructions for inclination adjustment
1. Loosen the locking nut.
2. Turn the jack bolt to adjust the picth tothe desired
inclination.
3. Tighten the locking nut.
4.Adjust the inclination of the remaining wall brackets.
5.Fine tone the pitch of individual bracket and adjust the level
of the front cover.
LOCKING NUTS
LOCKING NUTS
Winkeljustierung
NIVELLIERSCHRAUBEN
SICHERUNGSMUTTERN
Sechskant-
schlüssel: 6 mm
SICHERUNGS-
MUTTERN
Hinweise für die Neigungsjustierung
1. Lockern der Sicherungsmuttern.
2. Drehen Sie die Nivellierschraube,
um die gewünschte Neigung einzustellen.
3. Drehen Sie die Sicherungsmutter fest.
4. Passen Sie die Neigung der verbleibenden
Wandhalterungen an.
5. Justieren Sie den Stellplatz der einzelnen Wandhalterung
und passen Sie die Ebene der vorderen Abdeckung an.

- 12 -
D
Setting of travel limit for the sun shade
Warning :
1.Attention:Well finish the setting program alreadyfor all electric items,final client no need
adjust the motor again.
2. The user can adjust the limit of one direction at one time, do not adjust two knobs at the
same time.
3. Do not turn knobs fiercely, please check the limit with remote control per revolute about
half cycle, and check if the setting you satisfied.
The motor should be reset only bellow situation happened:
1). The front bar can't fold completely White:
Sun shade closing
limit setting
2). The fabric isn't smooth after open the awning
Red:
Sun shade projection
limit setting
Warning: When the front bar
touchesthe end cap shown
in the image, do not try to
bring them closer.
Otherwise, the product may
be damaged.
Up
Down
Up
10
Einstellung der Aus-und Einfahrbegrenzung
Warnung:
1. Achtung: Die Aus-und Einfahrbegrenzungen sind justiert und müssen vom Anwender nicht
eingestellt werden.
2. Sollte Nachjustiert werden ist immer einzeln, entweder Aus-oder Einfahren zu justieren, da die
Fernbedienung nicht zeitgleich mit Aus-und Einfahren betätigt werden darf.
3. Drehen Sie die Justierknöpfe nicht gewaltsam. Überprüfen Sie Ihre Einstellung mit der Fernbe-
dienung. Die Einstellung eingefahren ist korrekt, wenn die Markise geschlossen ist und der
Motor hörbar abgeschaltet hat. Die Einstellung ausgefahren ist korrekt, wenn das Markisentuch
nicht durchhängt, siehe Abbildung und der Motor hörbar abgeschaltet hat.
Ein Reset des Motors sollte nur in den folgenden Situationen durchgeführt werden:
1). Die Fallstange kann sich nicht vollständig einfahren Weiss:
Einfahren des
Sonnenschattens
begrenzt die
Einstellung
Fallstange
Warnung: Wenn die Fallstange die Endkappe berührt,
wie in der Abbildung gezeigt, versuchen Sie nicht,
sie näher zueinander zu bringen.
Andernfalls kann das Produkt beschädigt werden.
2). Der Stoff ist nicht glatt, wenn die Markise ausgefahren ist Rot:
Projektion des
Sonnenschattens
begrenzt die Einstellung
Nach oben
Nach unten

- 13 -
D
●Check to make sure thatthe awning is fixed tightly and securely before cleaning.
●Clean the metal surfaces of the awning with a slightly damp cloth.
●Clean the remote control and wall mount base with a slightly damp cloth.
●Wipe offdebris from the fabric cover using a dry,soft cloth when the awning is not clean or
when it is notused for longer period of time.
●Do not use any abrasive cleansers like chemicals,benzene or alcohol.
●Do not roll-in the awning when wet.
●Dry the fabric cover naturally when itis wet.
●Turn off the power when the awning is not used for a longer period of time.
Maintenance
g. Change the batteries of the remote control
1. Open the lid of the battery.
2. Get out the battery,pay attention tothe
direction of installation.
3.Put in a new battery .Close the
lid of the battery.
WARNING
The replacement and installation ofbatteries mustbe done by an adult.
Remove the worn out batteries ofthis product.
Do not expose the batteries to fire, they may leak or explode.
Do not short-circuitthe battery terminals.
Do not mix old batteries with new ones.
Do not use rechargeable batteries in this product.
Do not recharge batteries that are notrechargeable.
Use only the recommended type ofbatteries.
Keepthis product away from the reach of children.
Dispose off the batteries only in a recycling place.
11
g. Wechseln der Batterien der Fernbedienung
1. Öffnen Sie den Deckel
des Batteriefachs.
2. Entnehmen Sie die Batterie,
achten Sie auf die Ausrichtung
der Batterie.
3. Setzten Sie eine neue
Batterie ein. Schließen Sie
den Deckel des Batteriefachs.
WARNUNG
● Die Batterien dürfen nur von Erwachsenen eingesetzt oder gewechselt werden.
● Entfernen Sie die benutzten Batterien aus dem Produkt.
● Die Batterien sind von Feuer fernzuhalten, da sie auslaufen oder explodieren können.
● Schließen Sie Batterieklemmen nicht kurz.
● Verwenden Sie keine alten und neuen Batterien gemeinsam.
● Verwenden Sie für dieses Produkt keine wiederauadbaren Batterien.
● Nicht wiederauadbare Batterien dürfen nicht aufgeladen werden.
● Verwenden Sie ausschließlich den empfohlenen Batterietyp.
● Halten Sie dieses Produkt außerhalb der Reichweite von Kindern.
● Die Batterien müssen über eine Recycling-Stelle entsorgt werden.
Instandhaltung
● Überprüfen Sie, dass die Markise vor der Reinigung fest und sicher befestigt ist.
● Reinigen Sie die Metalloberächen der Markise mit einem leicht feuchten Tuch.
● Reinigen Sie die Fernbedienung und die Basis an der Wand mit einem leicht feuchten Tuch.
● Wischen Sie Schmutz von der Stoffoberäche mit einem trockenen, weichen Tuch, wenn die
Markise nicht sauber ist oder wenn sie für längere Zeit nicht verwendet wird.
● Verwenden Sie keine Scheuermittel wie Chemikalien, Benzin oder Alkohol.
● Fahren Sie die Markise nicht in nassem Zustand ein.
● Trocknen Sie das Markisentuch auf natürliche Weise, wenn nass.
● Nehmen Sie die Markise vom Strom, wenn sie länger nicht benutzt wird.

- 14 -
D
2.After two successive return ofthe blind, it is possible that the protecti
whenthe engine overheats,please make no manipulation
before attempting torestart.
3.Ifthe store does notwork after a certain time,this mean
wait 30 minutes, if the awning does not work, check at the co
connecting cables.
2)Question: The front bar of awning is not horizontal when the fabric is stretched
Answer: If this problem is found, make sure that the mount for support of blind-or clo
enough to each end. See in manual explaining the setting part the angle of inclinati
installation, and try to mount the low side to the top side dow
3)Question: Can notadjust the angle of inclination to install
Answer:
Itmay be that:
1.The bolts that attach the arms are not loose.
At2.Problem bolts or holes.
Solutions: It is advisable firstto readthe explanation in the
good understanding of the explanation and good operation, then adjust a
angles tiltand the user checksthe set when the blind is ha
angle whenthe blind is raised to 50CM before adjusting. If
problem persists, contact your store.
4)Question: If the awning closed with crank, it is automatically o
closed automatically.
Answer:Press the button (off) and after with crank. Solve t
forget to press the button (off) whenthe store closed complet
Disposal
Disposing of the product
Products marked with the symbol shown opposite must not be disposed of in the normal household wast
obliged to dispose of such devices separately. Please ask your local authorities for information on the disposal optio
available. Separate disposalensures that the device are submitted for re
prevent harmfulsubstances fromentering the environment.
Birchwoods(Lin’an) Leisure Products Co., Ltd.
Markisenreparatur
1) Frage: Was ist zu tun, wenn die Markise nicht reagiert?
Antwort:
1. Wenn der Anwender die Fernbedienung drückt oder der Schalter und die Markise reagieren
nicht, muss der Anwender die Verbindung am Schalter oder die Verbindung sämtlicher Kabel
überprüfen, um den Betrieb sicherzustellen.
2. Nach zwei aufeinanderfolgenden Einfahrungen der Markise, ist es möglich, dass der
Schutzmodus aktiviert wurde, wenn der Motor überhitzt, nehmen Sie bitte keine sofortige
Bearbeitung vor und warten Sie 30 Minuten, bevor Sie erneut starten.
3. Falls es nach einer gewissen Zeit nicht funktioniert, bedeutet das, dass es nicht das 1. Mal ist,
warten Sie 30 Minuten, falls die Markise nicht funktioniert, überprüfen Sie die Verbindung und
der Verbungskabel.
2) Frage: Die Fallstange der Markise ist nicht horizontal, wenn das Markisentuch gespannt ist.
Was ist zu tun?
Antwort:
Überprüfen Sie in der Bedienungsanleitung die Einstellung des Neigungswinkels. Richten Sie
durch verstellen der einzelnen Neigungswinkel an den Wandhaltern die Fallstange aus.
3) Frage: Der Neigungswinkel kann bei der Montage nicht justiert werden. Was ist zu tun?
Antwort:
Die Schrauben, die die Arme befestigen, sind nicht locker.
Lösungen: Es ist ratsam, erst die Erklärung für das Justieren in der Bedienungsanleitung zu lesen,
um ein gutes Verständnis der Erklärung und einen normalen Betrieb sicherzustellen, dann gemäß
der verschiedenen Winkel anzupassen und der Anwender überprüft die Einstellung, wenn die Mar-
kise halb ausgefahren ist oder der Anwender kann den Winkel anpassen, wenn die Markise bis
auf 50 cm vor dem Justieren eingefahren wird. Falls trotz dieser Hinweise das Problem weiterhin
besteht, kontaktieren Sie Ihren Händler.
4) Frage: Wie kann die automatisch geöffnete Markise mit der Handkurbel geschlossen bzw. die
von Hand geöffnete Markise automatisch geschlossen werden?
Antwort:
Drücken Sie die Taste (Off) und danach verwenden Sie die Handkurbel. Die Probleme wurden
gelöst, aber vergessen Sie nicht, die Taste (off) zu drücken, wenn die Markise vollständig
eingefahren oder vollständig ausgefahren wurde.
Entsorgung des Produkts
Produkte, die mit dem gegenüber gezeigten Symbol markiert sind, dürfen nicht im normalen
Haushaltsmüll entsorgt werden. Sie sind verpichtet, derartige Geräte fachgerecht zu entsorgen. Fragen
Sie bitte Ihre örtlichen Behörden nach Informationen bezüglich der vorhandenen Entsorgungsoptionen.
Fachgerechte Entsorgung gewährleistet, dass das Gerät dem Recycling für andere Formen der Nutzung
zugeführt wird. Dies hilft zu vermeiden, dass schädliche Substanzen in die Umwelt geleitet werden.
Birchwoods(Lin’an) Leisure Products Co., Ltd.
Lin'an Economic Development Zone, 311300 Hangzhou City, Zhejiang Prov., P. R. China
Entsorgung

- 15 -
D
- 79 -
Name • Nome • Nom • Naam
Nr. • No. • n°
Typ • Type • Tipo
Service • Servizio
Imported by baumarkt direkt GmbH & Co KG
Alter Teichweg 25, 22081 Hamburg, Germany
Produktberatung: 01806/ 63 06 30 Festnetz 20 Cent/Anruf, Mobilfunk max. 60 Cent/Anruf
Quelle D Fachberatung: 01806/111 100 Festnetz 20 Cent/Anruf, Mobilfunk max. 60 Cent/Anruf
D
CH
F
I
A
Bei Problemen oder Fragen wenden Sie sich bitte an unsere Servicehotline!
Quelle CH: 0848 85 85 00 Ackermann CH: 0848 85 85 11, Jelmoli Technik: 0848 858 530
Si vous avez des problèmes ou des ques
In caso di problemi o ulteriori domande, chiamate il nostro servizio clienti!
Quelle CH: 0848 85 85 02 Ackermann CH: 0848 85 85 31, Jelmoli Technik: 0848 858 530
tions, contactez notre service en ligne!
Quelle CH: 0848 85 85 01 Ackermann CH: 0848 85 85 21, Jelmoli Technik: 0848 858 530
Universal: 0043/662/4485 59 Fachberatung Heimwerken (zum Festnetztarif – je nach Betreiber)
Otto: 0043/316/606 159 Beratung Heimwerken (zum Festnetztarif – je nach Betreiber)
Quelle: 0043/662/9005 59 Fachberatung Heimwerken (zum Festnetztarif – je nach Betreiber)
NL call center telefoonnummer 0900-1901 15 ct/min
SERRE
SS1300
Importé par baumarkt direct GmbH & Co KG
Alter Teichweg 25, D-22081 Hamburg, Allemagne
Service
Markise
BW13000LED
Impotiert von baumarkt direkt GmbH & Co KG
Alter Teichweg 25, D-22081 Hamburg, Deutschland

- 16 -

- 17 -
Montageanleitung
DIstruzioni di montaggio
IT
Handeleiding voor de montage
NL
Notice de montage
F
Assembly instructions
GB
Docment No: xxxx
Product name
Tenda da sole elettrica
MANUALE UTENTE
Istruzioni di montaggio
Contents
►Intended use
►Precautions and safety warnings for
installation and operation
►Accessories and required tools
►Name listof the parts
►Installation procedure
►Connection
►Operation instructions
►Maintenance
►Awning repair
WARNING! THIS INSTRUCTION MANUALSHALL BE
READBEFORE THE USE AND THE INSTALLATION OF
THE PRODUCT
WARNING: Important safety instructions. It is important
for the safety of persons to follow these instructions. Save
these instructions.
BW31000 STORE BANNE
MOTORISE
BW31000LED
Documento N° BW31000LED
AVVERTENZA!
SI PREGA DI LEGGERE LE PRESENTI ISTRUZIONI
PRIMA DI UTIIZZARE O MONTARE IL PRODOTTO
AVVERTENZA:
Avvertenze importanti per la sicurezza.
Per motivi di sicurezza è indispensabile
seguire le presenti istruzioni.
Conservare le istruzioni
IT

- 18 -
Speciche
Modello della tenda da sole: BW31000
Indice
Utilizzo conforme alla destinazione d'uso....................................18
Misure precauzionali e avvertenze di sicurezza per il
montaggio e l'uso....................................................................19-21
Accessori e utensili necessari......................................................22
Elenco delle denominazioni dei pezzi..........................................23
Montaggio...............................................................................24-25
Raccordo......................................................................................26
Istruzioni sui comandi..............................................................26-28
Manutenzione ordinaria................................................................29
Riparazione della tenda da sole..................................................30
Assistenza....................................................................................31
Dimensioni effettive 5 x 3 m
Dimensioni dell'ombra 484 x 300 cm
Peso netto del prodotto
Angolo di inclinazione:
Telo:
Resistenza al vento:
Modello del motore:
Tensione nominale:
Corrente nominale:
Potenza nominale:
Numero di giri:
Momento torcente:
Classe di protezione:
Massimo ciclo di lavoro continuo:
0 ° 30 °
Poliestere
Classe 2
Dooya DM45RD-50/12
230V-50Hz
0.89A
205W
12 rpm
50Nm
IPX4
2
Temperatura d'esercizio:
Telecomando:
Funzionamento a batteria:
Canale del trasmettitore:
Area di esercizio:
Potenza in uscita:
Tensione in uscita:
LED:
LED VF:
Potenza LED:
Rumorosità:
-10°C bis +40°C
DC1600A
3 V
433 MHz
Aperta 200 m, due pareti 30 m
30W
DC12V
N° pezzo: SK-S5050W30F1W110
DC12V
7.2W/M
65 dB
2
Precautions and safety warning for installation and operation
Before opening the awning, make sure all the fixing bolts and security devices are properly installed
Always close the awning during rainy days, windy days or the awning is not in use.
rve the instrution may lead to material and constructional damage of the awning.
folding arms of the awning are under tension and can cause damage and injury when theyare
Never try to disassemble the awning or repair the awning by yourself. Consult a competent
dy for all electric items,final
-S5050W30F1W110
Full cassette awning
Factory: Birchwoods(lin'an)Leisure Products Co., Ltd
ADD: Lin 'an Economic Development Zone,Hangzhou,
Zhejiang,China
Date of production: 2013
Standard: EN 13561:2004+A1:2008
The shutters for outdoor use
Awning modle: BW31000LED 5x3m motorisiert
Rated Power:205W Rated Voltage: 230V~50Hz
Torque: 50Nm
Protection against electric shock:Class 1
Protection class: IPX4
Wind resistance: Class 2
Maximum continuous operation cycle: 2
Importer :
ADD:
Tenda da sole cassonata
Produttore: Birchwoods(lin‘an) Leisure Products Co., Ltd
Indirizzo: Lin 'an Economic Development Zone, Hangzhou, Zhejiang, Cina
Anno di produzione: 2019
Norma: EN 13561:2004 + A1:2008
Tenda da sole per esterni
Modello della tenda da sole: BW31000LED 5x3 m motorizzata
Potenza nominale: tensione nominale a 205 W: 230V-50Hz
Momento torcente: 50Nm
Protezione contro le scosse elettriche Classe 1
Classe di protezione: IPX4
Resistenza al vento: classe 2
Massimo ciclo di lavoro continuo: 2
Importatore:Baumarktdirekt GmbH & Co.KG
Indirizzo: Alter Teichweg 25, 22081 Hamburg
Attenzione: Tutti i prodotti elettrici sono già stati settati, non c'è bisogno di
regolare il motore da parte del cliente nale. IT
3,95x 3 m
379x 300 cm

- 19 -
Misure precauzionali e avvertenze di sicurezza
per il montaggio e l'uso
LEGGERE LE ISTRU-
ZIONI PER L'USO
PRIMA DI UTILIZZARE
IL DISPOSITIVO.
Symbol explanation:
IMPORTANT SAFTEY INSTRUCTIONS
WARNING - IT IS IMPORTANT FOR SAFETY OF PERSONS TO FOLLOW THESE INSTRUCTIONS SAVE THIS INSTRUCTIONS.
Means it is forbidden
Precautions and safety warning for installation and operation
READ THE INSTRUCTION BEFORE USING
THE PRODUCT
Rotational speed: 12rpm
Torque: 50Nm
Protection class: IPX4
Maximum continuous
operation cycle: 2
Means important
General
Read this instruction manual carefully before using the appliance. It contains important
information for your safety as well operating and maintenance advice.
Follow all safety instructions to avoid damage through improper use! Follow all warning
notices on the appliance.
Keep this instruction manual for future use. Should this appliance be passed on toathird
party, this instruction manual must be included.
Use this appliance only for its intended use.
No responsibility is accepted for damage resulting from improper use or non-compliance
with these instructions.
Assembly
Means for disconnection having a contact separation in all poles mustbe incorporated in
the fixed wiring in accordance with the wiring rules.
When you are ready to unpack and assemble the awning, make sure thatyou have the
appropriate tools, sufficient operators (3 persons are suggested) and space,and a clean
and dry area to perform the installation.
Switch the power off before cable installation.
Before installing the product, remove the unnecessary cord and disable any equipmentnot
needed for power operation.
Choosing a safe location
Never install it in high and windy places, as the sunshade may drop and hurtpeople.
Attention!
Before opening the awning, make sure all the fixing bolts and security devices are properly installed
and tightened.
Always close the awning during rainy days, windy days or the awning is not in use.
Failed to observe the instrution may lead to material and constructional damage of the awning.
The folding arms of the awning are under tension and can cause damage and injury when theyare
open up suddenly.
Never try to disassemble the awning or repair the awning by yourself. Consult a competent
technician for help.
Attention:Well finish the setting program already for all electric items,final
client no need adjust the motor again.
Output voltage: DC12V
LED: P/N:SK-S5050W30F1W110
LED VF: DC12V
LED power:7.2W/M
Noise: 65 dB
Protection class: IPX4
Wind resistance: Class 2
Maximum continuous operation cycle: 2
Importer :
ADD:
ATTENZIONE!
Prima di aprire a tenda da sole, assicurarsi che tutte le viti di
ssaggio e tutti i dispositivi di sicurezza siano montati e serrati
correttamente.
Chiudere la tenda da sole nei giorni di pioggia, nei giorni di vento o
quando la tenda da sole non viene utilizzata.
Il mancato rispetto dell'avvertenza per la sicurezza può provocare
danni materiali e strutturali alla tenda da sole.
I bracci della tenda da sole sono sotto tensione e possono provo-
care danni o lesioni se vengono aperti in modo troppo improvviso.
Non cercare mai di smontare la tenda da sole o di ripararla in
autonomia. Contattare un tecnico competente per ricevere aiuto.
Spiegazione dei simboli
AVVERTENZE IMPORTANTI PER LA SICUREZZA
ATTENZIONE: PER LA SICUREZZA DELLE PERSONE È IMPORTANTE SEGUIRE LE
PRESENTI AVVERTENZE.
[\] Signica che è vietato
[!] Signica che è importante
Linee generali
[!] Leggere attentamente le presenti istruzioni in ogni loro parte prima di utilizzare il dispositivo.
Esse contengono informazioni importanti per la vostra sicurezza e avvertenze per l'uso e la manu-
tenzione.
[!] Rispettare tutte le avvertenze per la sicurezza onde evitare danneggiamenti dovuti a un utilizzo
scorretto! Seguire tutte le avvertenze riportate sul dispositivo.
[!] Conservare queste istruzioni per la futura consultazione. Se questo dispositivo dovesse essere
consegnato a terzi, è indispensabile cosegnare insieme al dispositivo anche le istruzioni per l'uso.
[!] Utilizzare il prodotto esclusivamente per la nalità prevista.
[!] Non ci assumiamo alcuna responsabilità per danni derivanti da un utilizzo scorretto o dalla man-
cata osservanza delle presenti istruzioni.
Montaggio
[!] Nel cablaggio sso devono essere montati dispositivi di separazione elettrica con separazione
dei contatti su tutti i poli secondo le norme relative ai cablaggi.
[!] Quando la tenda da sole viene tolta dal suo imballaggio per essere montata, occorre assicurarsi
di avere a disposizione gli utensili e le persone necessari (è consigliabile che ci siano 3 persone) e
lo spazio sufciente, in un'area pulita e asciutta, per poter eseguire il montaggio.
[!] Staccare la corrente prima di collegare i cavi.
[!] Prima di installare il prodotto occorre rimuovere i cavi non necessari e mettere fuori servizio tutti
i pezzi non necessari al funzionamento.
IT

- 20 -
Scelta di un luogo sicuro
[\] Non installare la tenda da sole in un punto molto alto o molto battuto dal vento, perché potrebbe
cadere e ferire persone.
[\] Non utilizzare la tenda da sole in luoghi esposti a vibrazioni o urti.
[!] Il montaggio può essere eseguito da non professionisti a patto che questi seguano correttamen-
te le istruzioni. Se si dovessero riscontrare problemi durante il montaggio, rivolgersi a una persona
qualicata per ricevere assistenza.
[!] Utilizzare per il montaggio tutte le viti e tutti i dadi, perché è molto pericoloso che la tenda da
sole non sia ssata correttamente.
[!] Fare attenzione alle dita delle mani durante il montaggio.
[\] La tenda da sole non è adatta a stare in posti che diventino molto caldi, come ad esempio una
parete vicina a una stufa.
[\] Non appendere nulla al telaio o ai bracci orientabili, in quanto la tenda da sole potrebbe cadere
e cagionare danni alle persone.
Sicurezza elettrica
[!] Prima di collegare il dispositivo all'alimentazione di corrente occorre vericare che la tensione di
alimentazione e la corrente nominale coincidano con i dati riportati sull'etichetta del dispositivo.
[\] Pericolo di scossa elettrica! Non cercare di riparare il dispositivo in autonomia. In caso di
malfunzionamenti, le riparazioni devono essere eseguite esclusivamente da parte di personale
qualicato.
[!] Se il cavo di alimentazione della corrente è danneggiato, deve essere sostituito dal produttore,
dal suo servizio di assistenza clienti o da persone con analoga qualica, onde evitare pericoli.
[!] In caso di ispezioni o lavori di manutenzione sulle parti elettriche, la tenda da sole deve essere
staccata in modo afdabile dall'alimentazione di corrente.
Uso
[\] È vietato apportare al prodotto modiche di qualsiasi tipo!
[\] Non utilizzare accessori che non siano raccomandati dal produttore. Essi potrebbero rappresen-
tare un rischio per la sicurezza e potrebbero danneggiare il dispositivo. Utilizzare unicamente parti
e ricambi originali.
[\] Non utilizzare il prodotto in condizioni meteorologiche sfavorevoli. In presenza di venti di veloci-
tà superiore al livello 4 sulla scala di Beaufort, la tenda da sole deve essere ritirata nel suo casso-
ne.
[\] Non utilizzare mai il prodotto nei giorni di pioggia.
[\] L'utilizzo in caso di gelo può provocare danni alla tenda da sole.
[!] Assicurarsi che attorno alla tenda da sole ci sia spazio sufciente quando essa viene srotolata o
ritirata.
[\] Non fare grigliate sotto la tenda da sole né accendere il fuoco nelle sue vicinanze.
[\] Controllare la tenda da sole ogni 3 mesi per assicurarsi che tutti i ssaggi siano ben serrati e
che il prodotto non presenti danni visibili.
[!] Controllare l'installazione periodicamente per rilevare eventuale perdita di equilibratura e segni
di usura, oltre alla presenza di danni ai cavi e alle molle. Non usare il prodotto qualora sia neces-
saria una riparazione o una regolazione.
[\] Il prodotto non deve essere usato se presenta dei danni! In presenza di danni, staccare il dispo-
sitivo dall'alimentazione di corrente e contattare il proprio fornitore.
[!] Se la tenda da sole viene aperta manualmente occorre usare prudenza, perché potrebbe cade-
re velocemente qualora le molle fossero deboli o danneggiate.
[!] Staccare la tenda da sole dall'alimentazione di corrente se nelle sue vicinanze si stanno svol-
gendo attività di manutenzione (come per es. la pulizia delle nestre). IT
Table of contents
Other Konifera Accessories manuals

Konifera
Konifera BW23000 User manual

Konifera
Konifera BW31000 User manual

Konifera
Konifera BW92000 User manual

Konifera
Konifera BW23000 User manual

Konifera
Konifera BW73002 User manual

Konifera
Konifera BW31000 User manual

Konifera
Konifera BW92000 User manual

Konifera
Konifera BW13000SKD User manual

Konifera
Konifera BW92300 User manual

Konifera
Konifera BW13000LED User manual