Konig HAV-IR20 User manual

HAV-IR20/21/22/23
MANUAL (p. 2)
Internet radio
MODE D’EMPLOI (p. 26)
Radio Internet
MANUALE (p. 50)
Internet radio
BRUKSANVISNING (s. 100)
Internetradio
MANUAL DE UTILIZARE (p. 124)
Radio prin internet
HASZNÁLATI ÚTMUTATÓ (o. 75.)
Internetrádió
KÄYTTÖOHJE (s. 88)
Internetradio
GEBRUIKSAANWIJZING (p. 38)
Internet Radio
ANLEITUNG (s. 14)
Internetradio
MANUAL DE USO (p. 62)
Radio Internet
NÁVOD K POUŽITÍ (s. 112)
Internetové rádio
ΕΓΧΕΙΡΙΔΙΟ XPHΣHΣ (σελ. 136)
Ραδιόφωνο Ίντερνετ

2
ENGLISH
Remote control
MENU
BACK
REPEAT
DIRECTION KEYS
(UP/DOWN/LEFT/RIGHT)
STAND BY
NUMERIC KEYS
VOLUME “+”
VOLUME “-”
MUTE/SNOOZE
A-B LOOP
INFO
ALARM
MEMORY
RECORD
Front view
PLAY/PAUSE
STANDBY
USB SOCKET
DIRECTION KEYS ENTER REMOTE SENSOR
VOLUME +/-
MENU BACK MEMORY REC
Rear view
POWER ON/OFF
Ethernet port
AUX IN
AUX OUTDC12V/2A
POWER SUPPLY

3

4
Chapter 1 Overview
1.1 Introduction
Internet Radio is a radio system integrated digital audio playback that functions with network
connectivity. The system can play MP3/WMA audio les, USB devices and internet radio services such
as World Station and SHOUTCast which provide above 15,000 internet radio stations. Internet Radio
also supports audio streaming via UPnP Media Server.
1.2 Audio Sources
• Support MP3/ Windows Media® audio les (known as WMA)(Included ID3V1 ,2)
• Support static lyrics and synced lyrics (.txt /.lrc /.smi)
• Support USB Flash drive
• SHOUTCast Internet Radio (http://www.shoutcast.com)
• Support Podcast
• Support AUX
1.3 Storage
• Support standard USB Mass Storage device (FAT16/32).
1.4 Recording
• Be able to record audio data from internet radio stations (World Station / SHOUTCast) and transfer
audio data into 128K MP3 format.
1.5 Networking
• Support Ethernet 10/100 Mbps
• Support Wireless LAN IEEE 802.11 b/g dongle
• Support Infrastructure / Ad-hoc
• Support WEP64/128 and WPA-TKIP-PSK, WPA2-AES-PSK encryption
• Support Proxy Setting
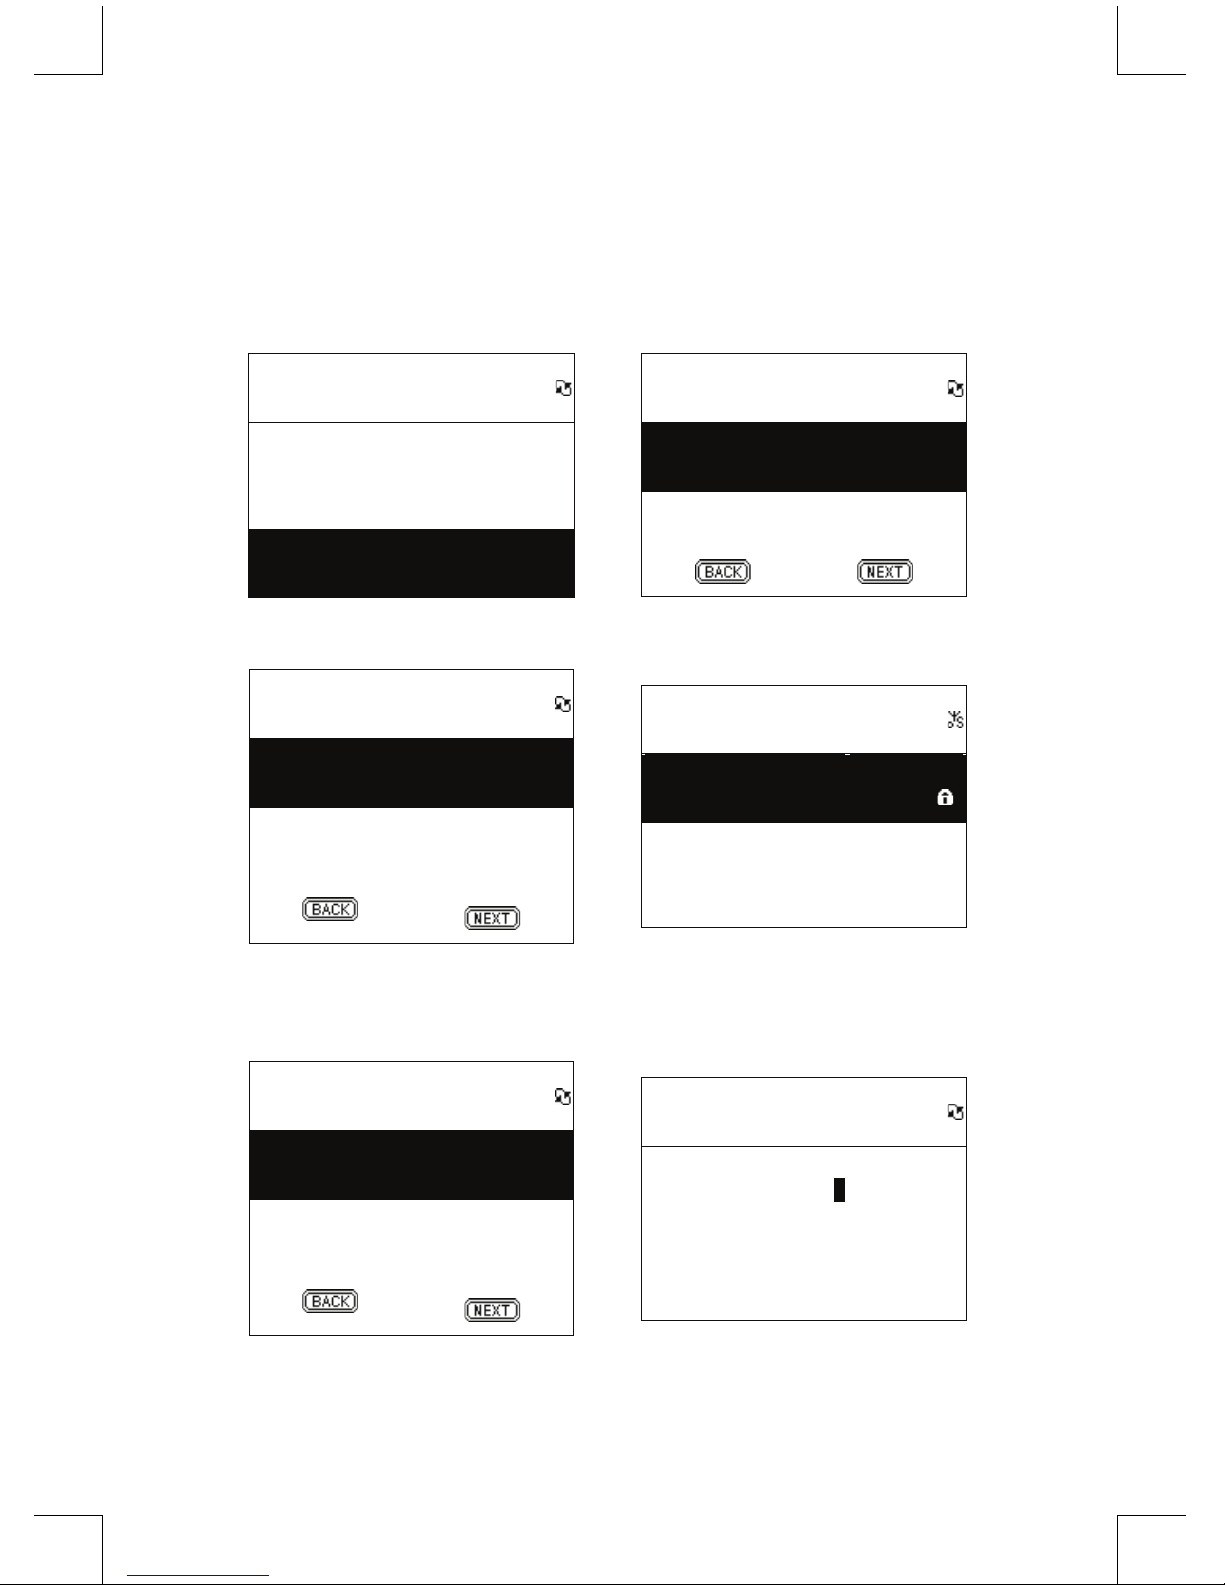
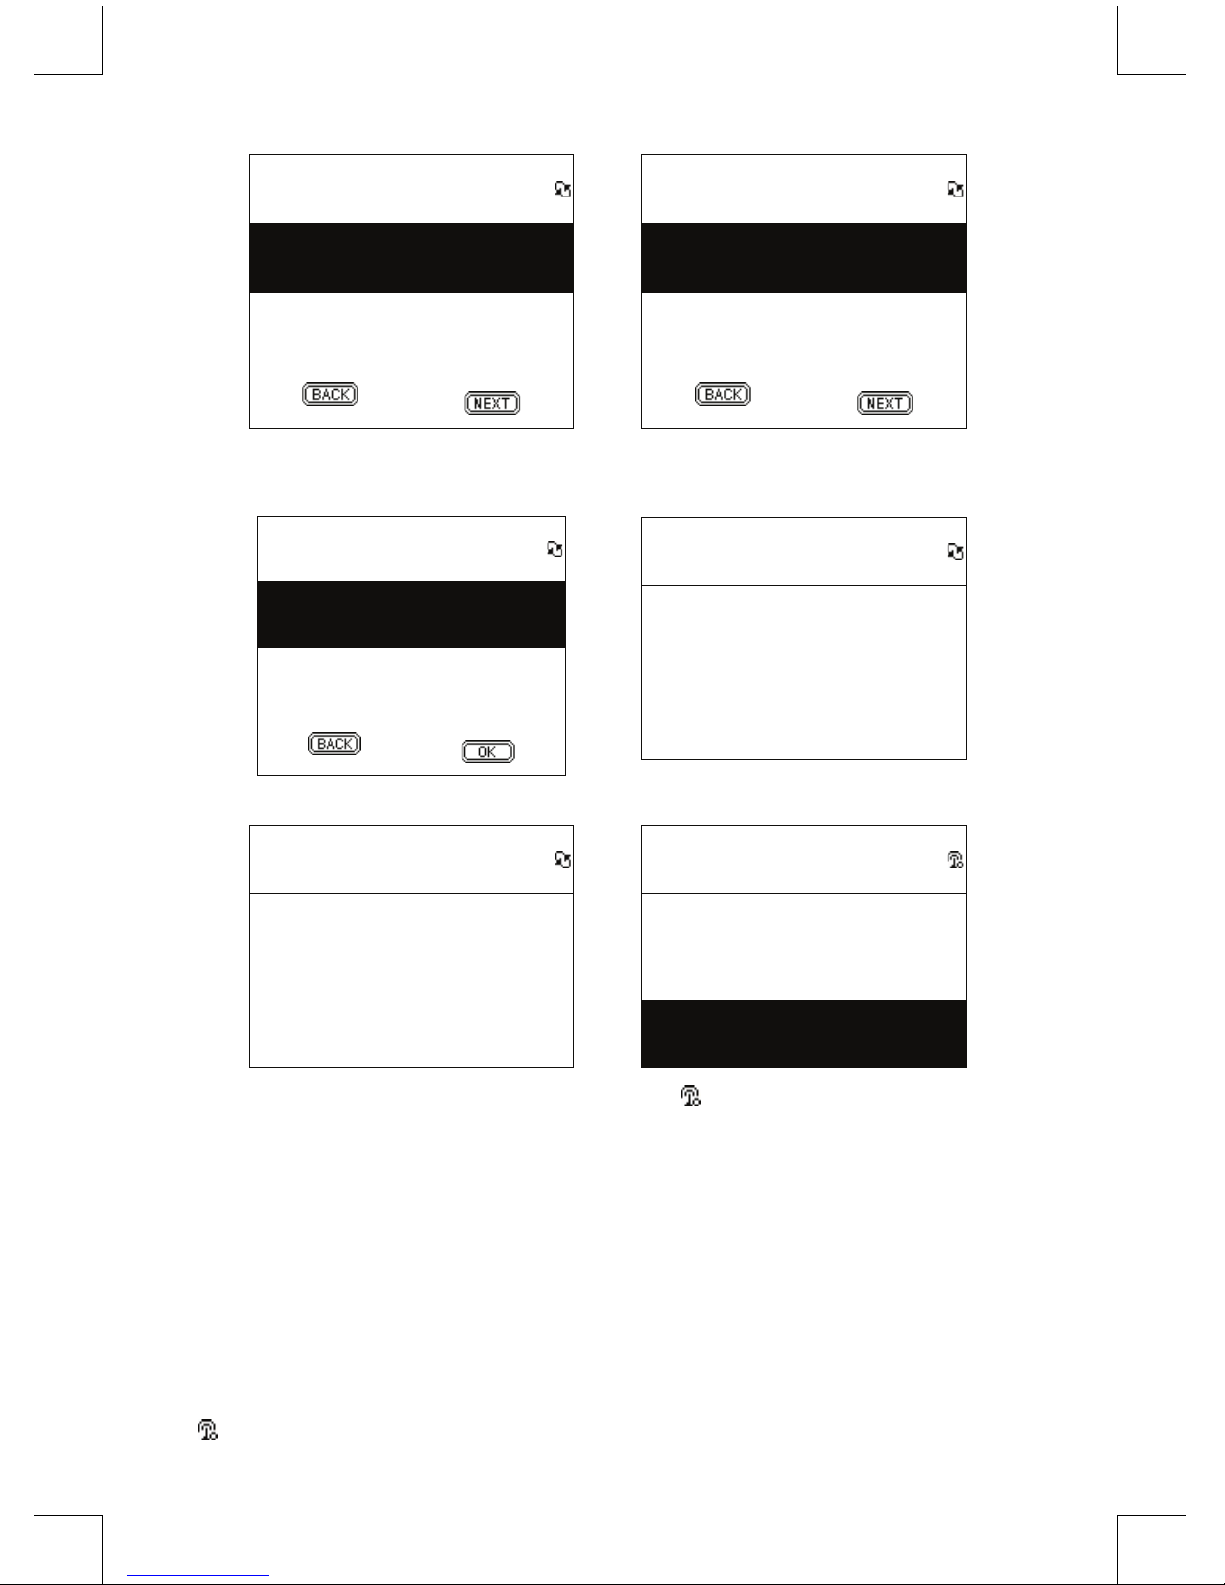
• The system provides a wireless setting wizard to make wireless network setup easier.
1.6 Others
• Support two alarm clock settings
• Support time sync technology (* network available)
• Support rmware upgrade
Chapter 2 Installation
2.1 Installation
NOTE: The proper voltage for Internet Radio is AC 110V~240V/50-60Hz. Be sure to the voltage in
your area before plugging in the unit.
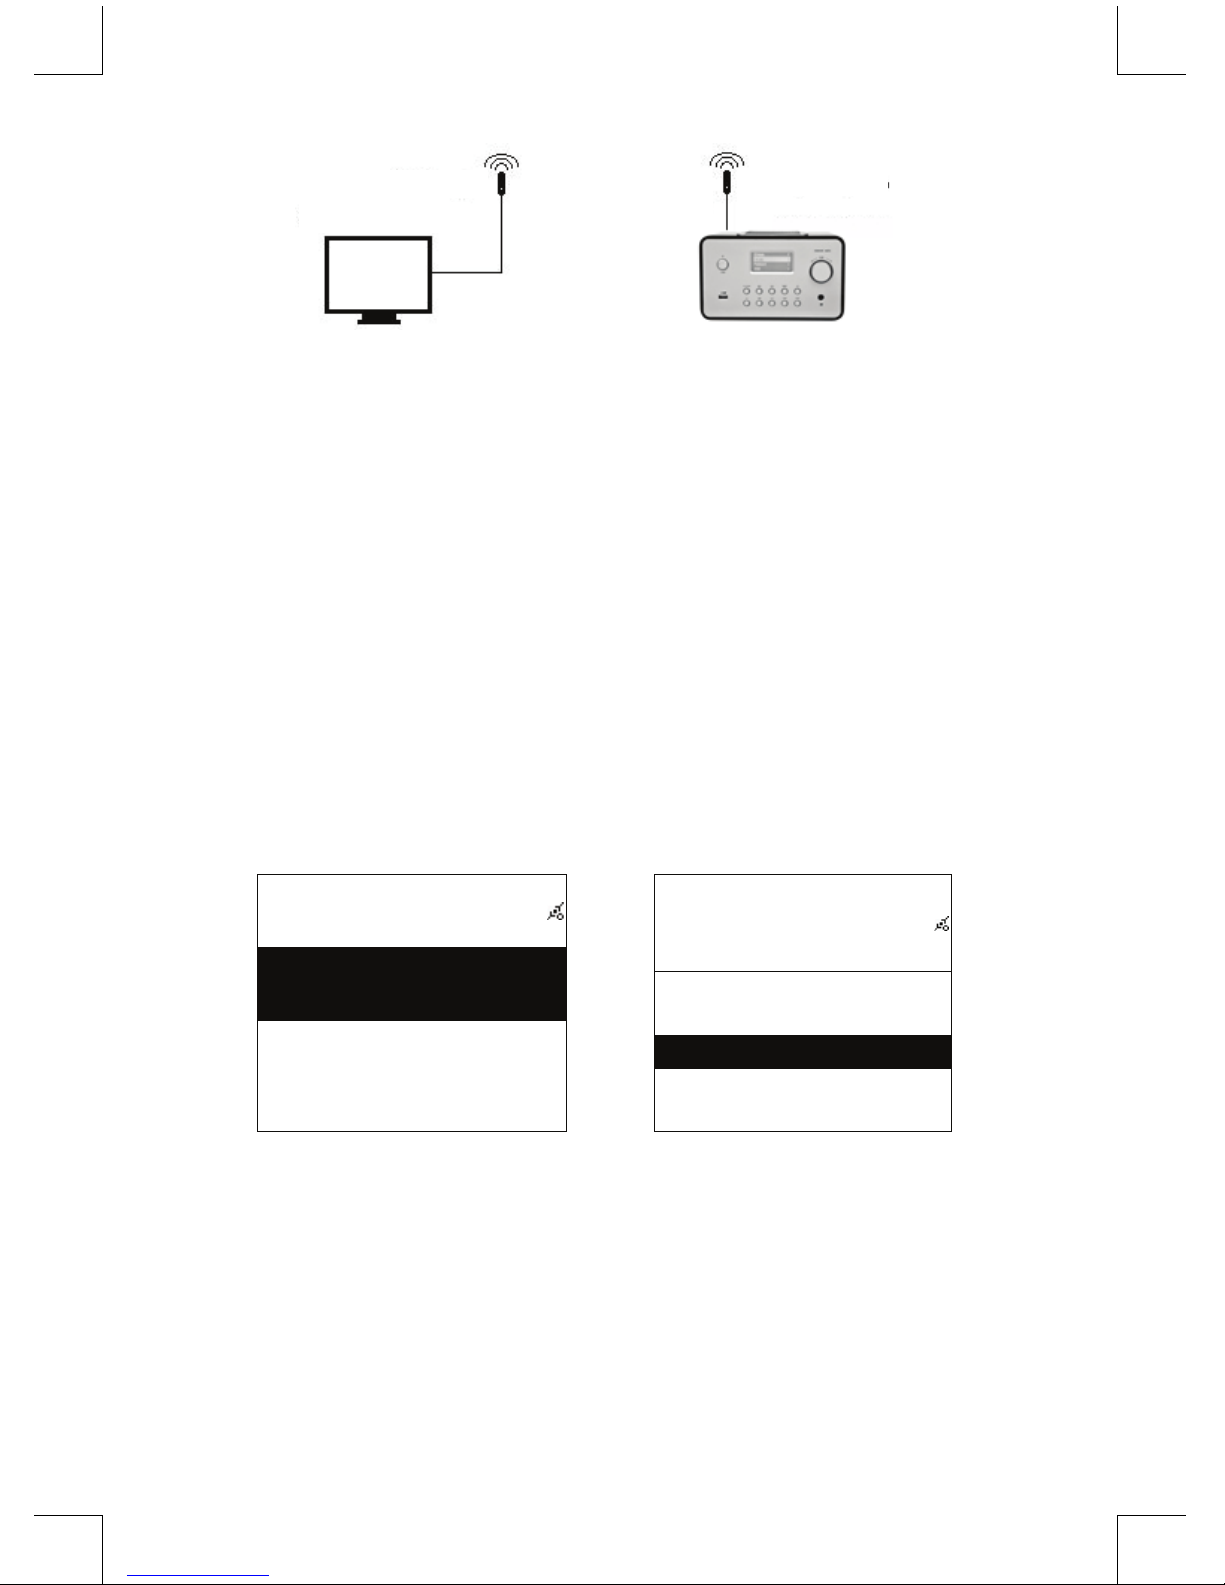
2.1.1 Installing onto network (LAN)
• Make sure the internet environment is ready and the network setting is available (ADSL or Cable
Modems is highly recommended).
• The default setting of network in your Internet Radio is DHCP. (more network setting please check
11.6 Network)

5
ADSL or Cable Modem Broadband Router
Ethernet
Ethernet
PC (Media Server)
Internet Radio
- Connect the device to an Internet connected router according to the picture. Use a standard network
cable.
PC (Media Server)
Cross-Over
Internet Radio
- Connect the device to a PC according to the picture if it is only going to be used for listening to
music that is stored in the computer. Use a crossed network cable.
- When the device is connected like this you can only listen to music which is stored in the
computer. The computer must have special software installed. See section Media Server.
2.1.2 Installation of a wireless network (WLAN)
• Make sure the internet environment is ready and the network setting is available.
• Plug-in Wi Dongle into Internet Radio (More setting please see 11.6 Network)
Wifi Dongle
Wifi Dongle
Internet Radio
PC (Media Server)
PC (Media Server)
Ethernet
ADSL or Cable Modem
802.11 b/g Wireless
broadband Router
- Connect the wireless network dongle to the socket.

6
PC (Media Server)
Wifi Dongle
Wifi Dongle Internet Radio
- You can connect the device wireless to a computer with a wireless network card.
- When the device is connected like this you can only listen to music which is stored in the
computer. The computer must have special software installed. See section Media Server.
2.2 Starting The Equipment for The First Time
When you turn on the equipment for the rst time the stereo will try to automatically search for an IP
address. If the network is connected to the Internet, the equipment will also synchronize the time with
the time server and then goes to standby mode. Usually it will take 6-30 seconds to nish the whole
process.
2.3 World Station
2.3.1 Listen to World Station
• Go to [Main] menu, choose [i.Radio] and press ENTER/OK button.
• Choose [World Station] and then press ENTER/OK button.
• Scroll up/down to a station and then press ENTER/OK button to play.
• You will hear music after buffering reaches to 100%.
Note: For fast search for an internet radio station, press Right button to jump from radio stations
started with alphabet A to alphabet B, alphabet B to alphabet C, and so on. Press Left button to jump
backward.
Table 2.3.1
Main
i.Radio >
USB >
>
→
i.Radio
Favorite >
World Station >
SHOUTCast >
Select i.Radio Choose World Station

7
i.Radio
Africa >
Americas >
Asia
>
→
World Station
South Korea >
SriLanka >
Taiwan
>
Categorized by Area Categorized by Country
World Station
Africa >
Americas >
Asia
>
→
World Station
Caribbean >
Europe >
Middle East
>
Press◄ / ► button for fast search The name of stations change
alphabetically
1/1637
‘A’ NET STATION
.977 The Oldies Channel
007 Audio - #1 For The
→
1/999
‘A’ NET STATION
.977 The Oldies Channel
007 Audio - #1 For The
Press INFO button The amount of stations will show on
the screen

8
World Station
HitFM 90.1 Taiwan
National Education Radio 1
National Education
Radio 2
→
i.Radio
HitFM 90.1 Taiwan
WMA ,48 Kbps
Categorized by alphanumeric order Playing
2.4 Network
• Support LAN (Ethernet) and WLAN (802.11b/g wi Dongle is optional)
• Support Wi-Fi Encryption WEP64/128, WPA-TKIP-PSK, and WPA2-AES-PSK.
• Support dynamic IP via DHCP (Dynamic Host Conguration Protocol) and static IP. Default setting
is Ethernet and DHCP.
• Support Infrastruct mode and Ad-hoc mode.
• Support Upnp.
• Auto-detect and auto-run LAN or WLAN(wireless LAN) environment.
2.4.1 Understanding the Networking States on The System
• The network connectivity status icon will show on the top side of the screen.
Table2.4.1.1 - LAN Status
Title
→• It is failed to detect the Ethernet cable.
Title
→• It is successful to detect the Ethernet cable.
• It is failed to get available DHCP information.
Title
→• It is successful to detect the Ethernet cable.
• It is successful to get available DHCP
information
Table 2.4.1.2 - WLAN Status
Title
→• It is failed to detect the USB Wi-Fi adapter.
Title
→• It is successful to detect the USB Wi-Fi
adapter.
• It is failed to get available DHCP information.
Title
→
• It is successful to detect the USB Wi-Fi
adapter.
• It is successful to get available DHCP
information.

9
2.4.2 Setting the Wi-Fi Connectivity in infrastruct mode
1. Insert a Wi-Fi USB adapter into the USB connector. (The Wi-Fi USB adapter is optional)
2. then scroll up/down to [Network] and press ENTER/OK button.
3. Select [Manual Setup] and press ENTER/OK button
4. Select [Connect] and press ENTER/OK button
5. Then please follow the steps below:
Table 2.4.2
Network
Connect LAN
Wizard >
Manual Setup >
→
Network
Connect WLAN
Select [Manual Setup] and press
[ENTER/OK] button
Select [WLAN] mode, for example,
then choose [NEXT]
SSID
SSID Auto Search
→
Site Survey
AP01 75%
wireless 100%
Choose [NEXT] to search any AP
available
Available APs listed by signal
strength. If an AP is required
encryption, it will be marked with a
symbol of lock.
Encryption
Encryption Mode WPA2
Passphrase >
→
Passphease
> 0 0 0 0 0 0 0 0 0 0 0
ENTER/OK: Next
Select [Encrytion] mode and then
choose [NEXT]
Key in the encryption code and then
press [ENTER/OK]

10
Connect Mode
Connect Mode Infra
→
IP Setting
IP Source Dynamic
Select [Connect] mode and then
choose [NEXT]
Select [IP Source] and then choose
[NEXT]
Proxy
Use Proxy No
→
Network Status
Config Wifi Module /
Select [Use Proxy] then choose [OK] The system will save all conguration
Network Status
Getting IP Address …
→
Network
Connect LAN
Wizard >
Manual Setup >
Start connecting to the AP will show up if connection is
successful
2.4.3 Setting the Wi-Fi Connectivity by Wi-Fi Wizard
1. Insert a Wi-Fi USB adapter into the USB connector. (The Wi-Fi USB adapter is optional).
2. Then scroll up/down to [Network] and press ENTER/OK button.
3. Select [Connect] and switch [LAN] to [WLAN].
4. Select [Wizard] and then press ENTER/OK button.
5. Scroll up/down to an access point you want to connect, and then press ENTER/OK button.
6. If the access point that you are selecting is protected, press ENTER/OK button to select the
protected AP.
7. To input the encryption key, press UP/DOWN (or numbered key) button to change characters and
press LEFT/RIGHT button to shift.
8. Press ENTER/OK after you nish setting.
9. icon will show on the topside of the screen if the wireless setting is successful.

11
Table 2.4.3
Network
Connect LAN
Wizard >
Manual Setup >
→
Network
Connect WLAN
Wizard >
Manual Setup >
Select [Connect] and switch [LAN] to
[WLAN].
Select [Wizard] and press [ENTER/OK]
button
Wizard
Apo1 65%
D-LINK 71%
Default 88%
→
Passphease
> 0 0 0 0 0 0 0 0 0 0 0
ENTER/OK: Next
All available AP and its signal strength
will be shown on the screen.
Key in the encryption code and then
press [ENTER/OK]
Apply ?
SSID: Penbex-MIS
Key:0000000000
→
Network
Connect LAN
Wizard >
Manual Setup >
Conrm will show up if connection is
successful
2.4.4 Inputting Static IP
1. Then scroll up/down to [Network] and press ENTER/OK button.
2. Scroll up/down to [IP Setting] and then press ENTER/OK button to enter.
3. Select [IP Source] and press ENTER/OK button to switch [Dynamic] to [Static].
4. Scroll up/down to [TCP/IP] and press ENTER/OK button to start editing.
5. Press UP/DOWN to change characters and press LEFT/RIGHT button to shift.
6. After nishing, press REC button to conrm.

12
Table 2.4.4
IP Setting
IP Source Dynamic
→
IP Setting
IP Source Manual
TCP/IP >
DNS >
Select [IP Source] and then press
[ENTER/OK] Switch to [Manual]
IP Setting
IP Source Static
TCP/IP >
DNS >
→
TCP/IP
IP 192.169.001.100
Mask 255.255.255.000
GW 192.169.001.254
Select [TCP/IP] and press [ENTER/OK]
button
Press [ENTER/OK] button to start key in.
Use UP/DOWN (or numbered key) then
LEFT/RIGHT to input IP.
NOTE: When IP setting value (including IP, Subnet Mask, or Gateway) is illegal, IP setting will change
to default value.
TCP/IP
The IP Setting Value is
illegal ! Setting is
Changed to Default !
2.4.5 Inputting DNS
1. Then scroll up/down to [Network] and press ENTER/OK button.
2. Scroll up/down to [IP Setting] and then press ENTER/OK button to enter.
3. Select [DNS] and then press ENTER/OK button.
4. Press UP/DOWN button to change characters, then press LEFT/RIGHT button to shift.
5. After nishing, press ENTER/OK button to conrm.

13
Table 2.4.5
IP Setting
IP Source Dynamic
→
DNS
DNS1 168.095.001.001
DNS2 000.000.000.000
Select [TCP/IP] and press [ENTER/OK]
button
Press UP/DOWN (or numbered key)
then LEFT/RIGHT to input IP
Safety precautions:
To reduce risk of electric shock, this product should ONLY be opened by
an authorized technician when service is required. Disconnect the product
from mains and other equipment if a problem should occur. Do not expose
the product to water or moisture.
Maintenance:
Clean only with a dry cloth. Do not use cleaning solvents or abrasives.
Warranty:
No guarantee or liability can be accepted for any changes and modications of the product or damage
caused due to incorrect use of this product.
General:
Designs and specications are subject to change without notice.
All logos brands and product names are trademarks or registered trademarks of their respective
holders and are hereby recognized as such.
Keep this manual and packaging for future reference.
Attention:
This product is marked with this symbol. It means that used electrical and electronic products
should not be mixed with general household waste. There is a separate collections system
for these products.
RISK OF ELECTRIC SHOCK
DO NOT OPEN
CAUTION

14
DEUTSCH
Fernbedienung
LAUTSTÄRKE “+”
LAUTSTÄRKE “-“
STUMM/SCHLUMMERFUNKTION
A-B WIEDERHOLEN
INFO
ALARM
SPEICHER
AUFNAHME
MENÜ
BEREITSCHAFT
WIEDERHOLEN
ZIFFERNTASTEN
ZURÜCK
NAVIGATIONSTASTEN
(HOCH/RUNTER/LINKS/RECHTS)
Vorderseite
WIEDERGABE/
PAUSE MENÜ
BEREITSCHAFT
NAVIGATIONSTASTEN ENTER FERNBEDIENUNGSSENSOR
LAUTSTÄRKE +/-
USB-PORT
ZURÜCK
AUFNAHME
SPEICHER
Rückseite
DC12V/2A
STROMVERSORGUNG
AUX-AUSGANG
BETRIEB EIN/AUS
Ethernet-Anschluss
AUX-EINGANG

15

16
Kapitel 1 Übersicht
1.1 Einführung
Das Internetradio ist ein Radiosystem mit integrierter digitaler Audiowiedergabe, dass eine
Internetverbindung benötigt. Das System unterstützt MP3/WMA Audiodateien, USB-Geräte und
Internet-Radiodienste, wie zum Beispiel World Station and SHOUTCast, die mehr als 15.000
Internetradiosender anbieten. Das Internetradio ermöglicht außerdem Audio-Streaming via UpnP-
Mediaserver.
1.2 Audioquellen
• Unterstützt MP3/ Windows Media® Audiodateien (bekannt als WMA), (einschließlich ID3V1, 2)
• Unterstützt statische Liedtexte und synchronisierte Liedtexte (.txt /.lrc /.smi)
• Unterstützt USB Flash Geräte
• SHOUTCast Internetradio (http://www.shoutcast.com)
• Unterstützt Podcast
• Unterstützt AUX
1.3 Speicher
• Unterstützt herkömmliche USB-Massenspeichergeräte (FAT16/32).
1.4 Aufnahme
• Audiodaten von Internetradiosendern (World Station / SHOUTCast) aufnehmen und Audiodaten in
128K MP3 Format umwandeln.
1.5 Netzwerk
• Unterstützt Ethernet 10/100 Mbps
• Unterstützt WLAN IEEE 802.11 b/g Dongle
• Unterstützt Infrastruktur / Ad-hoc
• Unterstützt WEP64/128 und WPA-TKIP-PSK, WPA2-AES-PSK Verschlüsselung
• Unterstützt Proxy-Einstellungen
• Das System bietet einen Einstellungs-Wizard für ein einfaches Setup eines drahtlosen Netzwerks
1.6 Verschiedenes
• Unterstützt zwei Weckrufeinstellungen
• Unterstützt Zeitsynchronisierung (* wenn Netzwerk verfügbar)
• Unterstützt Firmware-Aktualisierung
Kapitel 2 Installation
2.1 Installation
HINWEIS: Die ordnungsgemäße Spannung für das Internetradio ist AC 110V~240V/50-60Hz.
Vergewissern Sie sich vor dem Anschluss des Geräts an ein Netz, dass Ihre örtliche Spannung
entsprechend geeignet ist.
2.1.1 Installation im Netzwerk (LAN)
• Vergewissern Sie sich, dass die Internetumgebung betriebsbereit ist und die Netzwerkeinstellungen
verfügbar sind (DSL oder Kabelmodem sind insbesondere empfohlen).
• Die Werkseinstellung zum Netzwerk Ihres Internetradios ist DHCP. (Weitere Informationen zu den
Netzwerkeinstellungen nden Sie unter 11.6 Netzwerk.)

17
DSL oder Kabelmodem Breitband-Router
Internetradio
PC (Mediaserver)
Ethernet
Ethernet
- Schließen Sie das Gerät anhand der Abbildung an einen mit dem Internet verbundenen Router
an. Verwenden Sie ein herkömmliches Netzwerkkabel.
Crossover Kabel
Internetradio
PC (Mediaserver)
- Schließen Sie das Gerät anhand der Abbildung an einen PC an, wenn Sie nur auf dem Computer
gespeicherte Musik anhören möchten. Verwenden Sie dafür ein gekreuztes (Crossover)
Netzwerkkabel.
- Mit solch einer Verbindung des Geräts können Sie nur Musik anhören, die auf dem Computer
gespeichert ist. Der Computer benötigt eine besondere Software. Siehe Abschnitt zum
Mediaserver.
2.1.2 Installation eines drahtlosen Netzwerks (WLAN)
• Vergewissern Sie sich, dass die Internetumgebung betriebsbereit ist und die Netzwerkeinstellungen
verfügbar sind.
• Stecken Sie den WLAN-Adapter an das Internetradio an. (Weitere Informationen zur Einstellung
nden Sie unter 11.6 Netzwerk.)
WLAN-Adapter Internetradio
PC (Mediaserver)
PC (Mediaserver)
Ethernet
DSL oder Kabelmodem
Schnurloser 802.11 b/g
Broadband-Router
- Schließen Sie den WLAN-Adapter an die Buchse an.

18
WLAN-Adapter
PC (Mediaserver)
Internetradio
WLAN-Adapter
- Sie können das Gerät auch schnurlos an einen Computer mit schnurloser Netzwerkkarte
anschließen.
- Mit solch einer Verbindung des Geräts können Sie nur Musik anhören, die auf dem Computer
gespeichert ist. Der Computer benötigt eine spezielle Software. Siehe Abschnitt zum
Mediaserver.
2.2 Erstmaliger Gebrauch des Geräts
Wenn Sie das Gerät das erste Mal einschalten, wird das Gerät automatisch nach einer IP-Adresse
suchen. Wenn das Netzwerk mit dem Internet verbunden ist, wird das Gerät außerdem die Uhrzeit mit
dem Zeitserver synchronisieren und dann in den Standby-Modus umschalten. Dieser Vorgang dauert
normalerweise 6-30 Sekunden.
2.3 World Station
2.3.1 World Station anhören
• Öffnen Sie das [Haupt]-Menü, wählen Sie [i.Radio] und drücken Sie anschließend die Taste
ENTER/OK.
• Wählen Sie [World Station] und drücken Sie dann die Taste ENTER/OK.
• Suchen Sie aufwärts/abwärts nach einem Sender und drücken Sie anschließend für die
Wiedergabe die Taste ENTER/OK.
• Wenn die Pufferung 100% erreicht hat, beginnt die Wiedergabe der Musik.
Hinweis: Drücken Sie für die Schnellsuche nach Internetradiosendern die rechte Taste, um von
Radiosendern mit dem Anfangsbuchstaben A zu den Sendern mit B, oder von Sendern mit dem
Anfangsbuchstaben B zu den Sendern mit C zu springen, usw. Mit der linken Taste können Sie die
Suche rückwärts vornehmen.
Tabelle 2.3.1
Main
i.Radio >
USB >
>
→
i.Radio
Favorite >
World Station >
SHOUTCast >
Wählen Sie i.Radio Wählen Sie World Station

19
i.Radio
Africa >
Americas >
Asia
>
→
World Station
South Korea >
SriLanka >
Taiwan
>
Auistung nach Regionen Auistung nach Ländern
World Station
Africa >
Americas >
Asia
>
→
World Station
Caribbean >
Europe >
Middle East
>
Drücken Sie◄ / ► für die
Schnellsuche
Die Namen der Sender ändern sich
alphabetisch
1/1637
‘A’ NET STATION
.977 The Oldies Channel
007 Audio - #1 For The
→
1/999
‘A’ NET STATION
.977 The Oldies Channel
007 Audio - #1 For The
Drücken Sie die INFO-Taste Die Gesamtzahl der Sender erscheint
auf dem Bildschirm

20
World Station
HitFM 90.1 Taiwan
National Education Radio 1
National Education
Radio 2
→
i.Radio
HitFM 90.1 Taiwan
WMA ,48 Kbps
Auistung alphabetisch geordnet Wiedergabe
2.4 Netzwerk
• Unterstützt LAN (Ethernet) und WLAN (802.11b/g WiFi-Adapter ist optional)
• Unterstützt WiFi-Verschlüsselung WEP64/128, WPA-TKIP-PSK, und WPA2-AES-PSK.
• Unterstützt dynamische IP via DHCP (Dynamic Host Conguration Protocol) und statische IP.
Ethernet und DHCP sind die Standardeinstellungen.
• Unterstützt Infrastruktur-Modus und Ad-hoc-Modus.
• Unterstützt UPnP.
• Erkennt und startet LAN oder WLAN (Wireless LAN) automatisch.
2.4.1 Übersicht zu den Netzwerkzuständen des Systems
• Das Symbol zum Status der Netzwerkverbindung wird an der Oberseite des Bildschirms angezeigt.
Tabelle 2.4.1.1 - LAN-Status
Title
→• Ethernetkabel konnte nicht gefunden
werden.
Title
→• Ethernetkabel erfolgreich gefunden.
• Verfügbare DHCP-Daten konnten nicht
gefunden werden.
Title
→• Ethernetkabel erfolgreich gefunden.
• Verfügbare DHCP-Daten erfolgreich
gefunden.
Tabelle 2.4.1.2 - WLAN-Status
Title
→• USB WiFi-Adapter konnte nicht gefunden
werden.
Title
→• USB WiFi-Adapter erfolgreich gefunden.
• Verfügbare DHCP-Daten konnten nicht
gefunden werden.
Title
→• USB WiFi-Adapter erfolgreich gefunden.
• Verfügbare DHCP-Daten erfolgreich
gefunden.
This manual suits for next models
3
Table of contents
Languages:
Other Konig Radio manuals

Konig
Konig RDDB5000 Series User manual

Konig
Konig HAV-SR42 User manual

Konig
Konig HAV-TR200W User manual

Konig
Konig RDFM5010 Series User manual

Konig
Konig HAV-TR110 User manual

Konig
Konig HAV-MR20 User manual

Konig
Konig HAV-TR800 Series User manual

Konig
Konig HAV-IR10 Instruction manual

Konig
Konig HAV-TR900 Series User manual

Konig
Konig HAV-SR40 User manual