VP-480 - Defining the VP-480 CV to 3G HD-SDI Scaler 5
4 Defining the VP-480 CV to 3G HD-SDI Scaler
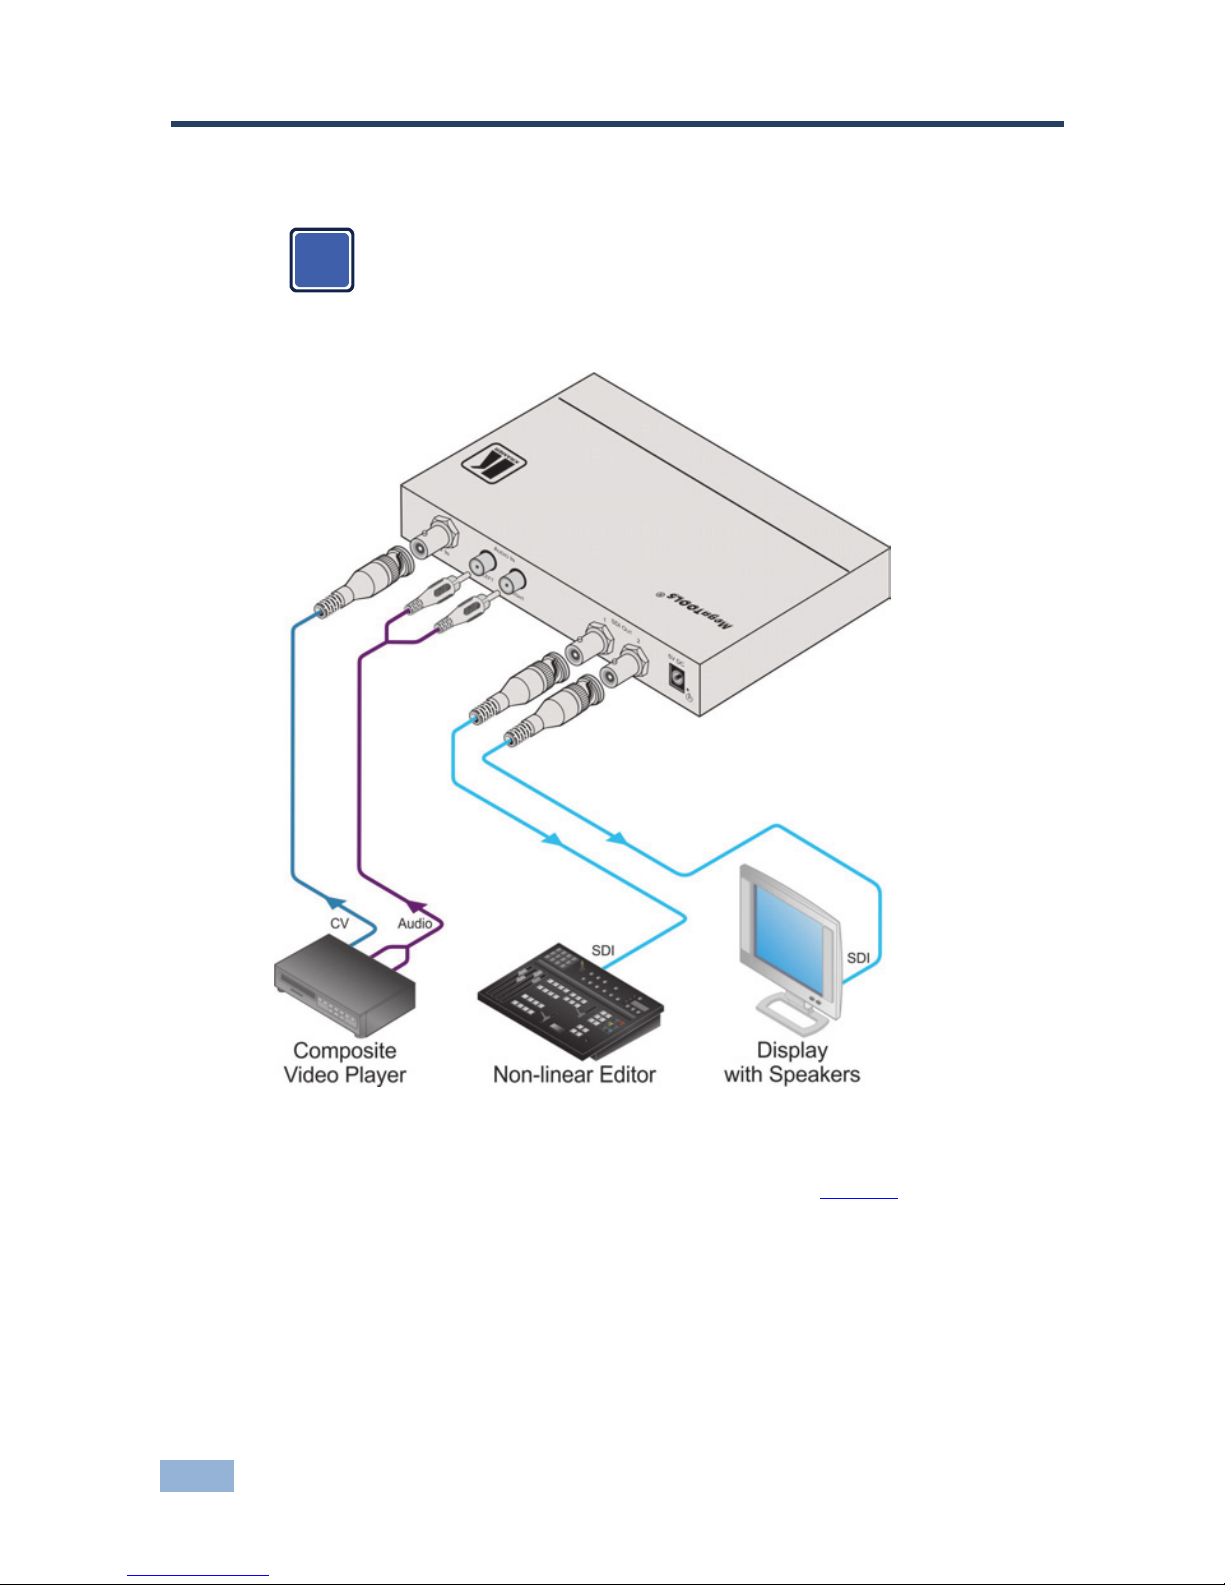
Figure 1defines the front and rear panels of the VP-480.
Figure 1: VP-480 CV to 3G HD-SDI Scaler
# Feature Function
1 ON LED Lights green when the device is powered on
2 INPUT LED Lights green when a composite video signal is detected on the
input
3 MENU Button Press to display the OSD (On-screen Display) menu.
When the OSD is not displayed, press together with the –
button to set the output resolution to 720p (1280x720)
4 ENTER Button In the OSD, press to select the highlighted menu item.
When the OSD is not displayed, press together with the +
button to set the output resolution to 1080p (1920x1080)
5 – Button In the OSD, press to step up through the options or to
decrement the parameter value
6 + / FREEZE Button In the OSD, press to step down through the options or to
increment the parameter value.
When the OSD is not displayed, press to freeze the display
7 CV IN BNC
connector Connect to a composite video source
8 AUDIO IN LEFT
RCA Connector Connect to the left channel of the unbalanced stereo audio
source. Audio from this input is output to SDI channel 1 of the
first group
9 AUDIO IN RIGHT
RCA Connector Connect to the right channel of the unbalanced stereo audio
source. Audio from this input is output to SDI channel 2 of the
first group
10 SDI OUT 1 BNC
Connector Connect to SDI acceptor 1. The signal is re-clocked and
equalized
11 SDI OUT 2 BNC
Connector Connect to SDI acceptor 2. The signal is re-clocked and
equalized
12 5V DC Connect to the +5V DC power adapter, center pin positive