Material Support/Stop (Fig. 2A-D)
The Material Support/Stop is a dual function feature
that both “Supports” large panels to keep them
perpendicular to the base of the jig, and “Stops”
workpieces in a desired position to easily repeat a
2-hole spacing across a rail.
If you intend to use the Support/Stop mainly as
a support, we recommend that you locate it 8-10”
from the base of the jig to provide proper
support across the full width of a panel. Add
multiple Support/Stops to your work surface to
gain more placement versatility (Item# KJSS). Screw
holes are provided to screw mount the Material
Support/Stop to the work surface.
The Material Support/Stop is also designed to
function as a position stop. The end of the Nylon
Stop Bolt is positioned to rest against the workpiece
to “center” the workpiece across the predetermined
2-hole spacing. By locking the Nylon Stop Bolt in
position several pieces of the same width may be
located and drilled quickly to minimize the time
involved in measuring the pocket hole location for
each workpiece. When the stop position is no longer
being used the Material Support/Stop Arm may be
pivoted out of the way to drill panels or large face
frame components. We recommend that you locate
the Material Support/Stop approximately 1/8” to
3/4” from the base of the jig for optimum
performance as a Stop.
You may notice that a notch in the bottom of the
Support/Stop Base is sized to span the profile of
Kreg Mini Trak (sold separately). A special “T”-nut and
#10-32 Machine Screw are included with the Material
Support/Stop hardware pack for mounting to the
Kreg Mini Trak.By adding a length of Kreg Mini Trak
(KMS7506). to either side of the K3 Benchtop Base
an adjustable Support/Stop system may be created
to allow the drilling of several pocket holes across the
width of large panels at repeatable locations. Mini Trak
sold separately.
The Material Support/Stop may also be used with
the K3 Portable Base as a Stop. Mount the Material
Support/Stop adjacent to the Portable Base in a
similar fashion as with the Benchtop Base.
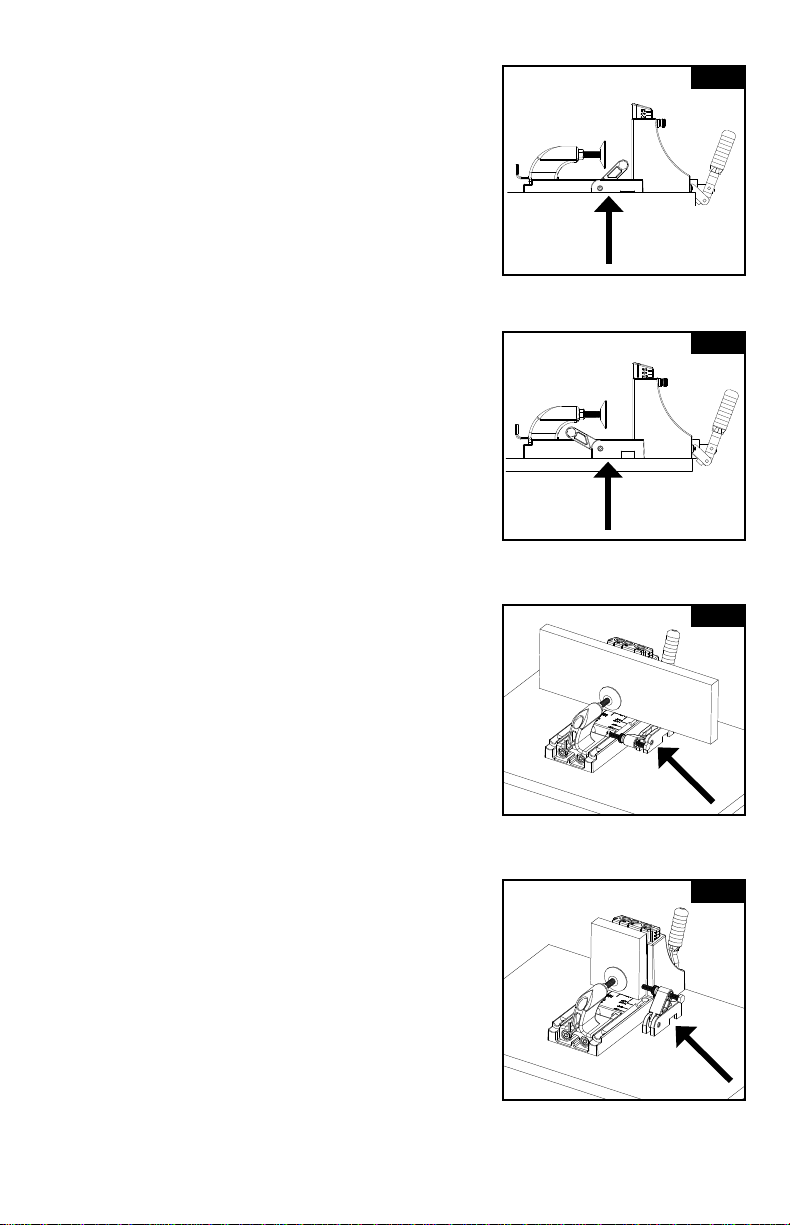
Material Support/Stop shown in
“Stop” position.
1” tall Material Support/Stop shown
in “Support” position.
Material Support/Stop helping to
balance a panel.
Material Support/Stop positioning
workpiece for proper placement.
Fig.2A
Fig.2B
Fig.2C
Fig.2D
Material Support/Stop (Fig. 2A-D)
The Material Support/Stop is a dual function feature
that both “Supports” large panels to keep them
perpendicular to the base of the jig, and “Stops”
workpieces in a desired position to easily repeat a
2-hole spacing across a rail.
If you intend to use the Support/Stop mainly as
a support, we recommend that you locate it 8-10”
from the base of the jig to provide proper
support across the full width of a panel. Add
multiple Support/Stops to your work surface to
gain more placement versatility (Item# KJSS). Screw
holes are provided to screw mount the Material
Support/Stop to the work surface.
The Material Support/Stop is also designed to
function as a position stop. The end of the Nylon
Stop Bolt is positioned to rest against the workpiece
to “center” the workpiece across the predetermined
2-hole spacing. By locking the Nylon Stop Bolt in
position several pieces of the same width may be
located and drilled quickly to minimize the time
involved in measuring the pocket hole location for
each workpiece. When the stop position is no longer
being used the Material Support/Stop Arm may be
pivoted out of the way to drill panels or large face
frame components. We recommend that you locate
the Material Support/Stop approximately 1/8” to
3/4” from the base of the jig for optimum
performance as a Stop.
You may notice that a notch in the bottom of the
Support/Stop Base is sized to span the profile of
Kreg Mini Trak (sold separately). A special “T”-nut and
#10-32 Machine Screw are included with the Material
Support/Stop hardware pack for mounting to the
Kreg Mini Trak.By adding a length of Kreg Mini Trak
(KMS7506). to either side of the K3 Benchtop Base
an adjustable Support/Stop system may be created
to allow the drilling of several pocket holes across the
width of large panels at repeatable locations. Mini Trak
sold separately.
The Material Support/Stop may also be used with
the K3 Portable Base as a Stop. Mount the Material
Support/Stop adjacent to the Portable Base in a
similar fashion as with the Benchtop Base.
Material Support/Stop shown in
“Stop” position.
1” tall Material Support/Stop shown
in “Support” position.
Material Support/Stop helping to
balance a panel.
Material Support/Stop positioning
workpiece for proper placement.
Fig.2A
Fig.2B
Fig.2C
Fig.2D


