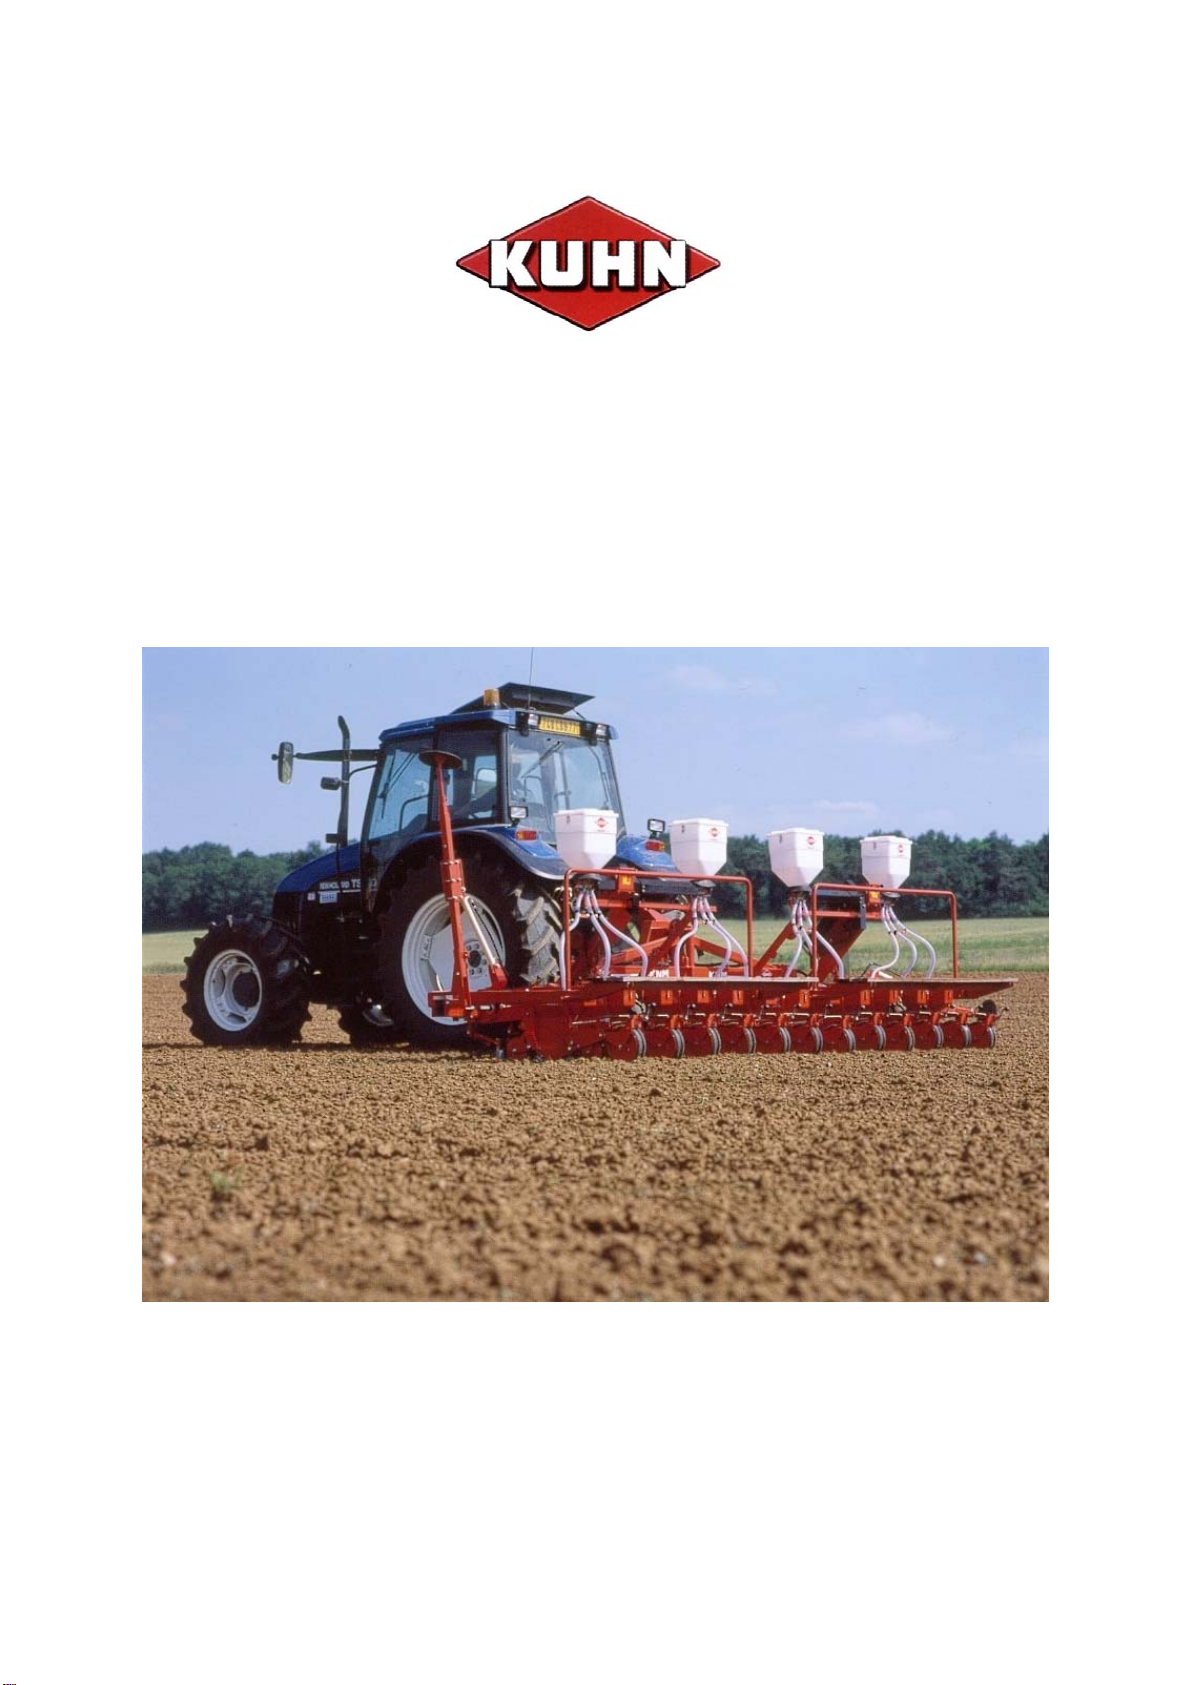
KUHN KNM User manual

9KN502GB – 04-2002
KUHN-NODET
INSTRUCTION MANUAL
KNM
PLEASE READ CAREFULLY
BEFORE USING THE MACHINE

2
.8+112'(76$
58('(/$*5$1'(+$,(=,
)0217(5($8&('(;
7(/
Serial No.
Machine model
Year of manufacture
Delivery date

3
0(66$*(7286(56
You have just acquired a KUHN-NODET machine and we thank you for the trust you have
placed in us through your choice.
Years of continuous design work, research, testing and improvement have resulted in the
design and manufacture of our products.
This machine is a tool worthy of your trust. Its proper operation and service life will depend
on the care you apply in maintaining it and using it.
This instruction manual will show you all the information required for the optimum use of your
machine. In order for it to give you the full satisfaction you are entitled to expect from it, we
would advise you to read this manual carefully and to follow all its instructions
scrupulously. This is a machine of simple design. However, although usually obvious, the
reasons for malfunctions are often disregarded.
YOU WILL NOT BE ABLE TO USE AND MAINTAIN YOUR MACHINE PROPERLY unless
you have read this instruction manual carefully.
KEEP IT TO HAND AT ALL TIMES.
Your KUHN-NODET dealer will explain how the machine works. He is there to enable you to
obtain the best service from it.
Your KUHN dealer also stocks a full range of genuine KUHN-NODET spare parts. They have
been inspected meticulously and are an exact match for the parts fitted to your machine
when it left the factory. These parts alone offer you the guarantee of the manufacturer’s
quality and standards, as well as being strictly identical to any part requiring replacement.
,03529(0(176
Our engineers strive constantly to improve our products. As a result, we reserve the right to
carry out any change or improvement we might deem necessary for our equipment, without
prior notice and without being under any obligation to apply such changes or improvements
to machines sold previously.

4
7$%/(2)&217(176
MESSAGE TO USERS 1
TABLE OF CONTENTS 2
GENERAL SAFETY GUIDELINES 3
&+$37(5.106((''5,//
I. DAILY MAINTENANCE 9
II. REPLACING DISCS AND SHEAR PIN 9
III. PERIODIC MAINTENANCE 11
IV. TRANSPORT AND FOLDING 12
V. HITCHING TO THE TRACTOR 13
VI. SECTION ALIGNMENT 13
VII. FOLDING SEED DRILL 14
VIII. USING HYDRAULIC MARKERS 15
IX. START UP 15
X. CHECKING AND VERIFYING SOWING 16
XI. SETTINGS 16
XII. SOWING DISTANCES 17
XIII. ELECTRONIC SYSTEM 17
&+$37(50,&52*5$18/$7256
I. INSTRUCTIONS FOR CLEANING AND MAINTENANCE AT THE END OF THE
SEASON 23
II. INSTRUCTIONS FOR FITTING ROTORS IN THE HOPPER 23
III. SETTING THE ANTI-ABRASIVE LEAF 25
IV. SETTING MICRO-GRANULATOR OUTPUT 25
V. OUTPUT TESTS 25
VI. CALCULATING THE NUMBER OF TURNS FOR THE MICRO-GRANULATOR 26
VII. USING THE MICRO-GRANULATOR GEARBOX 26
VIII. LAYING MICRO-GRANULES AS REQUIRED 29
IX. FITTING MICRO-GRANULATOR DRIVE CHAINS 30
STANDARD WARRANTY CONDITIONS 31
Tr.: Chapter 1 includes two additional sections in the body of the text which were omitted from the original.
Chapter 2 entries refer to the sections in document C.

5
*(1(5$/6$)(7<*8,'(/,1(6
Each time the tractor-machine combination is put into operation, ensure beforehand that it
meets regulations in force with regard to health and safety at work and the provisions of the
Highway Code.
*(1(5$/
1. In addition to the instructions set out in this manual, observe legislation on safety
guidelines and accident prevention.
2. The warnings affixed to the machine give indications on safety precautions to be
observed and help avoid accidents.
3. Observe the provisions of the Highway Code when driving on public roads.
4. Before starting work, users are required to familiarise themselves with the controls of the
machine and their respective functions. It will be too late to do so on the job.
5. Users should avoid wearing loose-fitting clothes which are liable to be snagged by
moving parts.
6. Use a tractor fitted with a safety cab. Keep the windows shut whilst the machine is in
use.
7. Check the immediate surroundings before starting up the machine and starting work
(children!).
Make sure you have adequate visibility!
Keep any personnel or animals well clear of the danger zone of the machine (risk of
objects being thrown!).
8. Carrying passengers or animals on the machine while in operation or travelling is strictly
forbidden.
9. The machine is to be hitched to the tractor using the mounting points provided for this
purpose only in accordance with current safety regulations.
10. Caution is to be observed when hitching and unhitching the machine to and from the
tractor.
11. Before hitching the machine, ensure the counterweight on the front axle of the tractor is
adequate. Weights are to be placed on the brackets provided for this purpose in
accordance with the tractor manufacturer’s instructions.
12. Observe maximum axle loads and maximum permissible train weight.
13. To travel on the public highway, use a trailer intended for this purpose and
recommended by the manufacturer.
14. Before setting out on a public road, ensure that guards and signalling equipment (lights,
reflectors, etc.) required by law are in place and operating properly.
15. Any remote controls (ropes, cables, links) are to be positioned such that they cannot
cause accidental movement liable to give rise to the risk of an accident or damage.
16. Set the machine to the transport position when travelling on public roads as directed by
the manufacturer.
17. Never leave the driver’s seat while the tractor is in motion.
18. Speed and driving manner are to be appropriate to the terrain, roads and tracks at all
times. Avoid sudden changes in direction whatever the circumstances.

6
19. Steering precision, tractor adhesion, road holding and braking efficiency are affected by
factors such as: terrain conditions, the weight and the nature of the machine hitched to
the tractor, ballast on the front axle, terrain or road conditions. It is therefore imperative
that precautionary rules as they relate to each situation be observed.
20. Take extra care on bends, allowing for overhangs, the length, height and weight of the
machine or the trailer hitched to it.
21. Before using the machine at all, ensure that all protective devices are in place and in
working order. Guards which are damaged (even slightly) are to be replaced
immediately.
22. Each time the machine is used, check screws and nuts beforehand for tightness,
especially those securing tools (teeth, tines, blades, knives, etc.). Retighten as
necessary.
23. Keep clear of the area in which the machine is operating.
24. :$51,1* Crushing or shearing zones may exist on remotely controlled units,
especially those operated hydraulically and pneumatically.
25. Before dismounting from the tractor or prior to any work on the machine, stop the
engine, remove the ignition key and wait until all moving parts have come to a standstill.
26. Do not stand between the tractor and the machine without having applied the parking
brake or placed suitable chocks under the wheels beforehand.
27. Ensure the machine cannot be started up accidentally before carrying out any work on it.
+,7&+,1*
1. Place the hydraulic lift control in a position which prevents any accidental operation of
the lift mechanism when hitching or unhitching the machine to or from the tractor.
2. When attaching the machine to the 3-point hitch on the tractor, ensure that the diameters
of the pins or stubshafts match those of the ball joints correctly.
3. Warning! There are crushing and shearing hazards in the area around the 3-point hitch!
4. Do not stand between the tractor and the machine when operating the external lift
control.
5. The machine needs to be stabilised by means of the hitch stiffening ties during transport
in order to prevent any float or sideways movement.
6. Lock the lift control lever when transporting the machine in the raised position.
+<'5$8/,&6<67(0
1. Warning! The hydraulic system is pressurised.
2. When fitting hydraulic cylinders or motors, take care to ensure that the system is
connected correctly in accordance with the manufacturer’s guidelines.
3. Before connecting a hose to the hydraulic system, ensure that the tractor system is not
pressurised.
4. Machine users are strongly advised to place identification marks on the hydraulic hoses
between the tractor and the machine in order to avoid improper connection.

7
Warning! This risks reversing functions (e.g.: lifting / lowering).
5. Check hydraulic hoses regularly! Damaged or worn hoses must be replaced
immediately.
When replacing hydraulic hoses, ensure that hoses of the specifications and quality
stipulated by the machine manufacturer only are used.
6. Take all necessary precautions aimed at avoiding accidents when tracing a leak.
7. Any liquid under pressure and the oil in the hydraulic system in particular can perforate
the skin and cause serious injury!.
In the event of injury, seek medical help without delay. There is a danger of infection.
8. Before carrying out any work on the hydraulic system, lower the machine, release the
pressure in the system, stop the engine and remove the ignition key.

8
0$,17(1$1&(
1. It is imperative that the PTO be disengaged, the engine stopped and the ignition key
removed from the tractor before carrying out any maintenance, adjustment or repair
work, as well as during fault-finding or diagnosing an operating malfunction.
2. Check screws, nuts and bolts regularly for tightness. Retighten if necessary!
3. Before carrying out any maintenance on a machine in the raised position, prop it up
using appropriate means.
4. Wear protective gloves and only use the proper tool for the job when replacing a working
part.
5. To protect the environment, it is forbidden to dispose of or pour away oil, greases and
filters of any kind. Arrange disposal with a company which specialises in collecting such
material.
6. Disconnect the power supply before carrying out any work on the electrical system.
7. Protective devices (guards) liable to wear and tear are to be checked regularly. Replace
them at once if they are damaged.
8. Spare parts must meet the standards and specifications stipulated by the manufacturer.
Use KUHN-NODET spare parts only.
9. Disconnect alternator and battery cables before undertaking any arc welding work on the
tractor or the machine hitched to it.
10. Repairs affecting units which are tensioned or pressurised (springs, hydraulic
accumulators, etc.) need adequate training and require tools as stipulated in the
regulations; they must also be carried out by trained personnel.

9
&+$37(5.106((''5,//
DAILY MAINTENANCE
Lubrication
∗Drive chains
∗Linkages on folding and articulated seed drills
∗Marker linkages Check
∗Rotation of all units
∗Operation of electronic control box
∗Cleanliness of axial gauging rollers, since soil adhering to them prevents the
scrapers from operating correctly (where stainless steel axial rollers are
concerned).
At the end of each day
∗Empty the seed trays through their rear drawer.
∗Run the seed drill empty in order to clear all the cells.
Night-time moisture actually degrades the seed coating, which can clog up the
discs.
∗Seed drill fitted with microgranulators: see page 19
Replacing discs and shear pin
Replacing discs:
∗Remove side cover
∗Remove ejector (2 bolts)
∗Remove beta clip
∗Replace disc
∗Replace clip, ejector and cover.
Shear pin
Each disc is retained on its shaft with a 2 mm dia. beta clip; this clip is made of
special steel and is not the same as those which can be bought across the
counter. It acts as a shear pin in the event of excessive force being required to
rotate the disc: crushed seeds, non-standard seed coating or foreign body.
∗Remove the side cover held on by 4 nuts
∗Retrieve the pieces of the sheared clip
∗Investigate and eliminate the cause of impeded rotation
∗Fit a new 2 mm dia. beta clip, replace the side cover.
Using chicory discs
Fitting a chicory disc
∗First remove the ejector (Diagram 1) and the beet disc
∗Fit the chicory disc
∗Ensure the beta clip is still in good condition
∗Replace the ejector with its 2 bolts as it was fitted previously

10
∗Before refitting the nuts, insert the spring over the front bolt, pass it under the
rear bolt, insert the folded end of the spring into the hole in the body of the
section. Purpose of spring
The spring holds the ejector as close as possible to the chicory seed in order to
provide greater accuracy in seed spacing.
This spring cannot be used for beet.
Note
Before sowing chicory, check the top deflector for correct adjustment as shown
on page 9.
'LDJUDP

11
periodic maintenance
Laying up at the end of the season
∗Empty the seed trays through their rear drawer;
∗Run the seed drill empty in order to clear all the cells since any seed remaining
will swell and may cause the distribution unit to seize up;
∗Clean the machine throughout, keeping water splashes off ball bearings,
bearing blocks, mechanical components and sections;
∗Grease all items in contact with the soil: coulters, stainless steel axial rollers,
steel vee wheels, overlap claws;
∗Keep tyres inflated – pressure: 1.3 bars;
∗Unhitch the machine keeping the coulters and rubber gauging wheels off the
ground;
∗Store the seed drill protected from the weather, dust, etc.
∗All chains need to be oiled to keep them in good condition:
−1 chain per wheel
−2 chains per section
−2 chains for each micro granulator attachment.
Maintaining and checking sections
∗Remove the disc cover (4 nuts)
∗Remove the ejector (2 bolts)
∗Remove the disc retaining clip
∗Remove the disc
∗Clean the disc, the cells and the ejector groove
∗Clean the inside of the section
∗Check to ensure that the shaft and the disc on its shaft rotate freely.
Assembling the ejector:
It is not adjustable and is held on by 2 bolts without nuts.
The bolt heads are to be placed on the left hand side in order for the cover to keep
them in place.
Top deflector – replacement and
setting
Removal
Unscrew the two side screws (Diagram 2)
Replacement
∗Check to ensure that the new deflector has been deburred properly on all
surfaces — smooth off with glass paper as required.
∗Replace it with its 2 side screws without tightening them.
∗The correct height setting is obtained by inserting two sheets of paper or
plastic 0.15 to 0.18 mm thick between the disc and the deflector.
∗Once the 2 side screws have been tightened, it should be possible to reinsert
the spacer sheets used.

12
'LDJUDP
transport AND FOLDING
12 row articulated seed drill
This function can be locked by shifting the clip relative to the spring of the central
lock (Diagram 3).
'LDJUDP
The seed drill needs to be free in the operating position for the wheels to have
proper adhesion. Making the seed drill rigid sometimes makes it easier to remove
using a lift truck.
Folding seed drills
In the folded position, the central lock holds the 2 halves of the seed drill together.
The 2 locks located to the left and right of the headstock hold the seed drill in the
open position.
To unfold the seed drill
∗Fully release the 2 locks located by the headstock so they do not interfere
while unfolding;
∗Open the central lock;
∗After opening, re-engage the locks located by the headstock.
To fold the seed drill
∗Release the 2 locks located by the headstock;
LOCKED
FREE

13
∗Check the central lock: it must be well clear;
∗Lock the central lock after folding.
Hitching to the tractor
∗It is advisable to extend the 3rd point of the tractor in order to give the seed drill a
backward rake of approximately 5 cm. This improves coulter action (Diagram 4).
∗The tractor hitch arms are to be free.
∗Check them as they drop to ensure that
the seed drill is resting fully on its wheels
in all conditions. If the hitch does not drop
sufficiently the wheels may skid and the
seed drill will stop sowing.
aligning Sections
Single bar or
articulated seed
drills
The sections are fitted at 90° to the main beam and do not normally require
adjustment.
In the event of a section not following its
sowing line properly, first check whether
the 4 bolts which secure it to the beam
are tightened properly and correct the
alignment as required by placing a shim
between the beam and the hinge bracket
of the section (Diagram 5). (To the left or
to the right, as necessary)
Folding seed drills
When the seed drill is in the operating position, the beams come into contact with
the adjustable stops (Diagram 6).
The stops can be set separately and enable each beam to be set such that the
sections are pulled in a straight line.
Where it is not required to correct all sections as a whole, use the adjustment
procedure set out in A.
If a substantial adjustment has been made and in order to ensure ease of opening
and closing the seed drill, refer also to linkage setting in the next item.
'LDJUDP
corrective shim
'LDJUDP

14
VWRSWREHVHW
'LDJUDP
Folding seed drill
6HWWLQJWKHDOLJQPHQWRIPRYLQJIUDPHVDQGVHFWLRQEHDPV
Setting requires the following:
∗That the moving frames, items 9 and 10 be mutually aligned and parallel to the
headstock
∗Alignment to be checked with locks 23 tightened properly
∗This adjustment to be carried out using screws item 32, located below the moving
frames, items 9 and 10
∗If substantial adjustment is needed, it is advisable before doing so to remove the
two links item 31 between the two beams.
+($'672&.
p
∗The two section carrier beams, items 2 and 3, need to be mutually aligned and
parallel to moving frames 9 and 10
∗Check that locks item 23 are securely tightened
∗Stretch a light cord between the left and right hand ends of the seed drill in order to
check alignment
∗Remove the 2 links item 31 before adjusting
∗Plates A and B are to be in full contact once alignment with the cord has been
achieved
∗If there is play between them once alignment has been achieved, weld a washer of
the desired thickness against plate item B

15
∗If it has not been possible to achieve the correct alignment with the cord because
one of the plates B has come into contact with plate A too soon, plate B will have
to be burnt off and welded on again after alignment
∗If necessary, remove the two stop plates item C, secured with four bolts and held
in place by two small runs of weld.
Once alignment is complete:
∗Replace links item 31, they are to be free lengthwise, they must not place any
loadings on their pivot points, either in the open or closed position
∗Replace stops item C, without tightening the bolts at that time
∗Clamp the stops together with two strong clamps, centre them relative to the
centreline of the seed drill (centre them equidistant from the ends of the beams),
tighten the bolts
∗Test the seed drill for folding and unfolding
∗Apply new dots of weld behind plates C in order to prevent the setting from being
disturbed. Using HYDRAULIc markers
∗Cylinder brackets items 21 and 22 need to be swapped in order to change from 45
to 50 cm seed spacing or vice versa
∗The hydraulic markers are to be operated by a single double-acting control
∗The hydraulic system is designed such that when one marker is raised, the other
drops automatically
∗Valve item 14 needs to be opened once the seed drill has been unfolded into the
operating position in order for the markers to operate
∗The following is required before folding the seed drill to the transport position:
• One marker to be in the raised position
• Shut off valve item 14
• Raise the second marker
• Fit the transport locks for the beam.
Start up
∗hitch arms are of the tractor to be free
∗Check them as they drop to ensure that the seed drill is resting fully on its wheels
in all conditions. If the hitch does not drop sufficiently the wheels may skid and the
seed drill will stop sowing
∗Fill the seed trays
∗Turn the seed drill by hand to fill the cells and check seed delivery for each section
∗Check that all gearboxes are set to the desired speed

16
∗Check all seed drill settings.
Checking and verifying sowing
Checking seeds
The KNM seed drill has been designed for coated seeds of a standard size.
Coatings are generally of excellent quality but some varieties nevertheless exhibit
a fairly high percentage of non-standard sized seeds, being either too small or too
large.
These discrepancies can cause double or missed sowing.
Checking sowing
Sowing quality is of considerable importance for a good harvest. Please ensure
you follow all the advice given as far as possible and check your seed drill is
operating correctly. Settings
The various settings are naturally a matter for individual choice, according to ground
conditions, climate and personal experience. Below we show how to achieve them.
It is advisable to carry out a sample test at the same speed as that which will be used
for the remainder of the field.
Checking the correct sowing level
The depth of the furrow formed by the coulter is determined by adjustment of the
rear crank (Diagram 7).
In order to increase sowing depth, turn clockwise
In order to reduce sowing depth, turn anticlockwise.
'LDJUDP
Covering the seed
Various types of equipment are available for use depending on the nature of the soil
and specific requirements:
∗Harrow with tines:

17
The position of the 2 tines can be
adjusted at will in order to achieve the
desired effect. The working depth of the
harrow is set through the position of the
top clip. Ground bearing pressure is set
at the lower clip.
∗Cage roller
'LDJUDP
∗Axial wheel:
Up to 2 pressure springs can be fitted in order to increase or reduce the ground
bearing pressure of the axial wheel (Diagram 10).
'LDJUDP
Sowing distances
The seed drills are fitted with a 6 ratio gearbox providing 6 seed spacings.
It has a neutral position which enables the following settings:
6 rows on 12 row seed drills
6 to 12 rows on 18 row seed drills.
Position of gearbox lever 1 2 3 4 5 6
Distance between seeds (cm) 15.2 16.2 17.1 18.1 20.0 21.9
Other sowing density ranges are available on request.
electronic System
Capabilities
The electronic system detects a stoppage in a sowing section and totalises
hectares sown. Section hopper bottom sensors are available as an option.
'LDJUDP

18
Components and connections
An electronic control box
To be fitted in the tractor cab.
∗Connect the brown wire (6) directly to the power supply (+) from the battery;
∗Connect the blue wire (6) to earth(–).
The control box includes:
•One 1.6 amp fuse (4)
•One 12 V supply cable and two female sockets to connect the wiring harnesses fitted to
the seed drill
A seed drill
wiring harness
consisting of:
a main connector at one end;
connectors for each section;
one connector for the hectares counter.
Sensors
Control box operation
Switching on
Press the control box ON/OFF function, the screen will light up and we can read:
The number of hectares already sown and the configuration of the seed drill
E.g.: 25.15HA CI 2- 45
'LDJUDP
64

19
Hectares counter
-On using the seed drill for the first time: select 45 or 50 cm working width and 6, 8,
12, 16, 18 row type of seed drill by changing the configuration of the control box
(see configuration menu).
-On switching on, the hectares counter shows the last value displayed for the
number of hectares sown (stored in the memory).
-The counter indicates hectares and ares: e.g.: 12.05 (12 ha 5 ares).
-Press RESET for 4 seconds to zero the counter.
-The reading indicated by the counter is stored even if the 12 V power supply is
off until the next 4 second reset.
Reset
Its function is twofold:
-Pressing this reset briefly shuts off the buzzer in the event of an alarm.
-Pressing the reset key for more than 4 seconds will zero the hectares counter.
"CFG" & "+" configuration
The “CFG” function provides access to the following data:
A. Type of seed drill (6 to 18 row) and spacing between rows (45 or 50), to be
entered before the seed drill is used for the first time.
B. Area coefficient (84 to 116), to be altered in line with your experience.
The first press on "CFG" accesses menu A
The second press on "CFG" accesses menu B
The third press on "CFG" exits the configuration menu.
In either menu A or B, available selections are scrolled in “configuration” mode by
pressing the “+” function repeatedly.
-The number of rows and the working width will scroll together:
C06-45, C06-50, C08-45, C08-50, C12-45, C12-50, C16-45, C16-50, C18-45,
C18-50.
(CO6 = 6 rows; - 45 = 45 cm spacing between rows)
-The correction coefficient will scroll thus:
84, 86, 88, 90, 92,…, 100, … 112, 114, 116.
If it is desired in future that the seed drill should read out:
-more hectares for a given area, select a higher coefficient,
-fewer hectares for a given area, select a lower coefficient.
This coefficient becomes active once it is changed and will only affect the hectares
sown thereafter.
Under no circumstances does it change the areas already sown.
The 3 settings entered above will be stored in the permanent memory until the
next changes.

20
Monitoring sowing
∗At rest: switched on, the control box displaying area and configuration (fig. A)
can be programmed by pressing the “CFG” and “+” buttons successively.
After a change it is advisable to exit this menu by pressing “CFG” and
returning to the hectares mode.
∗During sowing: two instances may arise:
• No alarm has been detected (fig. A)
• One or more alarms has/have been detected (fig. B).
The first line of the display shows the alarms for the distribution discs: the numbers
which are visible refer to the numbers of rows which are stopped.
Within the second line of the display the boxes that have turned black are those of
rows in which an alarm has been triggered (Optional).
With the seed drill in operation the control box appears as in fig. A.
As soon as a disc stops or there is no seed in a tray an alarm is triggered and shows
up in three ways simultaneously:
1. The display takes on the appearance of figure B (explained above).
2. Three LEDs light up in the lower section of the control box.
3. A buzzer sounds.
The buzzer may then be shut off by pressing “reset” on the control box (the display
and the LEDs are not affected) . The display will change in line with the actual
changes in the alarms. The LEDs glowing on the control will not be extinguished until
the problem detected has been resolved. It should be noted that after cancelling the
Table of contents
Other KUHN Farm Equipment manuals

KUHN
KUHN MAXIMA 2 M User manual

KUHN
KUHN FC243RGII User manual

KUHN
KUHN GF7702T User manual

KUHN
KUHN GF 4201 MH User manual

KUHN
KUHN HR3004D User manual

KUHN
KUHN FC 240 P Supplement

KUHN
KUHN GA8121 User manual

KUHN
KUHN MOUNTED MINOTOR 3050 User manual

KUHN
KUHN ALTERNA 500R User manual

KUHN
KUHN FC3160TCD User manual