Final Check:
Step 5:
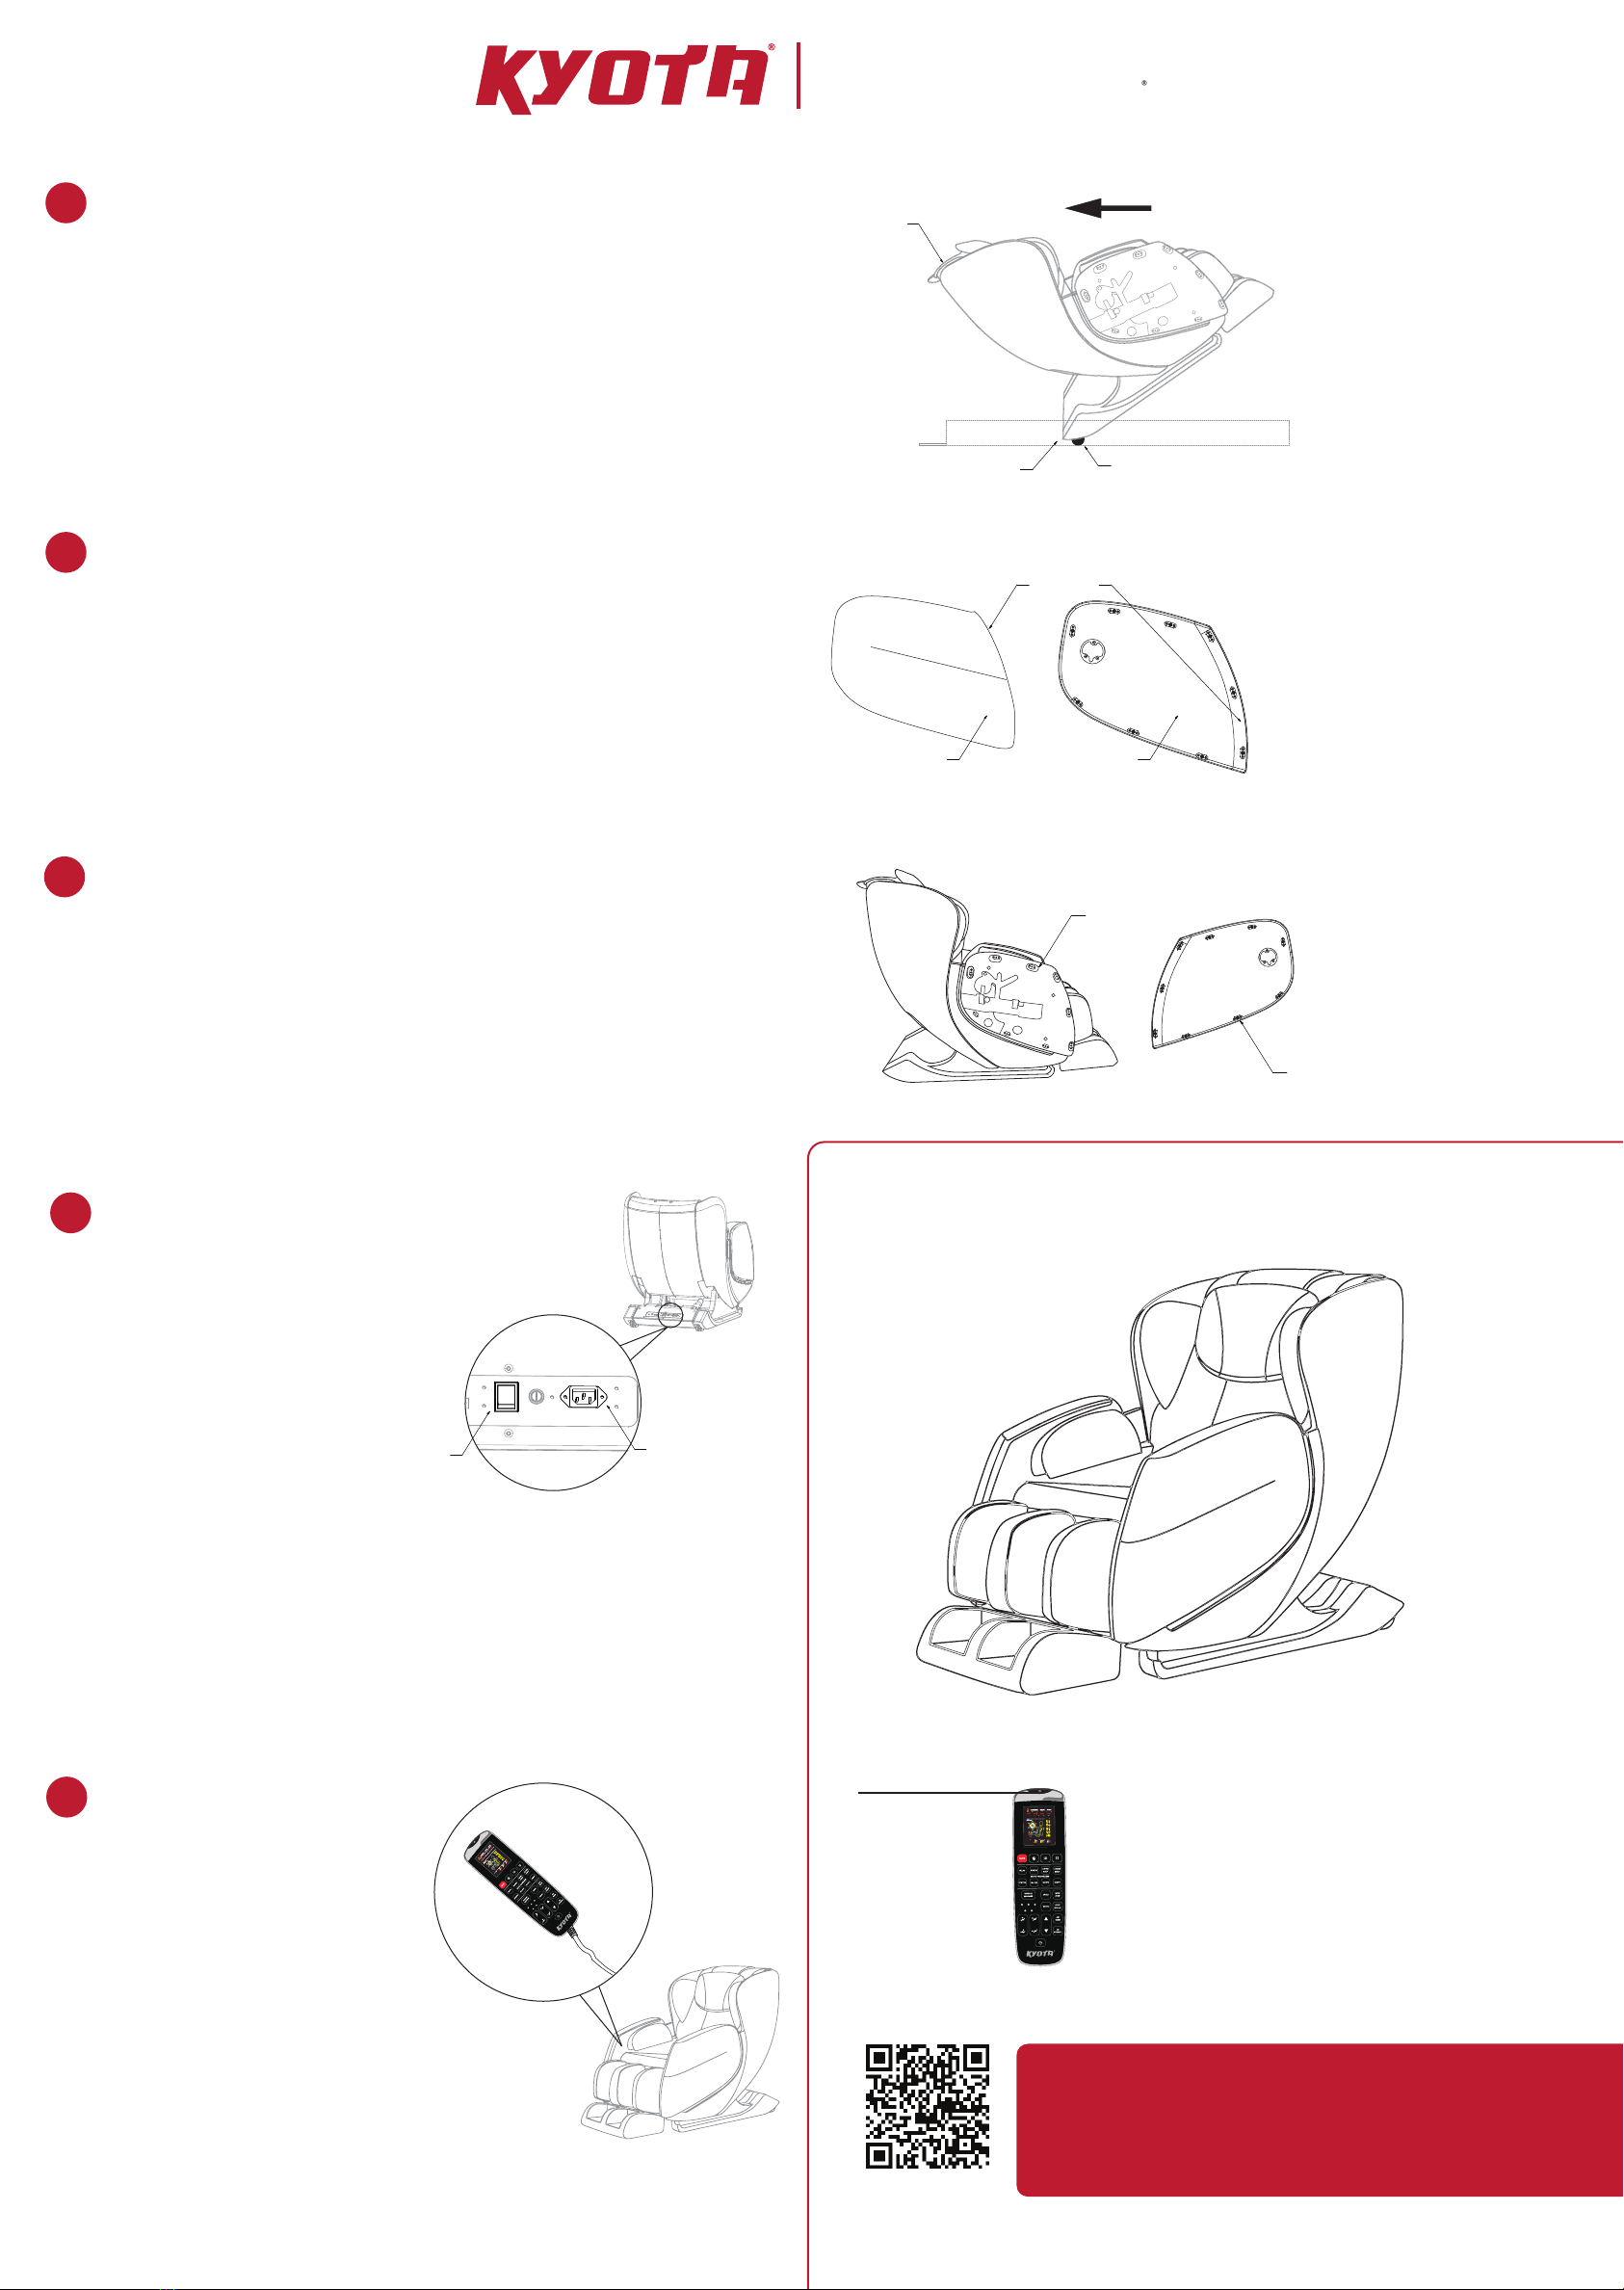
Place your foot behind the base of the chair to keep it from sliding
backwards, while you lean the chair back towards you to tip it up
onto the wheels built into the base. Make sure not to tip the chair
too far back.
5
Remove the protective covering from the arm panels. Position arm
panels on corresponding side of the chair, ensuring that the lip of
the arm panel faces towards the front of the chair.
Step 6:
6
Step 7:
To attach the arm panels, align the connectors on the arm panels
with the sockets on the chair body. Push firmly to connect into place.
7
Step 8:
Connect the chairs power
cord to a grounded 110V
electrical outlet and plug it
into the respective port on
the back side of the base
of the chair. Flip the main
power switch on.
8
Step 9:
Your remote control should
come already attached to
the chair body. Remove the
plastic wrapping from the
remote control and place it
in the remote holder
located in the forward
pocket of the chair.
9
Wheel chair this way
Place foot here Wheels
Place hands
here
Right arm panel Left arm panel
Arm panel lip
Arm panel
connectors
Chair body sockets
Review chair for smooth operation. If things are not
operating correctly, review all assembly steps. Call
Kyota support at 800 242-0761 if you need live
US-based support.
You are done; time for a Massage!
Power on the
remote and
select AUTO
SCAN CODE
Register your product at www.kyotamassagechairs.com/
warranty/registration to ensure it is in our system.
This will simplify the warranty process should you ever need it.
Alternatively, scan the QR code to go directly to the URL above.
Advanced Massage Chairs
Power cord port
Main power
switch


