manuals.online logo
Brands
  1. Home
  2. •
  3. Brands
  4. •
  5. Labelmate
  6. •
  7. Cash Counter
  8. •
  9. Labelmate RRC-330 User manual

Labelmate RRC-330 User manual

© LABELMATE – User_RRC-330 – 09/10
LEFT SIDE CONTROL PANEL:
SPEED VARIABLE or MAXIMUM:A
two (2) position Selector Switch allows
the user to select maximum (MAX)
speed (not adjustable) or adjustable
speed set by the front panel Speed
Control Knob. The maximum speed in
the "VARIABLE" position with the
SPEED potentiometer fully clockwise
is about 10% lower than the speed obtained in the "MAX" Speed position of the Speed
Switch. When the printing is correct, the unit can be used at MAX. Speed at all times.
PHOTOCELL ADJUST: Potentiometer.
TEST: Connector
ADJUSTING THE LABEL DETECTOR PHOTOCELL:
The label detector photocell has been adjusted at the factory (potentiometer fully CCW)
and requires no adjustment for a large variety of labels. However, some specific labels
(very transparent or relatively opaque backing paper) might require adjustment of the
photocell.
Using a voltmeter, you can do a
more accurate adjustment of the
photocell. Connect the provided test
cable to the “TEST” connector on
the side of the machine and
connect the leads to a DC voltmeter
with a range of +/- 20V. Load a roll
of labels on the machine, and
position the backing paper in front
of the photocell. Make sure that the labels are tensioned when doing the test. Set the
voltage with the potentiometer to around 5V, now put a label in front of the photocell; the
voltage should now be 10V or more. The reference voltage in the machine is set at 7.5V,
below 7.5V the machine sees no label, and above 7.5V the machine sees a label.
MAINTENANCE:
Your RRC-330 requires no maintenance.
LABELMATE LLC
69 AVENUE ALPHONSE XIII, 1180 BRUSSELS, BELGIUM
TEL: +322.375.69.60 – FAX: +322.375.38.96
[email protected]
www.labelmate.com
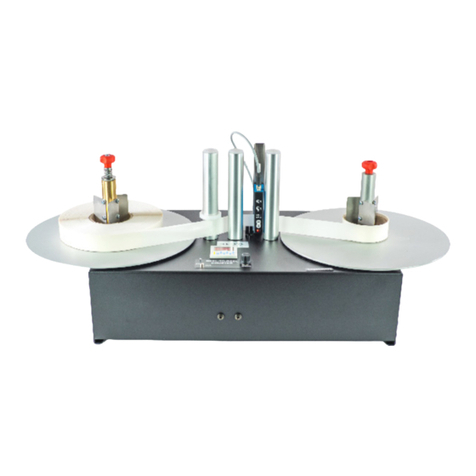
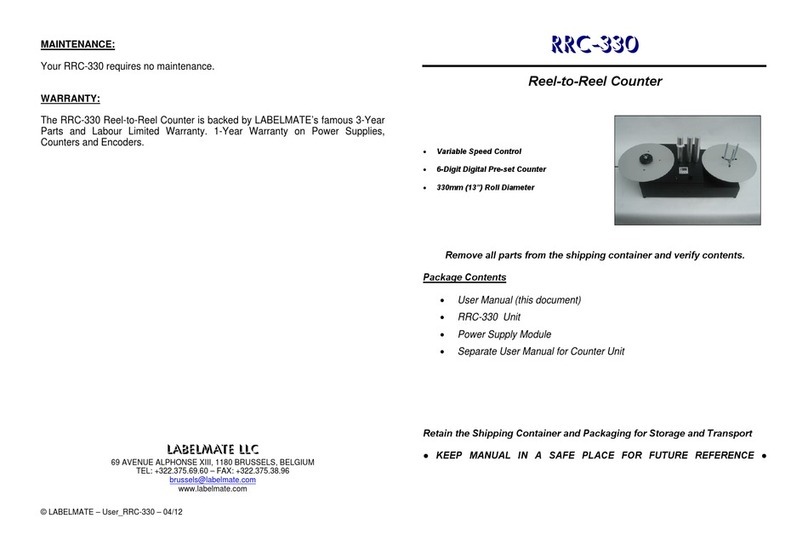
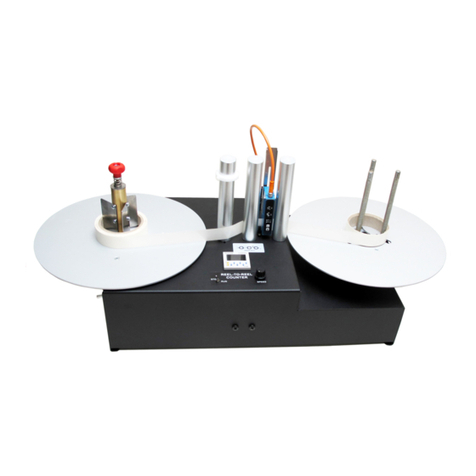
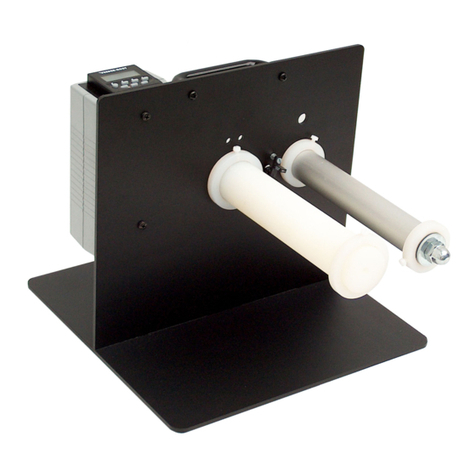
RRC-330
Reel-to-Reel Counter
•Variable Speed Control
•6-Digit Digital Pre-set Counter
•330mm (13") Roll Diameter
Remove all parts from the shipping container and verify contents.
Package Contents
•User Manual (this document)
•RRC-330 Unit
•Power Supply Module
•Separate User Manual for Counter Unit
Retain the Shipping Container and Packaging for Storage and Transport
●KEEP MANUAL IN A SAFE PLACE FOR FUTURE REFERENCE ●
SPECIFICATIONS:
Max. Label Roll Weight: 6Kg (13.2Lb)
Max. Label Roll Size: 330mm (13") diameter
Power Supply: Input: 220-240VAC – 50-60Hz.
Output: 24VDC – 4.17A.
Speed: Min. 65cm/sec with 76mm take-up roll diameter.
SET-UP:
1. Plug the Power Supply Output Cable to the Power Jack on the Rear Panel of
the RRC-330. Plug the Power Supply into a suitable AC Power Mains Outlet.
Place the Power Switch on the rear of the RRC-330 to the “ON / 1” position.
Observe that numbers are displayed on the Counter.
See the separate User Manual for the Counter Modules itself for other
operations.
2. The Counter is pre-programmed as a Preset Count-Up Counter. If you want
to use the preset function, introduce the number of labels with the blue push
button on the counter. If you do not want to use preset, set the value to “0”.
3. When the preset number of labels is reached, the RRC-330 will stop.
Pressing “R” on the counter will reset the count and restart the RRC-330.
USING THE ADJUSTABLE CORE HOLDER:
1. Unlock the three Locking Levers underneath the take-up Flange by turning
them clockwise. If the Levers are difficult to grasp, pull straight down on the
Lever Arm and reposition the Arm so it is more or less perpendicular to the
metal Hub.
2. While holding the Take-Up Flange, rotate the black Plate underneath the
Take-Up Flange to bring the “Fingers” together.
3. Place your Take-Up Core over the “Fingers” about half-way down and rotate
the black Plate again to bring the “fingers” in contact with the Core. Lock the
Locking Levers by turning them counter-clockwise. Reposition the Lever
Arms if necessary by pulling straight down and rotating them to a convenient
position.
4. Push the Core all the way down on the “Fingers”. The Core should now be
held tight on the “fingers”. If not tight enough, re-do the operation.
5. For easy removal of the roll from the ACH, release one of the Locking Levers
temporarily, remove the Roll and re-tighten the Locking Lever.
6. Once the ACH diameter is set, you can put the next empty core on the ACH
without readjusting the Locking Levers.
OPERATION:
1. Place the “STOP / RUN” Switch in the STOP Position.
2. Place your Roll of Labels on the Roll Holder at the left of the RRC-330. The
Take-Up Spindle on the right rotates in a counter-clockwise direction. Note
that your rewind can be “Wind-In” or “Wind-Out” according to which way you
place the Label Roll on the Roll Holder, right-side-up or upside-down.
3. The 2 plastic rings on the paper guides need to be used only if the unwind
roll is unevenly wound to begin with. Setting the rings at the proper height will
correct the unevenness of the roll on the rewind side.
4. The machine will stop when out of paper. To re-start, load paper, and set the
Stop/Run Switch to STOP. Re-set the counter if necessary. Start by
switching to “RUN”.
5. Place an empty label Core (not included) over the Take-Up Spindle and
secure the Label Web using a piece of tape.
6. Enter the desired Label Count via the Push Buttons on the Counter. If you do
not use preset, set the value to “0”.
IMPORTANT!
It is recommended to use the machine at its maximum speed.
Keep unwind plate clean of particles and glue.
WARNING!
This Product is for indoor use only.
Not for use in wet locations.
Other manuals for RRC-330

5

Other Labelmate Cash Counter manuals

Labelmate RRC-330-U User manual

Labelmate

Labelmate RRC-330-U User manual

Labelmate RRC-330 User manual

Labelmate

Labelmate RRC-330 User manual

Labelmate RRC-400 User manual

Labelmate

Labelmate RRC-400 User manual

Labelmate RRC-330 User manual

Labelmate

Labelmate RRC-330 User manual

Labelmate Count-100 User manual

Labelmate

Labelmate Count-100 User manual

Labelmate Count-100 User manual

Labelmate

Labelmate Count-100 User manual

Labelmate COUNT-100-DELUXE-US User manual

Labelmate

Labelmate COUNT-100-DELUXE-US User manual

Labelmate COUNT-200-DELUXE-US User manual

Labelmate

Labelmate COUNT-200-DELUXE-US User manual

Labelmate C-100-US User manual

Labelmate

Labelmate C-100-US User manual

Labelmate DISTRI-ST User manual

Labelmate

Labelmate DISTRI-ST User manual

Labelmate RRC-330 User manual

Labelmate

Labelmate RRC-330 User manual

Popular Cash Counter manuals by other brands

Test Equipment Depot HM8123 manual

Test Equipment Depot

Test Equipment Depot HM8123 manual

Conrad 86 02 14 operating instructions

Conrad

Conrad 86 02 14 operating instructions

TeraBee TeraRanger Evo user manual

TeraBee

TeraBee TeraRanger Evo user manual

Diamond MTX-10/R2 Technical instructions

Diamond

Diamond MTX-10/R2 Technical instructions

MightyOhm Geiger Counter Assembly instructions

MightyOhm

MightyOhm Geiger Counter Assembly instructions

Abra AK-130 manual

Abra

Abra AK-130 manual

Festo PZA-E-C operating instructions

Festo

Festo PZA-E-C operating instructions

HYOSUNG MoniMax7600 installation manual

HYOSUNG

HYOSUNG MoniMax7600 installation manual

BG7TBL FA-2 user manual

BG7TBL

BG7TBL FA-2 user manual

Alberici HIRA 1 ARM POS Operator's manual

Alberici

Alberici HIRA 1 ARM POS Operator's manual

Nokeval 2800-2061 manual

Nokeval

Nokeval 2800-2061 manual

Trotec PC220 operating manual

Trotec

Trotec PC220 operating manual

Omega DPF78 SERIES user guide

Omega

Omega DPF78 SERIES user guide

red lion MDMU manual

red lion

red lion MDMU manual

Vega NB-11 user manual

Vega

Vega NB-11 user manual

Particle Measuring Systems HandiLaz Mini Operator's manual

Particle Measuring Systems

Particle Measuring Systems HandiLaz Mini Operator's manual

IFM Electronic Ecomat200 100 Series operating instructions

IFM Electronic

IFM Electronic Ecomat200 100 Series operating instructions

Regent Control Systems FRT 7721 operating manual

Regent Control Systems

Regent Control Systems FRT 7721 operating manual

manuals.online logo
manuals.online logoBrands
  • About & Mission
  • Contact us
  • Privacy Policy
  • Terms and Conditions

Copyright 2025 Manuals.Online. All Rights Reserved.