12 BATTERY REPLACEMENT
1
Slide the battery cover o along the marked
direction and take it o.
2
Insert the two AAA batteries into the com-
partment according to the stated polarities.
3 Put the battery cover back.
Make sure that the batteries are
installed correctly. Otherwise, the
thermometer may be damaged.
If the low-battery symbol is displayed
on the screen, replace the batteries.
Batteries of a same type should be used.
Dispose the used batteries in accordance
with the local environmental policies.
The thermometer is shipped with
batteries. First open the battery cover,
then remove the insulating piece.
13 CLEANING AND DISINFECTION
Cleaning
Recommended detergents:
· Medical detergents;
· Home use mild detergents;
Cleaning steps:
1 Take the batteries out before cleaning.
2
Cleanthe temperature probe with a soft cloth.
Clean the lens of the temperature probe with
a cotton swab.
3
Wipe the thermometer body with a slightly
damp soft cloth.
Keep water out o the lens during
the cleaning process. Otherwise,
the lens may be damaged.
The lens may be scratched if it is
cleaned with a hard object, which
might result in inaccurate readings.
Do not clean the thermometer with
corrosive cleansers. During the cleaning
process, do not immerse any part of
the thermometer into liquid, or allow
liquid to penetrate the thermometer.
Disinfection
Recommended disinfectants:
· Isopropylalcoholsolution (concentration:70%)
· Medicinal alcohol (concentration: 75%)
·
Sodiumhypochloritesolution(concentration:3%)
Disinfecting steps:
1 Wet the clean soft cloth with a small quantity
of disinfectant, wipe the thermometer and
quickly dry it.
2 Disinfect the thermometer body and the area
around the temperature probe with a cloth
slightly moistened with 75% medical alcohol.
Do not use hot steam or
ultraviolet radiation for disinfection.
Otherwise, the thermometer may
be damaged or quickly aged.
It is recommended to disinfect the
thermometer before and after each use.
The disinfection time is completed within
1 minute, and the number of repetitions
per disinfection is not more than 2 times.
Clean and disinfect the thermometer
under the temperature of +10°C~+40°C
(50°F~104°F), the relative humidity of
15%~85% RH (no condensation) and the
barometric pressure of 86kPa~106kPa.
14 MAINTENANCE
Preventive inspection & maintenance period:
1 Ensure the safety of thermometer, and check
whether it has potential safety hazards in
normal use each week, e.g. whether the lens
is broken, the shell has cracks and the sensing
head is polluted. Do not use the thermometer
with potential safety hazard. Clean the ther-
mometer if not used for a long time.
2
After each use, clean the temperature probe
as described in the “Cleaning and Disinfec-
tion” chapter.
3
Store the thermometer in a dry, dust-free,
and well-ventilated place. Make sure that the
thermometerisnotexposedtosunlight.Make
surethat thestorageand transportation envi-
ronments meet the requirements.
4 Check regularly whether safety risks exist.
5 Remove the batteries if the thermometer will
not be used for more than two months.
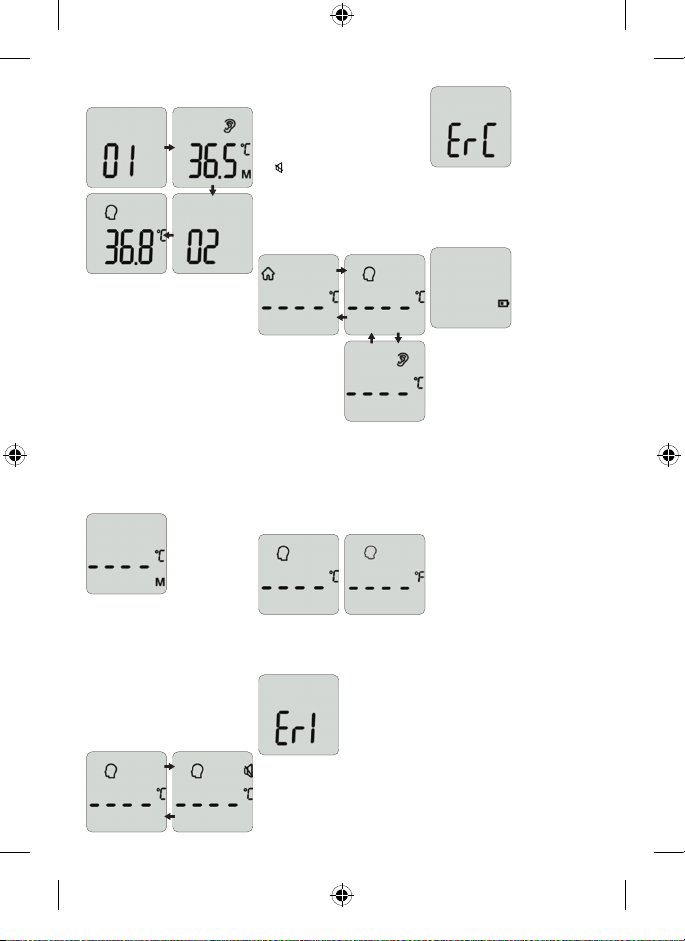
15 TROUBLESHOOTING
The thermometer fails to power on.
Low battery.
Change the batteries.
Polarities of the batteries are reversed.
Make sure that the batteries
are installed correctly.
The thermometer is damaged.
Contact the manufacturer.
“Er” is displayed.
The ambient temperature is lower than
°C (.°F) or higher than °C (°F).
Take a measurement under an
ambient temperature between
°C (.°F) and °C (°F).
The temperature reading is lower than
the typical body temperature range.
The lens of the temperature probe is dirty.
Clean the lens using a cotton swab.
The thermometer probe is not
aligned to the eardrum.
Reposition the thermometer probe so
that it is aligned to the eardrum.
The thermometer is used within minutes
after being taken from a cold environment.
Wait for more than minutes after
the thermometer is moved into the
measurement environment.
The temperature reading is higher than
the typical body temperature range.
The temperature probe is damaged.
Contact the manufacturer.
E-IM-IRT-200-002-EN-V2.0.indd 15E-IM-IRT-200-002-EN-V2.0.indd 15 23/06/2021 14:17:5223/06/2021 14:17:52