manuals.online logo
Brands
  1. Home
  2. •
  3. Brands
  4. •
  5. Landscape Forms
  6. •
  7. Outdoor Light
  8. •
  9. Landscape Forms Motive User manual

Landscape Forms Motive User manual

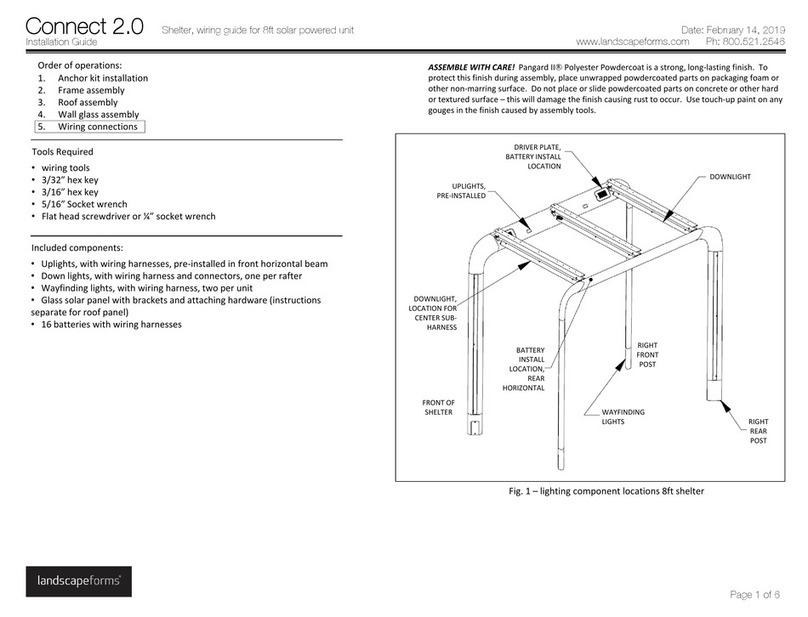
Surface Mount
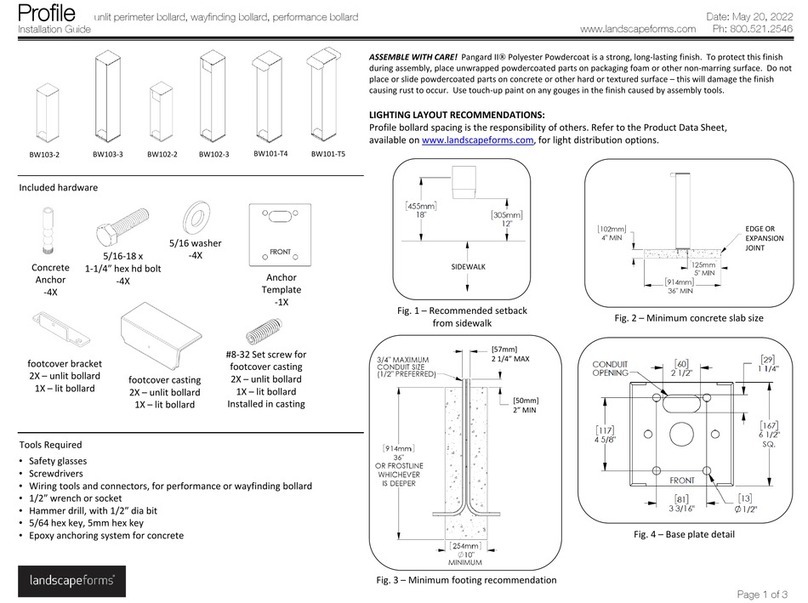
Tools Required
•Safety glasses
•Screwdrivers
•Wiring tools and connectors
•1/2” wrench or socket
•Hammer drill, with 1/2” dia bit
•2mm hex key
•Epoxy anchoring system for concrete
•Wire brush and compressed air for clearing anchor holes
•Standard octagon junction box, installed (not included)
ASSEMBLE WITH CARE! Pangard IIPolyester Powdercoat is a strong, long-lasting finish. To protect this finish
during assembly, place unwrapped powdercoated parts on packaging foam or other non-marring surface. Do not
place or slide powdercoated parts on concrete or other hard or textured surface –this will damage the finish
causing rust to occur. Use touch-up paint on any gouges in the finish caused by assembly tools.
LIGHTING LAYOUT RECOMMENDATIONS:
Path light spacing is the responsibility of others. Refer to the Motive Path Light
Product Data Sheet, available on www.landscapeforms.com, for light
distribution options.
Installation Guide
Motive Path Light
www.landscapeforms.com Ph: 800.521.2546
Date: November 19, 2019
Page 1 of 3
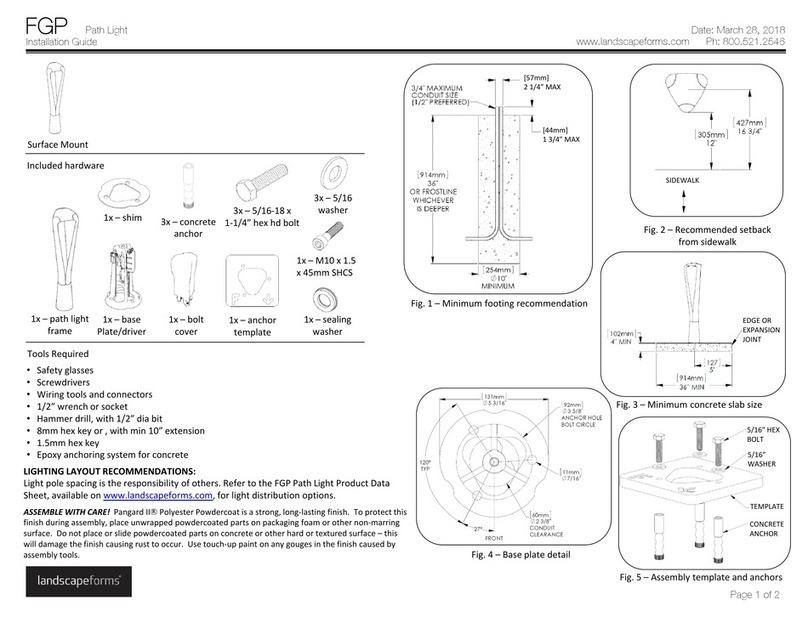
Fig. 3 –Base plate detail
[133mm]
Ø5-1/4”
BOLT CIRCLE
FRONT
OF LIGHT
Fig. 1 –Minimum footing recommendation
2-1/2”MAX
RECOMMENDED
CONDUIT CLEARANCE 1/2” –3/4”
RECOMMENDED
CONDUIT SIZE
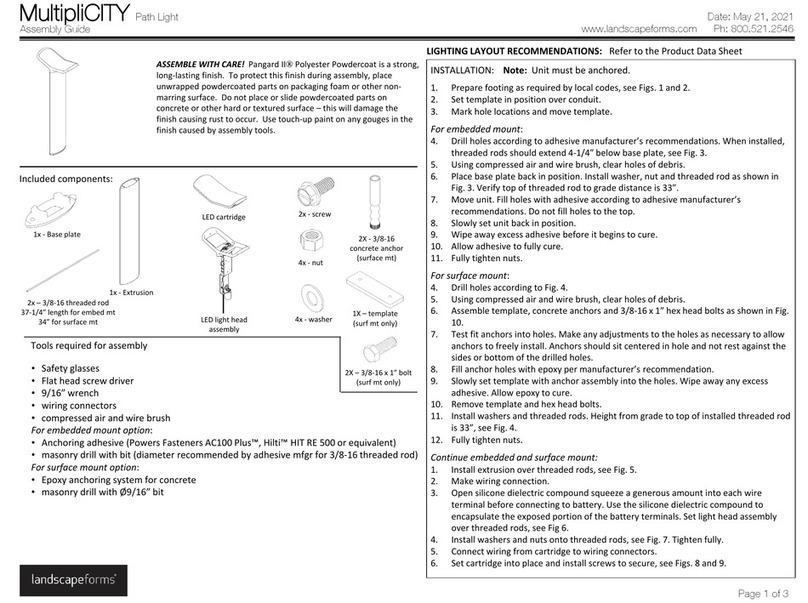
Included hardware
4x –concrete
anchor
4x –5/16
washer
1x –path light
assembly
4x –5/16-18 x
1” hex hd bolt
1x –anchor
template Fig. 2 –Recommended setback
from sidewalk
SIDEWALK
Landscape Forms is not responsible for site preparation and footings. Footing recommendations are included in these instructions.
Installation Guide www.landscapeforms.com Ph: 800.521.2546
Page 2 of 3
HEX BOLT
5/16 WASHER
CONCRETE
ANCHOR
COVER
PLATE
Fig.5 –Anchor detail Fig. 7 –Remove dome
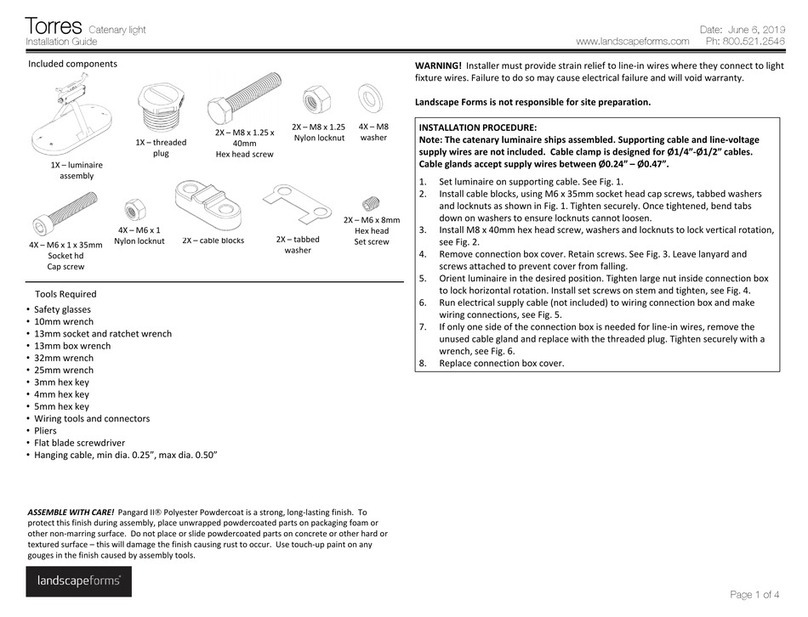
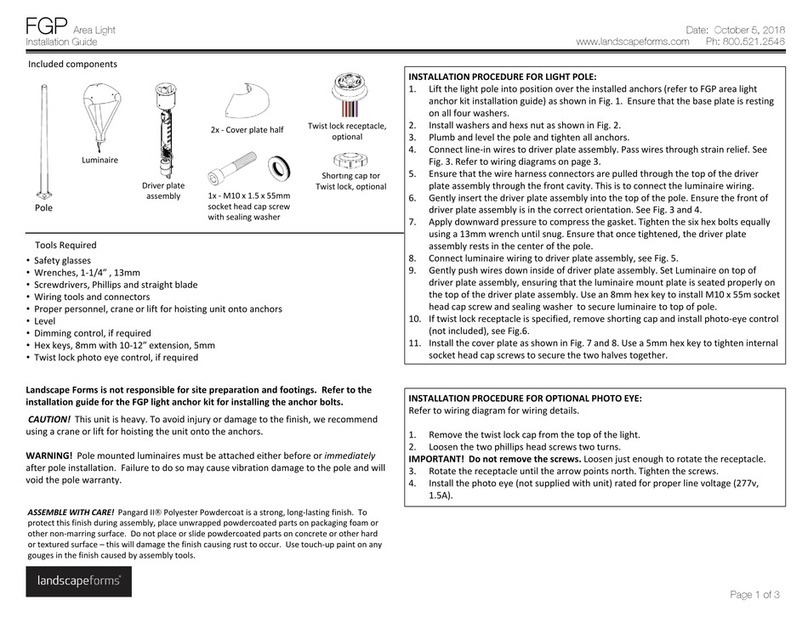
INSTALLATION PROCEDURE FOR PATH LIGHT:
1. Prepare footing as required by local codes, see Fig. 1, Fig. 2 and Fig. 5 for recommendations.
2. Set wooden anchor template in position over conduit.The ‘F’ on the template indicates the front of the unit.
3. Mark anchor hole locations and remove the template.
4. Drill holes according to anchor size and depth, see Fig. 5. Clear holes of debris.
5. Attach anchors to wooden anchor template as shown in Fig. 4.
6. Test fit template assembly with anchors into position before installing epoxy. Make any adjustments as necessary to allow
concrete anchors to freely install. Concrete anchor should sit centered in hole and not rest against the side of the drilled hole.
7. Add epoxy to anchor holes per epoxy manufacturer’s recommendations.
8. Slowly set template assembly with anchors into position. Wipe away any excess epoxy before it cures.
9. Allow epoxy to fully cure. Remove hex bolts and washers. Remove wooden template.
10. Loosen set screws in dome, see Fig. 6 and Fig. 7. Do not fully back out set screws. Set the dome aside on non-marring surface.
11. Lay fixture on its side, with the base near the conduit and anchors. Pull supply wires through two holes in top of post, see Fig. 8.
12. Make wiring connections (refer to page 3) between driver plate and line-in supply wiring, see Fig. 9 and Fig. 10.
13. Align arrow on base plate with front location of path light. Set pole over concrete anchors and attach using hex bolts and washers
as shown in Fig. 5.
14. Reattach dome to fixture. Align set screws with the holes in the cartridge and tighten evenly. Gently lift the dome while threading
in the set screws to check for proper engagement of threads.
15. Unwrap cover plate and set in position over base plate. Secure cover plate to base plate with two set screws. Set screws should be
tightened against flat sides of base plate.
Motive Path Light Date: November 19, 2019
Fig. 4 –Assembly template and anchors
HEX BOLT
5/16
WASHER
CONCRETE
ANCHOR
TEMPLATE
INDICATES
FRONT
Fig. 6 –Loosen set screws
PARTIALLY
BACK OUT
SET SCREWS
Fig. 8 –Supply wires holes
ACCESS
HOLES
FOR SUPPLY
WIRES
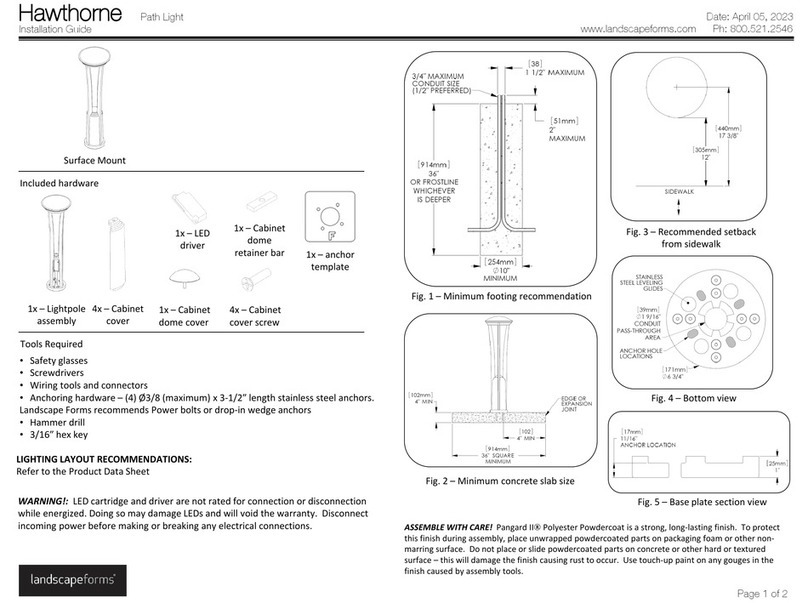
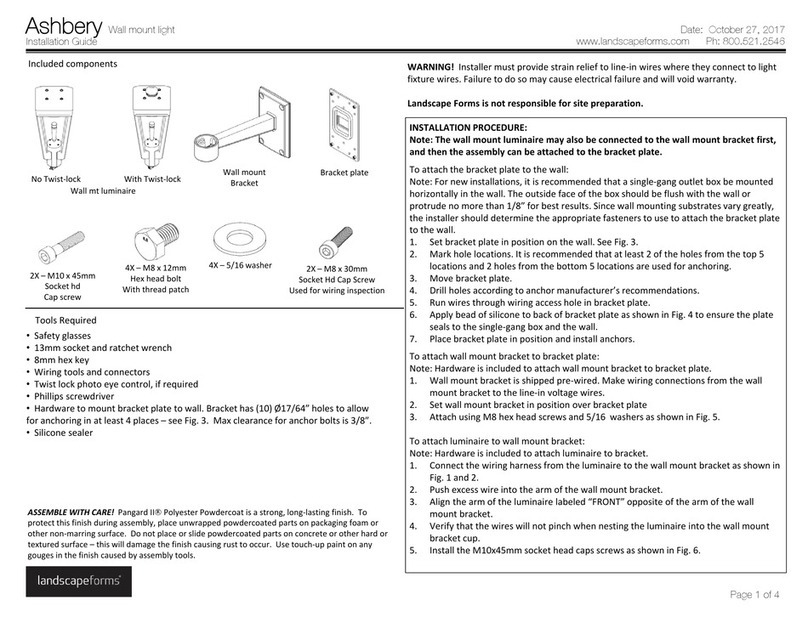
PROCEDURE FOR WIRING PATH LIGHT:
The following schematic is to be used to connect the unit to line voltage. It is the
responsibility of the installer to make sure that all connections are made in accordance
with the NEC and local building codes. Connection hardware not included.
INSTALLATION AND SERVICE SHOULD ONLY BE PERFORMED BY QUALIFIED PERSONNEL.
Installation Guide www.landscapeforms.com Ph: 800.521.2546
Page 3 of 3
Motive Path Light Date: November 19, 2019
GROUNDING
LUG
CONNECT
TO SUPPLY
WIRES
Fig. 9 –Make wiring connections
ARROW
INDICATES
FRONT FOR
ASYMMETRIC
DIST.
Fig. 10 –Path light wiring schematic

Other Landscape Forms Outdoor Light manuals
Landscape Forms Ashbery User manual

Landscape Forms

Landscape Forms Ashbery User manual

Landscape Forms Torres User manual

Landscape Forms

Landscape Forms Torres User manual

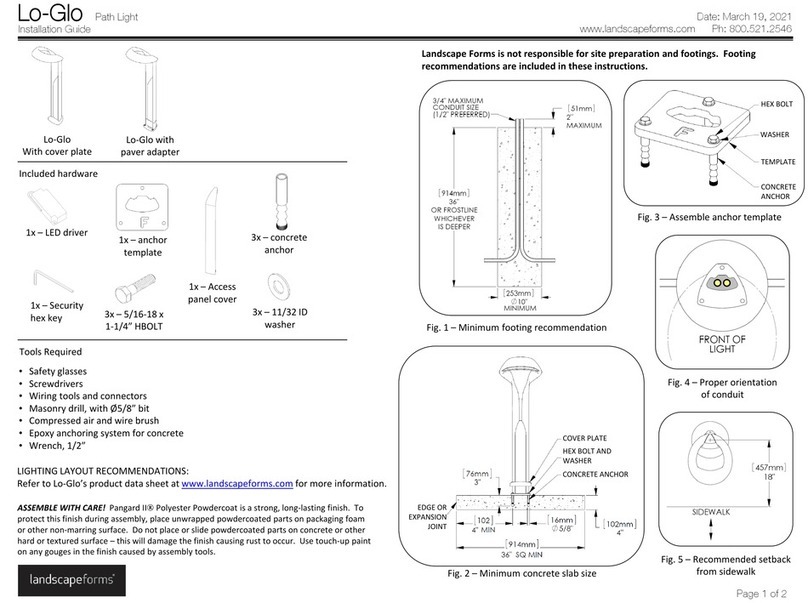
Landscape Forms Lo-Glo User manual

Landscape Forms

Landscape Forms Lo-Glo User manual

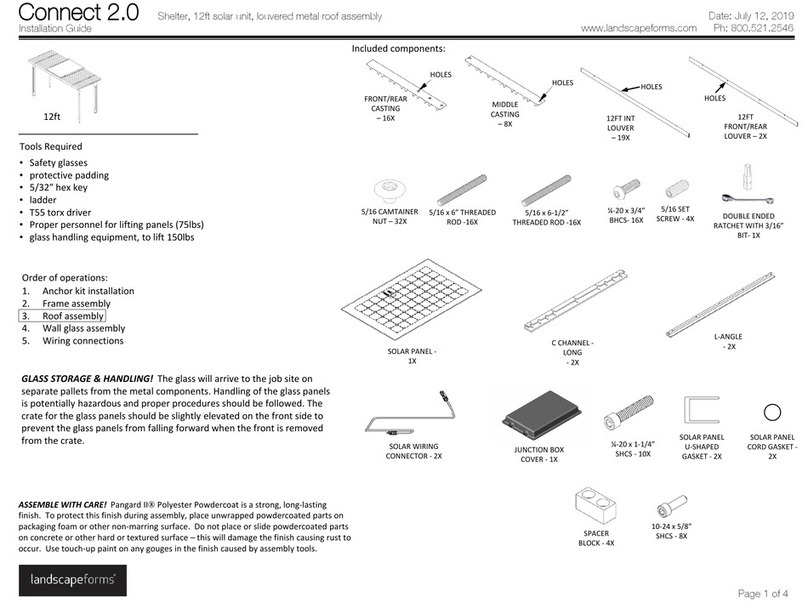
Landscape Forms Connect 2.0 User manual

Landscape Forms

Landscape Forms Connect 2.0 User manual

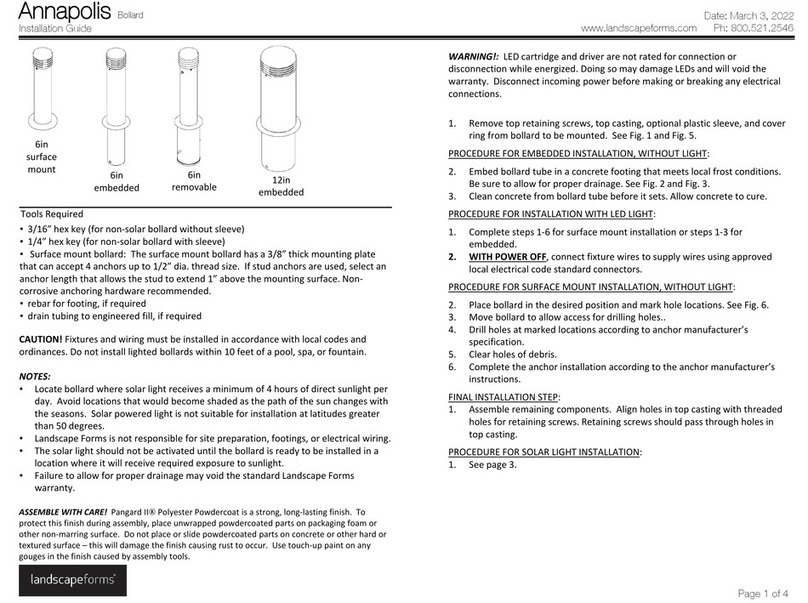
Landscape Forms Annapolis Bollard User manual

Landscape Forms

Landscape Forms Annapolis Bollard User manual

Landscape Forms Typology User manual

Landscape Forms

Landscape Forms Typology User manual

Landscape Forms Profile BW103-2 User manual

Landscape Forms

Landscape Forms Profile BW103-2 User manual

Landscape Forms FGP Path Light User manual

Landscape Forms

Landscape Forms FGP Path Light User manual

Landscape Forms Torres User manual

Landscape Forms

Landscape Forms Torres User manual

Landscape Forms Hawthorne User manual

Landscape Forms

Landscape Forms Hawthorne User manual

Landscape Forms Ashbery User manual

Landscape Forms

Landscape Forms Ashbery User manual

Landscape Forms MultipliCITY Path Light User manual

Landscape Forms

Landscape Forms MultipliCITY Path Light User manual

Landscape Forms Signal User manual

Landscape Forms

Landscape Forms Signal User manual

Landscape Forms Annapolis Bollard User manual

Landscape Forms

Landscape Forms Annapolis Bollard User manual

Landscape Forms FGP User manual

Landscape Forms

Landscape Forms FGP User manual

Landscape Forms Connect 2.0 User manual

Landscape Forms

Landscape Forms Connect 2.0 User manual

Landscape Forms Profile Area Light BW402 User manual

Landscape Forms

Landscape Forms Profile Area Light BW402 User manual

Popular Outdoor Light manuals by other brands

Kichler Lighting HELEN 37536 instructions

Kichler Lighting

Kichler Lighting HELEN 37536 instructions

Thorn OXANE L installation instructions

Thorn

Thorn OXANE L installation instructions

esotec Solar Globe Light multicolor 20 operating instructions

esotec

esotec Solar Globe Light multicolor 20 operating instructions

mitzi HL200201 ELLIS Assembly and mounting instructions

mitzi

mitzi HL200201 ELLIS Assembly and mounting instructions

HEPER TILA S AFX 3 Module Installation & maintenance instructions

HEPER

HEPER TILA S AFX 3 Module Installation & maintenance instructions

Designplan TRON 180 installation instructions

Designplan

Designplan TRON 180 installation instructions

Sealey LED37 instructions

Sealey

Sealey LED37 instructions

nordlux VEJERS Mounting instruction

nordlux

nordlux VEJERS Mounting instruction

SImx ELITE LED LHTC637 installation instructions

SImx

SImx ELITE LED LHTC637 installation instructions

GEV CAROLINE 10833 manual

GEV

GEV CAROLINE 10833 manual

WE-EF PFL540 LED Installation and maintenance instructions

WE-EF

WE-EF PFL540 LED Installation and maintenance instructions

HEPER DOGO Side LW6048.585-US Installation & maintenance instructions

HEPER

HEPER DOGO Side LW6048.585-US Installation & maintenance instructions

BEGA 84 253 Installation and technical information

BEGA

BEGA 84 253 Installation and technical information

HEPER LW8034.003-US Installation & maintenance instructions

HEPER

HEPER LW8034.003-US Installation & maintenance instructions

HEPER MINIMO Installation & maintenance instructions

HEPER

HEPER MINIMO Installation & maintenance instructions

LIGMAN BAMBOO 3 installation manual

LIGMAN

LIGMAN BAMBOO 3 installation manual

Maretti TUBE CUBE WALL 14.4998.04 quick start guide

Maretti

Maretti TUBE CUBE WALL 14.4998.04 quick start guide

Maxim Lighting Carriage House VX 40428WGOB installation instructions

Maxim Lighting

Maxim Lighting Carriage House VX 40428WGOB installation instructions

manuals.online logo
manuals.online logoBrands
  • About & Mission
  • Contact us
  • Privacy Policy
  • Terms and Conditions

Copyright 2025 Manuals.Online. All Rights Reserved.