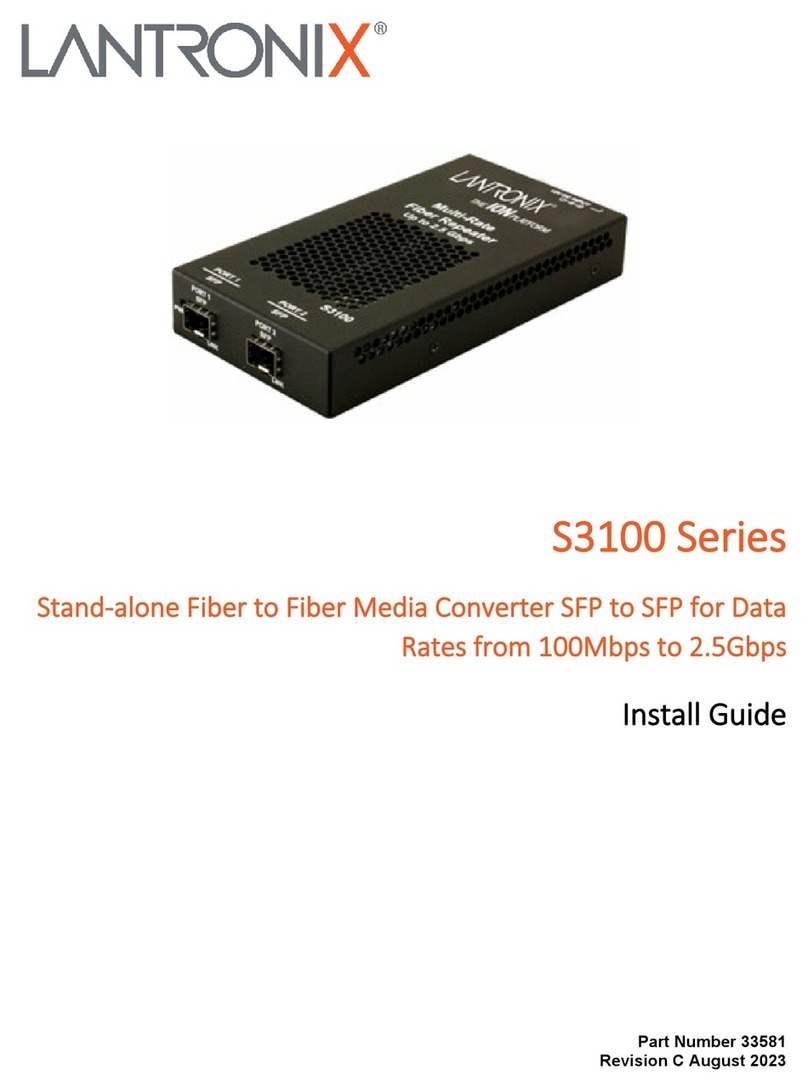
Lantronix C3100 Series User manual

C3100 Series
ION Fiber to Fiber Media Converter Module
SFP to SFP for Data Rates from 100Mbps to 2.5 Gbps
Install Guide
Part Number 33580
Revision C August 2023

Lantronix C3100 Install Guide
33580 Rev. C https://www.lantronix.com/ Page 2 of 32
Intellectual Property
© 2023 Lantronix, Inc. All rights reserved. No part of the contents of this publication may be transmitted or
reproduced in any form or by any means without the written permission of Lantronix.
Lantronix is a registered trademark of Lantronix, Inc. in the United States and other countries. All other
trademarks and trade names are the property of their respective holders.
Patented: https://www.lantronix.com/legal/patents/; additional patents pending.
Warranty
For details on the Lantronix warranty policy, go to http://www.lantronix.com/support/warranty.
Contacts
Lantronix Corporate Headquarters
48 Discovery, Suite 250
Irvine, CA 92618, USA
Toll Free: 800-526-8766
Phone: 949-453-3990
Fax: 949-453-3995
Technical Support
Online:https://www.lantronix.com/technical-support/
Sales Offices
For a current list of our domestic and international sales offices, go to the Lantronix web site at
www.lantronix.com/about/contact.
Disclaimer
All information contained herein is provided “AS IS.” Lantronix undertakes no obligation to update the
information in this publication. Lantronix does not make, and specifically disclaims, all warranties of any
kind (express, implied or otherwise) regarding title, non-infringement, fitness, quality, accuracy,
completeness, usefulness, suitability or performance of the information provided herein. Lantronix shall
have no liability whatsoever to any user for any damages, losses and causes of action (whether in
contract or in tort or otherwise) in connection with the user’s access or usage of any of the information or
content contained herein. The information and specifications contained in this document are subject to
change without notice.
Revision History
Date
Rev
Description
09/19/14
A
Initial release for v 1.2.
7/24/23
B
Clarify “CLI access” references. Initial Lantronix re-brand.
8/30/23
C
FW v 2.0.3; clarify management support and features set.

Lantronix C3100 Install Guide
33580 Rev. C https://www.lantronix.com/ Page 3 of 32
Contents
Product Description....................................................................................................................................... 4
Model Numbers ............................................................................................................................................. 4
Management Features .................................................................................................................................. 4
Manual Overview .......................................................................................................................................... 5
Related Manuals and Online Help ................................................................................................................ 5
Application Examples.................................................................................................................................... 6
Pre-Installation .............................................................................................................................................. 7
Safety........................................................................................................................................................ 7
Unpacking ................................................................................................................................................. 7
Package Contents .................................................................................................................................... 7
Installation and Setup.................................................................................................................................... 8
General ..................................................................................................................................................... 8
Install the C3100 in the ION Chassis........................................................................................................ 8
Port Locations ........................................................................................................................................... 9
Installing SFP Devices .............................................................................................................................. 9
Cabling.................................................................................................................................................... 10
Install Fiber Cable................................................................................................................................... 11
IONMM Installation ................................................................................................................................. 11
Replacing a Chassis Resident C3100 .................................................................................................... 12
Operation..................................................................................................................................................... 13
Power and Fiber Status LEDs ................................................................................................................ 13
Accessing the C3100.............................................................................................................................. 14
Product Features .................................................................................................................................... 22
Technical Specifications.............................................................................................................................. 24
Defaults................................................................................................................................................... 25
Cable Specifications ............................................................................................................................... 25
Troubleshooting .......................................................................................................................................... 26
Procedure ............................................................................................................................................... 26
Product and Packaging Labels ............................................................................................................... 27
Compliance Information .............................................................................................................................. 28
Declaration of Conformity ....................................................................................................................... 28
FCC Regulations .................................................................................................................................... 28
Canadian Regulations ............................................................................................................................ 28
European Regulations ............................................................................................................................ 29
Electrical Safety Warnings...................................................................................................................... 30
Safety Instructions for Rack Mount Installations..................................................................................... 31
Lantronix C3100 Install Guide
33580 Rev. C https://www.lantronix.com/ Page 4 of 32
Product Description
The ION C3100 is a fiber to fiber media converter module. It is protocol independent and supports data
rates from 100Mbps to 2.5Gbps through two open SFP slots. This any-rate to same-rate converter can be
used to perform reliable and cost-effective single mode to multimode fiber conversion or it can be used to
provide wavelength conversion in CWDM applications. The ION C3100 is a manageable device when
installed in a managed ION chassis.
The C3100 also supports:
•CWDM Wavelength transponder, general wavelength to specific wavelength.
•Connections between different types of fiber, such as SM-to-MM.
•Fiber repeater; MM-to-MM or SM-to-SM.
The C3100 can be used in telecom and enterprise applications where 100Mb - 2.5Gb links require fiber
extension or where 100Mb - 2.5Gb links require an interface between two fiber networks.
The C3100 performs a variety of protocol transparent services; it supports virtually any protocol from
100Mbps to 2.5Gbps. The x3100 can inter-connect with another x3100 and can support:
•100Mb (FE/FDDI)
•1.25Gb (GE)
•150Mb
•200Mb (ESCON/SBCON)
•155/622Mb (OC-3/12)
•2488Mb (OC-48)
•2.500Gb (2.5 InfiniBand/PCI-E)
•1.06/2.12 (2/1 GFC)
The x3100 is a “similar rate” to “similar rate” converter with no rate conversions. The x3100 is protocol
independent. Rate configuration is not required. LPT is always enabled.
Model Numbers
C3100-4040: 100Mbps - 2.5Gbps Fiber Repeater, ION Chassis version (dual SFP).
S3100-4040: 100Mbps - 2.5Gbps Fiber Repeater, Standalone version (dual SFP).
Lantronix SFP modules fully comply with Multi-Sourcing Agreement (MSA).
Management Features
Manageable C3100 features are available when used in an ION chassis with an ION Management
Module (IONMM) including:
•Provides port link statistics (C3100 only).
•Provides information on type of SFP installed (C3100 only).
•Supports Digital Diagnostics (DMI) on both ports.
•Link-pass-through (LPT) is always supported and can not be disabled.

Lantronix C3100 Install Guide
33580 Rev. C https://www.lantronix.com/ Page 5 of 32
Manual Overview
The purpose of this manual is to provide the information needed to install the C3100 to the point of
operation. Note that there is a separate install guide for the S3100. Transition Networks is now Lantronix.
Some products/firmware items are still in process of being re-branded and may still reflect the Transition
Networks name/logo.
Related Manuals and Online Help
A printed documentation card is shipped with each x3100 device. Context-sensitive Help screens, as well
as cursor-over-help (COH) facilities are built into the Web interface. For Lantronix Drivers, Firmware,
Manuals, Product Notifications, Warranty Policy & Procedures, etc. go to the Lantronix Technical
Resource Center. Note that this manual provides links to third party web sites for which Lantronix is not
responsible. Other ION system and related device manuals are listed below.
1. Product Documentation Postcard, 33504
2. ION C3100 Install Guide, 33580 (this manual)
3. ION S3100 Install Guide, 33581
4. ION x3100 Web User Guide, 33582
5. ION x3100 CLI Reference, 33583
6. Release Notes (firmware version specific)
Note: Information in this document is subject to change without notice. All information was deemed
accurate and complete at the time of publication. This manual documents the latest software/firmware
version. While all screen examples may not display the latest version number, all of the descriptions and
procedures reflect the latest software/firmware version, noted in the Revision History on page 2.

Lantronix C3100 Install Guide
33580 Rev. C https://www.lantronix.com/ Page 6 of 32
Application Examples
The x3100 can be used in telecom and enterprise applications where 100Mb - 2.5Gb links require fiber
extension or where 100Mb - 2.5Gb links require an interface between two fiber networks. The x3100
performs a variety of protocol transparent services; it supports virtually any protocol from 100Mbps to
2.5Gbps. The figure below shows two typical applications.
Figure 1: Application Examples

Lantronix C3100 Install Guide
33580 Rev. C https://www.lantronix.com/ Page 7 of 32
Pre-Installation
Safety
Before installing the C3100, read the “Safety Cautions and Warnings” on pages 3-4 of this manual and
ensure that the requirements noted are met. During installation and maintenance, avoid direct exposure
to laser beams. Specifically, do not look into laser ports. Ensure that each SFP port at which laser beams
are (or will be) present is occupied by an SFP that is locked in position. See the related SFP manual for
details. See "Electrical Safety Warnings" on page 30 for Electrical Safety Warnings translated into
multiple languages.
Unpacking
1. Carefully unpack all C3100 contents.
2. Verify receipt of all C3100 components; see “Package Contents” below.
3. Place the C3100 and related materials in the desired install location.
4. Save the C3100 shipping carton and packing materials for future use.
Package Contents
The C3100 is shipped with some standard and some optional components. Make sure you have received
the following standard items:
One C3100 device
One printed Product Documentation postcard
CAUTION: Wear a grounding device and observe electrostatic discharge precautions when handling the
C3100. Failure to observe this caution could result in damage or failure of the C3100.

Lantronix C3100 Install Guide
33580 Rev. C https://www.lantronix.com/ Page 8 of 32
Installation and Setup
General
This section describes how to install the C3100 and the procedures to access and initially set it up via
either a local serial interface (USB) or a remote Ethernet connection (Telnet session or Web interface).
Install the C3100 in the ION Chassis
The C3100 is a slide-in module that can be installed in a Lantronix ION chassis. For a complete list of
ION platform products, go to https://www.lantronix.com/products-class/media-converters/.
The following describes how to install the C3100 in the ION chassis.
Caution: Failure to wear a grounding device and observe electrostatic discharge precautions
when installing the C3100 could result in damage or failure of the module.
Figure 3: Chassis Installation
IMPORTANT
The C3100 slide-in cards are “hot swappable” devices, and can be installed with chassis power on.
1. Locate an empty slot in the ION System chassis. If necessary, remove a chassis slot cover from the
ION Chassis (keep the slot cover and screw).
2. Grasp the edges of the C3100 by its front panel, align the card with the upper and lower slot guides,
and carefully insert the C3100 into the slot.
3. Firmly seat the C3100 against the chassis back panel.
4. Push in and rotate clockwise the panel fastener screw to secure the C3100 to the chassis (Figure 3).
5. Note that the card’s Power LED lights. See Accessing the C3100 on page 14.

Lantronix C3100 Install Guide
33580 Rev. C https://www.lantronix.com/ Page 9 of 32
Port Locations
The C3100 has two ports. The locations of PORT1 and PORT 2 (SFP) are shown below.
Figure 4: Port Locations
Installing SFP Devices
The C3100 lets you install SFP devices of choice to make a fiber connection via two SFP ports.
Figure 5: SFP Installation

Lantronix C3100 Install Guide
33580 Rev. C https://www.lantronix.com/ Page 10 of 32
SFP Optical Transceivers
Lantronix SFP devices are small form factor, hot-pluggable transceivers which allow for a single piece of
network equipment to be connected to a multitude of interfaces, protocols, and transmission media via
the SFP port. All Lantronix SFPs devices are compliant with the Multi-Sourcing Agreement (MSA)
ensuring interoperability with all other MSA compliant networking devices. The SFP module used defines
the fiber length and type that can be used. Identical SFP modules must be used at each end of a datalink
for a given port.
To install an SFP device in the C3100:
1. Position the SFP device at either installation slot, with the label facing up.
2. Carefully slide the SFP device into the slot, aligning it with the internal installation guides.
3. Ensure that the SFP device is firmly seated against the internal mating connector.
4. Connect the fiber cable to the fiber port connector of the SFP device.
See the Lantronix SFP webpage for the latest information.
Cabling
The x3100 can be used in telecom and enterprise applications where 100Mb - 2.5Gb links require fiber
extension or where 100Mb - 2.5Gb links require an interface between two fiber networks. The x3100
performs a variety of protocol transparent services; it supports virtually any protocol from 100Mbps to
2.5Gbps
Figure 6: C3100-to-S3100 Connection
The figure above shows cabling a C3100 to an S3100. The procedure is provided below.

Lantronix C3100 Install Guide
33580 Rev. C https://www.lantronix.com/ Page 11 of 32
Install Fiber Cable
Port 1 and 2: Fiber Ports
1. Locate a fiber cable with male, two-stranded TX to RX connectors installed at both ends. See “Cable
Specifications” on page 27 for details.
2. Connect the fiber cable to the SFP fiber port (Port 2 labeled SFP) on the C3100 as described:
•Connect the male TX cable connector to the female TX connector.
•Connect the male RX cable connector to the female RX connector.
3. Connect the fiber cables to the 10GE fiber port on the other device (another media converter, hub,
S3100, etc.) as described:
•Connect the male TX cable connector to the female RX connector.
•Connect the male RX cable connector to the female TX connector.
Figure 7: Fiber Cable Connection
IONMM Installation
For IONMM Management Module installation information, see the IONMM Install Guide, 33420.
For IONMM operation see the ION Management Module (IONMM) User Guide, 33457.

Lantronix C3100 Install Guide
33580 Rev. C https://www.lantronix.com/ Page 12 of 32
Replacing a Chassis Resident C3100
The C3100 is a “hot swappable” device (it can be removed and installed while the chassis is powered on).
To replace a chassis resident C3100, do the following.
1. Backup the configuration (see the x3100 Web User Guide or CLI Reference manual).
2. Disconnect any cables attached to the C3100.
3. Loosen the panel fastener by turning it counterclockwise.
4. Pull the C3100 from the ION Chassis.
5. Carefully slide the new C3100 fully into the slot until it seats into the backplane.
6. Push in and rotate the attached panel fastener screw clockwise to secure the x3100 to the ION
chassis.
7. Connect the appropriate cables to the C3100.
8. Load the configuration into the new C3100 (see the x3100 Web User Guide or CLI Reference
manual).

Lantronix C3100 Install Guide
33580 Rev. C https://www.lantronix.com/ Page 13 of 32
Operation
Power and Fiber Status LEDs
The status LEDs (labeled PWR and PORT x LINK) are located on the front panel. Use the status LEDs to
monitor C3100 operation in the network.
LED Label Meaning Operation
PWR Power Green ON for power applied to board.
PORT 1 LINK SDF Fiber Status 1 On = Fiber Signal Detected.
Off = Fiber Signal Not Detected.
PORT 2 LINK SDF Fiber Status 2 On = Fiber Signal Detected.
Off = Fiber Signal Not Detected.
Figure 8: Power and Port Status LEDs

Lantronix C3100 Install Guide
33580 Rev. C https://www.lantronix.com/ Page 14 of 32
Accessing the C3100
The C3100 can be accessed through the IONMM installed in the ION chassis along with the C3100.
The network connection can be done via a Telnet session or a Web graphical user interface (GUI).
Access via Local Serial Interface (USB)
The IONMM can be connected to a local management station (PC) through a serial interface using a USB
connection. The IONMM and the C3100 can be controlled by entering command line interface (CLI)
commands at the local management station. To use the serial interface (USB) the following is required:
• Personal computer (PC)
• USB cable (type A male connector on one end and type B male connector on the other)
• Terminal emulator program (e.g., HyperTerminal) on the PC
• USB driver installed on the PC
• Configured COM port
IMPORTANT
In order to control the chassis slide-in module through a USB serial interface, the command line prompt
must be showing the location of the module to be managed.
Operating Systems Supported
USB drivers are available at the Lantronix website on the ION Product Page.
Windows®7 Windows 7 x64 Windows XP® 32 bit
Windows 2000 Windows 2003 32 bit Windows 8 (32- and 64-bit)
Windows Vista x64 Windows XP 64 bit
Virtual COM port (VCP) drivers make the USB device appear as an additional COM port available to the
PC. Application software can access the USB device in the same way as it would access a standard
COM port.

Lantronix C3100 Install Guide
33580 Rev. C https://www.lantronix.com/ Page 15 of 32
Installing the USB Driver (Windows XP)
IMPORTANT
The following driver installation instructions are for the Windows XP operating system only. Installing the
USB driver using another operating system is similar, but not necessarily identical to the following
procedure.
To install the USB driver on a computer running Windows XP, do the following.
1. Extract the driver (from the Lantronix website) and place it in an accessible folder on the local drive of
the PC.
2. Connect the C3100 to the USB port on the PC.
Note: for slide-in modules installed in an ION Chassis, the USB connection will be made to the ION
Management Module (IONMM) if one is installed in the ION chassis.
The Welcome to the Found New Hardware Wizard window displays.
3. Select No, not this time.
4. Click Next.

Lantronix C3100 Install Guide
33580 Rev. C https://www.lantronix.com/ Page 16 of 32
The installation options window displays.
5. Select Install from a list or specific location (Advanced).
6. Click Next.
The driver search installation options window displays.
7. Click Browse.
8. Locate and select the USB driver downloaded in step 1 above.
9. Click Next. Driver installation begins.
10. When the finished installing screen displays, click Finish. The USB driver installation is complete.
You must now configure access the C3100via an Ethernet network.

Lantronix C3100 Install Guide
33580 Rev. C https://www.lantronix.com/ Page 17 of 32
Access via an Ethernet Network
The C3100 can be managed remotely through the Ethernet network via either a Telnet session or the
Web interface. Before this is possible, you must set up the IP configuration for the C3100.
IMPORTANT
It is recommended that you initially set up the IP configuration through the serial interface (IONMM USB
connection). See “Accessing the C3100” on page 14.
Otherwise, in order to communicate with the C3100across the network for the first time, you must change
the network settings (IP address, subnet mask and default gateway address) of your PC to coincide with
the defaults of the C3100 (see “Defaults” on page 30). Make note of the original settings for the PC as
you will need to reset them after setting the IP configuration for the C3100.
Starting a Telnet Session
The C3100 can be controlled from a remote management station via a Telnet session over an Ethernet
connection. The C3100 is controlled and configured through CLI commands. Use the following procedure
to connect to and access the C3100 via a Telnet session.
1. Click Start.
2. Select All Programs > Accessories.
3. Click Command Prompt. The command prompt window displays.
4. At the command line type: telnet <xx> where:
xx = IP address of the C3100 (e.g., 192.168.1.10)
5. Press Enter. The login prompt displays.
Note: If your systems uses a security protocol (e.g., RADIUS, SSH, etc.), enter the login and password
required by that protocol.
6. Type your login (the default is ION). Note: the login is case sensitive.
7. Press Enter. The password prompt displays.
8. Type your password (the default is private). Note: the password is case sensitive.

Lantronix C3100 Install Guide
33580 Rev. C https://www.lantronix.com/ Page 18 of 32
9. Press Enter. The command line prompt displays.
10. Enter a go command to change the location for the command prompt. The go command format is:
go [c=<0-16>] [s=<0-32>] [l1ap=<1-15>] [l2ap=<1-15>] (l1p=<1-5>|l2p=<1-15>|l3p=<1-
15>|l1d|l2d|l3d)
11. Enter commands to set up the various configurations for the C3100. For web GUI configuration, see
the x3100 Web User Guide. For CLI command descriptions see the x3100 CLI Reference manual.
Note: If required by your organization’s security policies and procedures, use the CLI command set
community write=<xx> to change the default password. See the x3100 CLI Reference manual.
Terminating a Telnet Session
To terminate the Telnet session:
1. Type q(uit).
2. Press the Enter key.
Note: The C3100-4040 does not have a CLI port. References to this port concern the CLI port on the
IONMM as it shows how to manage the C3100 in the ION219 chassis via the IONMM. The C3100 and
S3100 do not support remote management when they are deployed as remote stand-alone converters.
The x3100 devices do not support remote in-band management over the fiber, even when the remote unit
is linked back to a local unit installed in a managed ION219 chassis.

Lantronix C3100 Install Guide
33580 Rev. C https://www.lantronix.com/ Page 19 of 32
Web Browsers Supported
The ION system supports the latest version of the latest version of most popular web browsers.
Starting the Web Interface
The C3100 can be controlled and configured from a remote management station via a Web graphical
user interface (GUI) over an Ethernet connection. Information is entered into fields on the various screens
of the interface. Note: fields that have a grey background can not be modified.
A Web session can be used to connect to and set up the C3100.
IMPORTANT
• Do not use the browser’s back button to navigate the screens. This causes the connection to drop.
• Do not use the browser’s back space key in grayed out fields. This causes the connection to drop.
• For DHCP operations, a DHCP server must be on the network and available.
To sign in to the C3100via the Web:
1. Open a web browser.
2. In the address (URL) block, type the IP address of the IONMM (the default address is 192.168.1.10).
3. Click Go or press Enter.
The ION System sign in screen displays.
Note: If your systems uses a security protocol (e.g., RADIUS, SSH, etc.), you must enter the login and
password required by that protocol.
4. Type the System name (the default is ION). Note: the System name is case sensitive - all upper
case.
5. Type the password (the default is private). Note: the password is case sensitive - all lower case.

Lantronix C3100 Install Guide
33580 Rev. C https://www.lantronix.com/ Page 20 of 32
6. Click Sign in or press Enter. The opening screen displays.
7. Click the plus sign [+] next to ION Stack. This unfolds "ION Stack" node in the left tree view and will
refresh device status.
8. Click the plus sign [+] next to Chassis to unfold the chassis devices.
9. Select the appropriate C3100 device. The MAIN screen displays for the selected C3100.
10. You can use the various fields to configure the device and ports. For configuration information, see
the x3100 Web User Guide manual for more information.
Table of contents
Other Lantronix Media Converter manuals

Lantronix
Lantronix M/E-TX-FX Series User manual

Lantronix
Lantronix SISTG10xx-211-LRT-B Series User manual

Lantronix
Lantronix C3210-10 Series User manual

Lantronix
Lantronix M/GE-ISW 01 Series User manual

Lantronix
Lantronix S3100 Series User manual

Lantronix
Lantronix ION C3110 User manual

Lantronix
Lantronix 6310 Series User manual

Lantronix
Lantronix 4110 Series User manual

Lantronix
Lantronix M/E-PSW-FX-02 User manual

Lantronix
Lantronix 4120 Series User manual