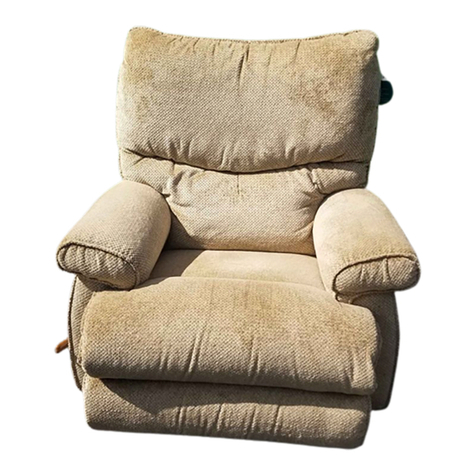
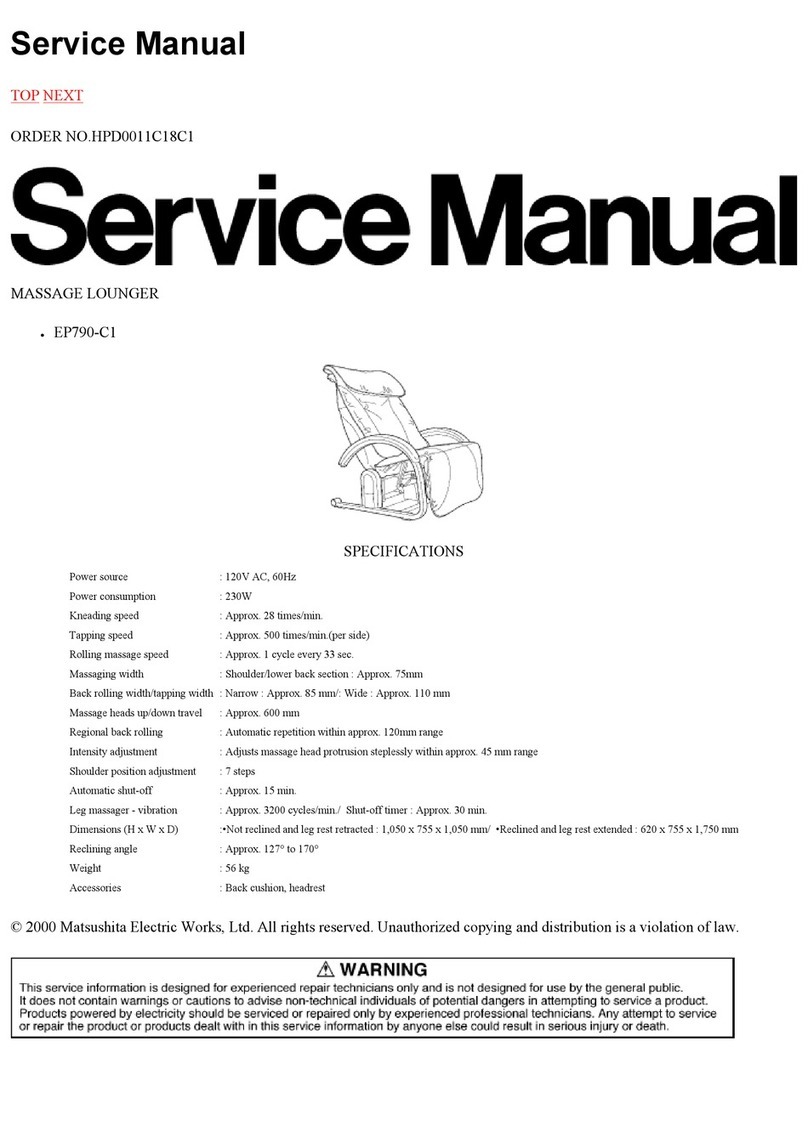
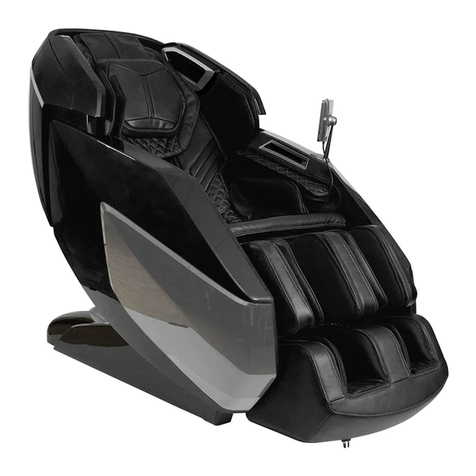
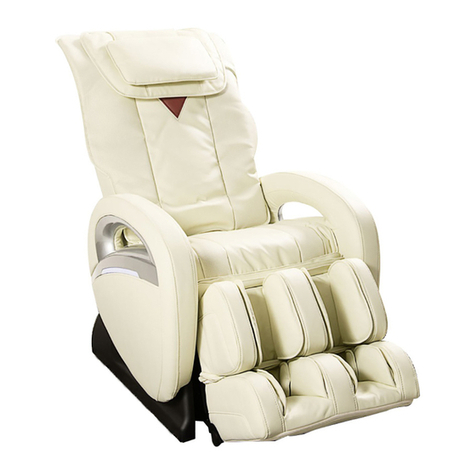
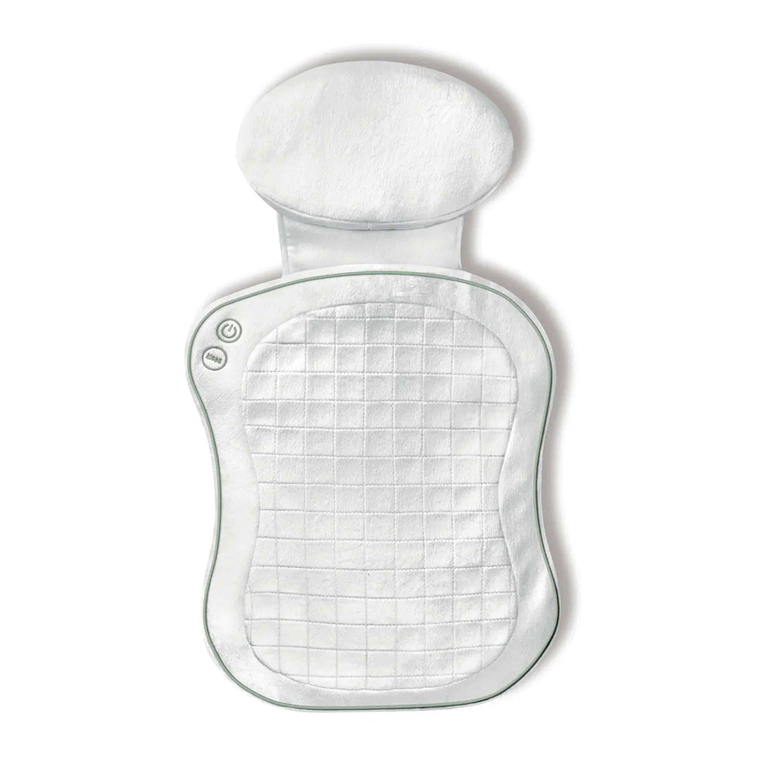
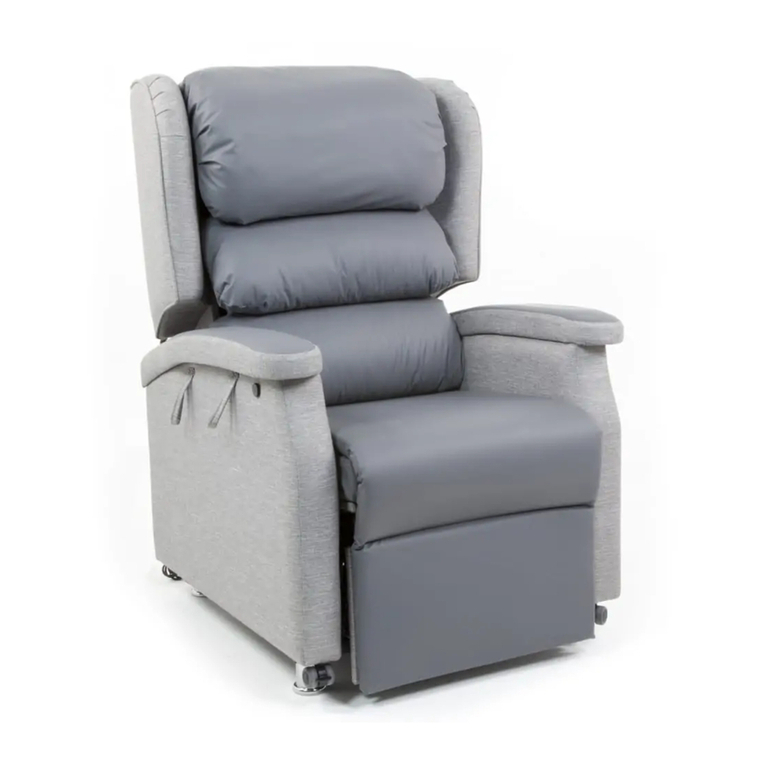
LAZBOY La-Z-Touch Series User manual

La-Z-Touch
operating instructions
__________
instrucciones de operación
__________
instructions
©2011 La-Z-Boy Incorporated 93000466-00 Rev. 11/11
La-Z-BoyIncorporated
1284 N. TelegraphRoad
Monroe, MI 4816 2- 5138
la-z-boy.com
Massage system
________
istema de masaje
________
ystème de massage

Congratulations!
You are now the proud
owner of a state-of-the-art La-Z-Touch®
Massage Recliner by La-Z-Boy®
.
You have just selected one of the
finest quality upholstered products
produced in the North American
furniture industry, backed by over
80 years of quality manufacturing
experience. La-Z-Boy®is proud of our
designs and craftsmanship and
know you will feel the same as
you enjoy your new furniture’s
comfort and style.
IMPORTANT
Read these instructions thoroughly before
using your La-Z-Touch
®
Massage Recliner.
Keep them for future reference.
3
2
Table o Contents
Important afety Instructions................................. 4-5
La-Z-Touch®2-Motor Massage & Heat Recliner
Assembly Instructions ...........................................6-9
La-Z-Touch®2-Motor Massage & Heat Recliner
Operating Instructions.........................................10-11
La-Z-Touch®6-Motor Massage & Heat Recliner
Assembly Instructions..........................................12-15
La-Z-Touch®6-Motor Massage & Heat Recliner
Operating Instructions.........................................16 -17
La-Z-Touch®10-Motor Massage & Heat Recliner
Assembly Instructions ..........................................18 -21
La-Z-Touch®10-Motor Massage & Heat Recliner
Operating Instructions........................................22-23
La-Z-Touch®Massage & Heat Recliner
Troubleshooting Instructions ...................................24
Reclining Tension Adjustment Instructions................25
3-Position Legrest Operating Instructions.................26
Furniture Placement Guide......................................27

5
4
– To reduce the risk of electric shock, serious injury or death:
• Disconnect the electrical plug from the wall outlet before cleaning, moving, servicing or when
not in use for an extended period of time.
• Do not use this product if it is wet, in water, around water or any liquid. Do not handle the plug
or remote control with wet hands.
• To prevent suffocation, keep plastic bags away from children.
• Plug directly into a wall outlet. Do not use an extension cord, adapter, or surge protector.
• eep cord out of the reach of small children, and do not use where it may be a trip hazard.
– To reduce the risk of burns, fire, electric shock,
serious injury or death:
• Always keep open flame and lit cigarettes away from upholstered furniture. Upholstered furniture
may burn rapidly with toxic gas and thick smoke.
• Closely supervise children and disabled persons using this product.
• Sit down in the unit slowly. To avoid tipover, do not throw your weight against the back
of the unit. Move the unit into or out of the reclining position slowly, making sure that no
children or pets are in close proximity.
• This product has many moving parts, serious injury can occur if not used properly. eep
hands, fingers and body parts away from the mechanism. To reduce the risk of head
entrapment and other injuries, keep children and pets away from the openings and moving
parts in and around furniture.
• Only the occupant should operate the unit. Never attempt to open the legrest by pulling on it.
• Do not stand, sit or place extra weight on the arms, back or open legrest.
• To safely exit the unit and prevent a tripping hazard bring the back upright
and close the legrest.
• Do not use this product if it is damaged. Do not use attachments or substitute parts.
• This product is intended for indoor residential use only.
• Provide a clear path for operation of the chair, back and legrest. Place tables and area
rugs at a distance to allow the legrest to fully extend without rubbing or interference.
• Check the condition of the power transformers, electrical cords, plugs and connectors
monthly. eep the power transformer and electrical cords away from heat sources.
Never operate the unit with a damaged power transformer, electrical cord, plug or
connector. Contact your La-Z-Boy
®
dealer for service.
• Do not use unit if power control is damaged or wet. Do not use unit if the hand wand
has been dropped in water or any liquid. Contact your La-Z-Boy
®
dealer for service.
• This product is not intended for use as a health care device.
• Users of medical devices should contact their health care provider before using this
product. Do not use this product if you have poor circulation, are immobile or cannot
sense heat, except as directed by your health care provider.
• Do not use this product where aerosol (spray) products are being used or
where oxygen is being administered.
• Do not operate the unit until the back is installed and locked.
• Before moving the product, disconnect the electrical plug from the wall outlet and secure the
mechanism to prevent unexpected opening or movement. Never move the product by
the mechanism, legrest, handle, reclining back or swivel base.
• This unit is equipped with a tension adjustment feature for the reclining mechanism that
is preset at the factory. The tension setting can be changed for your personal preference.
To avoid tipover and insure stability, do not operate the unit with the tension adjustment
wing nuts completely loosened (see Reclining Tension Adjustment Instructions).
• Do not attempt to disassemble or service the pump or motor; no serviceable parts are
inside. Contact your La-Z-Boy
®
dealer for service.
• Do not use La-Z-Boy
®
furniture in a recreational vehicle (or other moving vehicle) while
the vehicle is in motion. This furniture is not intended to protect its occupant in an accident.
Safely secure the furniture while the vehicle is in motion to prevent injury or damages
from any sudden stop.
• Do not allow electrical cord to be pinched between moving parts or between the frame
and the floor. Do not place cord under carpet or in location where it could become worn.
• Do not use pillow, blanket, or other cover between occupant and chair
surface when heat is engaged.
• Always unplug the power cord before connecting or disconnecting the hand wand.
• Unplug the power cord immediately if you detect strange odors or fumes coming from the chair.
• Burns may result from improper use and care of internal heating pads. To avoid risk of burns, do
not use pins, do not allow heating pad area to become wet, and do not remove upholstery cover.
• Do not attempt to disconnect the power plug by pulling the power cord. Always hold the power
plug and pull it out.
• If you give this product to someone else, include this Operating Instructions manual.
Important Sa ety Instructions:
Important: Read these instructions thoroughly be ore using.
DANGER
WARNING
Save These Instructions Save These Instructions
Important Sa ety Instructions:
Important: Read these instructions thoroughly be ore using.
NOTICE: To reduce the risk of product damage:
• Damage will occur to the mechanism if the legrest is forced closed from the 1st or 2nd
position. The legrest must be extended to the 3rd position and then closed.
• To prevent damage to the power transformer, do not plug in until instructed.
• Gently press the buttons during operation and avoid hitting the buttons with
pointed or hard objects.

7
6
NOTICE: Do not plug the transformer in until instructed.
1. The power transformer is secured to the seat swing. Carefully cut the cable tie and set
the power transformer aside.
2. Install the back.
•
Lay the back across the chair arms. Lift the back at a slight angle and align the brackets
on the back with the brackets on the body
(FIGURE 1)
.
•
Lower the back onto the body, making sure the back and body brackets are completely engaged.
-
To make sure the back is properly installed, with both sets of back and body brackets
engaged, stand behind the chair and twist the back from side to side. If one or both sides
move out of position, the brackets are not engaged
(FIGURE 2)
. Remove the back and
repeat the steps above.
-
If you are unable to install the back properly, contact your La-Z-Boy dealer for assistance.
•
Lock the brackets by using a screwdriver to push down the locking levers
(FIGURE 3)
.
3. To access the connectors, gently roll the chair forward to rest on the arms and the top of
the back. The connectors are located at the back of the chair, under the rear seat
(FIGURE 4)
.
4. Identify the three electrical connectors.
•
The two larger, round connectors are for the hand wand connection
(FIGURE 5)
.
•
The smaller, round connector is for the power transformer connection
(FIGURE 5)
.
La-Z-Touch®2-Motor Massage & Heat Recliner
Assembly Instructions:
– To reduce the risk of injury:
• Do not operate the unit until the back is installed and locked.
WARNING
(Assembly Instructions Continued)
FIGURE 4
FIGURE 3
FIGURE 5
Hand Wand
Connectors
Body
Bracket
Back Bracket Back and body brackets on this side
are not engaged. Remove the back
and reinstall.
Back
Bracket Locking
Lever
Locking
Position
La-Z-Touch®2-Motor Massage & Heat Recliner
Assembly Instructions:
FIGURE 1FIGURE 2
Left Side (Sitting) Rear Seat
Outside Back
Power Transformer
Connector

9
8
La-Z-Touch®2-Motor Massage & Heat Recliner
Assembly Instructions:
La-Z-Touch®2-Motor Massage & Heat Recliner
Assembly Instructions:
5. Align the white dots on the two larger, round hand wand connectors and push the
connectors together. Close the locking cover to secure the hand wand connection
(FIGURE 6)
.
6. Plug the power transformer connector into the smaller, round connector. Make sure the
connectors are securely fastened
(FIGURE 7)
.
– To reduce the risk of serious injury:
• Check the condition of the power transformer, electrical cords, plug and connectors
monthly. eep the power transformer and electrical cords away from heat sources.
Never operate the unit with a damaged power transformer, electrical cord, plug or
connector. Contact your La-Z-Boy®dealer for service.
• Do not allow electrical cord to be pinched between moving parts or between the frame
and the floor. Do not place cord under carpet or in location where it could become worn.
WARNING
7. Move the cord away from the base, and gently return the chair to the upright position.
Make
sure the cord is not pinched in moving parts or under the base
(FIGURE 8)
.
– To reduce the risk of serious injury:
• Provide a clear path for operation of the back and legrest. Place tables and area rugs
at a distance to allow the legrest to fully extend without rubbing or interference.
WARNING
8. Choose a location for the chair that is close to an electrical outlet. Proceed
to the Operating Instructions.
NOTICE: To prevent damage to the connectors and cords, it is important
to unfasten all connections prior to removing the back.
9. To remove the back, unplug the power transformer from the electrical outlet and
reverse the Assembly Instructions steps.
FIGURE 7
FIGURE 8
Power Transformer
Connection
Power Transformer
FIGURE 6
Hand Wand Connection
Transformer specifications depend on production date. Refer to transformer
to determine which specifications apply to your product.
La-Z-Touc 2-Motor Massage and Heat Power Transformer Specifications:
Input: 120V AC 60Hz 30W, Output: 12V AC 1500mA
or
Input: 100-240V AC 50-60Hz 1.5A, Output: 13.8V DC 2.9A

11
10
La-Z-Touch®2-Motor Massage & Heat Recliner
Operating Instructions
La-Z-Touch®2-Motor Massage & Heat Recliner
Operating Instructions
– To reduce the risk of electric shock, serious injury or death:
• Plug directly into a wall outlet. Do not use an extension cord, adapter or surge protector.
DANGER
– To reduce the risk of serious injury:
• Sit down in the unit slowly. To avoid tip over, do not throw your weight against the
back of the unit. Move the unit into or out of the reclining position slowly, making sure
that no children or pets are in close proximity.
• To safely exit the unit and prevent a tripping hazard bring the back upright and close
the legrest.
WARNING
Plug the 2-motor massage and heat power transformer directly into a wall outlet. Make
sure there is enough slack in the cord running from the chair to the outlet to allow for
rocking and reclining. Never stretch or strain a cord.
The massage and heat systems have an automatic timer that will shut off the massage and
heat functions after approximately 30 minutes of operation. The systems will remain off for
7½-minutes. If you select a massage or heat function before the cool down period is over,
either the PWR button or the HI or LO heat button will flash for 5 seconds, depending on
your selection. After the 7½-minute cool down period, you will be able to operate the
massage and heat systems for another 30-minute cycle.
•
Press the PWR button or either zone button (1 or 2) to start the massage.
-
Press the PWR button for a 15-minute massage, the PWR button light will change to
green when the 15-minute massage is activated.
-
Press and hold down the PWR button for three seconds for a 30-minute massage,
the PWR button light will change to orange when the 30-minute massage is activated.
•
Press the LO or HI heat button to start the heat. The LO heat button light will change
to orange when low heat is activated, and the HI heat button light will change to red
when high heat is activated. The heat function will operate for 30-minutes, and can
be used without operating the massage.
•
When you are finished, make sure to push the PWR button and the LO or HI heat button
(if activated) to turn the systems off.
•
The chair will return to the off setting when power is restored, after a power outage
or interruption.
We recommend that you unplug the power transformer if you will be away from your residence
for an extended period of time.
P
P
O
O
W
W
E
E
R
R
Activates the massage
system. Press once for
a 15-minute massage,
or press and hold down
for three seconds for a
30-minute massage.
L
L
O
O
H
H
E
E
A
A
T
T
Activates the low
heat feature. Use
independently or
with the massage.
Z
Z
O
O
N
N
E
E
S
S
Activates either zone,
or both of the zones.
S
S
P
P
E
E
E
E
D
D
Controls pulsing frequency
of massage in PULSE mode
and controls velocity as it
cycles through in WA E mode.
Press (+) to increase and (-)
to decrease.
H
H
I
I
H
H
E
E
A
A
T
T
Activates the high
heat feature. Use
independently or
with the massage.
M
M
O
O
D
D
E
E
S
S
SELECT - Choose
either or both zones for
massage.
PULSE - Massage turns
on and off to simulate a
pulsing action.
WA E - Massage
moves side to side in
a wave-like motion.
I
I
N
N
T
T
E
E
N
N
S
S
I
I
T
T
Y
Y
Will increase (+) or
decrease (-) intensity
during all modes.
– To reduce the risk of serious injury:
• Do not use unit if power control is damaged or wet. Do not use unit if the hand wand has
been dropped in water or any liquid. Contact your La-Z-Boy®dealer for service.
WARNING

13
12
La-Z-Touch®6-Motor Massage & Heat Recliner
Assembly Instructions
La-Z-Touch®6-Motor Massage & Heat Recliner
Assembly Instructions
NOTICE: Do not plug in until instructed.
1. The power transformer is secured to the seat swing. Carefully cut the cable tie and
set the power transformer aside.
2. Install the back.
•
Lay the back across the chair arms. Lift the back at a slight angle and align the brackets
on the back with the brackets on the body
(FIGURE 1)
.
•
Lower the back onto the body, making sure the back and body brackets
are completely engaged.
-
To make sure the back is properly installed, with both sets of back and body brackets
engaged, stand behind the chair and twist the back from side to side. If one or both sides
move out of position, the brackets are not engaged
(FIGURE 2)
. Remove the back and
repeat the steps above.
-
If you are unable to install the back properly, contact your La-Z-Boy dealer for assistance.
•
Lock the brackets by using a screwdriver to push down the locking levers
(FIGURE 3)
.
3. To access the connectors, gently roll the chair forward to rest on the arms and the top of
the back. The connectors are located at the back of the chair, under the rear seat
(FIGURE 4)
.
4. Identify the five electrical connectors.
•
The two larger, round connectors are for the hand wand connection
(FIGURE 5)
.
•
The smaller, round connector is for the power transformer connection
(FIGURE 5)
.
•
The two yellow, rectangular connectors are for the massage motor connection
(FIGURE 6)
.
– To reduce the risk of injury:
• Do not operate the unit until the back is installed and locked.
WARNING
(Assembly Instructions Continued)
FIGURE 4
FIGURE 3
FIGURE 5
Hand Wand
Connectors
Body
Bracket
Back Bracket Back and body brackets on this side
are not engaged. Remove the back
and reinstall.
Back
Bracket Locking
Lever
Locking
Position
FIGURE 1FIGURE 2
Left Side (Sitting) Rear Seat
Outside Back
Power Transformer
Connector
FIGURE 6
Massage Motor
Connectors

15
14
La-Z-Touch®6-Motor Massage & Heat Recliner
Assembly Instructions
La-Z-Touch®6-Motor Massage & Heat Recliner
Assembly Instructions
5. Align the white dots on the two larger, round hand wand connectors and push the
connectors together. Close the locking cover to secure the hand wand connection
(FIGURE 7)
.
6. Push the two yellow, rectangular connectors together until they lock
(FIGURE 8)
.
7. Plug the power transformer connector into the smaller, round connector. Make sure the
connectors are securely fastened
(FIGURE 9)
.
– To reduce the risk of serious injury:
• Check the condition of the power transformer, electrical cords, plug and connectors
monthly. eep the power transformer and electrical cords away from heat sources.
Never operate the unit with a damaged power transformer, electrical cord, plug or
connector. Contact your La-Z-Boy®dealer for service.
• Do not allow electrical cord to be pinched between moving parts or between the frame
and the floor. Do not place cord under carpet or in location where it could become worn.
WARNING
8. Move the cord away from the base, and gently return the chair to the upright position.
Make
sure the cord is not pinched in moving parts or under the base
(FIGURE 10)
.
– To reduce the risk of serious injury:
• Provide a clear path for operation of the back and legrest. Place tables and area rugs
at a distance to allow the legrest to fully extend without rubbing or interference.
WARNING
9. Choose a location for the chair that is close to an electrical outlet. Proceed
to the Operating Instructions.
NOTICE: To prevent damage to the connectors and cords, it is important
to unfasten all connections prior to removing the back.
10. To remove the back, unplug the power transformer from the electrical outlet and
reverse the Assembly Instructions steps.
FIGURE 8
FIGURE 9
Massage Motor
Connection
Power Transformer
Connection
FIGURE 7
Hand Wand Connection
FIGURE 10
Power Transformer
Transformer specifications depend on production date. Refer to transformer
to determine which specifications apply to your product.
La-Z-Touc 6-Motor Massage and Heat Power Transformer Specifications:
Input: 120V AC 60Hz 36W, Output: 12V AC 2000mA
or
Input: 100-240V AC 50-60Hz 1.5A, Output: 13.8V DC 2.9A

17
16
La-Z-Touch®6-Motor Massage & Heat Recliner
Operating Instructions
La-Z-Touch®6-Motor Massage & Heat Recliner
Operating Instructions
– To reduce the risk of electric shock, serious injury or death:
• Plug directly into a wall outlet. Do not use an extension cord, adapter or surge protector.
DANGER
– To reduce the risk of serious injury:
• Sit down in the unit slowly. To avoid tip over, do not throw your weight against the
back of the unit. Move the unit into or out of the reclining position slowly, making sure
that no children or pets are in close proximity.
• To safely exit the unit and prevent a tripping hazard bring the back upright and close
the legrest.
WARNING
Plug the 6-motor massage and heat power transformer directly into a wall outlet. Make
sure there is enough slack in the cord running from the chair to the outlet to allow for
rocking and reclining. Never stretch or strain a cord.
The massage and heat systems have an automatic timer that will shut off the massage and
heat functions after approximately 30 minutes of operation. The systems will remain off for
7½-minutes. If you select a massage or heat function before the cool down period is over,
either the PWR button or the HI or LO heat button will flash for 5 seconds, depending on
your selection. After the 7½-minute cool down period, you will be able to operate the
massage and heat systems for another 30-minute cycle.
•
Press the PWR button or any zone button (1, 2 or 3) to start the massage.
-
Press the PWR button for a 15-minute massage, the PWR button light will change to
green when the 15-minute massage is activated.
-
Press and hold down the PWR button for three seconds for a 30-minute massage,
the PWR button light will change to orange when the 30-minute massage is activated.
•
Press the LO or HI heat button to start the heat. The LO heat button light will change
to orange when low heat is activated, and the HI heat button light will change to red
when high heat is activated. The heat function will operate for 30-minutes, and can
be used without operating the massage.
•
When you are finished, make sure to push the PWR button and the LO or HI heat button
(if activated) to turn the systems off.
•
The chair will return to the off setting when power is restored, after a power outage
or interruption.
We recommend that you unplug the power transformer if you will be away from your residence
for an extended period of time.
H
H
I
I
H
H
E
E
A
A
T
T
Activates the high
heat feature. Use
independently or
with the massage.
M
M
O
O
D
D
E
E
S
S
SELECT - Choose any or
all zones for massage.
WA E - Massage moves up
and down in a wavelike motion.
PULSE - Massage turns on and
off to simulate a pulsing action.
I
I
N
N
T
T
E
E
N
N
S
S
I
I
T
T
Y
Y
Will increase (+) or
decrease (-) intensity
during all modes.
– To reduce the risk of serious injury:
• Do not use unit if power control is damaged or wet. Do not use unit if the hand wand has
been dropped in water or any liquid. Contact your La-Z-Boy®dealer for service.
WARNING
P
P
O
O
W
W
E
E
R
R
Activates the massage system.
Press once for a 15-minute
massage, or press and hold
down for three seconds for
a 30-minute massage.
L
L
O
O
H
H
E
E
A
A
T
T
Activates the low
heat feature. Use
independently or
with the massage.
Z
Z
O
O
N
N
E
E
S
S
Activates any or all zones.
LED indicates which zone(s)
has been selected.
1 Upper Back
2 Lower Back
3 Upper Thigh
S
S
P
P
E
E
E
E
D
D
Controls pulsing frequency of
massage in PULSE mode and
controls velocity as it cycles
through in WA E mode. Press (+)
to increase and (-) to decrease.

19
18
La-Z-Touch®10-Motor Massage & Heat Recliner
Assembly Instructions
La-Z-Touch®10-Motor Massage & Heat Recliner
Assembly Instructions
NOTICE: Do not plug in until instructed.
1. The power transformer is secured to the seat swing. Carefully cut the cable tie and
set the power transformer aside.
2. Install the back.
•
Lay the back across the chair arms. Lift the back at a slight angle and align the brackets
on the back with the brackets on the body
(FIGURE 1)
.
•
Lower the back onto the body, making sure the back and body brackets
are completely engaged.
-
To make sure the back is properly installed, with both sets of back and body brackets
engaged, stand behind the chair and twist the back from side to side. If one or both sides
move out of position, the brackets are not engaged
(FIGURE 2)
. Remove the back and
repeat the steps above.
-
If you are unable to install the back properly, contact your La-Z-Boy dealer for assistance.
•
Lock the brackets by using a screwdriver to push down the locking levers
(FIGURE 3)
.
3. To access the connectors, gently roll the chair forward to rest on the arms and the top of
the back. The connectors are located at the back of the chair, under the rear seat
(FIGURE 4)
.
4. Identify the five electrical connectors.
•
The two larger, round connectors are for the hand wand connection
(FIGURE 5)
.
•
The smaller, round connector is for the power transformer connection
(FIGURE 5)
.
•
The two yellow, rectangular connectors are for the massage motor connection
(FIGURE 6)
.
– To reduce the risk of injury:
• Do not operate the unit until the back is installed and locked.
WARNING
(Assembly Instructions Continued)
FIGURE 4
FIGURE 3
FIGURE 5
Hand Wand
Connectors
Body
Bracket
Back Bracket Back and body brackets on this side
are not engaged. Remove the back
and reinstall.
Back
Bracket Locking
Lever
Locking
Position
FIGURE 1FIGURE 2
Left Side (Sitting) Rear Seat
Outside Back
Power Transformer
Connector
FIGURE 6
Massage Motor
Connectors

21
20
La-Z-Touch®10-Motor Massage & Heat Recliner
Assembly Instructions
La-Z-Touch®10-Motor Massage & Heat Recliner
Assembly Instructions
5. Align the white dots on the two larger, round hand wand connectors and push the
connectors together. Close the locking cover to secure the hand wand connection
(FIGURE 7)
.
6. Push the two yellow, rectangular connectors together until they lock
(FIGURE 8)
.
7. Plug the power transformer connector into the smaller, round connector. Make sure the
connectors are securely fastened
(FIGURE 9)
.
– To reduce the risk of serious injury:
• Check the condition of the power transformer, electrical cords, plug and connectors
monthly. eep the power transformer and electrical cords away from heat sources.
Never operate the unit with a damaged power transformer, electrical cord, plug or
connector. Contact your La-Z-Boy®dealer for service.
• Do not allow electrical cord to be pinched between moving parts or between the frame
and the floor. Do not place cord under carpet or in location where it could become worn.
WARNING
8. Move the cord away from the base, and gently return the chair to the upright position.
Make
sure the cord is not pinched in moving parts or under the base
(FIGURE 10)
.
– To reduce the risk of serious injury:
• Provide a clear path for operation of the back and legrest. Place tables and area rugs
at a distance to allow the legrest to fully extend without rubbing or interference.
WARNING
9. Choose a location for the chair that is close to an electrical outlet. Proceed
to the Operating Instructions.
NOTICE: To prevent damage to the connectors and cords, it is important
to unfasten all connections prior to removing the back.
10. To remove the back, unplug the power transformer from the electrical outlet and
reverse the Assembly Instructions steps.
FIGURE 8
FIGURE 9
Massage Motor
Connection
Power Transformer
Connection
FIGURE 7
Hand Wand Connection
FIGURE 10
Power Transformer
Transformer specifications depend on production date. Refer to transformer
to determine which specifications apply to your product.
La-Z-Touc 10-Motor Massage and Heat Power Transformer Specifications:
Input: 120V AC 60Hz 36W, Output: 12V AC 2000mA
or
Input: 100-240V AC 50-60Hz 1.5A, Output: 13.8V DC 2.9A

23
22
La-Z-Touch®10-Motor Massage & Heat Recliner
Operating Instructions
La-Z-Touch®10-Motor Massage & Heat Recliner
Operating Instructions
– To reduce the risk of electric shock, serious injury or death:
• Plug directly into a wall outlet. Do not use an extension cord, adapter or surge protector.
DANGER
– To reduce the risk of serious injury:
• Sit down in the unit slowly. To avoid tip over, do not throw your weight against the
back of the unit. Move the unit into or out of the reclining position slowly, making sure
that no children or pets are in close proximity.
• To safely exit the unit and prevent a tripping hazard bring the back upright and close
the legrest.
WARNING
Plug the 10-motor massage and heat power transformer directly into a wall outlet. Make
sure there is enough slack in the cord running from the chair to the outlet to allow for
rocking and reclining. Never stretch or strain a cord.
The massage and heat systems have an automatic timer that will shut off the massage and
heat functions after approximately 30 minutes of operation. The systems will remain off for
7½-minutes. If you select a massage or heat function before the cool down period is over,
either the PWR button or the HI or LO heat button will flash for 5 seconds, depending on
your selection. After the 7½-minute cool down period, you will be able to operate the
massage and heat systems for another 30-minute cycle.
•
Press the PWR button or any zone button (1, 2, 3, 4 or 5) to start the massage.
-
Press the PWR button for a 15-minute massage, the PWR button light will change to
green when the 15-minute massage is activated.
-
Press and hold down the PWR button for three seconds for a 30-minute massage,
the PWR button light will change to orange when the 30-minute massage is activated.
•
Press the LO or HI heat button to start the heat. The LO heat button light will change
to orange when low heat is activated, and the HI heat button light will change to red
when high heat is activated. The heat function will operate for 30-minutes, and can
be used without operating the massage.
•
When you are finished, make sure to push the PWR button and the LO or HI heat button
(if activated) to turn the systems off.
•
The chair will return to the off setting when power is restored, after a power outage
or interruption.
We recommend that you unplug the power transformer if you will be away from your residence
for an extended period of time.
H
H
I
I
H
H
E
E
A
A
T
T
Activates the high
heat feature. Use
independently or
with the massage.
M
M
O
O
D
D
E
E
S
S
SELECT - Choose any or
all zones for massage.
WA E - Massage moves up
and down in a wavelike motion.
PULSE - Massage turns on and
off to simulate a pulsing action.
TAP - Massage rapidly turns on
and off at high intensity to
provide a tapping action.
SWELL - Massage cycles
from minimum to maximum
intensity to provide a
swelling action.
I
I
N
N
T
T
E
E
N
N
S
S
I
I
T
T
Y
Y
Will increase (+) or
decrease (-) intensity
during all modes.
– To reduce the risk of serious injury:
• Do not use unit if power control is damaged or wet. Do not use unit if the hand wand has
been dropped in water or any liquid. Contact your La-Z-Boy®dealer for service.
WARNING
P
P
O
O
W
W
E
E
R
R
Activates the massage system.
Press once for a 15-minute
massage, or press and hold
down for three seconds for
a 30-minute massage.
L
L
O
O
H
H
E
E
A
A
T
T
Activates the low
heat feature. Use
independently or
with the massage.
Z
Z
O
O
N
N
E
E
S
S
Activates any or all zones.
LED indicates which zone(s)
has been selected.
1 Upper Back
2 Lower Back
3 Hip Region
4 Upper Thigh
5 Lower Thigh
S
S
P
P
E
E
E
E
D
D
Controls pulsing frequency of
massage in PULSE mode and
tapping frequency in TAP
mode; and controls velocity as
it cycles through in WA E mode
and velocity of swell pattern in
SWELL mode. Press (+) to
increase and (-) to decrease.

25
24
La-Z-Touch®Massage & Heat Recliner
Troubleshooting Instructions
Reclining Tension Adjustment Instructions
Tension Spring
Wing Nut
– To reduce the risk of serious injury:
• Do not attempt to disassemble or service the pump or motor; no serviceable parts are
inside. Contact your La-Z-Boy®dealer for service.
• Check the condition of the power transformer, electrical cords, plug and connectors
monthly. eep the power transformer and electrical cords away from heat sources.
Never operate the unit with a damaged power transformer, electrical cord, plug or
connector. Contact your La-Z-Boy®dealer for service.
WARNING
Troubles ooting for Massage and Heat Function
There are no user maintenance or repair requirements. If the massage or heat function
does not work:
1. Make sure the Automatic Timer Operation has not been activated. Press the PWR (power)
button to restart the massage. Press the HI or LO heat button to restart the heat.
2. Make sure the power transformer is plugged into an electrical outlet.
3. Make sure the electrical outlet is working. For example, make sure there are no blown
fuses or tripped circuit breakers.
4. Make sure all the connectors are secured; refer to the Assembly Instructions.
5. Make sure that the electrical cords are not crimped or pinched. Make sure the electrical
cord or plug is not damaged.
If the massage system still does not operate properly, contact your dealer for instructions
on returning the unit for examination and repair. Except for replacement of the power
transformer, never attempt to make any repairs or adjustments yourself.
Power Transformer Replacement
If the Power Transformer must be replaced:
1. Unplug the Power Transformer from the electrical outlet.
2. Locate the Power Transformer connection; refer to the Assembly Instructions. Gently pull
the connectors apart to disengage.
3. Push the replacement Power Transformer connector into the mating connector; refer to
the Assembly Instructions. Make sure the connectors are secured with no gaps
between them.
NOTICE – To reduce the risk of product damage:
• Make sure the legrest is closed before tilting forward and adjusting the tension.
• Do not completely tighten the wing nuts. The tension springs should not be completely
compressed after making adjustments. If this occurs, the wing nuts must be loosened
counterclockwise a minimum of ½-turn to avoid damage to the spring tension assembly.
• Do not completely loosen the wing nuts. The spring should not slide on the bolt after making
adjustments. If the spring slides on the bolt, tighten the wing nut clockwise a minimum
of ½-turn after the spring no longer slides on the bolt.
• Adjust both wing nuts equally.
– To reduce the risk of injury:
• This unit is equipped with a tension adjustment feature for the reclining mechanism
that is preset at the factory. The tension setting can be changed for your personal
preference. To avoid tip over and insure stability, do not operate the unit with the
tension adjustment wing nuts completely loosened.
WARNING
Reclining Tension Adjustment Instructions:
You can adjust the tension of the reclining mechanism to respond to your individual size.
1. Unplug the power transformer from the electrical outlet. Gently roll the reclining chair
forward to rest on its arms and top of the back. Locate the wing nuts, one on each side,
toward the back of the recliner under the reclining seat (only one side shown below).
2. Adjust the tension by turning the wing nuts in ¼-turn increments until the desired
setting is reached.
•
A taller or heavier person may choose to increase the reclining tension by tightening
the wing nuts clockwise.
•
A smaller person may choose to decrease the reclining tension by loosening the wing
nuts counterclockwise.
3. Return the reclining chair to the upright position and test the new setting. Make additional
adjustments if needed, repeating these steps. Plug the power transformer directly into a
wall outlet.

27
26
3-Position Legrest Operating Instructions Furniture Placement Guide
NOTICE – To reduce the risk of product damage:
• Damage will occur to the mechanism if the legrest is forced closed from the 1st or
2nd position. The legrest must be extended to the 3rd position and then closed.
– To reduce the risk of serious injury:
• Provide a clear path for operation of the back and legrest. Place tables and area rugs
at a distance to allow the legrest to fully extend without rubbing or interference.
• To safely exit the unit and prevent a tripping hazard, bring the back upright and
close the legrest.
WARNING
To Operate t e Legrest
1. Your reclining chair is equipped with a three-position locking legrest for seating comfort.
Simply rotate the handle to operate the legrest
(FIGURE 1)
. You may stop in any one of
three ideal positions. The 1st position is slightly inclined for relaxed reading
(FIGURE 2)
.
The 2nd position is slightly more inclined for comfortable television viewing
(FIGURE 3)
.
The 3rd position is fully extended for complete relaxation
(FIGURE 4)
. To lower the legrest,
rotate the handle counterclockwise to the fully extended position, then rotate clockwise to
the fully closed position.
2. The chair back can be reclined with the legrest closed or extended. To recline, apply
pressure to the back. Sit upright to return the back to an upright position.
3. Bring the back upright and close the legrest before getting out of the chair.
To Operate t e Legrest
The chair body can be tilted back when the legrest is in use. Shifting your body weight
rearward will cause the chair body to tilt backward offering a number of different positions.
FIGURE 1
FIGURE 3
FIGURE 2
FIGURE 4
CLOSED
POSITION
1ST POSITION
2ND POSITION 3RD POSITION
– To reduce the risk of serious injury:
• Provide a clear path for operation of the back and legrest. Place tables and area rugs
at a distance to allow the legrest to fully extend without rubbing or interference.
WARNING
Furniture Placement Guide
To place your reclining chair the proper distance from the wall, fully recline the chair and
leave a minimum of 2" of space between the top of the back and the wall
(FIGURE 1)
.
Make sure tables and other items are at a safe distance to avoid interference with the
operation of the legrest. Improper placement of a table could cause the occupant to become
trapped in the seat, as demonstrated in
(FIGURE 2)
. There must be enough clearance for the
legrest to be fully extended before closing; see 3-Position Legrest Operating Instructions.
FIGURE 1
FIGURE 2
2” Min.

29
28
¡Felicitaciones!
Usted es ahora el orgulloso
propietario de un moderno sillón reclinable
con masaje La-Z-Boy®
.
Acaba de seleccionar uno de los
productos tapizados de más alta calidad
originados en la industria mobiliaria de
Estados Unidos, con el respaldo de más de
80 años de excelencia en fabricación.
En La-Z-Boy®estamos orgullosos de
nuestros diseños y nuestro trabajo,
y sabemos que usted sentirá lo mismo
cuando comience a disfrutar del confort
y el estilo de su nuevo mobiliario.
IMPORTANTE
Lea estas instrucciones cuidadosamente antes
de usar su sillón reclinable con masaje La-Z-Touch
®
Guárdelos para futura referencia.
Tabla de contenidos
Instrucciones importantes de seguridad ..............30-31
Instrucciones para armar el sillón de masaje, térmico
reclinable con dos motores La-Z-Touch®............. 32-35
Instrucciones de operación del sillón de masaje,
térmico reclinable con dos motores La-Z-Touch®
...36 - 37
Instrucciones para armar el sillón de masaje, térmico
reclinable con seis motores La-Z-Touch®.............38- 41
Instrucciones de operación del sillón de masaje,
térmico reclinable con seis motores La-Z-Touch®
...42- 43
Instrucciones para armar el sillón de masaje, térmico
reclinable con diez motores La-Z-Touch®
..............44- 47
Instrucciones de operación del sillón de masaje,
térmico reclinable con diez motores La-Z-Touch®...48-49
Instrucciones para localizar fallas del sillón de masaje,
térmico reclinable La-Z-Touch®................................50
Instrucciones para ajustar la tensión de reclinado.....51
Instrucciones de operación del descansapiernas
de tres posiciones................................................. 52
Guía para colocación de muebles ...........................53

31
30
– Para reducir el riesgo de choque eléctrico, lesiones
graves o la muerte:
• Desconecte el enchufe eléctrico del tomacorriente de pared antes de limpiar, mover, dar servicio
o cuando no estará en uso durante un período prolongado.
• No use este producto si está mojado, en agua, cerca de agua o de cualquier líquido. No toque
el enchufe o el control remoto si sus manos están mojadas.
• Mantenga bolsas de plástico alejadas de los niños para que éstos no se asfixien.
• Enchufe directamente en un tomacorriente en la pared. no utilice un cordón de extensión,
un adaptador o protector de sobretensión.
• Mantenga el cordón alejado de los niños pequeños y no lo use si puede implicar riesgo de tropiezos.
– Para reducir el riesgo de quemadura, incendio,
choque eléctrico, lesiones graves o la muerte:
• Mantenga siempre las llamas y cigarrillos encendidos alejados de muebles tapizados.
Los tapizados pueden quemarse rápidamente emitiendo gases tóxicos y humo espeso.
• Vigile estrechamente a los niños y personas discapacitadas cuando utilizan este producto.
• Siéntese lentamente en la unidad. Para evitar que se vuelque, no se arroje contra
el respaldo. Recline o enderece la unidad lentamente después de asegurarse que
no hayan niños o mascotas en las cercanías.
• Este producto tiene muchas piezas que se mueven y, por lo tanto, pueden ocurrir lesiones
graves si no se utiliza correctamente. Mantenga las manos, los dedos y otras partes
del cuerpo alejadas del mecanismo. Para reducir la posibilidad de que la cabeza quede
atrapada como también otras lesiones, no permita que niños y mascotas se acerquen
a las aberturas y piezas móviles del mueble.
• Solamente el ocupante debe operar la unidad. Nunca intente desplegar el descansapiernas
tirando del mismo.
• No se pare, siente o ponga peso adicional sobre los descansabrazos, el respaldo o el
descansapiernas desplegado.
• Para levantarse de la unidad y no tropezar regrese el respaldo a su posición
vertical y pliegue el descansapiernas.
• No utilice este producto si está dañado. No use accesorios o piezas no aprobadas.
• Este producto es solamente para uso en espacios interiores residenciales.
• Asegúrese que el sillón, respaldo y descansapiernas tengan suficiente espacio para su
operación. Coloque tapetes y mesas de forma que el descansapiernas pueda extenderse
sin que haga contacto con los mismos.
• Revise una vez por mes el estado de los transformadores, los cordones, enchufes y conectores
eléctricos. Mantenga los transformadores y cordones eléctricos alejados de fuentes de calor.
Nunca opere la unidad si tiene un transformador, cordón, enchufe o conector eléctrico
dañado. Comuníquese con su distribuidor de La-Z-Boy
®
si necesita servicio.
• No utilice la unidad si el control eléctrico está dañado o mojado. No utilice la unidad si
se ha sumergido el control remoto en agua u otro líquido. Comuníquese con su distribuidor
de La-Z-Boy
®
si necesita servicio.
• No se debe usar este producto como un dispositivo para cuidado de la salud.
• Los usuarios de dispositivos médicos deben contactar a sus médicos antes de utilizar este
producto. No use este producto si tiene mala circulación, está inmovilizado o no puede sentir
el calor, excepto cuando lo apruebe su doctor.
• No utilice este producto en áreas donde se usan atomizadores (rociadores) o donde se usa oxígeno.
• No opere la unidad antes de haber instalado y asegurado el respaldo.
• Antes de mover el producto, desconecte el enchufe de la pared y asegure el mecanismo
para que no se pueda abrir o mover inesperadamente. Nunca mueva la unidad sujetando
el mecanismo, el descansapiernas, la manija, el respaldo o la base giratoria.
• Esta unidad está equipada con una característica para ajuste de tensión del mecanismo de reclinado
que fue ajustado en la fábrica. Usted puede modificar la tensión a su gusto personal. Para evitar que
se vuelque y para asegurar la estabilidad, no opere la unidad con las tuercas de mariposa de ajuste
flojas completamente (vea las instrucciones para el ajuste de la tensión de reclinado).
• No intente desarmar o dar servicio a la bomba o al motor. No hay piezas dentro de la unidad
a las que se puede dar servicio. Comuníquese con su distribuidor de La-Z-Boy
®
para obtener
información sobre el servicio.
• No permita que el cordón eléctrico quede comprimido entre las partes en movimiento o
entre el marco y el piso. No coloque el cordón debajo de la alfombra o en una ubicación
en donde se puede desgastar.
• No ponga una almohada, cobija u otra cobertura entre el ocupante y el sillón cuando
está encendida la calefacción del sillón.
• Siempre desenchufe el cordón antes de conectar o desconectar el control remoto.
• Desenchufe el cordón inmediatamente si detecta olores extraños o humo proveniente del sillón.
• Podría sufrir quemaduras a causa del uso y cuidado incorrecto de las almohadillas térmicas
internas. Para evitar el riesgo de quemaduras, no utilice alfileres, no permita que se moje
el área de la almohadilla térmica y no retire la funda de tapizado.
• No intente desenchufar la unidad tirando del cordón. Siempre sujete el enchufe y tírelo hacia fuera.
• Si le da este producto a otra persona, déle también este manual de instrucciones de operación.
Instrucciones importantes de seguridad:
Importante: Lea estas instrucciones detenidamente antes de usar el sillón.
PELIGRO
Guarde estas instrucciones Guarde estas instrucciones
Instrucciones importantes de seguridad:
Importante: Lea estas instrucciones detenidamente antes de usar el sillón.
AVISO: Para reducir el riesgo de ocasionar da os al producto:
• El mecanismo se dañará si se fuerza el descansapiernas para plegarlo desde la primera
o segunda posición. Se debe extender el descansapiernas a la tercera posición y entonces
se puede plegarlo.
•
Para impedir daños al transformador eléctrico, no enchufe antes de lo indicado.
•
Presione ligeramente los botones durante la operación y no golpee los botones con objetos
puntiagudos o duros.
ADVERTENCIA

33
32
AVISO: No enchufe antes de lo indicado.
1. El transformador está asegurado al oscilador del asiento. Corte cuidadosamente el amarre
del cable y retire el transformador.
2. Instale el respaldo.
•
Coloque el respaldo a través de los brazos del sillón. Levante el respaldo a un leve
ángulo y alinee los soportes del respaldo con los soportes de la estructura
(FIGURA 1)
.
•
Ponga el respaldo sobre la estructura asegurándose que el respaldo y los soportes en
la estructura estén completamente acoplados.
-
Párese detrás del sillón y gire el respaldo de un lado al otro para asegurarse que el respaldo
está instalado correctamente, con ambos juegos de soportes del respaldo y de la estructura
acoplados. Si uno o ambos lados se mueven fuera de su lugar es porque los soportes no están
acoplados
(FIGURA 2)
. Retire el respaldo y repita los pasos anteriores.
-
Si no puede instalar el respaldo correctamente, comuníquese con su distribuidor La-Z-Boy
®
para solicitar asistencia.
•
Con un destornillador, empuje hacia abajo las palancas de seguro para asegurar
los soportes
(FIGURA 3)
.
3. Para acceder a los conectores, incline levemente hacia delante el sillón para que quede apoyado
sobre los descansabrazos y la parte superior del respaldo. Los conectores se encuentran en la
parte trasera del sillón debajo del asiento
(FIGURA 4)
.
4. Identifique los tres conectores eléctricos.
•
Los dos conectores redondos más grandes son para la conexión del control remoto
(FIGURA 5)
.
•
El conector redondo más pequeño es para conectar el transformador
(FIGURA 5)
.
Instrucciones para armar el sillón de masaje,
térmico reclinable con dos motores La-Z-Touch®
– Para reducir el riesgo de lesiones:
• No opere la unidad antes de haber instalado y asegurado el respaldo.
(Instrucciones para armar, continuación)
FIGURA 4
FIGURA 3
FIGURA 5
Conectores del
control remoto
Ménsula
de soporte
del cuerpo
Ménsula de
soporte del respaldo
El respaldo y los soportes de la
estructura no están acoplados. Retire
el respaldo y vuelva a instalarlo.
Soporte del
respaldo Palanca del
seguro
Posición de
asegurado
Instrucciones para armar el sillón de masaje,
térmico reclinable con dos motores La-Z-Touch®
FIGURA 1FIGURA 2
Lado izquierdo
(sentado)
Atrás del asiento
Panel trasero exterior
Conector
del transformador
ADVERTENCIA

35
6
34
Instrucciones para armar el sillón de masaje,
térmico reclinable con dos motores La-Z-Touch®
Instrucciones para armar el sillón de masaje,
térmico reclinable con dos motores La-Z-Touch®
5. Alinee los puntos blancos en los conectores redondos grandes para el control remoto y empuje los
conectores para juntarlos. Cierre la cubierta para asegurar la conexión del control remoto
(FIGURA 6)
.
6. Enchufe el conector del transformador en el conector redondo más pequeño. Asegúrese de
que los conectores estén afianzados de manera segura
(FIGURA 7)
.
– Para reducir el riesgo de lesiones graves:
• Revise una vez por mes el estado del transformador, los cordones, enchufes y conectores
eléctricos. Mantenga el transformador y cordones eléctricos alejados de fuentes de calor.
Nunca opere la unidad si tiene un transformador, cordón, enchufe o conector eléctrico
dañado. Comuníquese con su distribuidor de La-Z-Boy®si necesita servicio.
• No permita que el cordón eléctrico quede comprimido entre las partes en movimiento
o entre el marco y el piso. No coloque el cordón debajo de la alfombra o en una ubicación
en donde se puede desgastar.
– Para reducir el riesgo de lesiones graves:
• Asegúrese que el respaldo y descansapiernas tengan suficiente espacio para su operación.
Coloque tapetes y mesas de forma que el descansapiernas pueda extenderse sin que haga
contacto con los mismos.
8. Elija una ubicación para el sillón que esté cerca de un tomacorriente. Continúe con las
instrucciones de operación.
AVISO: Para que no se da en los conectores o cordones, es importante
liberar todas las conexiones antes de retirar el respaldo.
9. Para retirar el respaldo, desenchufe el transformador del tomacorriente e invierta
los pasos de las instrucciones de armado.
FIGURA 7
FIGURA 8
Conexión del transformador
Transformador
FIGURA 6
Conexión del control remoto
ADVERTENCIA
ADVERTENCIA
7. Aleje el cordón de la base y regrese cuidadosamente el sillón a la posición recta.
Asegúrese que el cordón no esté comprimido en partes en movimiento o debajo
de la base
(FIGURA 8)
.
Las especificaciones del transformador dependen de la fecha de producción. Consulte el transformador
para determinar cuáles son las especificaciones relevantes para su producto.
Especificaciones del transformador para masaje, térmico de 2 motores de La-Z-Touc :
Entrada: 120V AC 60Hz 30W, salida: 12V AC 1500mA.
O
Entrada: 100-240V AC 50-60Hz 1.5A, salida: 13.8V DC 2.9A.

37
36
Instrucciones de operación del sillón de masaje,
térmico reclinable con dos motores La-Z-Touch®
– Para reducir el riesgo de choque eléctrico, lesiones
graves o la muerte:
• Enchufe directamente en un tomacorriente en la pared. No utilice un cordón de extensión,
un adaptador o protector de sobretensión.
– Para reducir el riesgo de lesiones graves:
• Siéntese lentamente en la unidad. Para evitar que se vuelque, no se arroje contra el respaldo.
Recline o enderece la unidad lentamente después de asegurarse que no hayan niños
o mascotas en las cercanías.
• Para levantarse de la unidad y no tropezar, regrese el respaldo a su posición
vertical y pliegue el descansapiernas.
Enchufe el transformador de calor y masaje de dos motores directamente a un tomacorriente
de pared. Asegúrese de que hay suficiente holgura en el cordón que va del sillón al tomacorriente
para permitir que el sillón se pueda mecer y reclinar. Nunca estire ni tense el cordón.
Los sistemas térmico y de masaje tienen un temporizador automático que apagará las funciones
de calor y masaje después de aproximadamente 30 minutos de operación. Estos sistemas per-
manecerán apagados por 7-1/2 minutos. Si se selecciona masaje o calefacción antes de termi-
narse el período de enfriamiento, destellará ya sea el botón PWR o el de HI o LO de calefacción
alta o baja. Después de los 7-1/2 minutos de enfriamiento, usted podrá operar la función de
masaje o calefacción durante otro ciclo de 30 minutos.
•
Presione el botón PWR o uno de los botones de zona (1 ó 2) para comenzar el masaje.
-
Presione el botón PWR para un masaje de 15 minutos; la luz del botón PWR cambia
a verde cuando se activa el masaje de 15 minutos.
-
Presione por 3 segundos el botón PWR para un masaje de 30 minutos; la luz del
botón PWR cambia a naranja cuando se activa el masaje de 30 minutos.
•
Presione el botón LO o HI (baja o alta) para encender la calefacción. La luz del botón
LO cambia a naranja cuando se activa baja calefacción y la luz del botón HI cambia a
roja cuando se activa alta calefacción. La calefacción funcionará durante 30 minutos
y puede ser utilizada sin la función de masaje.
•
Cuando haya terminado, empuje el botón PWR y el botón LO o HI (si está activado) para
apagar los sistemas.
•
Después de un apagón eléctrico o interrupción del servicio, el sillón regresará
a la condición apagada.
Recomendamos que desenchufe el transformador si no estará en su residencia durante
un período prolongado.
P
P
W
W
R
R
Este botón activa el
sistema de masaje.
Presione una vez
para un masaje de
15 minutos o presione
durante tres segundos
para un masaje
de 30 minutos.
L
L
O
O
H
H
E
E
A
A
T
T
Enciende la calefacción
a nivel bajo. Puede
utilizarse por si sola
o junto con el masaje.
Z
Z
O
O
N
N
E
E
S
S
Activa una o todas las zonas.
El LED indica la zona o zonas
que fue o fueron seleccionadas.
S
S
P
P
E
E
E
E
D
D
Controla la frecuencia de
la pulsación en modalidad
PULSE y controla la velocidad
cuando cicla en la modalidad
WA E (olas). Presione
(+) para aumentar y
(-) para disminuir.
H
H
I
I
H
H
E
E
A
A
T
T
Enciende un alto nivel
de calefacción. Puede
utilizarse por si sola
o junto con el masaje
M
M
O
O
D
D
A
A
L
L
I
I
D
D
A
A
D
D
E
E
S
S
SELECT - Seleccione una
o todas las zonas para masaje.
PULSE - El masaje se enciende
y se apaga para simular
una pulsación.
WA E - El masaje se mueve
hacia arriba y abajo con
un ritmo de olas.
I
I
N
N
T
T
E
E
N
N
S
S
I
I
T
T
Y
Y
Aumenta (+) o disminuye (-)
la intensidad en todas
las modalidades.
– Para reducir el riesgo de lesiones graves:
• No utilice la unidad si el control eléctrico está dañado o mojado. No utilice la unidad si se ha
sumergido el control remoto en agua u otro líquido. Comuníquese con su distribuidor de
La-Z-Boy®si necesita servicio.
PELIGRO
ADVERTENCIA
Instrucciones de operación del sillón de masaje,
térmico reclinable con dos motores La-Z-Touch®
ADVERTENCIA

39
38
Instrucciones para armar el sillón de masaje, térmico
reclinable con seis motores La-Z-Touch®:
FIGURA 4
FIGURA 3
FIGURA 5
Conectores
del control remoto
Ménsula
de soporte
del cuerpo
Ménsula de
soporte del respaldo
El respaldo y los soportes de la
estructura no están acoplados. Retire
el respaldo y vuelva a instalarlo.
Soporte del
respaldo Palanca del
seguro
Posición de
asegurado
FIGURA 1FIGURA 2
Lado izquierdo
(sentado)
Atrás del asiento
Panel trasero exterior
Conector
del transformador
FIGURA 6
Conexión del motor
de masaje
AVISO: No enchufe antes de lo indicado.
1. El transformador está asegurado al oscilador del asiento. Corte cuidadosamente el amarre
del cable y retire el transformador.
2. Instale el respaldo.
•
Coloque el respaldo a través de los brazos del sillón. Levante el respaldo a un leve
ángulo y alinee los soportes del respaldo con los soportes de la estructura
(FIGURA 1)
.
•
Ponga el respaldo sobre la estructura asegurándose que el respaldo y los soportes en
la estructura estén completamente acoplados.
-
Párese detrás del sillón y gire el respaldo de un lado al otro para asegurarse que el respaldo
está instalado correctamente, con ambos juegos de soportes del respaldo y de la estructura
acoplados. Si uno o ambos lados se mueven fuera de su lugar es porque los soportes no están
acoplados
(FIGURA 2)
. Retire el respaldo y repita los pasos anteriores.
-
Si no puede instalar el respaldo correctamente, comuníquese con su distribuidor La-Z-Boy
®
para solicitar asistencia.
•
Con un destornillador, empuje hacia abajo las palancas de seguro para asegurar
los soportes
(FIGURA 3)
.
3. Para acceder a los conectores, incline levemente hacia delante el sillón para que quede apoyado
sobre los descansabrazos y la parte superior del respaldo. Los conectores se encuentran en la
parte trasera del sillón debajo del asiento
(FIGURA 4)
.
4. Identifique los cinco conectores eléctricos.
•
Los dos conectores redondos más grandes son para la conexión del control remoto
(FIGURA 5)
.
•
El conector redondo más pequeño es para conectar el transformador
(FIGURA 5)
.
•
Los dos conectores rectangulares amarillos son para la conexión del motor de masaje
(FIGURA 6)
.
Instrucciones para armar el sillón de masaje, térmico
reclinable con seis motores La-Z-Touch®:
– Para reducir el riesgo de lesiones:
• No opere la unidad antes de haber instalado y asegurado el respaldo.
(Instrucciones para armar, continuación)
ADVERTENCIA
Other manuals for La-Z-Touch Series
2
Table of contents
Languages:
Other LAZBOY Massager manuals

LAZBOY
LAZBOY La-Z-Touch User manual

LAZBOY
LAZBOY La-Z-Touch Series User manual

LAZBOY
LAZBOY La-Z-Touch Series User manual

LAZBOY
LAZBOY AirSpa User manual

LAZBOY
LAZBOY ComfortTouch Series User manual

LAZBOY
LAZBOY La-Z-Touch User manual

LAZBOY
LAZBOY Luxury-Lift User manual

LAZBOY
LAZBOY Platinum Luxury-Lift Series User manual
Popular Massager manuals by other brands

Gymstick
Gymstick 61147 user manual

OSIM
OSIM uNek 2 Operation manual

HoMedics
HoMedics BKL-100 Instruction manual and warranty information

HoMedics
HoMedics BKP-110-THP Instruction manual and warranty information

HoMedics
HoMedics FMS-340H Instruction manual and warranty information

HoMedics
HoMedics FMS-250H Instruction manual and warranty