manuals.online logo
Brands
  1. Home
  2. •
  3. Brands
  4. •
  5. LEGRAND
  6. •
  7. Touchscreen
  8. •
  9. LEGRAND VANTAGE Equinox 73 EQ73RT-INSTALL User manual

LEGRAND VANTAGE Equinox 73 EQ73RT-INSTALL User manual

Other LEGRAND Touchscreen manuals

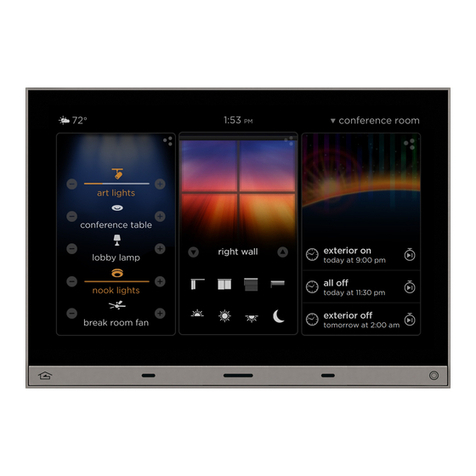
LEGRAND Vantage Equinox 73-III User manual

LEGRAND

LEGRAND Vantage Equinox 73-III User manual

LEGRAND 7" Video Touch Screen User manual

LEGRAND

LEGRAND 7" Video Touch Screen User manual

LEGRAND Wattstopper EQ41-LCAP User manual

LEGRAND

LEGRAND Wattstopper EQ41-LCAP User manual

LEGRAND 5739 60 User manual

LEGRAND

LEGRAND 5739 60 User manual

LEGRAND 7" Video Touch Screen User manual

LEGRAND

LEGRAND 7" Video Touch Screen User manual

LEGRAND Wattstopper LMEQ-41 User manual

LEGRAND

LEGRAND Wattstopper LMEQ-41 User manual

LEGRAND 7" Video Touch Screen User manual

LEGRAND

LEGRAND 7" Video Touch Screen User manual

Popular Touchscreen manuals by other brands

HAI OmniTouch 10p user manual

HAI

HAI OmniTouch 10p user manual

NEXIO HID Touch-screen user guide

NEXIO

NEXIO HID Touch-screen user guide

Elo TouchSystems E534869 user manual

Elo TouchSystems

Elo TouchSystems E534869 user manual

Dell C8618QT user guide

Dell

Dell C8618QT user guide

InTouch INDT156 user manual

InTouch

InTouch INDT156 user manual

Tipro FREE+ 12.1" Getting started

Tipro

Tipro FREE+ 12.1" Getting started

Advantech IDP31-215W Series user manual

Advantech

Advantech IDP31-215W Series user manual

Element VK Series user manual

Element

Element VK Series user manual

Johnson Controls Advanced Graphic Touchscreen Display Installation and operation manual

Johnson Controls

Johnson Controls Advanced Graphic Touchscreen Display Installation and operation manual

Elo TouchSystems 2799L user manual

Elo TouchSystems

Elo TouchSystems 2799L user manual

Elo TouchSystems 2020L Product dimensions

Elo TouchSystems

Elo TouchSystems 2020L Product dimensions

Wiggly-Amps Engage installation instructions

Wiggly-Amps

Wiggly-Amps Engage installation instructions

gefran G-Vision 67-070 Operating instructions manual

gefran

gefran G-Vision 67-070 Operating instructions manual

Sinocan T06-15 user manual

Sinocan

Sinocan T06-15 user manual

COMFILE CUTOUCH CT1820 user manual

COMFILE

COMFILE CUTOUCH CT1820 user manual

Future Design ELI101-IPHW user manual

Future Design

Future Design ELI101-IPHW user manual

InTouch KIO-LITE-215L-WM user manual

InTouch

InTouch KIO-LITE-215L-WM user manual

Elo TouchSystems 1739L user guide

Elo TouchSystems

Elo TouchSystems 1739L user guide

manuals.online logo
manuals.online logoBrands
  • About & Mission
  • Contact us
  • Privacy Policy
  • Terms and Conditions

Copyright 2025 Manuals.Online. All Rights Reserved.

©Vantage, 4/18/2017 / IS-0571-B Equinox 73 Retrofit Install Kit — MODEL: EQ73RT-INSTALL page 1 of 2
*When using the
TPT650 power supply
inside of the TPT650
wall box, drill a hole
7/64” diameter in
the metal barrier at
the exact location in
the illustration.
Sheetrock
TPT650
wall box
retrofit bracket
Screws and clips
left and right sides
3-D Sheetrock Vie
w
Top View
TPT650 WALL BOX
(semi-transparent for illustration purposes)
EQ73RT-INSTALL kit screws and clips
Equinox 73 retrofit
bracket
Sheet-
rock
Sheet-
rock
retrofit bracket
connector clips
TPT650 wall box
screws
Optional bezel
– see bezels
next page
Equinox 73
touchscreen
INSTALLATION
VANTAGECONTROLS.COM VANTAGE INSTALL GUIDES
2168 West Grove Parkway, Suite 300, Pleasant Grove, UT. 84062 USA
Telephone: 801 229-2800 ●Fax: 801 224-0355 Equinox 73 Retrofit Install Kit — MODEL: EQ73RT-INSTALL
Overview
Vantage’s Equinox 73 retrofit install kit is designed to mount the
Equinox 73 Touchscreen in an existing TPT650 install box or
directly to the sheetrock. For new construction installations, please
see
Equinox 73 LCD Standard_EQ73ST-INSTALL_install_IS-0545.pdf
instruction sheet. Please also see the new installation instructions
for the new touchscreen;
Equinox 73-II LCD Touchscreen_EQ73TB-TI-II_install_IS-00700.pdf
Specifications
DESCRIPTION SPECIFICATION
retrofit bracket dimensions, outside
– HWD
6.3” x 8.2” x 1.1”
160mm x 208mm x 28mm
inside retrofit bracket
sheetrock hole – HW
4.6” high x 6.5” wide
116.8mm high x 165mm wide
Optiona
l
Bezel
Dimensions, HWD
6.5” x 8.5” x 0.47”
165mm x 216mm x 12mm
Optiona
l
Bezel for EQ73TB-TI-II EQ73RT-BEZEL-II (titanium finish)
Optiona
l
Ethernet 4 Port PoE
Injector Part Number DA2400
Installation
Installation of Vantage products should be performed or
supervised by a Certified Vantage Installer. Study the steps below
for installation scenarios and select the method that most closely
matches current installation.
Method 1 - Replacing existing TPT650 Installed in Wall Box
Preparation
Prepare the box by removing or safely terminating all old
connection wires in the box except the Ethernet connection
needed for the new Equinox 73 touchscreen and the TPT650
power supply*if using instead of POE.
Steps
1. The TPT650 Wall Box should be empty (old wiring properly
terminated or removed) except for the Ethernet RJ-45
connection wire. NOTE: existing Ethernet cable should be
CAT5e or better with POE or POE+ support.
2. Insert the retrofit kit connector clips into the (inside) left and
right sides of the TPT650 Wall Box as illustrated.
3. Insert retrofit bracket.
4. Secure the retrofit bracket to the clips and wall box with
supplied screws. Do not over tighten to prevent the retrofit
bracket from lifting away from wall around its perimeter.
a. Optional: Finish wall over retrofit bracket lip with new
mud. NOTE: If “mudding” the wall over the retrofit
bracket lip, the new Equinox 73 touchscreen does not
require a bezel.
5. Pull all connections through the bezel.
6. Connect Ethernet and power to the Equinox 73 touchscreen
and insert the touchscreen into the bezel and snap into retrofit
bracket. Or, if no bezel is used, snap the touchscreen into
retrofit bracket.
METHOD 1 STEPS
I N S T A L L A T I O N
©Vantage, 4/18/2017 / IS-0571-B Equinox 73 Retrofit Install Kit — MODEL: EQ73RT-INSTALL page 2 of 2
Equinox 73 retrofit
bracket box - back
Equinox 73 Retrofit Kit screws
and connector clips - reversed
Equinox 73 retrofit
bracket face
sheet-
rock
sheet-
rock
Retrofit bracket
Screws and clips
(left and right sides)
sheetrock
sheetrock
METHOD 2 STEPS
CAUTION!
Left and Right Speakers of Equinox 73 are
exposed. Use extreme caution handling,
installing and removing. Do not accidentally
touch or push in on the speaker cones to
avoid damage to either speaker.
Cut a hole
in the
sheetrock
Retrofit bracket
sheetrock
connector
clips
screws
optional
bezel
Equinox 73
touchscreen
Order Correct*
Bezel
EQ73RT-BEZEL-II
Method 2 – Retrofit Installation of Equinox 73 In Sheetrock
Preparation
Prepare the wall opening. This method may also be used if a
TPT650 was installed to the sheetrock without a wall box or for a
new install into a sheetrock wall. The recommended mounting
height is six inches above that of a typical keypad station or
approximately 50” to 58” from the floor to the bottom of the
Equinox 73 Touchscreen. However, it may be installed at any
height fitting specific custom installation requirements. The
installer must provide an Ethernet RJ-45 connection wire. NOTE:
Ethernet cable should be CAT5e or better with POE or POE+
support.
Steps
1. Cut a hole in the sheetrock 6.5” wide by 4.6” high – corners do
not need rounded. The hole should be very clean-cut, exact and
level.
TIP: cut to outside of 6.5” X 4.6” sheetrock lines.
2. Pull the Ethernet RJ-45 connection wire through the retrofit
bracket (from back to front) and Insert the retrofit bracket into
the hole with the Ethernet wire hanging outside of the hole.
3. Rotate and insert the connector clips to the back of the retrofit
bracket as illustrated (study Steps, Top View and 3-D View
illustrations below).
a. Please note, when the connector clips are properly
rotated, they will pull into the back side of the sheetrock
when the retrofit bracket is secured.
4. Secure the retrofit bracket and connector clips to the wall with
supplied screws. DO NOT OVER TIGHTEN!
a. Optional: Finish wall over retrofit bracket lip with new
mud. NOTE: If “mudding” the wall over the retrofit
bracket lip, the new Equinox 73 Touchscreen does not
require a bezel – optional part EQ73RT-BEZEL-II.
5. If not refinishing the wall over the retrofit bracket, pull all wire
connections through the bezel.
6. Connect wires to the Equinox 73 touchscreen and insert the
touchscreen into the bezel – if using one – and snap into retrofit
bracket. Or, if no bezel is used, snap Equinox 73 touchscreen
into retrofit bracket.
*Bezels
If needed, order Bezel EQ73RT-BEZEL-II (titanium finish) for EQ73TB-TI-II screens.
Top View
3-D Sheetrock View