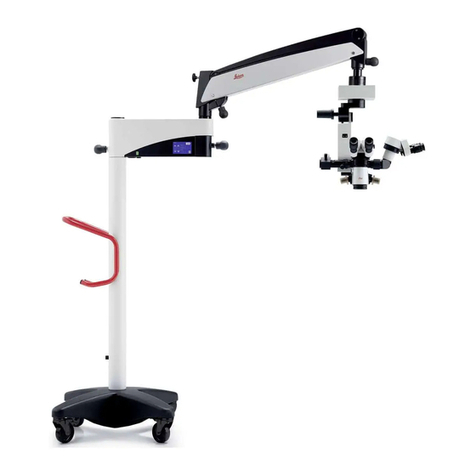
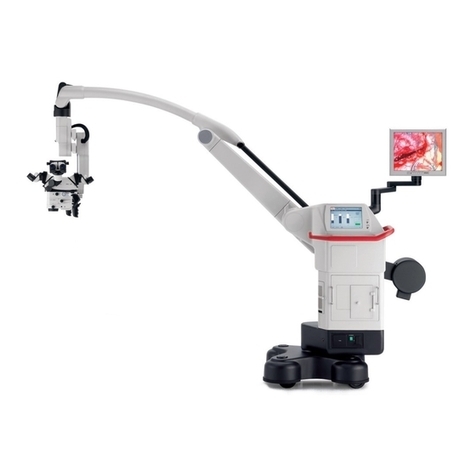
Leica ARveo User manual

MEDICAL DIVISION
User Manual
10 747 384 - Version 04
ARveo

II ARveo / Ref. 10 747 384 / Version 04
Thank you for purchasing a Leica surgical microscope system.
In developing our systems, we have placed great emphasis on simple, self-
explanatory operation. Nevertheless, we suggest studying this user manual in
detail in order to utilize all the benefits of your new surgical microscope.
For valuable information about Leica Microsystems products and services, and the
address of your nearest Leica representative, please visit our website:
www.leica-microsystems.com
Thank you for choosing our products.We hope that you will enjoy the quality and
performance of your Leica Microsystems surgical microscope.
Leica Microsystems (Schweiz) AG Medical Division
Max-Schmidheiny-Strasse 201 CH-9435 Heerbrugg
Tel.: +41 71 726 3333
Legal disclaimer
All specifications are subject to change without notice.
The information provided by this manual is directly related to the operation of the
equipment. Medical decision remains the responsibility of the clinician.
Leica Microsystems has made every effort to provide a complete and clear user
manual highlighting the key areas of product use. Should additional information
regarding the use of the product be required, please contact your local Leica
representative.
You should never use a medical product of Leica Microsystems without the full
understanding of the use and the performance of the product.
Liability
For our liability, please see our standard sales terms and conditions. Nothing in this
disclaimer will limit any of our liabilities in any way that is not permitted under
applicable law, or exclude any of our liabilities that may not be excluded under
applicable law.

ARveo / Ref. 10 747 384 / Version 04 1
Contents
1 Introduction 2
1.1 About this user manual 2
1.2 Symbols in this user manual 2
1.3 Optional product features 2
2 Product identification 2
3 Safety notes 3
3.1 Intended use 3
3.2 Directions for the person responsible
for the instrument 3
3.3 Directions for the operator of the instrument 3
3.4 Dangers of use 4
3.5 Signs and labels 6
4 Design 9
4.1 ARveo stand 9
4.2 Leica M530 Optics carrier 11
5 Functions 12
5.1 Balancing system 12
5.2 Brakes 13
5.3 Illumination 14
5.4 Leica FusionOptics 14
5.5 Leica SpeedSpot 15
6 Controls 16
6.1 Leica M530 Microscope with arm system 16
6.2 Control unit 17
6.3 Interface panels 17
6.4 Stand 19
6.5 Handles 20
6.6 Footswitch 21
6.7 Mouth switch 21
7 Preparation before surgery 22
7.1 Transportation 22
7.2 Installing optical accessories 23
7.3 Setting the binocular tube 23
7.4 Adjusting the eyepiece 24
7.5 Selecting the assistant 25
7.6 Stand settings 25
7.7 Positioning on the operating table 31
7.8 Attaching sterile controls and drape 32
7.9 Function check 33
8 Operation 34
8.1 Switching the microscope on 34
8.2 Positioning the microscope 35
8.3 Adjusting the microscope 35
8.4 Transport position 41
8.5 Shutting down the surgical microscope 41
9 Control unit with touch panel 42
9.1 Menu structure 42
9.2 Selecting users 42
9.3 Menu – User Settings 44
9.4 Menu – Maintenance menu 50
9.5 Menu – "How to..." 52
9.6 Menu – "Service" 52
10 Accessories 53
10.1 Devices and accessories
manufactured by Leica 53
10.2 Devices and accessories
fromLeica and 3rd party manufacturers 54
10.3 Drapes 54
11 Care and maintenance 55
11.1 Maintenance instructions 55
11.2 Cleaning the touch panel 55
11.3 Maintenance 56
11.4 Changing bulbs 56
11.5 Changing fuses 57
11.6 Notes on reprocessing
of resterilizable products 58
12 Disposal 59
13 What to do if ...? 60
13.1 Malfunctions 60
13.2 Malfunctions documentation accessories 62
13.3 Error messages on the control unit 62
14 Specifications 63
14.1 Electrical data 63
14.2 ARveo 63
14.3 Ambient conditions 66
14.4 Standards fulfilled 67
14.5 Limitations of use 67
14.6 List of weights of balanceable configurations 68
14.7 Dimensional drawings 71
15 Manufacturer's declaration of
electromagnetic compatibility (EMC) 74
15.1 Table 1 from EN 60601-1-2 74
15.2 Table 2 from EN 60601-1-2 75
15.3 Table 4 from EN 60601-1-2 76
16 Annex 77
16.1 Checklist before the operation 77

Introduction
2 ARveo / Ref. 10 747 384 / Version 04
1 Introduction
1.1 About this user manual
In this user manual the surgical microscope ARveo is described.
In addition to notes on the use of the instruments
this user manual gives important safety information
(see chapter "Safety notes").
X Read this user manual carefully before operating
the product.
1.2 Symbols in this user manual
The symbols used in this user manual have the following meaning:
Symbol Warning
word
Meaning
Warning
Indicates a potentially hazardous situation or
improper use that could result in serious
personal injuries or death.
Caution
Indicates a potentially hazardous situation or
improper use which, if not avoided,
may result in minor or moderate injury.
Note
Indicates a potentially hazardous situation or
improper use which, if not avoided, may
result in appreciable material, financial and
environmental damage.
Information about use that helps the user to
employ the product in a technically correct
and efficient way.
X Action required; this symbol indicates that
you need to perform a specific action or series
of actions.
Medical Device
1.3 Optional product features
Different product features and accessories are optionally available.
The availability varies from country to country and is subject to
local regulatory requirements. Please contact your local
representative for availability.
2 Product identification
The model and serial numbers of your product are located on the
identification label on the illumination unit.
X Enter this data in your user manual and always refer to it when
you contact us or the service workshop regarding any questions
you may have.
Type Serial no.
...
...

Safety notes
ARveo / Ref. 10 747 384 / Version 04 3
3 Safety notes
The ARveo surgical microscope is state-of-the-art technology.
Nevertheless, hazards can arise during operation.
X Always follow the instructions in this user manual, and in
particular the safety notes.
3.1 Intended use
• The ARveo surgical microscope is an optical instrument for
improving the visibility of objects through magnification and
illumination. It can be applied for observation and
documentation and for human medical treatment.
• The ARveo surgical microscope may be used only in closed
rooms and must be placed on a solid floor.
• The ARveo surgical microscope is subject to special
precautionary measures for electromagnetic compatibility. It
must be installed and commissioned in accordance with the
guidelines and manufacturer's declarations and recommended
safety distances (according to EMC tables based on
EN60601-1-2: 2015).
• Portable and mobile as well as stationary RF communications
equipment can have a negative effect on the reliability of the
ARveo surgical microscope's functionality.
• The ARveo is intended for professional use only.
• The essential performance of the ARveo is to provide
illumination and mechanical stability of the optics carrier in any
position.
WARNING
Danger of injury to the eyes.
X Do not use the ARveo in ophthalmology.
3.2 Directions for the person
responsible for the instrument
X Ensure that the ARveo surgical microscope is used only by
persons qualified to do so.
X Ensure that this user manual is always available at the place
where the ARveo surgical microscope is in use.
X Carry out regular inspections to make certain that the
authorized users are adhering to safety requirements.
X When instructing new users, do so thoroughly and explain the
meanings of the warning signs and messages.
X Allocate responsibilities for commissioning, operation and
maintenance. Monitor compliance with this.
X Only use the ARveo surgical microscope when it is
free of defects.
X Inform your Leica representative or Leica Microsystems
(Schweiz) AG, Medical Division, 9435 Heerbrugg, Switzerland,
immediately about any product defect that could potentially
cause injury or harm.
X If you use accessories from other manufacturers with the ARveo
surgical microscope, make sure that these manufacturers
confirm that the combination is safe to use. Follow the
instructions in the user manual for those accessories.
• Modifications to or service on the ARveo surgical microscope
may be carried out only by technicians who are explicitly
authorized by Leica to do so.
• Only original Leica replacement parts may be used in servicing
the product.
• After service work or technical modifications, the device must
be readjusted in accordance with our technical specifications.
• If the instrument is modified or serviced by unauthorized
persons, is improperly maintained (as long as maintenance was
not carried out by us), or is handled improperly,
LeicaMicrosystems will not accept any liability.
• The effect of the surgical microscope on other instruments has
been tested as specified in EN 60601-1-2. The system passed the
emission and immunity test. Comply with the usual pre-
cautionary and safety measures relating to electromagnetic and
other forms of radiation
• The electric installation in the building must conform to the
national standard, e.g., current-operated ground leakage
protection (fault-current protection) is suggested.
• Like any other instrument in the operating theater, this system
may fail. Leica Microsystem (Schweiz) AG therefore
recommends that a backup system is kept available during the
operation.
3.3 Directions for the operator of the
instrument
X Follow the instructions described here.
X Follow the instructions given by your employer regarding the
organization of work and safety at work.
Safety notes
4 ARveo / Ref. 10 747 384 / Version 04
3.4 Dangers of use
WARNING
Danger of injury to the eyes.
X Do not use the ARveo in ophthalmology.
WARNING
Danger of injury due to:
• uncontrolled lateral movement of the arm system,
• tilting of the stand,
• trapping of feet in lightweight shoes beneath the casing
of the base.
X For transportation, always move the ARveo surgical
microscope into the transport position.
X Never move the stand while the unit is extended.
X Never roll the stand or OP equipment over the cables
lying on the oor.
X Always push the ARveo surgical microscope; never pull
it.
WARNING
Risk of injury due to downward movement of the surgical
microscope.
X Complete all preparations and adjustments to the stand
before the operation.
X Never change the accessories or attempt to rebalance
the microscope while it is above the eld of operation.
X Balance the ARveo after re-equipping it.
X Do not release the brakes when the instrument is in an
unbalanced state.
X Before re-equipping during the operation, rst swing
the microscope away from the operating eld.
X Never carry out the intraoperative AC/BC balancing
above the patient.
WARNING
Danger of injury due to movement of the microscope during
the balancing process.
X Do not sit or stand immediately next to the microscope
during the balancing process.
WARNING
Danger of injury to the eyes due to possibly hazardous
optical infrared and UV radiation.
X Do not look at the operating lamp.
X Minimize exposure to eyes or skin.
X Use appropriate shielding.
WARNING
Danger of burn injuries in otologic surgery.
X Use the lowest comfortable light intensity.
X Adjust the eld of view to match the operating eld.
X Irrigate the wound frequently.
X Cover the exposed parts of the pinna with a moist
surgical sponge.
WARNING
Risk of infection.
X Always use the ARveo surgical with sterile controls and a
sterile drape.
WARNING
Danger of fatal electrical shock.
X The ARveo surgical microscope may be connected to a
grounded socket only.
X Operate the system only with all equipment in its proper
position (all covers tted, doors closed).
WARNING
Danger of injury to the eyes.
At a short focal distance, the light source of the illumination
unit may possibly be too bright for the operating physician
and the patient.
X Begin with the lower-intensity light source and slowly
increase it until the operating physician has an optimally
illuminated image.
WARNING
Danger to the patient due to failure of the magnication or
working distance motor.
X If the magnication motor fails, adjust the
magnication manually.
X If the working distance motor fails, adjust the working
distance manually.
WARNING
Danger of serious damage to tissue due to incorrect working
distance.
X When using lasers, always set the working distance of
the microscope to laser distance and lock the microscope
in position.
X Do not adjust the rotary button for manual setting of
the working distance while using the laser.

Safety notes
ARveo / Ref. 10 747 384 / Version 04 5
WARNING
Danger of injury to the eyes due to laser radiation.
X Never point the laser directly or indirectly via reecting
surfaces to the eyes.
X Never point the laser to the eyes of the patient.
X Do not look into the laser beam.
CAUTION
Surgical microscope can move without warning.
X Always lock the footbrake when you are not moving the
system.
CAUTION
Danger of injury due to falling weight disk or cover.
X When changing the weight disk, make sure that your
feet are not beneath the weight disk or the cover.
CAUTION
Danger of injury due to falling counterweights.
X Before attaching the sterile drape, check the
counterweights for correct seating.
CAUTION
Risk of infection.
X Leave sucient space around the stand to ensure
that the sterile drape does not come into contact with
non-sterile components.
CAUTION
Hot lamp insert can cause burns.
X Do not touch the hot lamp insert.
CAUTION
If the eld diameter is greater than the eld of view and the
light intensity is too high, uncontrolled tissue heating may
occur outside of the area visible through the microscope.
X Do not set the light intensity too high.
CAUTION
Danger to the patient due to changes in the user settings.
X Never change the conguration settings or edit the user
list during an operation.
CAUTION
Danger of skin burns. The lamp insert gets very hot.
X Check that the cover has cooled before you replace the
lamp.

Safety notes
6 ARveo / Ref. 10 747 384 / Version 04
3.5 Signs and labels
1
2
315
14
9
8
7
11
4
A
6
5
16/17 12
A
10
10
13

Safety notes
ARveo / Ref. 10 747 384 / Version 04 7
1
For installation
purpose only
2
Equipotential
bonding
3
Brasil Certification
4
Grounding label
(Only for US/Canada)
5
Fabrication label
a Prefix number
b Leica system article no.
c Serial number
d Incremental numbers
tarting at 1 for each batch
e JJ = year (2 digits)
f MM = month (2 digits)
g TT = day (2 digits)
h Production starting date
6
System weight label
7
US Info Label
8
Type label
9
Follow the user manual
10
Warning of hot surface
11
RISK GROUP 3
WARNING IR emitting from this product. Do not
look at operating lamp.
WARNING Possibly hazardous optical radiation
emitted from this product. Do not look at
operating lamp. Eye injury may result.
NOTICE UV emitted from this product.
Minimise exposure to eyes or skin. Use
appropriate shielding.
Warning of
XENON light emission
12
Contraindication
13
Warning Lamps
14
MET Label
15 Only to be operated
by trained personnel
Utilisation réservée à
un personnel formé
Trained Personnel
16
ANVISA Registration
Label
17 UDI Label
Production Identifier (PI)
Serial number
Date of manufacturing
GS1 Data Matrix Code
Device Identifier (DI)

Safety notes
8 ARveo / Ref. 10 747 384 / Version 04
1
2
3
5
2
4
2
2
1
Monitor weight label
2
Warning sign for
squeezing hands or
fingers
3
For installation only
4

Design
ARveo / Ref. 10 747 384 / Version 04 9
4 Design
4.1 ARveo stand
1
2
3
4
5
6
7
8
9
10
1 Arm system
2 Tension rod
3 Video monitor (optional)
4 Control unit with touch panel
5 Suspension device for footswitch
6 Illumination unit
7 Base
8 Interface panel
9 Lock (for installation purpose only)
10 Leica M530 Optics carrier

Design
10 ARveo / Ref. 10 747 384 / Version 04
14
13
11
12
15
9
16
17
9 Lock (for installation only)
11 Vertical arm
12 Interface panel
13 Footbrake
14 Handrail
15 Monitor arm
16 Camera control unit (optional)
17 Recording unit (optional)
With its open architecture the ARveo provides space for
holding the camera and recording units.

Design
ARveo / Ref. 10 747 384 / Version 04 11
4.2 Leica M530 Optics carrier
4.2.1 LeicaM530 with ULT530
• Optics carrier with integrated camera for visible light
LeicaHDC100 (optional)
• Interface for assistants, either to the left and right side or to the
back
• Main surgeon and back assistant interface, 360° rotatable both
• Back assistant interface with fine focus knob
• For use with Image Injection Module CaptiView
The Leica Accessories functions are described in the
corresponding user manuals.

Functions
12 ARveo / Ref. 10 747 384 / Version 04
5 Functions
5.1 Balancing system
With a balanced surgical microscope ARveo you can move the optics
carrier in any position without tilting or falling down.
After balancing all movements during operation only need a minor
force.
5.1.1 Balancing the optics carrier
On the optics carrier Leica M530 two directions of movement are
balanced: A and B.
4
5
The essential performance of the ARveo is:
Providing sufficient light to the situs and to guarantee mechanical
locking of the optics carrier in any possible positioning.
5.1.2 Balancing the arm system
On the arm system the direction of movement C is balanced.
1
5.1.3 Balancing the parallelogram
The parallelogramm balances the up/down movement (direction D).
D
D
1
If the direction D cannot be balanced, a weight disk has to be added
or removed, see section 7.6.4.

Functions
ARveo / Ref. 10 747 384 / Version 04 13
5.2 Brakes
The ARveo may be moved only with released brakes.
X Do not perform any movements when the brakes are
locked.
The ARveo surgical microscope has 6 electromagnetic brakes which
stop the movements of the stand and surgical microscope.
1
2
3
4
6
5
• Up/down and forward/back in parallelogram (1 and 2)
• Foot (3)
• In arm system (4)
• On the A and B carriages of surgical microscope (5)
• In the rotary joint (6)
Brakes are operated via handle or footswitch, if used.
The button of a handle / footswitch with the assigned function
"Selected Brakes" (refer also to the chapter on "Assigning handles",
page48) can trigger two different brake combinations:
"FocusLock" or "XYZ Free".
5.2.1 Selected Brakes – XYZ Free
The following movements can be performed with the surgical
microscope when the brake combination "XYZ Free" is activated:
5.2.2 Selected Brakes – Focus Lock
The following movements can be performed with the surgical
microscope when the brake combination "Focus Lock" is activated:

Functions
14 ARveo / Ref. 10 747 384 / Version 04
5.3 Illumination
The illumination of the surgical microscope Leica M530 is a xenon
lamp and is located in the stand. Illumination is routed to the optics
carrier via fibre optics cable.
There are two identical lamps. In case of a failure of the lamp in use,
the other lamp can be selected, either on the touchscreen or
manually.
5.3.1 AutoIris
AutoIris synchronizes the illumination field automatically according
to the magnification factor.
Using the manual override, the illumination field can be adjusted
manually.
5.3.2 BrightCare Plus
BrightCare Plus is a safety function which automatically limits the
maximum brightness depending on the working distance.
Excessively bright light can, in combination with a short working
distance, cause burns to patients.
When shipped from the factory, the "BrightCare Plus" safety
function is activated for all users.
Luminous energy
The optics of the ARveo surgical microscope have a variable working
distance of between 225 and 600 mm. The system is designed in
such a way that it delivers sufficient light to produce a bright image
even at a long working distance of 600 mm.
In accordance with the formula Ev=Iv/d2, the light quantity
continually increases by 710% when the working distance is
changed from 600 to 225 mm.
(Ev= light intensity, Iv= brightness,
d= distance from light source).
This means that less light is required to work with the microscope
at a shorter distance than at a greater distance.
It is advisable to begin with a low light intensity and
increase it until an optimum level of illumination is
achieved.
Heat release
Heat from non-visible light (over 700 nm) is filtered out of the light
from the used xenon light source. Nevertheless, white light also
always develops heat. An excessive amount of white light can lead
to overheating of tissue and metal objects.
It is advisable to begin with a low light intensity and
increase it until an optimum level of illumination is
achieved.
BrightCare Plus display
When BrightCare Plus is activated, the red line on the brightness
adjustment bar shows the maximum adjustable brightness for the
current working distance.
The brightness cannot be set to a level beyond the red line unless
the BrightCare Plus function is intentionally deactivated.
When the working distance is reduced too much at a set brightness,
the brightness is reduced automatically.
5.4 Leica FusionOptics
This feature provides an augmentation in resolution and depth of
field for an ideal 3-D optical image.
Leica FusionOptics operates with two separate beam paths with
different information: the left beam path is optimized for high
resolution, the right beam path for optimum depth of field.
The human brain merges these two very different images to a
single, optimal spatial image.

Functions
ARveo / Ref. 10 747 384 / Version 04 15
5.5 Leica SpeedSpot
Leica M530 is equipped with the Laser focussing aid Leica
SpeedSpot.
If Leica SpeedSpot is activated for the current user (see page49),
the focussing aid is released when the brakes are released or when
focussing.
Two convergent light beams meet exactly in the focussing point of
the microscope.
Exit of the laser beams
Laser
Course of the laser beams
Laser

Controls
16 ARveo / Ref. 10 747 384 / Version 04
6 Controls
6.1 Leica M530 Microscope with arm
system
1
2
3
4
5
78910
6
11
12 13
14
6
1 Status LED for fluorescence
- LED illuminates in blue = FL400 mode
- LED illuminates in yellow = FL800 mode
- LED illuminates in green = playback mode
- LED illuminates in magenta = GLOW800 mode
- LED illuminates in cyan = FL560 mode
2 Status LED for recording
LED lights up red = recording in progress
3 Push-button for intraoperative AC/BC balancing
4 Switch for manual balancing of the C carriage
5 C carriage
6 Handle
7 Display of set working distance and magnification
8 Leica M530 Optics carrier
9 Switch for manual balancing of the A carriage
10 A carriage
11 Handle clamping lever
12 Switch for manual balancing of the B carriage
13 B carriage
14 Microscope carrier
6.1.1 Optics carrier – rear
LeicaM530 with ULT530 or GLOW800
1
1 Optical fiber connection
6.1.2 Optics carrier – controls
Leica M530 with ULT530 or GLOW800
6
4 3 2 1
8
9
5
7
Button "Focus lock" (counter-sunk)
2 LED Focus lock active
3 Receiver Remote Control Camera
4 Rotary knob "Working distance" (emergency operation only)
5 Rotary knob "AutoIris manual override"
6 Rotary knob "Magnification" (emergency operation only)
7 Assistant back/side
8 Fine focus back assistant
9 Button "AutoIris reset"
The Leica Accessories controls are described in the
corresponding user manuals.

Controls
ARveo / Ref. 10 747 384 / Version 04 17
6.2 Control unit
1
2
3
1 Touch panel
2 Push-button with illumination LED (on/off)
3 Push-button with LED for Auto Balance
6.3 Interface panels
1 5 6 72 3 4
1 AD.F. Additional Function 2
2 AD.F. Additional Function 1
3 Foot/handswitch 2 *
4 Foot/handswitch 1 *
5 Internal CAN **
6 External CAN ***
7 External CAN ***
* Only foot and handswitches supplied by Leica Microsystems
(Schweiz) AG may be connected to the foot/handswitch 1 and 2 (3)
and (4) terminals.
** not used
*** Only systems verified by Leica Microsystems (Schweiz) AG may be
connected here.
AD.F. 1 and 2 are digital relay outputs that can switch
24 V/2 A.
9
10
11
12
13
14
15
16
17
18
19
20
8
8 not in use
9 camera input, optional
10 BNC IN (2x)
11 BNC OUT
12 S-video IN (2x)
13 S-Video OUT
14 only for Storz footswitch
15 only for Sony 12 V NIR
camera
16 only for Leica recording
systems
17 XGA IN 3 from common, e.g.,
endoscope
18 XGA IN 2 from IGS
19 XGA IN 1 from
LeicaFL800ULT (SGA output
from documentation/
recording system)
20 XGA OUT CaptiView
21 22 2423
21 S-Video
22 HDMI
23 BNC
24 Ethernet***
Connections (21) to (23) are couplings for guiding
connections of an optional video control system unit or a
camera control unit towards the outside.
Medically approved devices only.

Controls
18 ARveo / Ref. 10 747 384 / Version 04
Interface panels with GLOW800
25
26
25 DVI In from endoscope camera (HDMI compatible)
26 XGA in from IGS systems
27 28 29
27 DVI out for external monitor (note the requirements regarding
EMC on this page)
28 SDI out for IGS systems
29 Ethernet***
*** Only systems verified by Leica Microsystems (Schweiz) AG may be
connected here.
External Monitor
Interface panel stand
Ferrite 1
Ferrite 2
Ferrite 2
Ferrite 1
Requirements regarding EMC
To reduce emission and ensure EMC compatibility of external monitors
connected to the DVI outlet (see picture).
The cable has to be equipped with 2 ferrites each (outlet at stand an inlet
at Monitor).
Specification for the ferrites:
Würth 74271622 (tested ferrite)
Würth 74271112 (tested ferrite)
Ferrites with the same frequency/impedance charateristic can also be
used.
Table of contents
Other Leica Microscope manuals

Leica
Leica DVM6 User manual

Leica
Leica EZ4 User manual

Leica
Leica DM100 User manual

Leica
Leica BM E User manual

Leica
Leica M500 N User manual

Leica
Leica Sp5 WLL STED Operation instructions

Leica
Leica WILD M690 User manual

Leica
Leica DMI6000 B User manual

Leica
Leica M165 FC User manual

Leica
Leica Stellaris 5 User manual
Popular Microscope manuals by other brands

Edu Science
Edu Science M640X user manual

Vanguard
Vanguard 1210CM, 1211CM, 1220CM, 1221CM, 1222CM, 1223CM, 1230CM, 1231CM, 1232CM,... Operation manual

Niigata seiki
Niigata seiki XTS2021 instruction manual

3D Histech
3D Histech Pannoramic 250 FLASH III user guide

Philips
Philips CM200 operating manual

3B SCIENTIFIC PHYSICS
3B SCIENTIFIC PHYSICS 1013377 instruction manual