Contents
Page
Introduction
User manual............................................................................3
Product identification...........................................................3
Symbols in this user manual................................................3
Design and function ..............................................................4
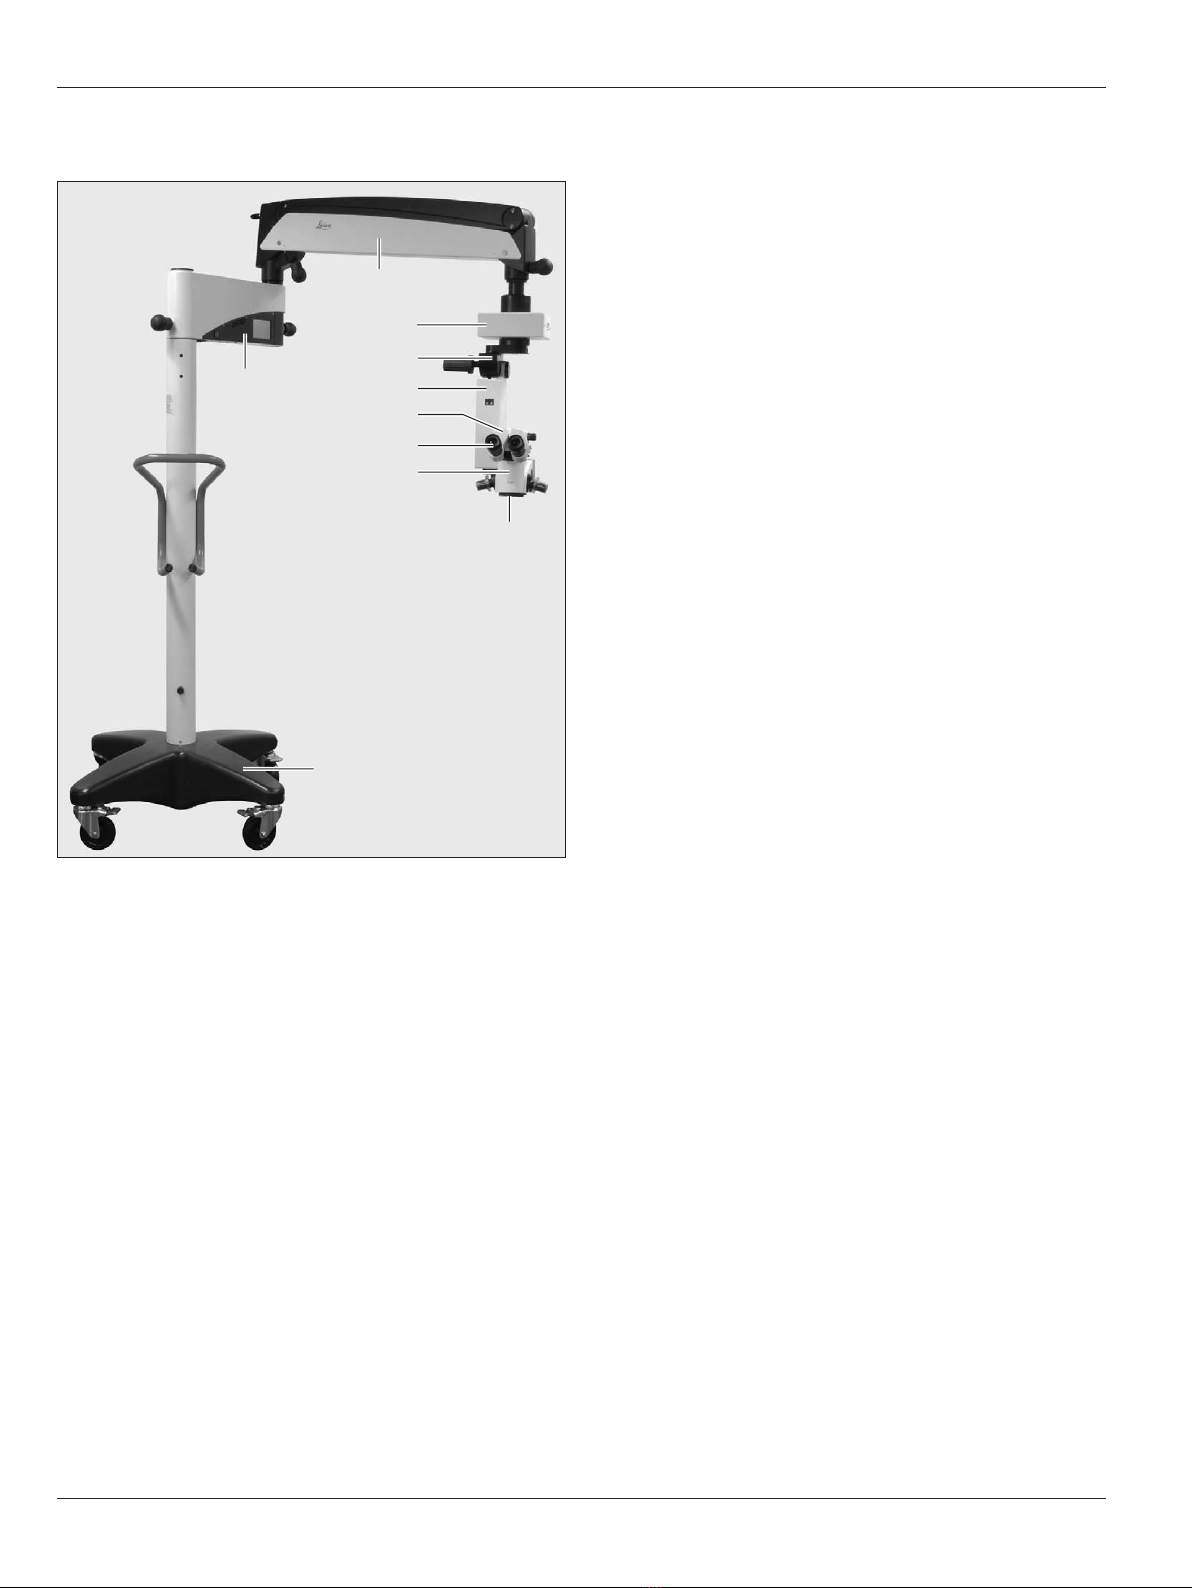
Controls
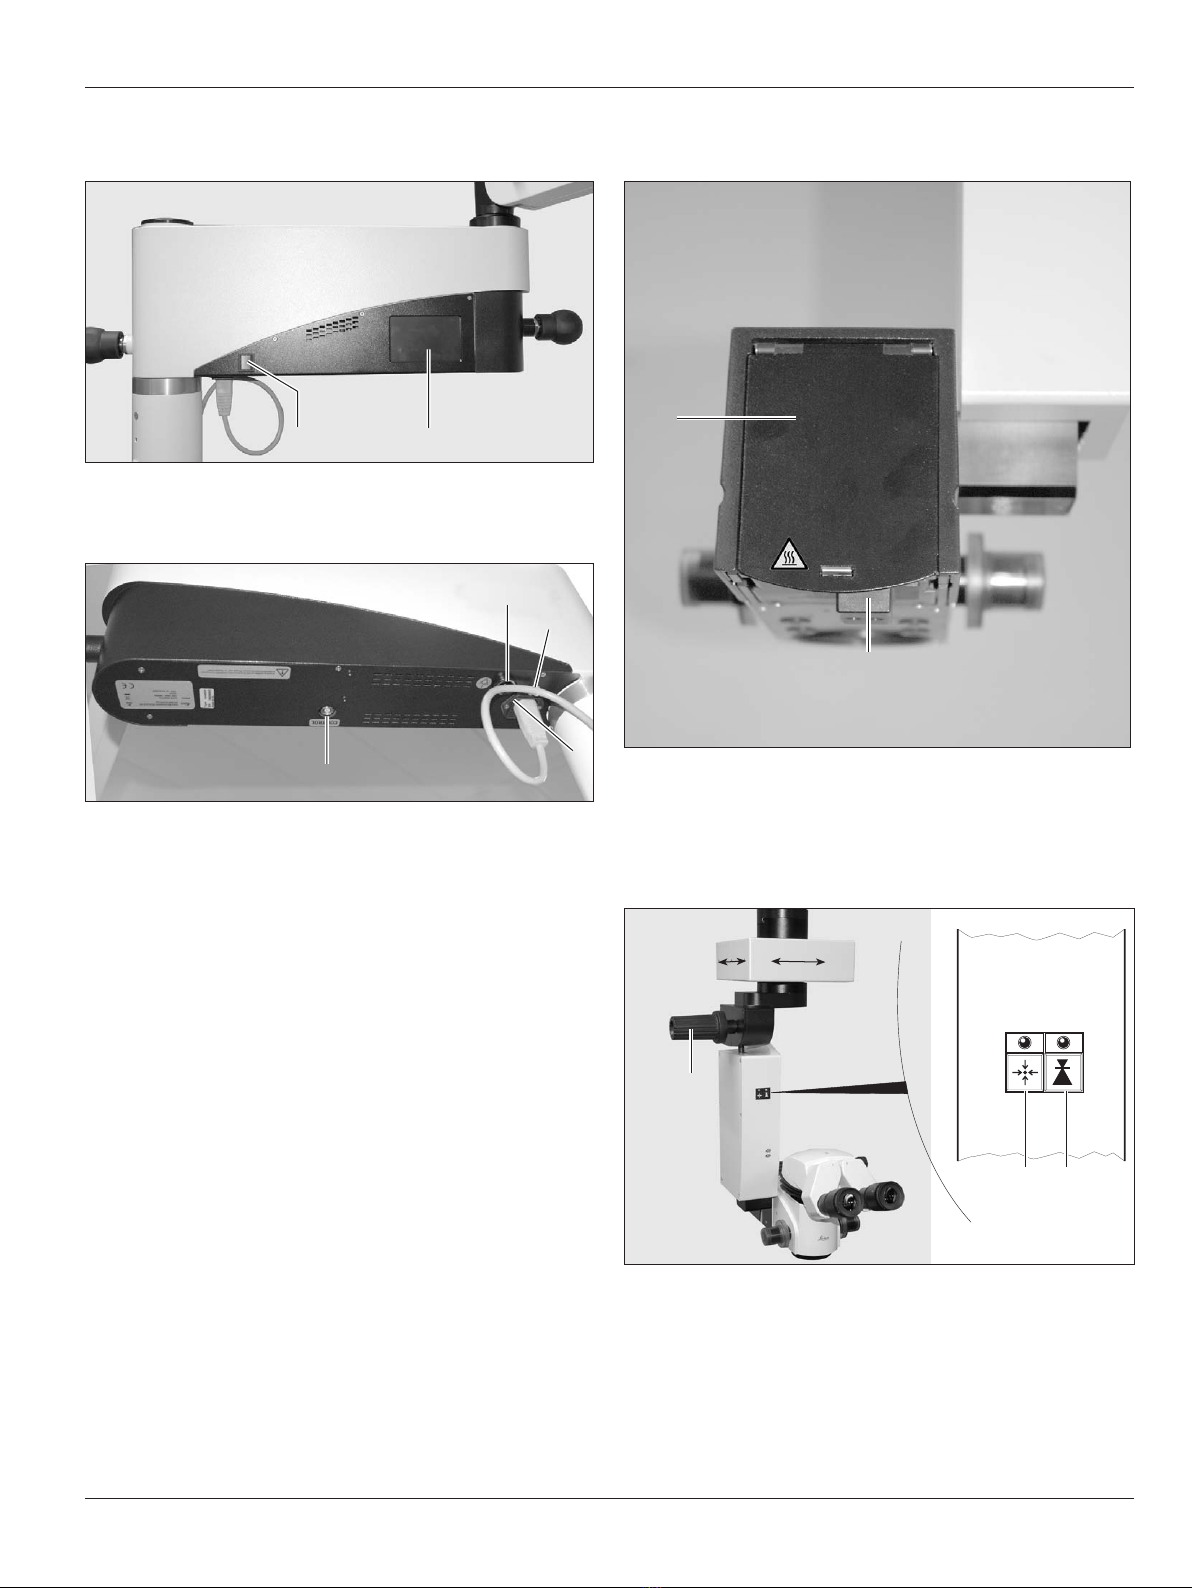
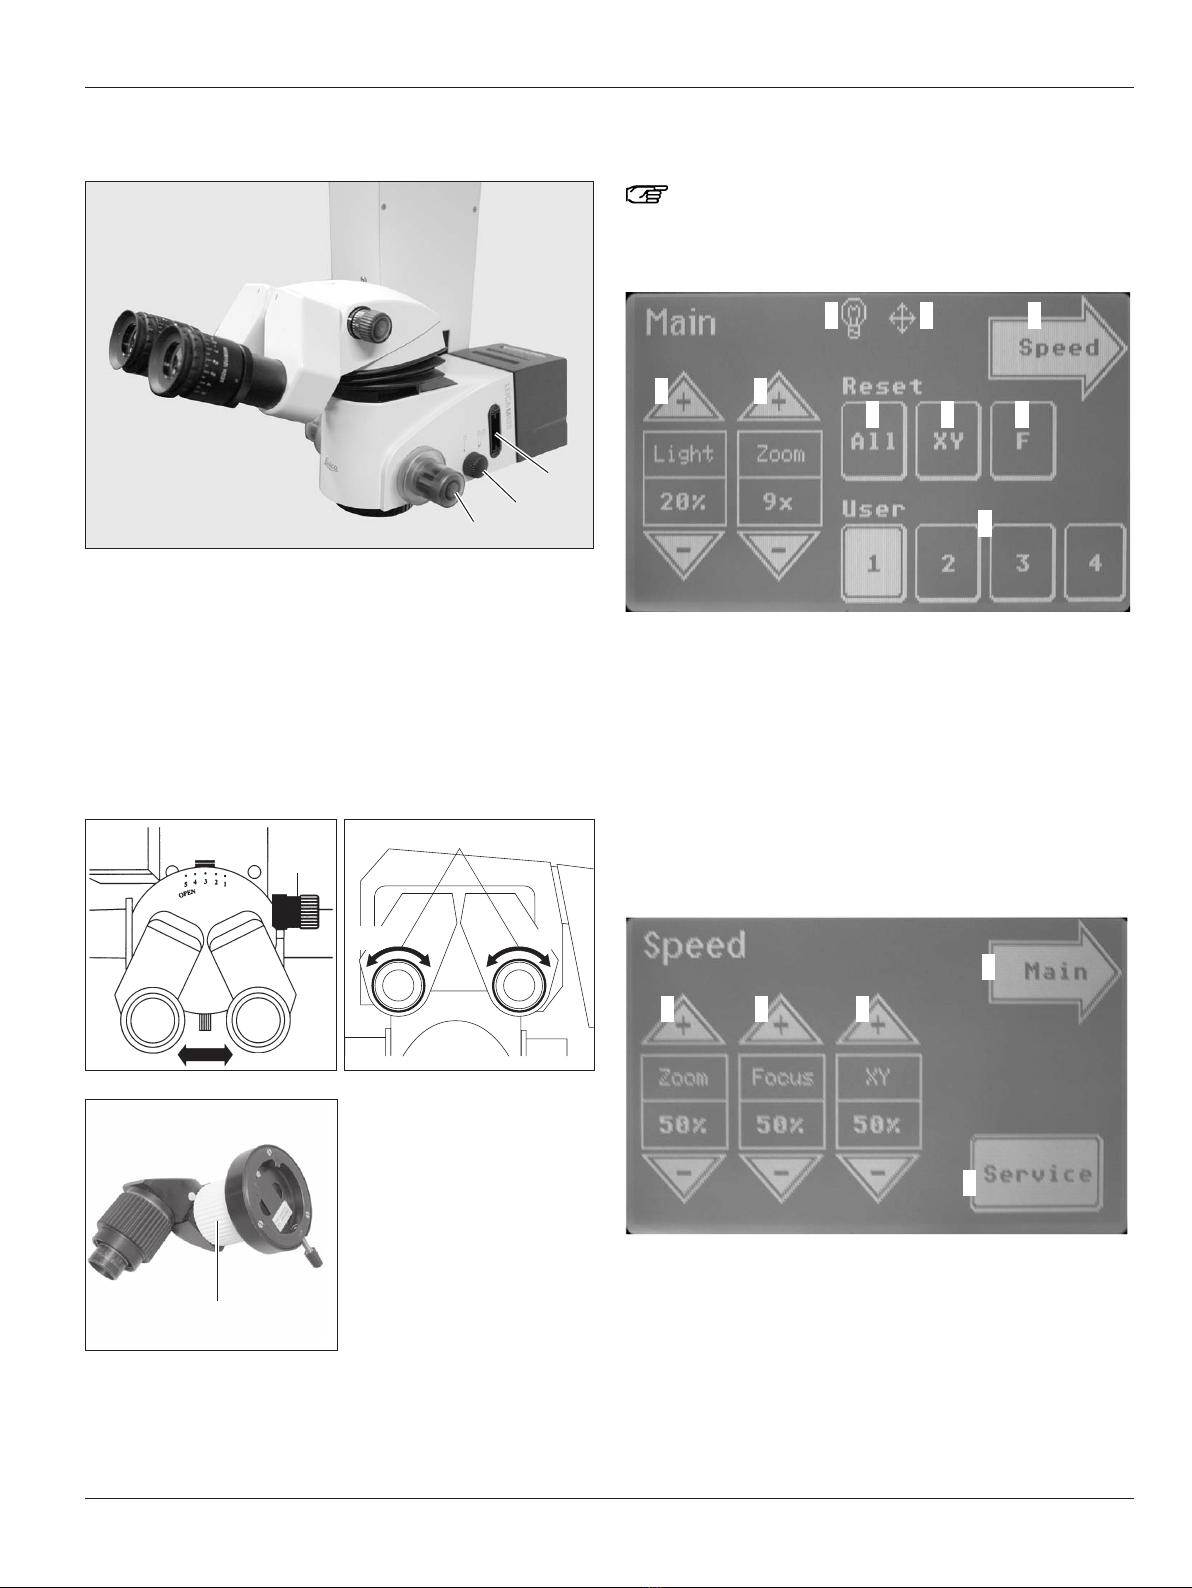
Control unit .............................................................................5
Lamp housing .........................................................................5
Tilt head/focus unit ...............................................................5
Footswitch (standard configuration) ................................6
Stand........................................................................................6
Optics carrier .........................................................................7
Binocular tube, eyepiece,
second observer tubes.........................................................7
User interface of the control panel....................................7
Preparation Before Surgery
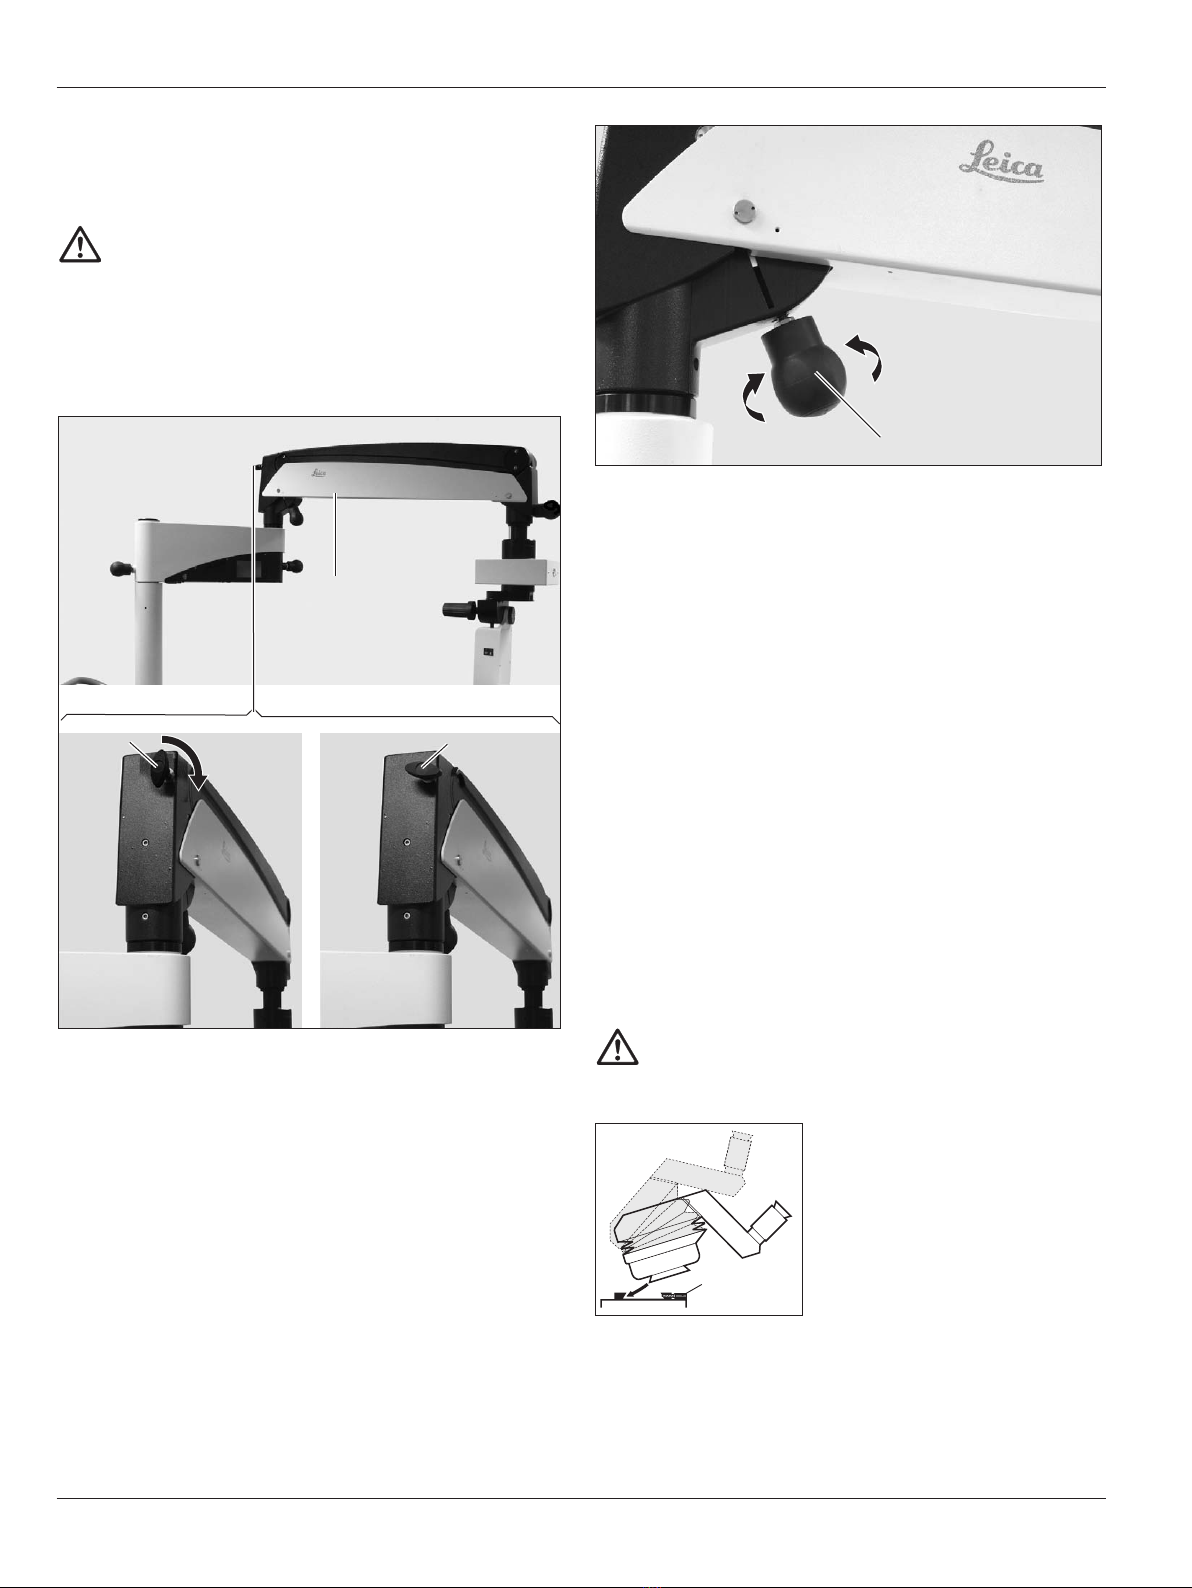
Changing accessories of the surgical microscope
and balancing the swing arm..............................................8
Installing binocular tube, eyepiece and objective..........8
Fitting adapters for accessories ......................................10
Adjusting the second-observer tube...............................10
Fitting documentation accessories.................................11
Selecting documentation accessories ...........................12
Adjusting the eyebase and eyepoint ...............................13
Adjusting the parfocality ...................................................13
Show/switch footswitch type ..........................................13
Reversing + and – directions of the
XY unit....................................................................................14
Transporting the surgical microscope ............................14
Positioning the surgical microscope at the
operating table.....................................................................15
Installing sterile components ...........................................16
Checking the function of the lamp ...................................16
Preparing the surgical microscope for use....................17
Use
Positioning the microscope...............................................18
Adjusting the focus .............................................................18
Adjusting the magnification ..............................................18
Adjusting the illumination..................................................19
Switching from main to spare illumination.....................19
Setting the illumination type and working distance ... 20
Operating the control panel ............................................. 20
Decomissioning................................................................... 22
Accessories
Components and accessories.......................................... 23
Video accessories for Leica M620 F20 .......................... 28
Load table............................................................................. 29
Page
Safety Notes
Intended use of instrument .............................................. 31
Information for the person responsible for the
instrument............................................................................ 31
User qualifications ............................................................. 31
Information for the user .................................................... 31
Manufacturer's declaration of electromagnetic
compatibility (EMC)............................................................ 33
Table 2 from EN 60601-1-2:2007....................................... 34
Table 4 from EN 60601-1-2:2007....................................... 35
Table 6 from EN 60601-1-2:2007....................................... 36
Dangers of use .................................................................... 37
Signage................................................................................. 39
Care and Maintenance
Care instructions................................................................ 40
Cleaning the control panel................................................ 40
Maintenance ....................................................................... 40
Care and Maintenance of the
Leica Footswitch ................................................................ 40
Changing the fuse................................................................41
Changing the bulb................................................................41
Function check.....................................................................41
Notes on reprocessing of resterilizable products....... 42
Instructions ......................................................................... 42
Maintenance ....................................................................... 43
Disposal
Disposal................................................................................ 44
What To Do If...?
General malfunctions ........................................................ 45
Microscope.......................................................................... 45
TV, photography.................................................................. 46
Specifications
Electrical data..................................................................... 47
Microscope.......................................................................... 47
Optical data.......................................................................... 47
Control unit ......................................................................... 47
Stand..................................................................................... 48
Ambient conditions ............................................................ 48
Standards fulfilled.............................................................. 48
Limitations of use ............................................................... 48
Configurations and Weights ............................................ 48
Dimensions .......................................................................... 49
Leica M620 F20 / Ref. 10 714 371 / Version 00
2