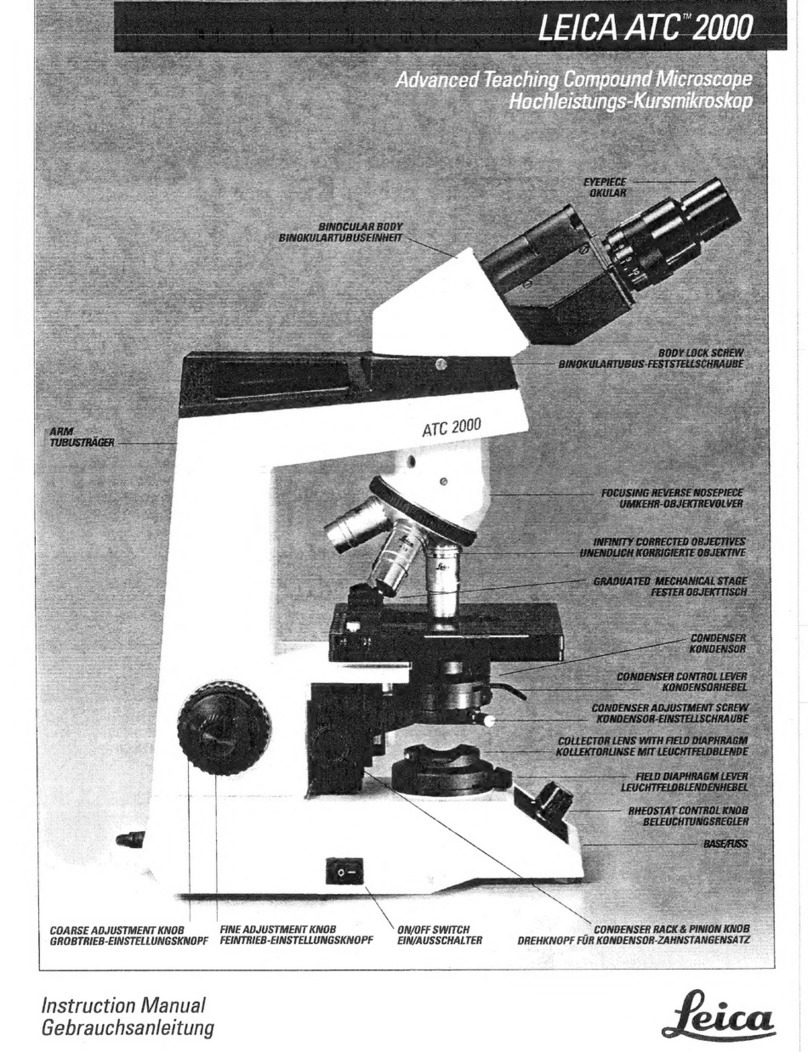
Leica SP5 II User manual

8/31/2020 Instruction for Leica SP5 confocal microscope
file:///E:/pang/work/web-oringinal/sp5_inst_print.shtml 1/16
Instructions for the Leica SP5 II laser
scanning confocal microscope
Content: Check-in and Start up • Set up acquistion parameters • Optimize acquistion parameters • Acquire
a z-stack • Sequential scan • Check out • Appendix
Check-in and Start up
1. Main Switch Board: switch on PC Microscope, log on and wait until Windows XP is fully loaded
2. Main Switch Board: switch on Scanner Power, wait 5 S
3. launch LAS AF (desktop shortcut),
select the desirable Configuration
and scanner mode, then click ok
Note: Usually, Configuration is
Machine and Activate Resonant
Scanner is unchecked. However,
if the previous user has selected
simulated SP5 or used resonant
scanner, these will become the
default when start up, therefore please check carefully before clicking OK.
4. make sure the condenser is in the "up" position, click Yes to initialize the stage when prompted
this enables Mark and Find, and Tile scan
stage is configured to return to the position before initialization
5. Main Switch Board: when the software finish loading, switch on Laser Power and turn the key clockwise to
On-1 to enable Laser Emission
6. in LAS AF, click on the Configuration Operating step on top left to bring up Hardware Configuration
Laser: check to activate lasers that will be used for the session
Note: If you need the Ar laser, set the power to 20%. You can use higher power which will
shorten the life span of the laser; but one should never go above 80% into the red region.
(optional) Settings > Resolution > Bit Depth: select 12 Bit for 4096 grey levels, the maximum this
system can offer

8/31/2020 Instruction for Leica SP5 confocal microscope
file:///E:/pang/work/web-oringinal/sp5_inst_print.shtml 2/16
Set up acquistion parameters and acquire an image
1. Beam Path Settings in the central Work area: there are 3 ways to
configure excitation and emission parameters
A. use a preset
i. click on Load/Save single setting
ii. select a Leica or User Settings (for multichannels, the default
is simultaneous scan, see below for sequential scan)
B. reuse a setting from a previous scan
i. open a previous experiment
ii. in the Experiments tab, click to select the desirable scan
iii. right-click to choose Apply Setting or hit Apply button at the bottom
C. assemble from scratch
i. set laser power
activate the shutter
set power level of the desirable laser
line, 5% is a good starting point

8/31/2020 Instruction for Leica SP5 confocal microscope
file:///E:/pang/work/web-oringinal/sp5_inst_print.shtml 3/16
ii. select the beam splitter (dichroic)
selections for different laser lines
beamsplitter
\
laserline(nm)
RT 30/70 for
backscatter or
reflection
Substrate TD
488/561/633
DD
458/514
RSP
500
DD
488/561
spectra or details for the beam splitters are in the Appendix
405 ✓ ✓
458 ✓ ✓ ✓
476 ✓ ✓ ✓ ✓
488 ✓ ✓ ✓ ✓
514 ✓ ✓
561 ✓ ✓ ✓
633 ✓ ✓
iii. setup the detector
select the emission band: drag the lower and upper
bounds or double click the slider to enter the begin
and end wavelengths
Caution: Drag the sliders slowly or else they will
jam!
click on PMT n to adjust PMT Gain* and Offset*;
good starting values are 800 and 0, respectively
select a LUT as default
activate the PMT

8/31/2020 Instruction for Leica SP5 confocal microscope
file:///E:/pang/work/web-oringinal/sp5_inst_print.shtml 4/16
2. select the Acquire Operating step on top left, click the Acquisition tab to set up the data format
A. Acquisition mode panel
defaults to xyz simultaneous scan
seq. button enables sequential scan
Tile scan, and Mark and Find
Best Focus
B. XY panel (click ▶ on upper right corner to expand)
Format: frame resolution defaults to 512x512pixels, max 8192x8192pixels
Speed: line frequency defaults to 400Hz, scan area will be reduced above 700Hz, max 2800Hz
Zoom* and panning
Average and Accumulate
Scan Field Rotation*
Pinhole*: default is 1AU and displays in µm
3. acquire an image (buttons in the lower left pane of LAS AF)
Live: scan, apply accumulate if set
Capture Image: acquire an image at the current z position, apply both average and accumulate if set
Start: acquire all configured scans, e.g., z-stack, stage positions, tile scan, time points, spectral series etc.
*these parameters are also adjustable via the Smart Panel with the default configuration
Optimize acquisition parameters
1. center your prep in the field of view with either BF or FLUO (see Modes of operation in the Appendix)
2. to toggle on scanning, click Live or use the button on the left side of Smart Panel
Caution: if there is no signal in the viewer display Window on the right, DO NOT move the stage
controls (XYZ) or increase the laser power; try the following
i. with BF or FLUO, make sure object of interest is still in focus
ii. open up pinhole to increase the slice thickness
iii. raise PMT gain
iv. lastly, increase laser power
3. bring the object of interest into focus, adjust PMT gain, offset, and laser power to obtain an image
with good dynamic range
Note: the "glow-over, glow-under", Glow (OU) LUT which displays 0 intensity in green and
saturation in blue (255 for 8-bit or 4095 for 12-bit), facilitates this setup
i. top left side of the viewer display Window: activate the Glow (OU) LUT via the Quick
LUT button which cycles through the default , Glow(OU) , and grey LUTs
ii. adjust offset so the pixels in the area you think should be darkest just turn green, usually
around -0.2%; increase the sensitivity of the control panel offset knob may help
iii. vary the PMT gain or laser power so a few pixels in the brightest object of interest just turn
blue
4. with multichannel simultaneous scan, always check for cross-talk between channels by dropping the laser
power of the suspected channel to zero; if cross-talk does present, use sequential scanning

8/31/2020 Instruction for Leica SP5 confocal microscope
file:///E:/pang/work/web-oringinal/sp5_inst_print.shtml 5/16
Z-stack
Z-Stack panel
focus control is selectable: z-Galvo (default) or z-
Wide
focus (z-Position) can be adjusted with the
microscope controls, Smart Panel and also via
software (see z-drives in the Appendix)
z-drive controls
controls
\
z-drives
microscope
focus knob* Smart Move* Smart Panel range min.
step size
*the objective turret i.e., focus is always adjustable with the microscope focus knob and Smart Move, regardless of the z-drive
selection in the software
z-Galvo ✓±250µm 42 nm
z-Wide ✓ ✓ ✓ >4mm 49 nm
Acquire a z-stack
1. in Live mode, move deeper into the prep (z is more positive) to where the stack should start, click
Begin to register this z-Position (black: unset, red: set)
2. move towards the outside of the prep to where the stack should stop, click End to register this z-
Position
3. stop scanning, click the z-step size button and then enter the appropriate slice thickness (check setting
slice thickness in Appendix for recommendations)
4. select the number of passes to average in the XY panel
5. click Start (lower middle) to collect the stack

8/31/2020 Instruction for Leica SP5 confocal microscope
file:///E:/pang/work/web-oringinal/sp5_inst_print.shtml 6/16
Sequential scanning
1. set up a simultaneous scan for the fluorophores needed with regard to laser power, beam splitter, emission
band, and PMT settings; activate one laser line and detector combination at a time to find out the optimal
acquisition parameters
2. click the button on Acquistion Mode on the upper left to open the Sequential Scan panel
3. select between lines, -frames, or -stacks (see useful tips below)
4. click the + button to add as many scans as needed
5. for each scan
drop the unwanted laser power to 0%
select the appropriate beam splitter
deactivate the unwanted PMTs
6. (optional) save the setting
useful tips:
if you use different beam splitters, have overlapping emission bands, apply different number of passes in
average or accumulate, or need different size pinhole for different scans, you will need to use the slower
"between frames" or "between stacks"
with "between frames" or "between stacks", keep hardware changes to a minimum between scans will ensure
fast and smooth operation e.g., use the same emission band for the same PMT in each of the scans
each scan can have multiple simultaneous channels e.g., adding the transmission detector, or have 2
simultaneous channels that do not show any cross-talk
the function buttons act differently in different sequential scan mode
display behavior of the function buttons in sequential scan
mode
buttons
\
scan mode
Live Capture Image Start
*to obtain all scans at the current focus (z-position), switch to xyt mode, set frame to 1, and then click Start
between lines all scans all scans acquire all scans
between frames currently selected scan currently selected scan* acquire all scans
between stacks currently selected scan currently selected scan* acquire all scans

8/31/2020 Instruction for Leica SP5 confocal microscope
file:///E:/pang/work/web-oringinal/sp5_inst_print.shtml 7/16
Stage automation
Caution: whenever the Tile Scan or Mark and Find window is launched
i. any tiles or points marked will be processed when you click Start
ii. the grey area represents the stage, a left mouse click will cause the stage to move to that specific
location and can be dangerous for any objective lenses except the 10×
Tile Scan
1. click to toggle displaying the Tile Scan window
2. check that Scan Field Rotation is set correctly (see
r elevant details
below)
3. go Live
4. move the prep/stage to the left boundary of the region of interest, focus
5. click to mark the current position
6. repeat the last 2 steps for the top, right, and bottom boundries, the software will calculate the matrix
needed
Note: Marking any points outside the established coverage area will expand the matrix but
marking any points inside will not change anything. Unfortunately, there is no provision to
save the points here or apply any points already saved from Mark and Find.
7. move about to make sure the coverage is sufficent, especially with multichannel acquistion
8. setup Z-stack, configure Average etc., as needed
9. click Start to acquire data
Mark and Find
1. click to toggle displaying the Mark and Find window
2. if there are existing coordinates, you can save or clear them first
3. go Live
4. move the prep/stage to the desirable area and focus on the object of interest
5. click to mark the current position, which will be listed as positionN
6. repeat the above 2 steps to mark more positions as needed, i.e., positionN+1, N+2... etc.
7. you can go back to any position by selecting it from the drop down list

8/31/2020 Instruction for Leica SP5 confocal microscope
file:///E:/pang/work/web-oringinal/sp5_inst_print.shtml 8/16
1. viewer display window 2. at the microscope
viewer display windows rotated 90 ° right
3. Tile Scan or Mark and Find window
viewer display windows rotated 90 ° left
relevant details
for tile scan, current rotation calibration for stitching is -0.19 ° (-0.18 ° is also OK) with a 10% overlap
tile scan order is row-wise in the viewer display window, starting from the lower left, which
corresponds to column-wise starting from the lower right as displayed in the Tile Scan window
Note: The orientation of the specimen as shown in the viewer display window (1) is rotated
when compared to that as observed through the ocular of the microscope (2) or represented
in the Tile Scan or Mark and Find window (3). Confusing? Indeed!
coordinate system
values (mm) displayed in the window denotes the upper right corner of the image in the viewer
display window
upper left of the stage is 0, 0
lower right of the stage is 126, 82

8/31/2020 Instruction for Leica SP5 confocal microscope
file:///E:/pang/work/web-oringinal/sp5_inst_print.shtml 9/16
Check out
1. lower the turret, remove your prep; if applicable, remove oil/immersion fluid on immersion objectives
2. switch to the 10× objective
3. if there are users signed up within the next 6 hours do the following, otherwise go to the next step
i. save your experiments and quit LAS AF
ii. copy your data to external storage media or network file servers, as needed
iii. submit your usage using the google form and log out of Windows
4. if no one signed up within the next 6 hours, please proceed to shutdown everything
i. save your experiments and quit LAS AF
ii. Main Switch Board: turn the key counterclockwise to Off-0 to disable Laser Emissions
iii. Main Switch Board: wait 10 s, switch off Scanner Power
iv. copy your data to external storage media or network file servers, as needed
v. submit your usage using the google form
vi. shutdown Windows XP
vii. Main Switch Board: after computer has shutdown, switch off PC Microscope
viii. Main Switch Board: when the Argon laser cooling fan stops, switch off Laser Power
ix. turn off FLUO, if applicable
x. put the cover back on the microscope
5. clean up the work area

8/31/2020 Instruction for Leica SP5 confocal microscope
file:///E:/pang/work/web-oringinal/sp5_inst_print.shtml 10/16
Appendix
Content
DMI 6000 inverted microscope: basic controls • modes of operation • using immersion objectives
beam splitter spectra • working with lif files • scanner
software overview and layout
LAS AF user interface
DMI 6000 inverted microscope
Controls
focus knob on either side of microscope (z-Wide)
commonly used functions are controlled by 5 sets of buttons
1. left rear variable function buttons
CHGTL◑: switch to transmitted light, TL
and rotate through different modes TL_BF
(bright field), _DIC, _POL (polarization)
CHANGECS: toggle between confocal SCAN
and the last selected TL mode
COMBI◑: epifluorescent + DIC
Z COARSE Z FINE: toggle z control
2. left front: Illumination Manager
TL/IL: toggle between TL and IL (incident-
light i.e., epifluorescence)

8/31/2020 Instruction for Leica SP5 confocal microscope
file:///E:/pang/work/web-oringinal/sp5_inst_print.shtml 11/16
AP: aperture diaphragm for TL
INT : light intensity, press both together to toggle between Coarse and Fine mode
FD: field diaphragm for IL
3. front top row switches should not be activated, or
else it may block viewing through the
binocular, to rectify
press the leftmost button to select
binocular
press the rightmost button to deselect
the supplemental magnification changer
SHUTTER: for epifluorescent illumination
bottom 6 buttons: for selecting specific cube
(DAPI, GFP, DsRed) for epifluorescence; press
the middle 2 buttons together to display the programs assigned to the variable function buttons
4. right rear variable function buttons
CHGOBJ↻: rotates the objective turret one position
clockwise in the current mode (dry or immersion)
CHGOBJ↺: same as above but counterclockwise
DRY/IMM: toggles between dry and immersion mode
5. right front: Focus buttons
Z↑: moves the Z drive up when a upper focus stop has
been set
Z↓: moves the Z drive down
SET+Z↑: toggles set and unset upper focus stop
SET+Z↓: toggles set and unset lower focus stop
SmartMove remote control for stage movements, as observed in the viewer
display window of the software
1. X
2. Y
3. Z (focus, z-wide)
4. left button set selects Precise or Fast XY movement
5. right button set selects FINE or COARSE focus control

8/31/2020 Instruction for Leica SP5 confocal microscope
file:///E:/pang/work/web-oringinal/sp5_inst_print.shtml 12/16
front LCD panel displays the current status
1. Contrasting method e.g., TL, FLUO, or SCAN;
and IL SHUTTER status
2. Objective lens and Magnification, see front top
buttons above
3. Illumination and Apertures
4. Camera Ports/Eyepieces, see front top buttons
above
5. Focus control
Note:display on the right shows z at 0µm
with upper focus stop set and lower
focus stop unset
if upper focus stop is unset, display will indicate --.--mm and
indicates lower focus stop is set
Modes of operation
TL
1. press CHGTL◑ to rotate
through BF, DIC, and POL
2. adjust intensity (INT) and
aperture (AP) as needed
3. optional, press CHG CS to scan
mode thus shutoff transmitted
light
4. a knurled wheel (arrowhead) on
the left side below the objective
turret adjusts the DIC shear; it's a
rather tight space!
IL/epifluorescence
1. turn on FLUO (fluorescent light source)
2. press the button for the desirable cube, see the front buttons in Controls
3. press Shutter to illuminate specimen
4. adjust the intensity (INT) and field diaphragm (FD) as needed
5. press Shutter to block illumination when done viewing

8/31/2020 Instruction for Leica SP5 confocal microscope
file:///E:/pang/work/web-oringinal/sp5_inst_print.shtml 13/16
Using immersion objective lenses
2 ways to switch from DRY to IMM objectives
semi-auto with Mark and Find (recommended)
1. locate the area of interest with a dry objective and focus
2. click to bring up the Mark and Find interface
3. click to record the current position: positionN
4. press and hold Z↓ to lower the turret completely
5. switch immersion objective into light path
via the objective link in LAS AF (recommended)
or at the microscope: press DRY/IMM to switch mode, press either button CHGOBJ↻
or ↺ to select the desired objective
6. move the stage to expose the objective so you can apply immersion fluid
7. apply an appropriate amount of immersion fluid
8. select positionN from the drop down list and the stage should move back and bring the
objective to focus
9. click to dismiss the Mark and Find interface
manual (not recommended)
1. locate the area of interest with a dry objective and focus
2. make sure upper focus stop is set
3. press and hold Z↓ to lower the turret completely
4. switch immersion objective into light path (see semi-auto procedures above)
5. offset the turret ~15° counterclockwise manually and apply a small drop of immersion fluid on
the objective
6. swing the turret back into position
7. press and hold Z↑ to put the prep back to the previously set focal plane
when finish
1. press and hold Z↓ to lower the turret completely
2. remove slide
3. at the end of the session, use the provided lens paper to remove the excess immersion fluid from the
front lens
4. switch in the 10× objective
Best practice
always set the upper focus stop whenever you put on a prep, press SET+Z↑
switch objective lenses via LAS AF software or the right rear buttons on the microscope
if you want to manually switch the objective, DO NOT grab the objective lens barrel, use the turret
instead
Caution: All our immersion objective lenses have aperture or correction collar, grabbing the
barrel can easily move the collar and also strain the lenses.
select the 10× objective at the end of the session

8/31/2020 Instruction for Leica SP5 confocal microscope
file:///E:/pang/work/web-oringinal/sp5_inst_print.shtml 14/16
20×/0.7 NA multi immersion objective, currently set
to use oil only
OIL: oil, with or without coverglass
GLYC: glycerol, with or without coverglass
0.17: water, with #1.5 coverglass
W: ca. 3% NaCl, without coverglass
0: water, without coverglass
63×/1.2 NA water immersion objective, set at 0.17
T+ ←: turn to this direction for higher
temperature or thinner coverglass
0.14 0.16 0.18: water, with specified
coverglass thickness in mm
→ SW: turn to this direction for higher salt
concentration, lower temperature, or thicker
coverglass
40×/1.25 NA oil immersion objective 63×/1.4 NA oil immersion objective
more on immersion objective lenses
objective with correction collar (the upper knurled ring with a black dot)
Note: Please consult facility staff if it is the first time you want to adjust the correction collar, the
poor design of this area of the inverted stand makes it almost impossible to adjust the collar.
objective with iris diaphragm, controlled by turning the aperture collar (knurled ring)
these lens should be used with the iris diaphragm fully open for the highest NA
to fully open the iris turn the collar clockwise slowly until it clicks
the collar should have a little bit of resistance to turning at this fully open position

8/31/2020 Instruction for Leica SP5 confocal microscope
file:///E:/pang/work/web-oringinal/sp5_inst_print.shtml 15/16
TD 488/561/633 DD 458/514 is similar to the TD 458/514/594 shown
here
DD 488/561
Smart Panel (coming soon)
beam splitter spectra
RT 30/70 is 30% reflection and 70% transmission
Substrate is just plain glass (50/50)
RSP 500 is a 500 nm long pass filter
TD and DD are triple and double dichroics (transmission bands in blue)
working with lif file
use ImageJ and Bio-Formats plugins, see details on using ImageJ
use the free Leica software
32-bit Windows 7 and XP: LAS AF Lite
64 bit Windows 7: LAS X from the Downloads section, or LAS AF Lite
scanner
dwell time at several common scan speed settings
line frequency (Hz) horizontal scan duration (s) dwell time (µs)
max min
10 0.1 84.9 49.7
100 0.01 8.5 5.0
400 0.025 2.1 1.2
600 0.0017 1.4 0.8
1000 0.001 0.9 0.5

8/31/2020 Instruction for Leica SP5 confocal microscope
file:///E:/pang/work/web-oringinal/sp5_inst_print.shtml 16/16
Z
software control of the z-drive
This provides alternate means to control the z-Position only when
the Smart Panel is unavailable
enter a number directly into the text boxes of z-Position,
Begin, or End
mouse: place cursor on z-plane (cursor change into double
arrow), either click and drag, or click and then use thumb
wheel
Caution: Use extreme caution with mouse control! It is
very easy to drag the z-position too far and ram the
objective onto the slide and damage the objective.
setting z-step size or slice thickness
the general guideline is to set the z-step size to ½ to ⅓ of
the section thickness (clickable link) shown in the XY panel
section thickness (dz) is dependent on the emission
wavelength (λ), refractive index of the immersion
medium (n) and NA of the objective, and the size of
the pinhole (AU)
dz = √((λ×n÷NA²)²+(AU×n×√2×1.22×λ÷NA²)²)
section thickness can be adjusted to the mean of the
emission wavelength by following the link and then
Apply to the step size
usually the shortest wavelength emission band is used
to set the section thickness in a multichannel scan
use System optimized in the Z-Stack panel if you plan to do
deconvolution
Other manuals for SP5 II
1
Table of contents
Other Leica Microscope manuals