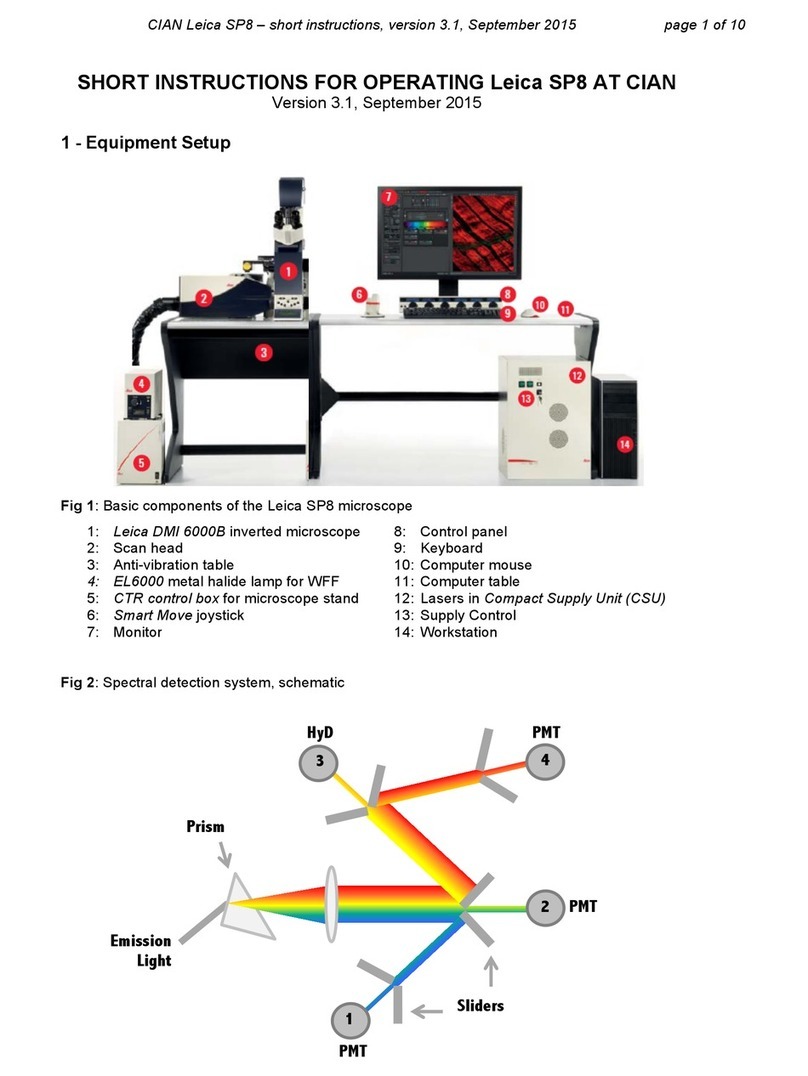
~ Place the detector bar (G) in correspondence with the fluorophore emission by sliding right or left and
resizing. Repeat for each detector.
~ Click the “Live” Button to check settings. View image as intensity values by selecting
the Glow (OAU) LUT with the QLUT button.
~ Adjust Smart Gain so that there are mostly orange and white pixels and minimal blue (saturated)
pixels. If necessary, adjust laser intensity or detector bar positions.
~ Click “Stop” then click “Capture Image” to acquire a single image.
4. Setting up a sequential scan.
~ If you are using the UV laser or have significant overlap between fluorophore emission, a
Sequential Scan may be required. To get started, select the “Seq” button (H).
~ In the Sequential Scan window, click the (+) button until you have the desired number of scans present.
Choose “Between Lines” “...Frames” or “...Stacks.” “Between lines” can only be used when the same
dichroic is used in all scans.
~ Set up the laser and detector bars for each scan as appropriate for each fluorophore, following
directions from #3 above. Changes made in one “Scan” will not affect those made in others.
~ Save settings for use in the future, if desired. Click “Save” in the “Sequential Scan” window.
5. Acquiring a Z-series
~ In the Acquisition tab (B), be sure “xyz” is selected under Acquisition Mode (I).
~ Click “Live”. Move to the top of your sample with the Z position knob in Smart control bar and set the
position by clicking the “Begin” arrowhead (J).
Note: using focus knob onmicroscope or joystick will not adjust galvostage position for z-stack.
~ Move to the bottom of your sample with the Z position knob and set the position by clicking on the
“End” (J) arrowhead. Click “Stop”.
~ Set the desired number/size of z steps.
~ Ensure imaging settings are correct then hit “Start” to collect z-stack.
~ The z-stack will be saved under the Open projects tab, as a Series00X file.
6. Save images
~ At the bottom of the Experiment tab, click “Save All”. Select the appropriate directory and change the
Experiment file name, if desired.
~ Click OK to save.
7. Shut Down
~ Remove sample. Clean oil off objectives with lens paper. Return objective turret to 10x.
~ Transfer files to flash drive or network storage. Close software.
~ If there is another userwithin a 2-hour time period, stop here, leaving microscope and computer
on. End reservation in NUCore. If not, proceed with following steps for complete shutdown.
~ Turn OFF power strip to turn off all components.
~ Cover microscope. End reservation in NUCore.
If help is needed, please see BIF staff
