manuals.online logo
Brands
  1. Home
  2. •
  3. Brands
  4. •
  5. Leigh
  6. •
  7. Tools
  8. •
  9. Leigh D4R User manual

Leigh D4R User manual

F1 Template Assembly,
Mounting and Template Alignment
1Mount the D4R jig firmly to a bench as per
its instructions. Remove the dovetail finger
assembly.














8Move the combined template and bar to the
left until the right side of the outer 1⁄4"[8mm]
opening touches the block ➀. Taking care to not
move the template assembly, tighten the scale
screws at the left end ➁. Remove the block.
Remove the pin and slide the template left. Tighten
the scale screw at the right end ➂. Your Leigh F1
is now ready for use. ■
7Trim off the end of a perfectly straight block
at about 30 degrees. Slide the combined
bar/template to allow the block to protrude into
the last socket of the 1⁄4"[8mm] comb. Clamp the
block with its vertical edge tight against the right
hand side stop.
6Discard the plastic shipping plug from the
centre hole. Align the template so that the
right hand hole ➀ of the three central template
holes aligns with the hole in the bar. Insert the
template pin ➁, gently twisting and pushing the
tapered pin into the hole until it is fully seated.
5Tighten the scale bracket screws ➁, but do
not tighten the scale bar screws ➀ yet. 4Loosen the fence knobs ➀ and move the fence
on the template toward you as far forward as
possible and with the fence scale reading the same
at both ends ➁. Then tighten the fence knobs ➀.
3Slide the template assembly onto the jig
support brackets with the 1⁄2" and 1⁄4"[10
and 8mm] combs toward you and lower it gen-
tly onto the D4R jig’s spacer board ➃ (D4R
UserGuide 1-1). Make sure the scale reading is
the same on both scales, say on the 1"[25mm]
mark, then tighten the thumb screws ➂.
2Loosen the two scale bar set screws ➀,
the two fence bracket screws ➁, and the
two scale thumb screws ➂ at both ends of the
template.
ATTENTION D4R Jig Owners.
This addendum replaces all of Chapter 1 of the F1
User Guide when using the new Leigh D4R Jig Body.
Joining Tradition with Today
© Leigh Industries Ltd. All rights reserved.
This pdf publication may be downloaded and stored on a computer and printed, viewed, and freely distributed for operational guidance and evaluation purposes. This document supplements the full User Guide publication
for the Leigh tool and may refer to and depend on information in other parts of the tool’s User Guide for completeness. Except as provided herein, no part of this document may be reproduced, sold, published or modified
without the prior written permission of Leigh Industries Ltd. [Nov2005]
!Note: These parts are no longer required
for setting up the F1 Template. They are not
included with the Template package, and can be
ignored if you already received them with your jig.
Nov 2005
10:01 am, Nov 10, 2005
F1 Template Assembly,
Mounting and Template Alignment
1Mount the D4 jig firmly to a bench as per
its instructions. Remove the dovetail finger
assembly.















9Move the combined template and bar to the
left until the right side of the outer 1⁄4"[8mm]
opening touches the block ➀. Taking care to not
move the template assembly, tighten the scale
screws at the left end ➁. Remove the block.
Remove the pin and slide the template left. Tighten
the scale screw at the right end ➂. Your Leigh F1
is now ready for use. ■
8Trim off the end of an 8"[200mm) long per-
fectly straight block at about 30 degrees.
Slide the combined bar/template to allow the
block to protrude into the last socket of the
1⁄4"[8mm] comb. Clamp the block with its vertical
edge tight against the right hand side stop.
7Discard the plastic shipping plug from the
centre hole. Align the template so that the
right hand hole ➀ of the three central template
holes aligns with the hole in the bar. Insert the
template pin ➁, gently twisting and pushing the
tapered pin into the hole until it is fully seated.
6Tighten the scale bracket screws ➁, but do
not tighten the scale bar screws ➀ yet. 5Loosen the fence knobs ➀ and move the fence
on the template toward you as far forward as
possible and with the fence scale reading the same
at both ends ➁. Then tighten the fence knobs ➀.
4Slide the template assembly onto the jig
support brackets with the 1⁄2" and 1⁄4"[10
and 8mm] combs toward you and lower it gently
onto the D4 jig’s spacer board ➃ (D4 UserGuide
1-1). Make sure the scale reading is the same
on both scales, say on the 1"[25mm] mark, then
tighten the thumb screws ➂.
3Loosen the two scale bar set screws ➀,
the two fence bracket screws ➁, and the
two scale thumb screws ➂ at both ends of the
template.
Joining Tradition with Today
ATTENTION D4, D3, D1258 Jig Owners.
Nov 2005
© Leigh Industries Ltd. All rights reserved.
This pdf publication may be downloaded and stored on a computer and printed, viewed, and freely distributed for operational guidance and evalu-
ation purposes. This document supplements the full User Guide publication for the Leigh tool and may refer to and depend on information in other
parts of the tool’s User Guide for completeness. Except as provided herein, no part of this document may be reproduced, sold, published or modified
without the prior written permission of Leigh Industries Ltd. [Nov2005]
This addendum replaces all of Chapter 1 of the F1
User Guide when using the classic Leigh D4 Jig Body.




2Ensure that the side stops are precisely
11⁄2"[38mm] in from each end of the jig extru-
sions ➀. This will position them 241⁄8"[613mm]
apart ➁ centred on the jig ➂.
!Note: These parts are
no longer required for
setting up the F1 Template.
They are not included with
the Template package, and
can be ignored if you already
received them with your jig.
10:04 am, Nov 10, 2005

Other Leigh Tools manuals

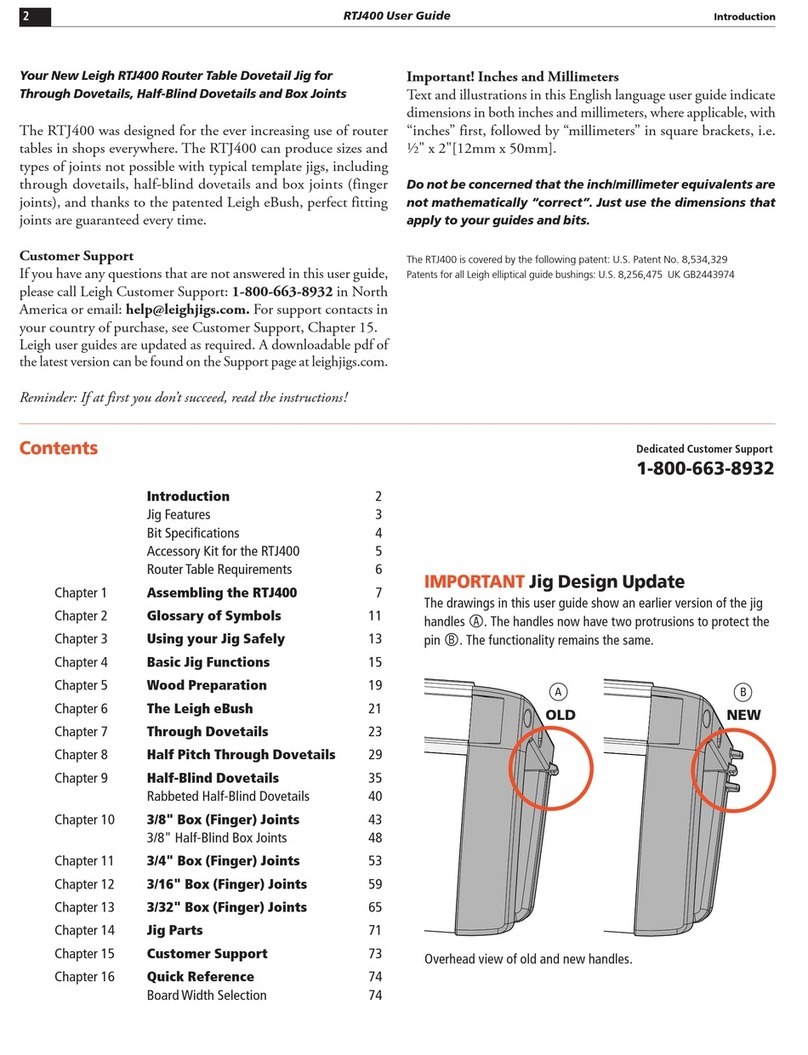
Leigh B975 User manual

Leigh

Leigh B975 User manual

Leigh rtj400 User manual

Leigh

Leigh rtj400 User manual

Leigh rtj400 User manual

Leigh

Leigh rtj400 User manual

Leigh SUPERJIG-12-18-24 User manual

Leigh

Leigh SUPERJIG-12-18-24 User manual

Leigh TD330 User manual

Leigh

Leigh TD330 User manual

Leigh D4R Pro User manual

Leigh

Leigh D4R Pro User manual

Leigh D4R Pro User manual

Leigh

Leigh D4R Pro User manual

Leigh FMT PRO Guide

Leigh

Leigh FMT PRO Guide

Leigh R9PLUS User manual

Leigh

Leigh R9PLUS User manual

Leigh F1 User manual

Leigh

Leigh F1 User manual

Leigh Multiple Mortise and Tenon User manual

Leigh

Leigh Multiple Mortise and Tenon User manual

Leigh B975 User manual

Leigh

Leigh B975 User manual

Leigh FMT PRO User manual

Leigh

Leigh FMT PRO User manual

Leigh D4R Pro User manual

Leigh

Leigh D4R Pro User manual

Popular Tools manuals by other brands

Marsh 241d quick guide

Marsh

Marsh 241d quick guide

APE 50 owner's manual

APE

APE 50 owner's manual

Wen 61711 user manual

Wen

Wen 61711 user manual

Motortech SparkScan1 operating manual

Motortech

Motortech SparkScan1 operating manual

AMF 84-55 UJ Parts and service manual

AMF

AMF 84-55 UJ Parts and service manual

Omer HR20 M5 Use, maintenance and spare parts manual

Omer

Omer HR20 M5 Use, maintenance and spare parts manual

GEKA plus PA30 Translation of the original instruction manual

GEKA

GEKA plus PA30 Translation of the original instruction manual

Silver Eagle SE1214 quick start guide

Silver Eagle

Silver Eagle SE1214 quick start guide

Sealey SX0408.V2 instructions

Sealey

Sealey SX0408.V2 instructions

SIP 06434 Instructions for use and maintenance

SIP

SIP 06434 Instructions for use and maintenance

GARANT 967520 user manual

GARANT

GARANT 967520 user manual

ASTA A-673P manual

ASTA

ASTA A-673P manual

Gage Bilt GB731OSSH Original instructions

Gage Bilt

Gage Bilt GB731OSSH Original instructions

Unimax HS3319P user manual

Unimax

Unimax HS3319P user manual

Westfalia 85 34 95 instruction manual

Westfalia

Westfalia 85 34 95 instruction manual

Fein MULTIMASTER FMM 250 user guide

Fein

Fein MULTIMASTER FMM 250 user guide

Alemlube 600A Service instructions

Alemlube

Alemlube 600A Service instructions

kincrome K15061 manual

kincrome

kincrome K15061 manual

manuals.online logo
manuals.online logoBrands
  • About & Mission
  • Contact us
  • Privacy Policy
  • Terms and Conditions

Copyright 2025 Manuals.Online. All Rights Reserved.