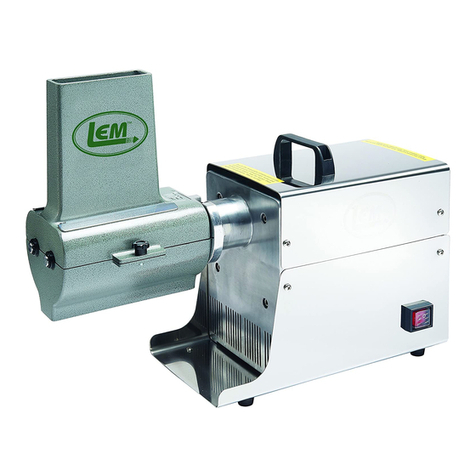
LEM 602TJ User manual

IMPORTANT WARRANTY INFORMATION PLEASE READ
FILL OUTAND RETURN ENCLOSED WARRANTY CARD
THIS WARRANTY COVERS THE LEM 602TJ:
2in1 Jerky Slicer and Tenderizer Attachment with LEM Motor
THE WARRANTY IS EXTENDED TO THE ORIGINAL PURCHASER ONLY.
WARRANTY DURATION: This product is warranted to the original purchaser for a period of one
(1) year from the original purchase date. EACH UNIT COMES WITH A WARRANTY CARD,
WHICH MUST BE FILLED OUT COMPLETELY AND RETURNED IMMEDIATELY,
WITH A COPY OF THE PURCHASING RECEIPT. FAILURE TO RETURN YOUR WAR-
RANTY CARD WILLLIMIT WARRANTY TO 90 DAYS WITH PROOF OF PURCHASE.
WARRANTY COVERAGE: This product is warranted against defective materials or workman-
ship. The warranty is void if the product has been damaged by accident, misuse, neglect, modification
or improper service or repairs by unauthorized personnel. It is also void if damaged in shipment or by
other causes not arising out of defects in the materials or workmanship. This warranty does not
extend to any units which have been in violation of written instructions furnished, or to units which
have been altered or modified.
WARRANTY DISCLAIMERS: This warranty is in lieu of all warranties expressed or implied, and
no representative or person is authorized to assume any other liability in connection with the sale of
our products. There shall be no claims for defects or failure of performance under any theory of sort,
contract or commercial law including, but not limited to negligence, gross negligence, strict liability
or breach of contract. The manufacturer declines all responsibility for damage to persons, things or
animals arising from the failure to comply with the norms contained in this manual. The manufacturer
reserves the right to make modifications at anytime to the models while maintaining the main charac-
teristics described herein. The manufacturer also declines all responsibility for any errors in compil-
ing this manual.
WARRANTY PERFORMANCE: During the above one year warranty period, a product with a
defect will either be repaired or replaced after the product has been inspected by an LEM Service
Technician. NO PRODUCT WILL BE EVALUATED UNLESS THE ORIGINAL SALES
RECEIPT OR THE WARRANTY CARD IS ON FILE. The repaired product will be in warranty
for the balance of the one year warranty period. No charge will be made for such repair or replacement.
IMPORTANT NOTICE: If any parts are missing or defective, please contact our Customer Service
Department for assistance at 877-536-7763. (M-F 8:30am to 4:30pm EST) DO NOT RETURN TO
THE STORE WHERE THE PRODUCT WAS PURCHASED.
LEM PRODUCTS MERCHANDISE RETURN POLICY WARRANTY SERVICE:
To obtain service under terms of this warranty, please contact us at 877-536-7763 to obtain authoriza-
tion prior to returning the merchandise. No merchandise will be accepted without prior authorization.
Please return the product pre-paid in the original packaging if possible, enclose a copy of your
receipt, (Keep a copy of your proof-of purchase for your records.) and include a written explanation
of the issue. Ship to LEM Products, 107 May Drive, Harrison, OH 45030, LEM Products is not
responsible for damage incurred in shipping, make certain to pack product properly. Return shipping
charges are the responsibility of the purchaser. Packages returned to LEM should be insured for the
value of the product to cover any damages that may occur during shipping.
LEM Products • 109 May Drive, Harrison, OH 45030 • PH: 877-536-7763 • www.lemproducts.com
December 2011 Version
2 in 1
Jerky Slicer &
Tenderizer With Motor
MODEL #602TJ
Instruction Manual
1 YEAR
WARRANTY
LEM .35 HP Motor Included
SAFETY INSTRUCTIONS:
When using electrical appliances, basic safety precautions should be followed to reduce the risk of
fire, electric shock, and injury to persons, including the following:
1. Read all instructions before using the appliance.
2. Place unit on a firm level surface.
3. To avoid fire or shock hazard, plug the motor directly into a 120V AC electrical outlet.
4. Use extreme caution when operating unit in the presence of children.
5. Never operate unit without the upper case in place. The rolling action of the knives could
pull fingers and hands into the knives and cause serious injury.
6. Never leave unit unattended when in use or plugged in.
7. Always unplug the motor when not in use, when changing parts or cleaning.
8. Be sure to pull by the plug and not the cord when unplugging.
9. To disconnect unit, turn motor switch to OFF position and then remove plug from the outlet.
10. Never use fingers to push meat once dropped into the chute.
11. Use appliances only for intended household use as described in this manual. Any other use not
recommended by the manufacturer may cause a malfunction or injury and void the warranty.
12. Remove the slicer/tenderizer attachment from the motor when not in use.
13. To avoid the risk of fire, do not use extension cords.
14. Discontinue use if plug or outlet is hot. It is recommended that the outlet be replaced if plug
or outlet is hot to the touch.
KEEP OUT OF REACH OF CHILDREN
KEEP HANDS ASAFE DISTANCE FROM THE EXPOSED
BLADES ON THE BOTTOM OF THE UNIT
ALWAYS KEEPWATERAWAY FROM ELECTRICALMOTOR
FOR SAFETY, DISCONNECT UNIT WHEN NOT IN USE:
Do not operate unit without meat. When motor is turned off, cooling fan will no longer operate.
Do not touch housing during cool down period. Housing will take a few minutes to cool down after
unit is turned off. Store unit in a cool dry area.
This product is equipped with a polarized AC (Alternating Current) plug (a plug having one blade
wider than the other). This plug will fit into the power outlet only one way. (If the plug does not fit
fully into the outlet, contact a qualified individual to install the proper outlet.) DO NOT DEFEAT
THE SAFETY PURPOSE OF THIS POLARIZED PLUG INANYWAY.
LEM Products • 109 May Drive, Harrison, OH 45030 • PH: 877-536-7763 • www.lemproducts.com LEM Products • 109 May Drive, Harrison, OH 45030 • PH: 877-536-7763 • www.lemproducts.com
LEM .35 HPMOTOR FOR 602TJ -
JERKY SLICERAND TENDERIZER
ATTACHMENT

!! WARNING: BLADESARE SHARP !!
BEFORE USE:
1. Wash all parts in hot soapy water. This will remove any residue and dirt left from the
manufacturing process. Keep water away from electrical motor unit.
2. Rinse and dry thoroughly.
3. DO NOT PUT PARTS IN ADISHWASHER.
CLEANING OF UNIT:
1. Turn unit off and remove plug from wall outlet.
2. Remove attachment from motor by loosening star bolt (on motor).
3. Remove meat combs (#1).
4. Remove thumbscrews (#2).
5. Remove upper case (#3).
6. Remove the drive and driven cutter shafts. (Caution! Blades are sharp!)
7. Wash with hot soapy water. Rinse and dry parts thoroughly.
TO REASSEMBLEAFTER CLEANING:
1. Put the drive shaft (#13A) into position first.
2. Put the driven shaft (#4A or #4B) into position next.
3. Make sure the gears (#14) are properly aligned and mesh.
NOTE: If gears are not in alignment, unit will malfunction which
could cause injury and will void the manufacturers’warranty.
4. Replace upper case (#3) and secure with thumbscrews (#2).
DISASSEMBLY:
Over time, meat will wedge between the knives and spacers. Occasionally the drive and driven
rollers should be disassembled, and each piece washed thoroughly. Start disassembly by:
1. Remove C-Clip (#15) on the end opposite the gear.
2. Slide all remaining parts off to be hand washed.
TROUBLE SHOOTING:
If your unit fails to operate, contact LEM Products technical assistance. Do not attempt to repair or
adjust any electrical or mechanical functions on this unit without contacting an LEM technician.
Doing so will void warranty. Servicing should be performed as directed by qualified personnel only.
LEM Products Technical Assistance: Toll Free at 877-536-7763.
PARTS LIST FOR #8 MOTOR
Part #
Description
Qty
15
Star Bolt
1
16 Allen Screws M6 for Front Panel 4
17
Front Panel
1
18
Grease Seal
1
19
Roller Bearing
1
20
Main Washer
1
21
Main Gear
1
22
Bearing
3
23
Rubber Pad
1
24
Screws
10
25
S/S Upper Housing
1
26 Handle Screw 2
27
Handle
1
28
Back Panel
1
29
Circuit Breaker
1
30
Fastener for the Power Cord
1
31
Power Cord
1
32
Brace
1
33
Allen Screw M6 for Brace
2
34
S/S Lower Housing
1
35
Switch
1
36
Plastic Feet
4
37
Allen Screw M4
6
38
Phillips Screw M4 for Feet
5
39
Step Gears
1
40
Clip Spring
1
41
Pinion Gear
1
42
Front Panel of the motor
1
43
Electric Box
1
44
Motor
1
LEM Products • 109 May Drive, Harrison, OH 45030 • PH: 877-536-7763 • www.lemproducts.com LEM Products • 109 May Drive, Harrison, OH 45030 • PH: 877-536-7763 • www.lemproducts.com

TO INSTALLATTACHMENT TO MOTOR:
1. Align the drive of the motor with the hub (#9) and drive shaft (#11C) of the
slicer/tenderizer attachment and tighten the star bolt (on motor) securely.
2. Insert the two meat combs (#1) into the slots in the top of the upper housing (#3) – one comb on
each side of the upper case. The combs should slide easily into the holes between the drive and
driven shafts. When inserted properly, the combs will be visible from the bottom of the lower
case (#8).
OPERATING INSTRUCTIONS OFATTACHMENT UNIT:
Read these instructions before operating jerky slicer/tenderizer attachment.
1. Drop meat through the opening of the cover. DO NOT attempt to force meat into the opening.
Rolling action of the knives will carry appropriately sized portions of meat into the unit.
2. Use boneless cuts of meat only. Meat should not exceed 1 1/4” thickness. Remove gristle and
bone before tenderizing/slicing to eliminate clogging or stalling.
3. For tenderizer attachment: run meat through tenderizer twice at a 90 degree angle to experience
the maximum tenderness.
433TJ - 8 1
CASE-LOWER
433TJ - 3
1
CASE-UPPER
433TJ - 9 1
HUB
433TJ - 4A
1
Driven Shaft Assy
(SLICER)
433TJ - 13A 1
DRIVE SHAFT
Assembly
433TJ - 10 2
HUB SCREW
433TJ - 2 2
THUMB SCREW
433TJ - 1 2
COMB
433TJ - 4 2
DRIVEN SHAFT
433TJ - 5 6
BUSHING, NYLON
433TJ - 17 15
KNIFE-SLICER
433TJ - 18 6
SS WASHER
433TJ - 15 6
LOCK RING, (C-Clip)
433TJ - 16 6
E RETAINER RING
433TJ - 13 1
DRIVE SHAFT
433TJ - 11C 1
DRIVE SHAFT ADAPTER
433TJ - 14 3
GEAR
433TJ - 7 93
SPACERS
433TJ - 6 30
KNIFE TENDERIZER
433TJ - 12 1
SET SCREW
Part # Qty Description
433TJ Parts List
433TJ - 4B
1
Driven Shaft Assy
(TENDERIZER)
CIRCUIT BREAKER INFORMATION:
Your LEM motor is equipped with a circuit breaker to protect the unit. In the event of a power
disruption, abnormal operation or over heating, the motor will temporarily shut down to prevent
damage. If this should happen, follow the seven steps listed below:
Step 1: Turn On/Off switch to off.
Step 2: Unplug unit.
Step 3: Check inside of unit and remove any obstruction.
Step 4: Wait 1 or 2 minutes, then plug unit into wall outlet again.
Step 5: Push Restart Button and release. Located on back panel of motor.
Step 6: Turn switch on.
Step 7: Resume Operation.
LEM Products • 109 May Drive, Harrison, OH 45030 • PH: 877-536-7763 • www.lemproducts.com LEM Products • 109 May Drive, Harrison, OH 45030 • PH: 877-536-7763 • www.lemproducts.com

14
5
16
18
7
17
4
17
7
x2
18
16
5
15
7
15
14
5
16
18
4
7
18
16
5
15
7
15
6
7
x2
433TJ-4A Jerky Slicer Driven
Shaft Assembly
433TJ-4B Tenderizer Driven
Shaft Assembly
6
LEM Products • 109 May Drive, Harrison, OH 45030 • PH: 877-536-7763 • www.lemproducts.com
ASSEMBLY OF THE
TENDERIZER & SLICER SHAFTS:
!! Do not assemble without carefully
reading the instructions below !!
The 433TJ can be used as a jerky slicer (the drive shaft has tenderizer blades, and the
driven shaft has slicer blades) or as a tenderizer (both shafts have tenderizer blades).
These must be assembled correctly, or the unit will not function.
For slicing:
The spacers (#7) must be assembled exactly the same on both shafts so the tenderizer
blades and the slicer blades are adjacent to each other. The tenderizer blades have a notch
in the square opening, so always line these up after washing. They also have a cutting
direction (see schematic). The pointed side should always be on the back edge of the
cutting action. The slicer blades also have a direction. They are sharpened on only one
edge, so they have a bevel. The direction of the bevel should be the same for all the
knives as shown in Detail A on the schematic. Always install the flat side toward the gear
end of the shaft. When installing the driven shaft (#4A) in the unit, always place the flat
side of the slicer blade against the tenderizer blade. If you place the beveled edge against
the tenderizer blade, the unit will not slice properly.
For tenderizing:
The spacers must be positioned so the tenderizer blades on the drive shaft and the
tenderizer blades on the driven shaft are one spacer apart. This is accomplished by
placing an extra nylon spacer (#7) nearest the gear on the driven shaft. This will offset
the tenderizer knives by about 1/8”. Be sure the direction of the knives on both shafts is
correct, i.e. the pointed edge should be on the back edge of the cutting action.

11c
7
7
15
12
14
5
18
13
6
7
x2
515
6
18
16
16
10 9 8
13a
3
2
433TJ-4A
1
433TJ-4B
433TJ Diagram
& Parts List 433TJ-13A
Drive Shaft Assembly
LEM Products • 109 May Drive, Harrison, OH 45030 • PH: 877-536-7763 • www.lemproducts.com
Table of contents
Other LEM Kitchen Appliance manuals

LEM
LEM 602SS Parts list manual

LEM
LEM 1216 Parts list manual

LEM
LEM Roots & Harvest 1608 Parts list manual

LEM
LEM 586 User manual

LEM
LEM 778A Parts list manual

LEM
LEM BIG BITE 1020 User manual

LEM
LEM 829 Parts list manual

LEM
LEM Big Bite 1217 Parts list manual

LEM
LEM MIGHTY BITE 1606 Parts list manual

LEM
LEM 1152 Parts list manual