LENCO XEMIO-1020 User manual

20-40G Portable Media Player
Portable Media Player
MPEG4 MP Play JPEG picture browse function
Operation manual
Please read carefully prior to operation
20-40G Portable Media Player

Contents Contents Contents
Contents
P.1 Forward
P.1 Statement
P.2 Auxiliaries of the player
P.3 Power application
P.3 Notes for attention
P.3 Requirements on computer deployment
P.4 Auxiliaries of the player
P.5 Brief description of functions
P.6 Mp3 Play function
P.7 MPEG4 movie play function
P.7 JPEG picture play function
P.8 FM radio function
P.8 Record function
P.9 Top panel
P.9 Front panel
P.10 Side panel
P.11 Preparation before operation
First time operation
Turn on the player
Turn off the player and battery energy saving features
Forward/Statement
Necessity for the user
Brief description of functions
Description of functions
Description of function keys
Operation guide
P.12 Basic function
Enter main menu
Main menu interface description
P.13 Play MP3
Music mode
P.15 PlayAV format MPEG4 video/audio file
Movie mode
P.18 Supporting JPEG format digital photo
Photo album mode
P.20 FM radio
Radio mode
P.21 Recorder
Record mode
P.22 External disc operation function
Movable disc function
P.24 System setting
System setting mode
P.24 Voice setting
P.25 Display setting
P.26 Setting slider
P.26 Energy saving setting
P.27 Language setting
P.28 Technical specifications
Technical specifications
Safety and maintenance
Safe precautions
Maintenance

Statements
Forward/Statements
1.1 Please con firm if the par ts and auxiliaries given below are complete when
purchasing:
(1) Hi-fi earphone 1 set affiliated to the player
(2) Charger 1 set
(3)
(4)
Operation manual 1 copy
(5)
Certificate 1 sheet
(6)
Card of guarantee 1 sheet
(7)
USB connection line 1 pc
(8)
Video adapter 1 pc
(9)
Stereo, audio adapter 1 pc
Line-in connection line 1 pc
(1) Auxiliaries of the player
Forward/Statements Necessity for the user Necessity for the user
Please read firstly the operation manual so as to operate correctly the
product.
To have a better service, the contents of the operation manual may be
modified. No prior Notice will be available if there is any change in
product performance and functions.
Please visit the web site of the company to check for the newest
information of the product if the practical setting and operation of the
product are not the same as those in the operation manual.
Thank you foryou operating the digital player.
From the manual,you may obtain knowledge concerning product
description, operation description, system setting and safety
precautions to help you utilise betterthe various functions of the
product.
We arevery careful and strict when compilingthe manual andwe
consider the information provided in the manual is reliable and
correct.
However, there is possibly mistakes and careless missing
concerning the information, therefore, the usersare kindly asked
to give an understanding to it and you are always welcome to
have any commentor suggestion.
Forward

Necessity for the user Brief description of function
Brief description of function
Necessity for the user
Supporting Windows 98 / ME / 2000 / XP and above, and for Win98
system and above, without installation of driver
(2) Power operation
(3) Notes for attention
1. To have a proper operation of the player and to avoid
accident, please do not place the product at a location of too
high a temperature, too low atemperature and high humidity
or near tofire and a place splashed byrain.
2. Seeing that the player is of a precise workmanship, please
do not disassemble the player by yourself, and it is
recommended to consult the after sale service department of
the company ifthere is any problem in operation.
3. For your own safety, please do not use earphone when you
are driving a car or riding other vehicle. It is especially true
when crossing the street, and it is required to remove the
earphone if necessary.
4. To avoid harming your hearing ability, it is recommended to
adjust the volumeto minimum prior to listening to the music,
and then increase the volume step by step according to the
practical situation tomeet your requirements.
5. Please keep theproduct away fromstrong magnetic field.
(4) Requirements on computer deployment
The player is powered by chargeable Li-ion battery of
specifications of 4.2V 2000mA. The charging mode is DC
charging.
TFT colour display screen is its output interface, with a display
resolution (dot):
320(W) 240(H), an active area (mm) 72.96(W) 54.72(H).
The system adopts built-in Li-ion polymer battery as power supply,
using directly DC charger charging the player.
Using USB port connecting to the computer, having the movable
disc function, using USB Mass Storage class driver program,
needing no installation of driver program for Windows98 and
above operation system, real attaining plug and use.
It is available to realise operation USB interface and player
transmission data.
It is provided with a 1A charger, and it is available to operate any
function when charging.
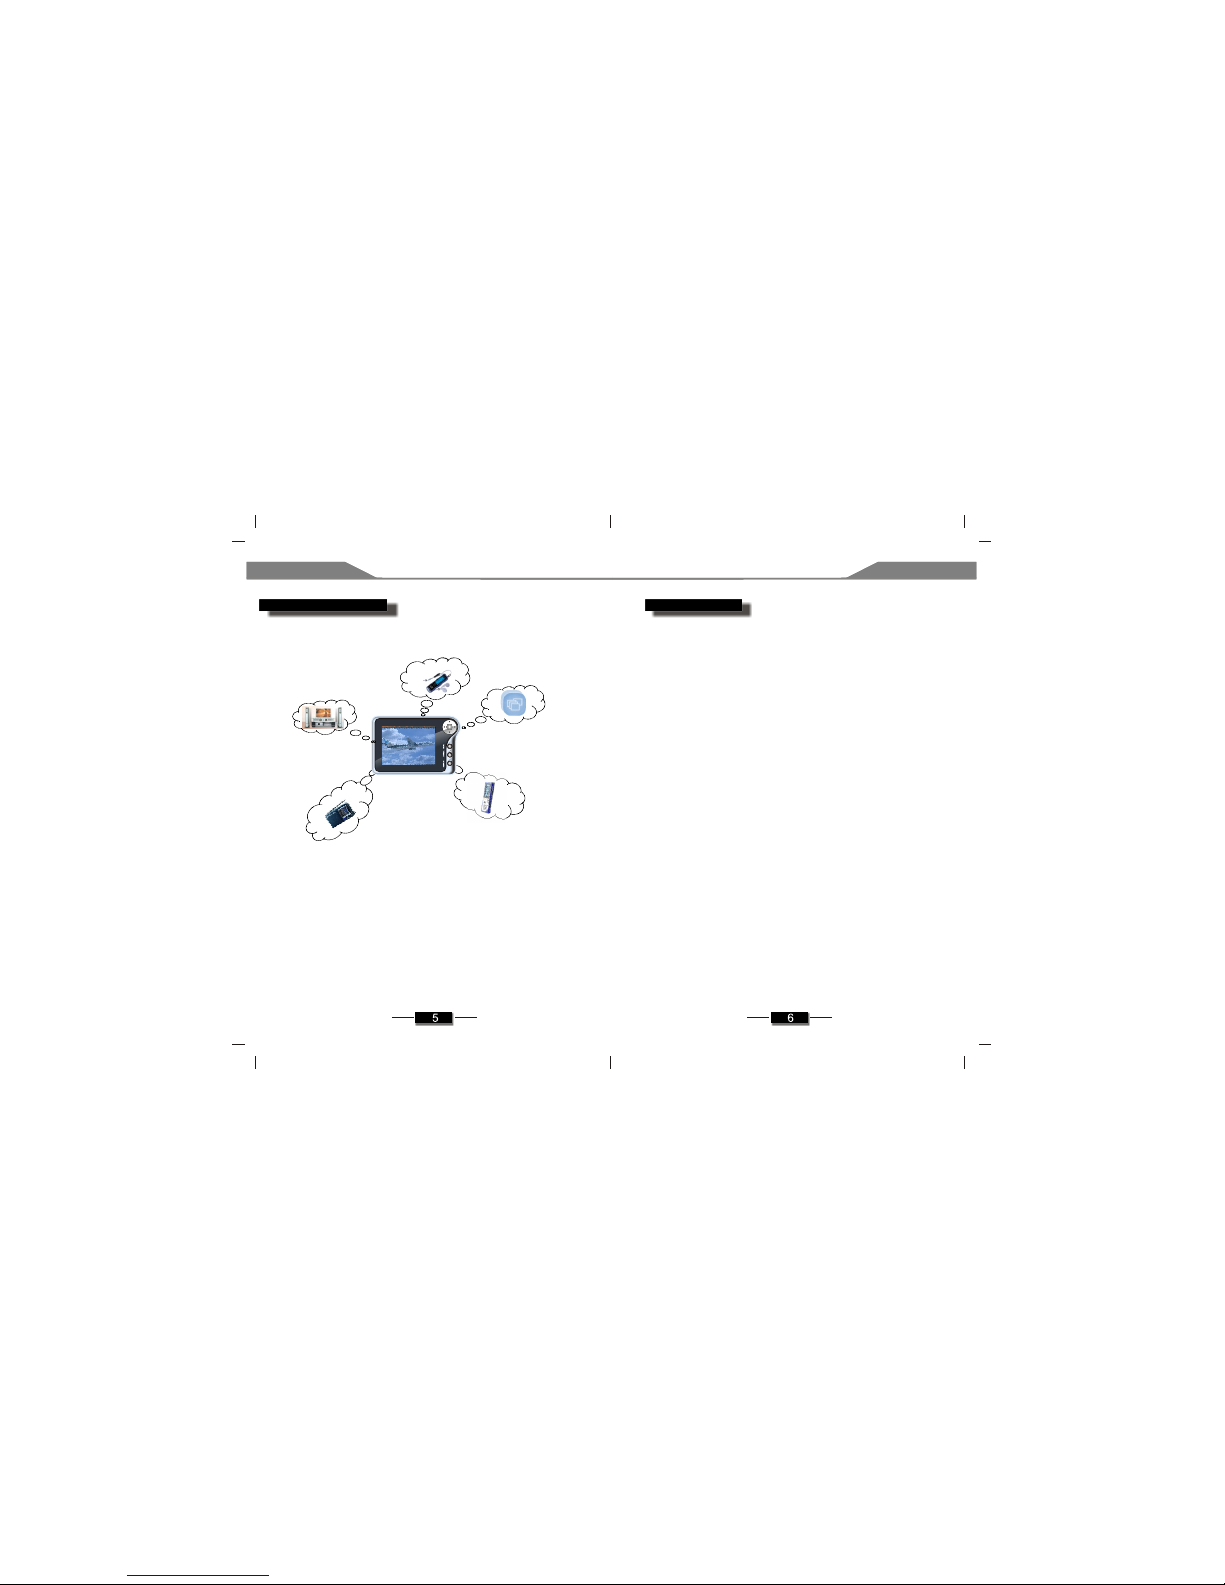
It supports multiple audio files and video files play, supporting
thoroughly video decoder MPEG-1 and MPEG-2, MPEG-4,
JPEG still image, audio decoder MPEG-1 layers1, 2 and 3 (MP3)
and MPEG-2.
It supports built-in microphone record, INE-IN record function.
Supporting FM stereo radio.
It supports electronic photo album.
It is provided with a unique energy saving mode, and is available
to define auto screen timer OFF.
It is provided with simplified/original Chinese menu selection
function.
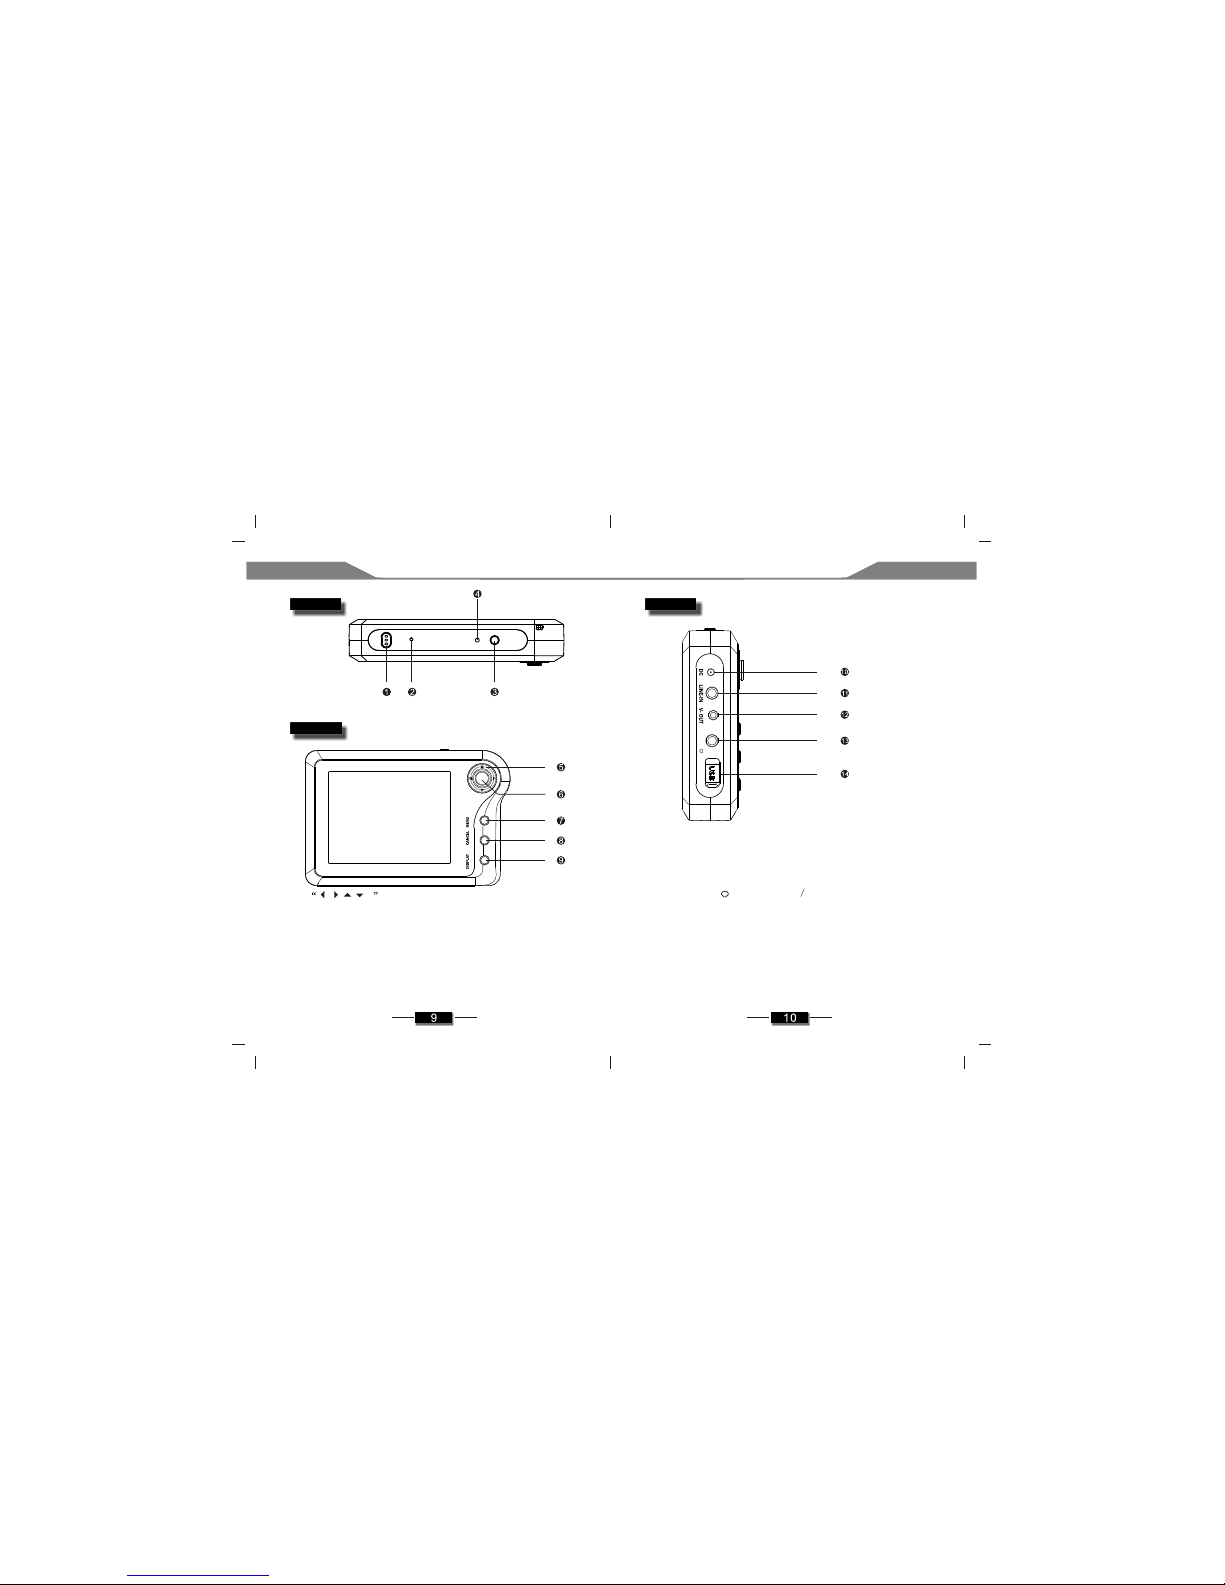
Its video output is of NTSC/PAL composite signal and S-VIDEO
signal.
Brief description of function

Detail description of functions
Brief description of function
Brief description of functions
It is a digital product combining Portable Media Player, MP3, portable elect ronic
photo album, FM radio, recorder and movable disc function.
1. It is available to operate by pressing the following keys on the panel:
a. It is available to press the key to carry out previous/next track selection
and fast forward/rewind.
b. It is available to press the key to carry out play list paging selection.
c. It is available to press the key to adjust the volume.
d. It is available to press the key to play/pause the present track.
e. It is available to press the key to stop the track and to return back to
the main interface.
f. It is available to press and hold on power key to turn the power off.
2.It is available to carry out MENU operation during play:
a. TV signal output
b. LCD output
3. With the help of panel DISPLAY key, it is available to turn off LCD,
and to enter energy saving mode.
MP3 Player functions
It possesses thefollowing main functions:
I. Portable MediaPlayer function:
1. Toplay MPEG4 formatvideo/sound files
2. Toplay MP3, WMA.format music
II. Portable electronicphoto album:
3. Supporting JPEGformat digital photo
III. Movable discfunction:
4. Supporting USH2.0
IV.FM stereo radio
V.Digital record

Brief description of function
Detail description of functions
1. It is available to operate by pressing the following keys on the panel:
a) It is available to pressthe keyto carry out previous/next track selection
and fast forward/rewind.
b) It is available to press the key to adjust the volume.
C) It is available to press the key to play/pause the present movie.
d) It is available to press the key to stop the movie and to return back to
the main interface.
C) It is available to press and hold on power key to turn the power off.
2. It is available to carry out MENU operation during play:
i. To carry out system display setting:
a. Brightness adjustment
b. Contrast adjustment
ii. Play operation:
a. Enlarge and contract
b. Move
iii. Video output setting:
a. TV signal output
b. LCD output
1. It is available to operate by pressing the following keys on the panel:
a) Enlarge and contract of picture
b) Picture movable
C) It is available to press the key to carry out page up/down picture sel
ection.
JPEG picture play function
MPEG4 movie play function
2. It is available to carry out MENU operation during play:
i. To carry out system setting:
a. Brightness adjustment
b. Contrast adjustment
ii. Video output setting:
a. TV signal output
b. LCD output
1. Up/down key for selection of pre-set station 5
2. Left/right key to pre-set station frequency 87~108MHz
3. Press and hold for a while up/down key for volume adjustment up,
increase, and down, decrease .
4. Press CANCEL key to exit from radio and to return back to the main
menu.
1. Press the confirm key to start record.
2. Press CANCEL key to stop record.
3. At stop mode, press CANCEL key to exit from record and to return
back to the main menu.
4. At stop mode, press MENU key to select MIC , LINEIN
record mode.
FM stereo radio
Record operation

MIC RESET POWER
A-OUT/
Know your player Description of the function keys Description of the function keys Know your player
Top panel
Front pane
Side panel
1. Microphone 2. Reset button 3. Power supply button
4. Battery charge and operate indicator
5. button: The screen displays operation menu or
system entries, at standby mode, it is available to press these
buttons to move the selected mark to select the entry needed.
6. “Confirm” key: It is used to confirm the present selection.
7. “MENU” key: To carry out settings for the player for some
modes.
8. “CANCEL” key: It is used to exit from the present mode or to
cancel the present operation.
9. “DISPLAY” button: Use to close or open LCD screen display.
10. “Dc” jack: power port.
11. “LINE-IN” jack: record input jack.
12. “V-OUT” jack: video output.
13. “A-OUT/ ” jack: earphone audio output jack.
14. USB port.

Preparation before operation
Operation guide Operation guide Basic function
Preparation before operation Basic function
First time operation
Prior to first time using this player, please insert the charger and make the
built-in battery fully charged.
1. Only the charger/transformer affiliated to the system can be used. After
the insertion of the charger, the charging will be automatically started and
the power supply indicator will change into red color.
2. It means that the battery is fully charged when icon of fully charged
indicated on display screen.
A. Idle battery: it means that the battery is run out of capacity and it is required to
carry out the charging.
B. Bouncing battery: it means it is at the charging mode.
C. Full load battery: battery is fully charged, and in this case it is available to
remove the charger.
3. It is still available to operate the player when the charger is
connected.
Remarks:
For the first time charging, it is required to charge for enough 4-8
hours.
Turning on the player
1. Press [POWER] button, the power supply indicator will become
green and the screen will display, explaining that the player has
begun to work.
2. If the player displays idle battery icon, or the player may not display,
it is necessary to insert the charger so that the battery starts charging.
Turning off the player and battery energy saving features
1. Press [POWER] key, and hold on the key for 3s to turn off the
player.
2. At play music and radio mode, and when the player does not carry
out any operation, 5s later system default , the screen display
will be turned off for energy saving. It is available to select at [main
menu, setting energy saving] for a time of 0-10s turning off the
screen.
Basic function
Enter main menu
Press and hold for a while POWER key to turn on the player and to
enter the main menu, with the interface displayed as follows:
Description of the main menu interface
1. Music: browse music files directory and select one of the track to play.
2. Movie: it is used to play video file.
3. Ph oto album: display photo files and check the relative information of photo.
4. Radio: carry out frequency tuning.
5. File: to carry out browse and management for all the files in the player.
6. Record: it is used to record voice and to form record files.
7. Setup: setting the related information
Browse and play the folder of the music files
At the main menu interface, on the upper left of the screen is
displayed with the present battery capacity. At the lowest most,
there is a mode column, describing simply the function of cursor
related icon, press the direction key at any direction“ ” to
navigate among the icons, press “confirm ” key after the icon is
selected to start operation, and press CANCEL key to return
back to theprevious interface.

Operation guide Operation guide
Portable Media Player function
Basic operation
1. Plug the earphone into earphone jack.
2. Press and hold for a while “POWER” key to turn on the player,
and enter the main menu. At the main menu interface, press the direction
key at any direction “ ” to select “music” icon, then, press
“confirm” key to enter music play list. The interface display is given
as follows:
Music mode
Play Mp3
Battery capacity
List of music
Mode
Progress bar
Volume indication
Music
Route
Music 1. mp3
First snow of 2002
Two butterflies.mp3
See the sea
3. Selection of music
At the music play interface, press any “ ” key to select the required
track to be played, press any “ ” key to carry out up/down paging ,
press “confirm ” key to select one of the track for play, and press
“CANCEL” key to exit from the selection.
4. Play music
Select the track to be played, and press “confirm” key to start playin g musi c.
If it is required to change to play another track , pre ss any “ ” ke y to sel ect
respectively the previous or next track of the presently playing track,with
the interface displaying as follows:
To carry out energy saving, it is available to set up auto timer offfor the player
(setting energy saving screen saving time)in the setting of the screen saving.
5. Fast forward or rewind: press and hold for a while “ ” key to carry
out fast forward operation, press and hold for a while “ ” key to
carry out rewind operation.
6. Pause/Play: At play mode, press “confirm”key to pause play music,
then, press “confirm” key to enter play mode again.
7. Stop Play: during music play, press “CANCEL” key to stop play music.
8. To exit from music mode : at stop mode, press “CANCEL” key to exit from
music mode, to return back main menu and to carry out other operation.
9. Turn off the screen: it is available to press and hold for a while
“DISPLAY” key to turn off the screen to save energy, then, press and
hold for a while “DISPLAY “key to turn on the screen.
4. Volume adjustment, press " ": to increase volume, press" ": to
decrease volume.
10. File delete
Press" Menu" to pop out operation menu, select" file management"
Press button to have" delete" and then press " confi rm" button
11. Play mode
Press " Menu" to pop out operation menu, select" Play mode"
Press button to select mode and then press " confirm" button
Music 1. mp3
First snow of 2002
Two butterflies.mp3
See the sea
See the sea.mp3
Music
The present play time
The total play time
Route

Operation guide Operation guide
Portable Media Player function
4. At play mode, press confirm key. In this case, at the lower side
of the screen, the mode column will appear, including [pause]
[enlarge/contract] [movable][load caption]. It is available to play
with the screen to carry out four kinds of operation, it is available to
press any “ ”direction key toselect the required operation entry, with
the interface displayed as follows:
5. Pause play
At play mode, press “confirm” key to enter operation interface,
press any “ ”direction key to select “pause”, then, press
“confirm” ke y, to enter the pause mode, and press “confirm” key
to go on with the play.
6. Enlarge/contract picture
At play mode,press “confirm” key to enter operation interface, press
any “ ” direction key to select“enlarge/contr act”. Then,
press “confirm” key to enter “turn on enlarge/contract” mode. It is
available to press “ ” key to contract horizontally the play screen,
to press “ ” key to enlarge horizontally the play screen, to press
“ ” key enlarge vertically the play screen, to press “ ” key to
contract vertically the play screen and to press CANCEL key to ex it
from the enlarge/contract mode.
7. Movable picture
Movie mode
1. At the main menu interface, press the direction key at any direction
“ ” to select “movie ”, press “confirm ”key to enter movie
play mode, with the interface displayed as follows:
Play video/sound file of MPEG4
2. Select movie
At the movie play interface, press any “ ” key to select the required
video file for play, press any “ ” key to paging , and press
“confirm ”key to play movie.
3. Play movie
Select the required movie to be played, and press “confirm” key
to enter play mode, the screen will indicate “buffering......”or
“read file... .0.05%, wait for a few seconds to play movie”, with the
interface displayed as follows:
Movie
Monster Slake
Route Pause Zoom Drag Coad caption

Operation guide Operation guide
Portable Media Player function
Portable electronic photo album
At the play mode, press “confirm” key to enter operation interface, press
any “ ” key to select “movable”, then, press “confirm key to
enter “movable ” mode, press “ ” key to move leftward horizo ntally
the movable play picture, press “ ” key to mov e rightward horizonta lly
the movable play picture, press “ ” key to move upward vertically
the movable play picture, and press “ ” key to move downward
vertically the movable play picture.
8. Exit from the operation menu
At the play mode, press CANCEL key to exit from the operation menu .
9. Volume adjustment: press shortly the “ ” key to control the volume,
press shortly the “ ”: increase volume. press shortly the “ ”:
decrease volume.
10. Fast forward or rewind: press shortly the “ ” key to carry out fast
forward operation, press shortly the “ ” key to carry out rewind
operation and press confirm key to carry out play operation.
11. Stop play: For movie play, press CANCEL key to stop play movie
and to return back to movie play mode.
12. Exit from movie mode: at stop mode, press CANCEL key to exitfrom
the movie mode, to return back to the main menu and to carry
out oth er operation.
13. Video adjustment: press shortly the MENU to spring out various
values for video adjustment OSD, up/down key adjustment entry,
and left/right key adjustment.
Support JPEG format digital photo
Photo album mode
2. Full screen browse mode
At”photo album”mode, press the direction key at any direction
“ ” to select the picture you like. It is available to press
confirm” key to carry out full screen observation. Press “ ”
direction key to select one full screen picture, and press “ ”
directi on key to se lect next full screen picture. Press “ ” directi on
key clockwise to the present picture, and press “ ” direction key
counter clockwise the present picture.
3. Operation menu
Atthe full screen browse mode, press “confirm” key. In this case,
at the lower side of the screen the mode column will appear, in cluding
[enlarge/contract][movable][recover to full screen] [start slider]
functions, carrying out the respective operation. The interface
display is given as follows:
1. At themain menu interface, withthe help of fourdirection buttons
Select “Photo album” icon,press "Confirm" button to enter "Photo album"
mode. It is availableto see the selectedphoto at the left side of screen. It is
available to press “ ” to move tothe photo required toview. Press“ ”
to page up anddown. Press "Confirm" buttonto have full screendisplay of
the selected photo.
Photo
Tabulated file.jpg
Dimensions:1,809 kb
Size:
Modification date:640*480
Route
Tabulated file.jpg
Tabulated file.jpg

Portable electronic photo album
Operation guide Operation guide FM radio
The specific operation is as shown below:
a. Enlarge/contract picture
At the full screen browse mode, press confirm key to enter operation
mode, press any four direction keys “ ” to select “enlarge/contract”,
press “confirm” key to enter “turn on enlarge/contract” mode, press
“ ” key to contract horizontally the picture, press “ ” direction
key to enlarge horizontally thepicture, press “ ” key to vertically enlarg e
the picture, press “ ” key to vertically contract the picture and
press “CANCEL” key to exit.
b. Movable picture
At full screen browse mode, press confirm key to enter operation mode,
press any f our direction keys “ ” selection “movable”, press
“confirm” ke y to enter “movable” mode. It is av ailable to press “ ”
key to move horizontally the picture, press “ ” key to move vertically
the picture.
c. Recover to full screen
At enlarge/contract movable picture mode, if it is desired to recover
to the original mode, press “confirm” key to enter the four operation
modes, press any direction key “ ” to select “recover to full
scr een”, then, press “confirm” key to recover to full screen mode. In this
case, the screen displays only picture, without any other information.
d. Start slider
After turning on a picture, press the direction key at any direction
“ ” to select [start slider], the system will browse until the last
picture, and press “CANCEL” key to exit .
4. Video adjustment
Press shortly MENU to spring out various data for video adjustment
OSD, up/down key adjustment entry, and left/right key adjustment.
FM radio
Radio mode
1. At the main menu interface, press the direction key at any direction
“ ” to select “radio” icon, press “confirm ” key to enter radio
interface. The in terface display is as shown below:
2. Station selection and frequency tuning
Press key to select 5 rapid radio stations. Press shortly
“ ” keyto select frequency,
3. Volume adjustment
Press and hold for a while “ ” key to increase volume, press and
hold for a while “ ” key to decrease volume.
4. Exit from radio mode
Press “CANCEL” key to exit from radio function, and to return
back to the main menu, press and hold for a while “DISPLA” key
to turn off the screen, entering energy saving mode.
5. Store station
After a station is selected, press “confirm” to store the station.
Press and hold for a while “ ”
button to auto search station.
Radio
Zoom Drag
Recover screefull
Start slide

Operation guide Operation guide
Record mode
Movable disc function
Record mode
1. At main menu interface, press the direction key at any direction “ ” to
select “record”icon, press “confirm”key to enter record mode, with the
interface display as shown below:
Recorder
3. Press “MENU” key to select record mode: “MIC”and “LINEIN”
4. Record file is saved in the root directory, RECORD file holder. It is
available to enter MUSIC mode to play the record files.
2. Press "Confirm" button to begin recording, press" CANCEL" button
to stop recording, then press" CANCEL" button again to exit from
“record" mode, and return back to the main menu.
Movable disc function
1. With the simple copy and paste method, it is available to convert th e
files from computer to the player. The reason is that when the player is
connected to the computer, it is available to be used asa common disc
to carry out the operation. The specific operation is as shown below:
A. Connect the player to the computer and run theWindows resource
manager. Now enter computer disc, copy (click mouse right key and
select [copy]) to copy one MP3 file or all in MP3 file folder.
B. Turn on the disc marked player at the computer, and then turn on
the file folder to be used for the copied files. Click mouse right
key and select (paste).At the Windows operation system, it is
avai labl e to o pen t wo windows on the table top, one is the source of
file folder (computer disc), and the other is the copy target position
(the player disc). By doing this way, it is easily to drag the target
file or file folder from a window to another window.
2. Disconnect the player and computer
a. The icon for safe removal is located at the side of system clock
and is i n the system mode column. To remove safely the player disc,
firstly,it is required to click the removal icon at the system mode
column (as s hown in th e diagram below by the green arrow). Then,
completethe operationfollowing the correct indication and wait for
the computer sending command of “available to remove equipment
safely” before the USB connection line may be disconnected.
Note: Prior to pulling out the USB connection line, it is required to
follow the related management stipulation steps of the Windows
related equipment to disconnect the computer and the player. Otherwise,
the phenomenon of data loss or failure to operate for the computer
and the player may occur.
External disc operationfunction
b. Move the mouse to the removal icon at the mode column, clic k the
rig ht mouse key, and click “safely remove hardware” (safely remove)
information at the diagram below.
Record
Disc information
Total capacity
Occupied space
Surplus space
Ready
To record about 330 hours' file of Mp3
Enterbutton start;C ancelbutton exit

Operation guide Operation guide
Movable disc function System setting
c. On the computer the screen, a dialog block of “safely delete hard
ware” will appear, click “stop”.
4. At the dialog block sprung out “stop using hardware equipment”,
click “confirm”. In this case, the system will indicate to safely
remove the player.
Remarks: if one of the files has been opened and the system is in
operat ion, then, the operation system will notindicate “available to remove
safely equipment”. In this case, it is necessary to turn off all the files,
which have already been opened and run in the player. If the computer
operation is of windows2000 or XP system, it is also necessary to turn
off windowsresource manager.Theiconwith green arrow in the operation
system mode column will help removing safely the USB connection
line from the player.
System setting mode
At the main menu interface, press “MENU” key to enter setting main
menu, the screen will display 6 modules for setting functions: [voice]
[display][slider ][about][energy saving][language ], with the interface
displayed as follows:
System setting
Specific operation as shown below:
1. Voice setting
Press the direction key at any direction “ ” selection [voice ]icon , press
“confirm” key to carry out specific voice setting. It is availableto carry
out setting at both volume and balance, with the help of “ ”the
direction key moving the cursor to “volume”and “balance”, and with
“ ” key for increasing or decreasing.
Pull down or pop out hardware
Setting
Sound Displays Slider
Information Energy saving Language

Operation guide Operation guide System setting
System setting
Among them, the red character means the present entry. After completing
the setting, press [CANCEL] key to save the setting and to exit back to
the setting main menu.
2. Display setting
Press the direction key at any direction “ ” to select [display ]icon,
press “confirm”key to enter specific display setting, with “ ” key to
carry out respectively the setting from “LCD brightness”,”brightness”,
“contrast”. “saturation”, with “ ” key to change the value, with the
interface display as shown below:
3. Setting slider
As stated above, t o browse pic ture, if it is to select [start slider], the
play er will browse next picture automatically at a certain interval. In this way,
itwill automatically change over to the next one, until the last picture is
browsed. The “certain time” is to be set up here. Press any direction key
“ ” to select [slider] icon, and press “confirm” key to carry out
slider setting, with “ ” key changing the interval. The interface
display is as shown below:
4. Setting “about”
Press any direction key “ ” to select [about]icon, press
“confirm” key to enter contents of “about”.
5. Energy saving setting
Voice setting
Volume
Balance
Display setting
LC brightness
Brightness
Contrast
Saturation
Change over display LCD TV
Slide Setting
Time Interval S
System information
Disc information
Total capacity
Occupied space
Surplus space

6. Language setting
Press the direction key at any direction “ ”to select [language ]icon,press
confirm key to enter language settinginterface, the player provides two
languages for display and support, one is “simplified Chinese”, which is the
default of the system, the other is English, and it is available to carry out the
change over with“ ”key, with the interface display as shown below:
Outline dimensions
Weight
USB port
Media play format
Photo format
Language
Record
Audio Play format
Support output video signal
Support output audio signal
Video output mode
Power
Computer system requirements
Temperature requirements
FM frequency range
180g
USB2.0 high speed port, compatible to USB1.1
Support MPEG-1, MPEG-2,MPEG-4,SVCD,
VCDIS,VCD2X,CD-DA,CD-ROM
JPEG format
Supporting simplified Chinese and English
Recorded MP3 format
Record signal source :MIC, LINE-IN
SupporMPEG1, 2Layer, Mp3, LOW AAC,
AC-3, WMA, DVD-AUDIO
Stereo (L) 10mW R 10mW
Earphone
Available to deliver to power amplifier and TV
Built-in power: chargeable Li-ion battery
(output 3.7V)
External power: power adapter (input 120V~
230V;output 5V)
Supporting energy save mode
Computer: Intel Pentium 266MHz processor
or higher,WIN-ME,WIN-2000,WIN-XP,64MB,
with USB port
-5~40
124 82 24mm
78mHZ-108mHZ
AV, S-VIDEO
Operation guide Technical specifications
System setting Technology and Performance Specifications
It is available to send to TV System: NTSC/PAL
The battery available to play video: 2~5 hours
The battery available to play music: 7~9 hours (close LCD)
Press the direction key at any direction “ ”to select [energy saving ]icon , press
confirm key to enter energy saving setting interface. At play music mode
and radio mode, if no any operation is excited, the contents of screen display
will be turn ed off automa tically at a certain interval, which is so called “interval”
screen save . The interval may also be changed by “ ” key in accordance
with the requirements. If the interval is to be set to “ ”, it is to cancel the screen
save, with the interface display as shown below:
Energy saving setting
Voice setting
Language setting
Video output method It is available to send to 3. 6 inches color LCD for
indication, with a resolution of 320 240.
English

Safe precautions Safe precautions
Safe precautions
Please read these clear and simple rules. Not obeying these rules may
cause danger. More detailed information of the relevant safe
precautions is given in the manual.
Repair and maintenance
Traffic safety first
Please observe all related local laws and stipulations. While
driving, the traffic safety should be considered first of all. Please
do not use the player as far as possible when driving a car.
Reasonable application
As described in Product Operation Manual, it is only available to
operate the player with the operation method as referred to the
description in the operation manual.
Implementing qualified repair service
Only those professional repair personnel can assemble or repair
the player.
Fittings
Only those approved fittings, battery and charger may be used.
Please do not connect the player to the product which is not of a
completing kit.
Waterproof
Your player does not have the waterproof performance. Please
keep it dry.
Making back-up
Do remember to make back-up for all the important information
stored in the player.
Connection to other equipment
While connecting to other equipment, please read carefully the
operation manual of that equipment to acquire detailed safety
description. Please do not connect the player to the product which
is not of a completing kit.
Repair and maintenance
Your player is a product of advance design and craft and should be used
carefully. The following suggestions will help you protect your player from
damage or troubles.
Please keep the player dry. The rainwater, humidity and all kinds of liquid or
water vapor may include the mineral material, which may corrode the
electronic circuit. If player is found wetted, please shut down the player
immediately and the player can only be turned on after it has been fully dried
in the air.
Do not use or store the player in a dusty or dirty place. Otherwise, the parts
available to dismantle and electronic components may be damaged.
Do not store the player in a place where it is overheating. The high
temperature will shorten the life of the electronic equipment, destroy the
battery and make some plastic parts deform or fusion.
Do not store the player in a place where it is too cold. Otherwise, the
electronic board may be damaged due to the moisture resulted when the
temperature of player rises up to the normal temperature.
Please use the player according to the description of operation manual, and
never try to use other methods.
Do not throw, knock or vibrate the player. Treating player gruffly will
damage the inner circuit board, inner micro-disc and the precision structure.
Do not use violent chemical products, cleaning agent or strong washing
agent to clean the player.
Do not use pigment to smear over the player. Smearing over the player will
block the parts available to dismantle with foreign object, affecting the
normal operation.
To replace DC charger, it is only available to use the completing kit or the
approved charger. The charger not approved may cause failure of the player,
the battery and the related electronic components/devices.
Please use the charger in door.
All the above suggestions are equivalently adaptable to your player, charger
and each fitting.
Other manuals for XEMIO-1020
1
Table of contents
Other LENCO Media Player manuals

LENCO
LENCO APD-100 User manual

LENCO
LENCO XEMIO-858 User manual

LENCO
LENCO Xemio-657 User manual

LENCO
LENCO Xemio-668 User manual

LENCO
LENCO MMC-2900 User manual

LENCO
LENCO DVP-350 User manual

LENCO
LENCO PO DO-153 User manual

LENCO
LENCO XEMIO-1020 User manual

LENCO
LENCO Xemio-280 User manual

LENCO
LENCO XEMIO-866 User manual

LENCO
LENCO XEMIO-3530 User manual

LENCO
LENCO XEMIO-965 - V1.0 User manual

LENCO
LENCO Xemio-6531 User manual

LENCO
LENCO IR-2002 User manual

LENCO
LENCO XEMIO-3530 User manual

LENCO
LENCO Xemio-656 User manual

LENCO
LENCO Xemio-657 User manual

LENCO
LENCO DVP-741 User manual

LENCO
LENCO Xemio-760BT User manual

LENCO
LENCO Xemio-668 User manual