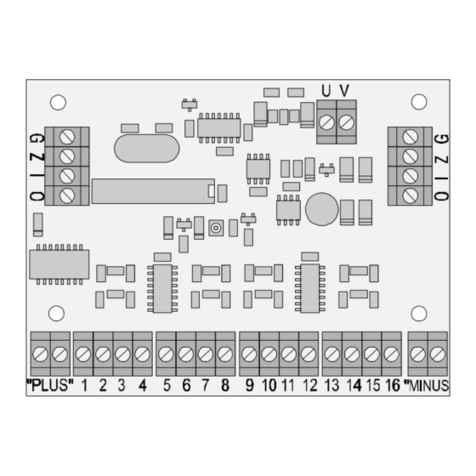
Lenz Digital plus SET-01/4 User manual

Unleashing the
Power of DCC
SET-01/4
Operations Manual
art. no. 60000
November 2000
Version 3.1
Welcome!
We would like to congratulate you on your acquisition of the

2Information SET-01
Digital plus by Lenz®SET-01 and we hope you will enjoy working
with this model-railway control system.
The purpose of this operating manual is to explain the use of the Set
and its components to you. In order to proceed as quickly as
possible to the pleasure of operating your model railway with DCC,
begin by reading the section "First Steps". After you have operated
your first train you will be better able to follow the step by step
description of SET-01's entire range of functions. It is not necessary
to understand or use all the system's features. Select the set of
features you are comfortable with and enjoy your model railroad.
If you still have questions, for which you can not find the answers
even after reading this operating manual, please contact us. We will
be happy to help you. There are four different ways of contacting
Lenz Elektronik GmbH: Europe North America
Postal
address: Lenz Elektronik GmbH
Huettenbergstrasse 29
D-35398 Giessen
Lenz Agency
PO Box 143
Chelmsford, MA 01824
Phone ++49 (0) 6403 900 133 ++1 978 250 1494
Fax ++49 (0) 6403 900 155 ++1 978 455 LENZ
Do you have everything?
Please check, whether all the components of the SET-01 have been
delivered:
LH100 - Keyboard based Dispatcher's Throttle
LV101 - Power Station (Booster)
LE102XF-WH or LE077XF - locomotive decoder
one 4- and one 3-terminal green connector attached to the
rear of the LV101
one 6, one 4, and one 3-terminal green connector attached to
the rear of the LZ100
operating manual (this booklet)
If an item is missing, please contact your retailer to have the
missing item replaced.

Information SET-01 3
DIGITAL plus
1Important information — Please read first!
Each component of your Digital plus by Lenz ® Set-01 system was
subjected to intense testing before shipping. Lenz Elektronik GmbH
guarantees problem free operation when you follow these directions:
This manual contains all the possible LH100 capabilities present
when used with an LZ100 V3. If you are using a different command
control system, the LH100 capabilities may be reduced by the
capabilities provided by that system. For details check out the
system manual of the system you desire to use your LH100 on.
Your Set-01 system must only be used with components that have
been branded to support XpressNet or the older X-Bus protocols. A
branded system will display the XpressNet logo. Any other use
than the one described in this operation manual is not allowed and
will lead to voiding of the warranty.
Even when other devices (including ones from other manufacturers)
have the same connectors, you may not operate your Set-01 with
these devices unless they display the XpressNet logo. Other
systems may use the same connectors but have different internal
wiring that can harm the LZ100, LV101 or LH100.
Do not expose any system component to moisture.
FF If you have problems,
please first check this operation manual to see if you may have
missed a direction for use. The table of contents and especially
the section “Troubleshooting” will help you here.
1 3 8
LH100 Configured with
German Display LH100 Configured with
English Display
If you need to change the display language please refer to
section 15.2.2 starting on page 69.

4Information SET-01
1.1 Method for describing commands within this
manual:
This manual is written with the assumption that the LH100 is
configured for the English language display. You can configure the
LH100 for either English or German display. See section 14.2.2 for
a description on how to configure the language of your LH100
display.
Showing step-by-step directions: explanatory text
The entries that you must make using the LH100 keys are
shown on the left. In the middle you will see what is shown
on the display after the keystroke. To the right a brief
explanation is provided.
All the described steps assume that the hand held
controller is connected to a Version 3.0
Digital plus by Lenz ®system, and that this system is
turned on.
Showing displays and keys in text:
"E 0001" 'Enter'
In most cases the display of LH100 is showed as a picture,
as are the keys. If the main text makes reference to
displays, then it is put in double quotes. Keys referred to in
the text are shown with single quotes.
Cross references:
(ðp. 23)
This arrow points you to a particular page in this operation
manual, where you will find additional information about the
subject at hand.
Important notes:
FF Text marked with this symbol and frame
contains especially important information and tips.

Information SET-01 5
DIGITAL plus
2Contents
1Important information — Please read first! 3
1.1 Method for describing commands within this manual: 4
2Contents 5
3Quick Start Users Guide 7
3.1 Connection and initial operation 7
3.2 Operating Your first Train 9
4System design overview of DIGITAL plus 12
4.1 Command Station LZ100 13
4.2 Installing the Command Station 13
5Overview of the functions of LH100 15
5.1 Controlling locomotives 15
5.2 The function menu of LH100 16
6The LH100 LCD Display 19
7Controlling locomotives with the LH100 20
7.1 Changing locomotive speed and direction 20
7.2 Entering a new locomotive address on the LH100 keypad 20
7.3 Quickly toggling between 2 locomotive addresses 21
7.4 Selecting an address from the command station stack 22
7.5 Taking over control of a locomotive from another hand held
controller 24
7.6 Activating locomotive functions 24
7.7 Showing and changing throttle-notches 26
8Emergency stop and emergency off 28
8.1 Turning off the track power 28
8.2 Changing operating information during emergency stop/off 29
8.3 Switching turnouts during emergency stop 30
9Configuring locomotive decoder functions 30
10 Double header 32
10.1 Prerequisites for creating a double header 33
10.2 Configuring two locomotives as a double header: 33
10.3 Combining locomotives with different speed step numbers into a
double header 35
10.4 Error messages when assembling a double header 35
10.5 Disassembling a double header 36
11 Multi-unit consists (MU) 37
11.1 What is a multi-unit consist? 37
11.2 Prerequisites for a multi-unit consist: 38
11.3 Assembling a multi-unit consist (MU) 38
11.4 Controlling a multi-unit consist 40
11.5 Displaying the members of a MU and switching between
locomotives in a MU 40
11.6 Removing a locomotive from a MU consist 41

6Information SET-01
11.7 Erasing a completed MU 42
11.8 Error messages in multi-unit consists 42
12 Throwing turnouts and setting signals 43
12.1 Feedback and display of the turnout position 44
12.2 Train operation while controlling turnouts or signals 45
13 Displaying feedback 46
14 Reading/Changing decoder settings 47
14.1 What is programming and what purpose does it serve? 47
14.2 Programming on the Main - PoM 50
14.3 Programming on the Programming track 54
14.4 Error messages during programming 65
15 Configuring the LH100 handheld using the SYS menu 66
15.1 SYS_0: entering the XpressNet device address 66
15.2 SYS_1: the system menu 67
15.3 SYS_7: Displaying the command station ID 74
15.4 SYS_8: Displaying the version number of the command station 74
15.5 SYS_9: Displaying the version number of LH100 75
16 Expanding SET-01 76
16.1 Adding XpressNet to allow additional input devices 77
16.2 More power through more power stations 78
17 Technical appendix 80
17.1 Error messages on the display 80
17.2 The LZ100 locomotive database 82
17.3 LZ100 Reset 82
17.4 Selecting suitable transformers for Set-01 82
17.5 Power Station LV101 83
17.6 Advice on the wiring of the model railway 88
17.7 Mixed operation: conventional DC and digital DCC 90
17.8 Wiring the XpressNet Data Network 91
17.9 Bits and bytes - Conversion calculation help 93
17.10 Glossary 94
18 Troubleshooting Guide 96
19 Radio And Television Interference 98
20 North American Warranty 99

Information SET-01 7
DIGITAL plus
3Quick Start Users Guide
In this section you will learn about:
-the few steps that you need to know to operate your SET-01
-how to start your first test run
In the later sections, the whole range of functions of the SET-01 will
be explained in detail.
3.1 Connection and
initial operation
1. Plug the 5 pin din plug at
the end of the LH100 cord
into the 5 pin din socket
that is located on the rear
of the LZ100
2. Connect terminals J and K of the
LV101 power station to the tracks of
your model railway. You can pull off the
green terminal connectors on the back
of the LZ100 and LV101. This will
facilitate the installation of cables.
Make sure that no other transformers
or operating controllers are connected
to the tracks.
3. For a quick start, connect terminals U and V of the LZ100 and
of the LV101 to a model railway transformer with a 14-18 VAC
voltage. Eventually you will want two separate transformers but
for now a single transformer will work fine. For initial operation
virtually any transformer with a current rating of greater than 13
VA will work. To operate the maximum number of locomotives a
transformer with a minimum capacity of 60 VA should be used
for the LV101 and a 1.25 Amp 14 volt transformer such as the
TR16 used for the LZ100. See page 82 for more details on
suitable transformers.

8Information SET-01
4. Connect the LZ100 and the LV101 by installing a wire
between the Cconnection on the LZ100 to the Cconnection
on the LV101. Install a second wire between the Dconnection
on the LZ100 to the Dconnector on the LV101.
5. Put the locomotive which is equipped with the
locomotive decoder onto the track. (refer to
the instructions that came with the decoder
for installation instructions)
6. Plug the power cord of the transformer into a
wall socket. The display on the LH100 lights
up and the red led's on the LZ100 and LV101
turns on solid red.
You can now start operating trains!
(Yes, already!)

Information SET-01 9
DIGITAL plus
3.2 Operating Your first Train
For this example we will assume that you are using a locomotive
with the address 3.
3.2.1 Selecting the locomotive address:
To operate a locomotive you must first enter the address of the
locomotive into the LH100:
Press On the display you see Explanation
First clear the display, and begin
entering the address
The number keyed in is displayed. If
you keyed in the wrong number, you
can clear the last entered digit with
‘CL’. You do not need to enter leading
0s of an address
You end the data entry with ‘Enter’.
The direction of travel and the status
of the functions for this particular
locomotive will now be displayed. In
this example the direction of travel is
forward (arrow on left points up),
the functions 0 (light symbol), F1, F3
and F8 are activated.
3.2.2 Controlling the locomotive's speed:
The speed of travel of the locomotive is controlled with any one of
the four following operation keys.
If you press any one of these keys and keep it pressed, the speed
steps will automatically be increased (or decreased) until the
maximum upper speed limit (or speed step 0) is reached.

10 Information SET-01
Key Explanation Key Explanation
Each time you press this key,
you decrease (or slow
down) the speed of the
locomotive by 1 step until the
locomotive is stopped
Each time you press this key,
you increase (or speed up)
the speed of the locomotive
by 1 step until the maximum
speed is reached.
Each time you press this key,
you decrease (or slow
down) the speed of the
locomotive by 5 steps in 14
throttle notch mode, 8 steps
in 27 or 28 throttle notch
modes, or 16 steps in 128
throttle notch mode. The
locomotive will slow down at
its programmed deceleration
rate
Each time you press this key,
you increase (or speed up)
the speed of the locomotive
by 5 steps in 14 throttle
notch mode, 8 steps in 27 or
28 throttle notch modes, or
16 steps in 128 throttle notch
mode. The locomotive will
speed up at its programmed
acceleration rate
Pressing any of these keys will also cause the display to
automatically change from showing the locomotive address to
showing the locomotives current speed.
Each time you change the locomotive's speed, the display will
automatically change from showing the locomotive's address to
showing the locomotive's speed and direction. If speed step 0
(locomotive standing still) is reached, the display will automatically
change back from showing speed steps to showing the locomotive
address.
You can also toggle back and forth between displaying the
locomotive's speed and the locomotive's address using the 'Enter'
key.
Press On the display you see Explanation
If the locomotive address is shown,
you can use the ‘Enter’ key to
change to showing the speed steps.
31 8
This does not change the speed or
direction of the locomotive.
When showing the locomotive's
speed, pressing the ‘enter’ key will
again change to showing the
locomotive's address.

Information SET-01 11
DIGITAL plus
3.2.3 Changing the locomotive's direction of travel:
To change the locomotives direction of travel, first set the speed to
“0”. Then you can change the direction of travel:
Key Display Explanation
Each pressing of this key changes
the direction of travel of the
locomotive. The changed direction
will be shown in the display.
When the arrow is up the locomotive
goes forward. When the locomotive
points down the locomotive will
operate in reverse.
The direction of travel is tied to each locomotive, for example: with a
steam engine, forward means “smokestack forward”, regardless of in
what direction you have placed this locomotive on the track.
If the locomotive has speed step 00, each pressing of the '<>' key
will change the direction of travel.
The '<>' key also has another function: It affects an emergency stop
for the specific locomotive contained in the display.
If the locomotive is operating at a speed step greater than 00,
pressing the '<>' key once will cause the locomotive being
controlled to immediately stop without any pre-programmed
deceleration. Only by pressing the '<>' key a second time will
change the direction of travel, which is shown in the display by an
arrow in the upper right hand of the display that points up (forward)
or down (backwards).
3.2.4 Emergency stop/Emergency off:
With the key you cause an emergency stop for the entire
layout. When this key is pressed, all locomotives will immediately
stop. By pressing this key again, the emergency stop is released.
This operation of this key can be configured using the set
command. (ðp. 28)
At this point you have very quickly learned how to operate a
locomotive with the LH100 throttle.
There are many more advanced capabilities that the LH100 provides.
These features are described in the following sections. It is not
important that you know how to use all these advanced features.
You can learn to use them at any time in the future when you have a

12 Information SET-01
need.
4System design overview of DIGITAL plus
DIGITAL plus is a digital multi-train control system for all model
railroad scales. It was developed in close co-operation with model
railroaders. Figure 1shows the simple and clear system design of
DIGITAL plus.
DIGITAL plus is compatible with NMRA-DCC systems and their
locomotive and accessory decoders. It is also compatible with all
XpressNet certified handheld or other system devices. If you have
an older NMRA DCC system, you can use this older system as a
handheld using the Translation Module LC100.
Figure 1: DIGITAL plusSystem Overview
The capabilities of DIGITAL plus are to a large extent determined by
a program running inside the unit, the software. Version 3.0 is our
4th major system release.
The advantage of this approach is that new functions can be
adopted simply by changing the software. It is not necessary to
purchase new units. This way it is easier to implement suggestions
for improvements from model railroaders.

Information SET-01 13
DIGITAL plus
4.1 Command Station LZ100
The core of the system is Command Station LZ100. It co-ordinates
the input devices (Hand Held Controller LH100, etc.) and is also
responsible for data processing. Information is exchanged between
Command Station and input devices via a 4-wire cable, called
XpressNet. The Command Station generates the control signals for
Power Station LV101, which combines them with the necessary
power and sends them to locomotive and accessory decoders.
The Command Station has no boosted output to connect to tracks.
Accordingly it only needs a small transformer 14V AC (15VA),
which could be one you already have from a starter set or supplied
as part number TR16.
4.2 Installing the Command Station
Command Station LZ100 is connected to the AC output of the
transformer with 2 wires at terminals Uand V(see Figure 2). For
long term operation you need a separate transformer such as the
TR16.
Figure 2: Complete Connections of Command Station and Power
Station

14 Information SET-01
Connect the programming track to terminals Pand Q. This track
must be completely isolated from the rest of the layout.
Terminals Cand Dtransmit the data signal needed by the Power
Station. These terminals are connected with the corresponding
terminals on the Power Station with a twisted pair wire (see Figure
2). You can easily make a twisted pair wire from two normal single
wires that you twist together.
The terminal Econnection between the LZ100 and the LV101 is
optional. If terminal Eon the Command Station is connected to
terminal E on the Power Station, the Power Station is able to
provide feedback about overloads. The Command Station will then
turn off all other Power Stations and send the corresponding
information to Hand Held Controllers and other input devices. You
can also use a pushbutton to connect terminal Eto connection M.
This allows the push button to be used as a layout emergency stop.
The feedback bus is connected at terminals Rand S. Via this wire,
which also must be a twisted pair, the Command Station asks for
the state of for example turnouts or track occupancy detectors. For
this purpose, feedback units are connected to this (Accessory
Decoder with Feedback LS100 or Feedback Encoder LR101). For
more details on connecting these units, please refer to the
respective manuals.
If the Command Station is correctly installed and wired, and the
supply power of the transformer switched on, the LED on the front of
the Command Station lights up. If the LED flashes after the power
up, then there is a wiring problem on the XpressNet.

Information SET-01 15
DIGITAL plus
5Overview of the functions of LH100
This section will provide you:
-a short overview of each of the functions of LH100.
Specific details for using each feature follows in subsequent
subsections, which follow this section.
5.1 Controlling locomotives
5.1.1 Selecting locomotive addresses
There are 3 different ways to select a locomotive address. Up to
9999 addresses for digital locomotives are available to you. With
address 0 you control a conventional locomotive in the digital
operation. More about entering and selecting locomotive addresses
can be found in the section "Entering a new locomotive address on
the LH100 keypad" starting on page (ðp.20 ).
5.1.2 Changing speed and direction of travel
You change the speed and the direction of travel of the locomotive
with specially shaped keys described in the section "Changing
locomotive speed and direction" starting on page (ðp.20 ).
5.1.3 Emergency stop
With the emergency stop you bring one or all locomotives to an
immediate stop described in the section "Emergency stop and
emergency off" starting on page (ðp.28 ).
5.1.4 Turning locomotive functions on and off
You can access up to 13 functions in each locomotive decoder.
You can also determine if the function operates as a on/off or
momentary function. How you control locomotive functions is
described in the section "Activating locomotive functions" starting
on page (ðp.24 ).
5.1.5 Setting the Throttle-notches for a particular locomotive
With the LH100 you can select 14, 27, 28 or 128 Throttle-notches
for the currently selected locomotive address. (Depending on the
software version of `the command station you are using). This
information is stored in the command station for subsequent use.
How you select the different Throttle-notches and match it to your
locomotive decoder is shown in section "Showing and changing
throttle-notches" starting on page (ðp. 26 ).

16 Information SET-01
5.2 The function menu of LH100
The LH100 function menu provides you access to all other functions
of the LH100.
The different menu items can be reached in 2 different ways when
you are in the locomotive control mode:
Option 1:
Press and scroll through
the menus with until you reach the desired
menu
Option 2 (Quick access):
Press and then the number of the desired function. The
corresponding numbers can be found in the detailed
description of each function.
Following is a brief description of each of the individual LH100 menu
items.
5.2.1 Setting locomotive decoder functions to on/off or momentary
function
Each individual function between F1 and F12 can be configured on a
per locomotive basis to either be on/off or momentary. In on/off
operation the function is turned on with one keystroke and turned off
with the next keystroke. In momentary operation the function is only
turned on for as long as you keep the corresponding key pressed.
When you release the key again, the corresponding function turns
off again.
The procedure for setting this is described in "Configuring
locomotive decoder functions" starting on page (ðp.30 ).
5.2.2 Double header
Double heading allows you to easily assign two locomotives to a
double header and then operate it as a single locomotive from either
locomotive address. The procedure for setting this is described in
"Double herder" starting on page (ðp.32 ).

Information SET-01 17
DIGITAL plus
5.2.3 Multi-Unit Consist (MU)
The LH100 implements smart consisting. Smart consisting allows
you to set up a number of locomotives that can be operated as a
single unit. As many as 256 locomotives can be controlled at the
same time using a common consist address, which we call the
locomotive's multi-unit consist address (MU-address). To you it is
as if you only controlled one single locomotive, but all the
locomotives in the MU react at the same time.
With the LH100 you can (depending on the software version of the
command station you are using) control, assemble and
disassemble multi-unit consists.
Detailed information is found in "Multi-unit consists (MU)" starting on
page (ðp.37 ).
5.2.4 Throwing turnouts and setting signals
Using your LH100 you can throw turnouts, set signals or activate
relays. To allow control via the LH100, these devices must be
connected to accessory decoders LS100/110/120 of
Digital plusby Lenz®system or other compatible modules. The
procedure is controlling these devices using the LH100 is described
in "Throwing turnouts and setting signals" starting on page
(ðp.43 ).
5.2.5 Display feedback information
The LH100 can also be used to display the status of the inputs
generated by feedback encoders LR100/101. These feedback
encoders can be used for example to display occupancy of selected
locations of your layout.
You find the directions for displaying feedback information in
"Displaying feedback" starting on page (ðp.46 ).

18 Information SET-01
5.2.6 Configuring decoder settings: Programming
Each decoder has settings that can be set to customize the
decoder to an individual locomotive, for example the locomotive's
address. The user-settable acceleration and deceleration delays are
also configurable settings on a locomotive decoder. These settings
can be changed by a technique we refer to as programming. The
LH100 provides two programming methods. Which method you can
use depends on your command station and its software version, as
well as the locomotive decoders you use.
5.2.7 Operations mode programming
Using operations mode programming or "Programming on the main',
you can configure the settings of your locomotive decoder while the
locomotive is being operated anywhere on the layout. For example,
couple your locomotive in front of a heavy freight train and now
adjust the acceleration delay to fit the train! Operations mode
Programming is descried in "Programming on the Maim (POM)"
starting on page (ðp.50 ).
5.2.8 Programming on the programming track
Using a separate programming track you can both configure and
read back each of the individual locomotive decoder's settings.
Information on programming using a programming track can be
found in "Programming on the programming track" on page
(ðp.54 ).
5.2.9 System settings
The LH100 allows you to configure several system settings. For
example, you can program how the emergency stop button works,
check and change the LH100 XpressNet address, read out the
software version of your command station, and more. Detailed
descriptions can be found in "Configuring the LH100 handheld using
the SYS menu" starting on page (ðp.66 ).

Information SET-01 19
DIGITAL plus
6The LH100 LCD Display
In this section you will learn about the LH100 two-row LCD display.
Depending on which mode of operation you are using, the display
will look different. The display for the locomotive address always
uses 4 digits. Zeros are added in front of the address if needed.
Here are examples of the most important displays:
A single locomotive with address 0003 is
being controlled.
A locomotive with address 1234 is in a
multi-unit consist.
A multi-unit consist with address 33 is
being controlled.
Examples for the display of speed steps:
1 2 6 8
Speed step 1 in "28 speed steps" mode
Speed step 28 in "28 speed steps" mode
1 2 6 8
Speed step 1 in "128 speed steps" mode
1 2 6 8
Speed step 126 is the maximum speed in
"128 speed steps" mode

20 Information SET-01
While the speed step is displayed, the locomotive address is
hidden. The direction of travel and the functions continue to be
displayed.
7Controlling locomotives with the LH100
In this section you will learn about basic locomotive control using
the LH 100. When you want to control a locomotive, you have to
call it up first. There are three different ways you can call up a
locomotive you want to control:
-Enter the number of the locomotive on the LH100 keypad
-Toggle between 2 locomotive addresses
-Seek out a locomotive from the command station stack.
All addresses from 0 to 9999 are valid. Address 0 is intended for
conventional locomotives (ones without a digital decoder).
When you first start using the LH100, it displays locomotive address
0003.
7.1 Changing locomotive speed and direction
How to control a locomotive’s speed and direction of travel was
already described in the section "First Steps: Controlling
locomotives". Please refer back to this section on how to control the
speed and direction of your locomotive.
7.2 Entering a new locomotive address on the
LH100 keypad
In the following example a locomotive address "1234" is entered
using the LH100 keypad.
Press On the display you see Explanation
Clear the display first.
Begin to enter the address by
pressing the first digit of the
locomotive's address on the
keypad.
If you make an error, you can use
to erase the last entered
digit.
Table of contents
Other Lenz Control Unit manuals

Lenz
Lenz Digital Plus BM2 User manual

Lenz
Lenz Digital plus POWER-1 Owner's manual

Lenz
Lenz Digital Plus BM1 Owner's manual

Lenz
Lenz Digital Plus XpressNet SET-01/10 User manual

Lenz
Lenz Digital Plus LK200 User manual
Lenz
Lenz Digital Plus LW150 Owner's manual

Lenz
Lenz Digital Plus LW120 Owner's manual

Lenz
Lenz Digital plus LW130 User manual
Lenz
Lenz Digital Plus BM3 Owner's manual
Popular Control Unit manuals by other brands

Festo
Festo DeviceNet CMGA-E1-DN installation manual

Helo
Helo WE 40 User and installation manual

Bosch
Bosch Rexroth NYCe 4000 instructions

Atkinson Electronics
Atkinson Electronics GSCM-MINI manual

Leadshine Technology
Leadshine Technology MA860 user manual

National Instruments
National Instruments NI PXI-6682H user manual