Leuze MLC 100 Series User manual

We reserve the right to make technical changes
EN • 2022-02-15 • 50127504
Original operating instructions
MLC 100
Safety Light Curtains

© 2022
Leuze electronic GmbH + Co. KG
In der Braike 1
73277 Owen / Germany
Phone: +49 7021 573-0
Fax: +49 7021 573-199
www.leuze.com
Leuze electronic GmbH + Co. KG MLC 100 2

Table of contents
Leuze electronic GmbH + Co. KG MLC 100 3
Table of contents
1 About this document ............................................................................................5
1.1 Used symbols and signal words ............................................................................................. 5
1.2 Checklists................................................................................................................................ 6
2 Safety .....................................................................................................................7
2.1 Intended use and foreseeable misuse.................................................................................... 7
2.1.1 Intended use........................................................................................................................7
2.1.2 Foreseeable misuse ............................................................................................................8
2.2 Necessary competencies........................................................................................................ 8
2.3 Responsibility for safety........................................................................................................ 10
2.4 Disclaimer ............................................................................................................................. 10
3 Device description ..............................................................................................11
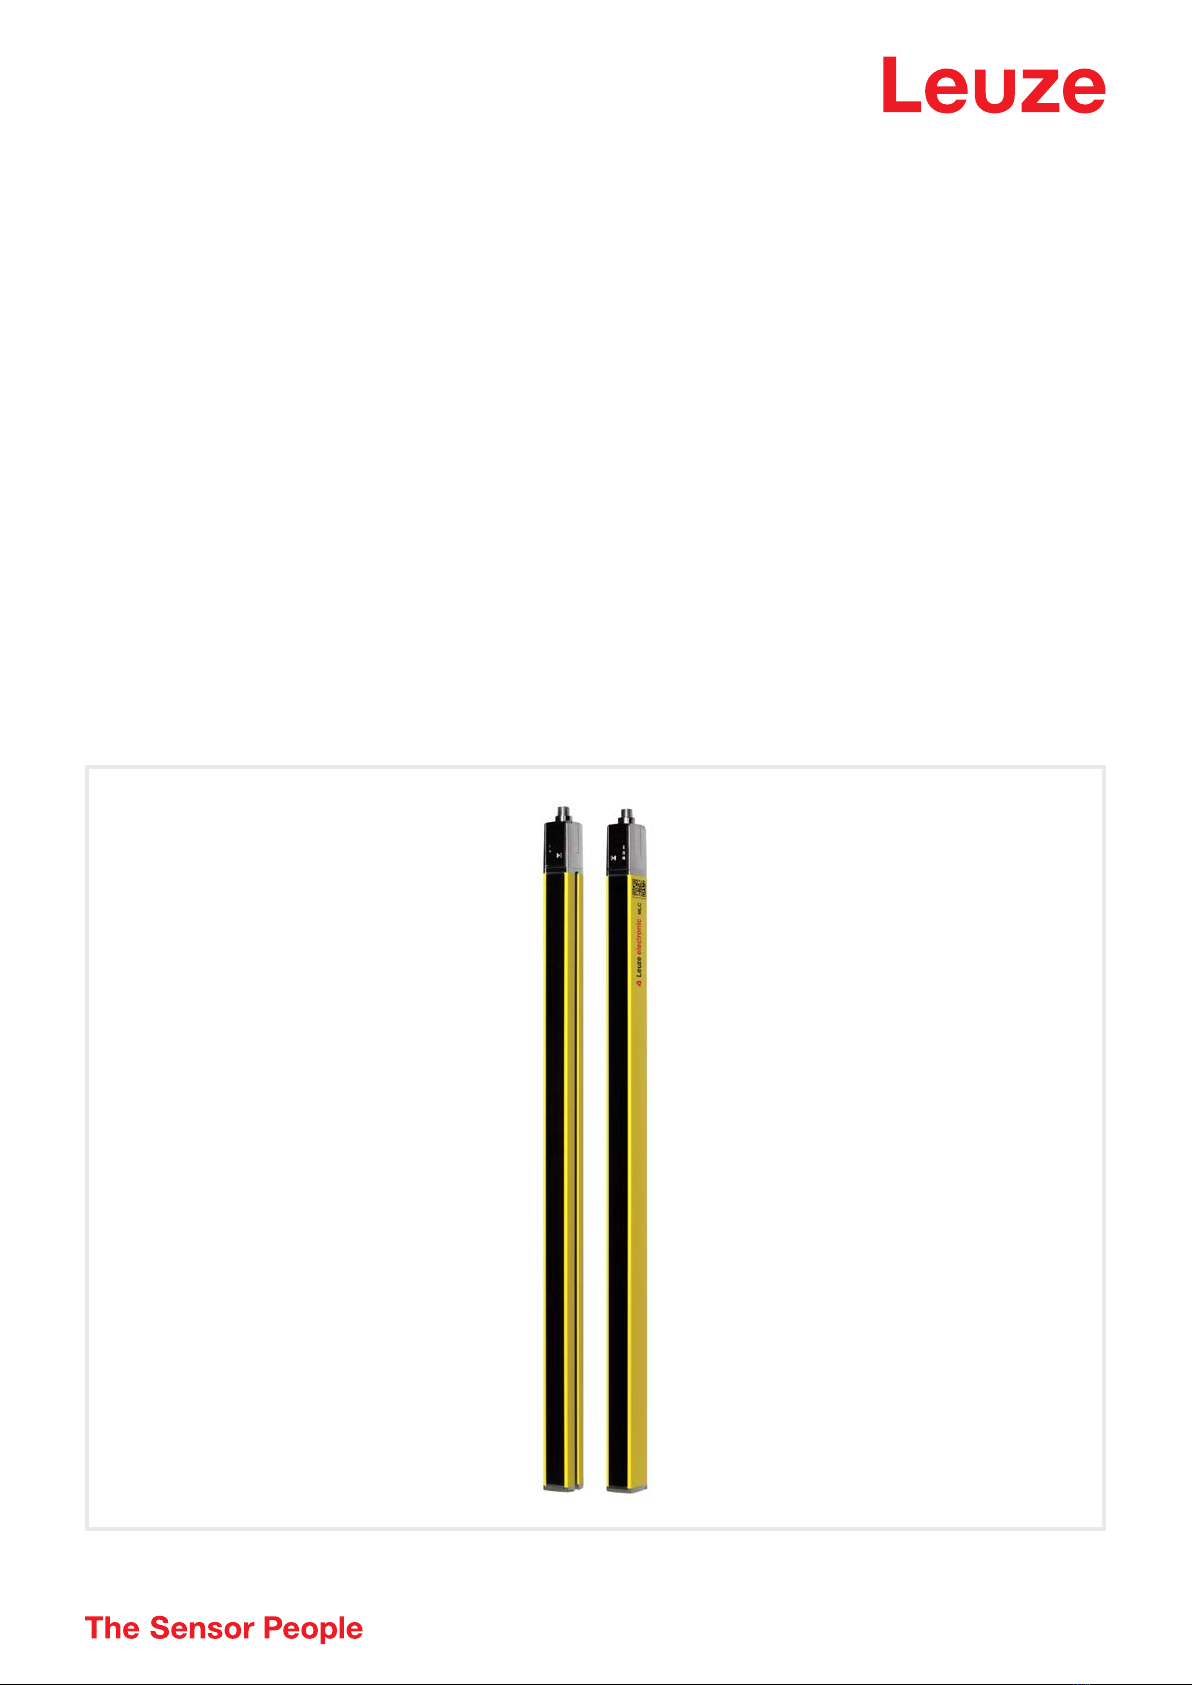
3.1 Device overview of the MLC family....................................................................................... 11
3.2 Connection technology ......................................................................................................... 12
3.3 Display elements .................................................................................................................. 13
3.3.1 Operating indicators on the MLC100 transmitter..............................................................13
3.3.2 Operating indicators on the MLC110 receiver..................................................................14
4 Functions.............................................................................................................15
4.1 Transmission channel changeover ....................................................................................... 15
4.2 Operating range selection..................................................................................................... 15
5 Applications ........................................................................................................16
5.1 Point of operation guarding................................................................................................... 16
6 Mounting..............................................................................................................17
6.1 Arrangement of transmitter and receiver .............................................................................. 17
6.1.1 Calculation of safety distanceS ........................................................................................17
6.1.2 Calculation of safety distance if protective fields act orthogonally to the approach direction
............................................................................................................................................. 18
6.1.3 Minimum distance to reflective surfaces ...........................................................................21
6.1.4 Preventing mutual interference between adjacent devices ............................................... 22
6.2 Mounting the safety sensor................................................................................................... 22
6.2.1 Suitable mounting locations ..............................................................................................23
6.2.2 Definition of directions of movement .................................................................................23
6.2.3 Fastening via BT-NC60 sliding blocks...............................................................................24
6.2.4 Fastening via BT-2HF swivel mount..................................................................................24
6.2.5 Fastening via BT-2SB10 swiveling mounting brackets .....................................................25
6.2.6 One-sided mounting on the machine table........................................................................26
6.3 Mounting accessories ........................................................................................................... 26
6.3.1 Deflecting mirror for multiple-side guarding.......................................................................26
7 Electrical connection..........................................................................................28
7.1 Pin assignment transmitter and receiver .............................................................................. 28
7.1.1 MLC100 transmitter..........................................................................................................28
7.1.2 MLC110 receiver ..............................................................................................................30
7.2 Circuit diagram examples ..................................................................................................... 31
7.2.1 MLC100 circuit diagram example.....................................................................................31
8 Starting up the device ........................................................................................32
8.1 Switching on ......................................................................................................................... 32
8.2 Aligning the sensor ............................................................................................................... 32
8.3 Aligning of deflecting mirrors with the laser alignment aid.................................................... 33

Table of contents
Leuze electronic GmbH + Co. KG MLC 100 4
9 Testing .................................................................................................................34
9.1 Before commissioning and following modifications .............................................................. 34
9.1.1 Checklist for integrator – to be performed prior to commissioning and following modifica-
tions...................................................................................................................................34
9.2 To be performed periodically by competent persons............................................................ 36
9.3 Periodically by the operator .................................................................................................. 36
9.3.1 Checklist – periodically by the operator.............................................................................37
10 Maintenance ........................................................................................................38
11 Troubleshooting..................................................................................................39
11.1 What to do in case of failure? ............................................................................................... 39
11.2 Operating indicators of the LEDs.......................................................................................... 39
12 Disposing.............................................................................................................40
13 Service and support ...........................................................................................41
14 Technical data .....................................................................................................42
14.1 General specifications .......................................................................................................... 42
14.2 Dimensions, weight, response time ...................................................................................... 44
14.3 Dimensioned drawings: Accessories .................................................................................... 45
15 Order guide and accessories.............................................................................48
16 EU/EC Declaration of Conformity......................................................................51

About this document
Leuze electronic GmbH + Co. KG MLC 100 5
1 About this document
1.1 Used symbols and signal words
Tab.1.1: Warning symbols and signal words
Symbol indicating dangers to persons
Symbol indicating possible property damage
NOTE Signal word for property damage
Indicates dangers that may result in property damage if the measures for dan-
ger avoidance are not followed.
CAUTION Signal word for minor injuries
Indicates dangers that may result in minor injury if the measures for danger
avoidance are not followed.
WARNING Signal word for serious injury
Indicates dangers that may result in severe or fatal injury if the measures for
danger avoidance are not followed.
DANGER Signal word for life-threatening danger
Indicates dangers with which serious or fatal injury is imminent if the measures
for danger avoidance are not followed.
Tab.1.2: Other symbols
Symbol for tips
Text passages with this symbol provide you with further information.
Symbol for action steps
Text passages with this symbol instruct you to perform actions.
Symbol for action results
Text passages with this symbol describe the result of the preceding action.
Tab.1.3: Terms and abbreviations
Response time The response time of the protective device is the maximum time between the
occurrence of the event that results in activation of the safety sensor and the
provision of the switching signal at the interface of the protective device (e.g.,
OFF state of the OSSD pair).
AOPD Active Optoelectronic Protective Device
(Active Optoelectronic Protective Device)
ESPE Electro-sensitive protective equipment
LED LED, display element in transmitter and receiver
MLC Brief description of the safety sensor, consisting of transmitter and receiver
MTTFdMean time to dangerous failure
(Mean Time To dangerous Failure)
OSSD Safety-related switching output
(Output Signal Switching Device)
PFHdProbability of a dangerous failure per hour
(Probability of dangerous Failure per Hour)

About this document
Leuze electronic GmbH + Co. KG MLC 100 6
PL Performance Level
Scan Consecutive scans of the protective field from the first to the last beam
Safety sensor System consisting of transmitter and receiver
SIL Safety Integrity Level
State ON: device intact, OSSD switched on
OFF: device intact, OSSD switched off
Locking: device, connection or control / operation faulty, OSSD switched off
(lock-out)
1.2 Checklists
The checklists (see chapter 9 "Testing") serve as a reference for the machine manufacturer or supplier.
They replace neither testing of the complete machine or system prior to initial commissioning nor their peri-
odic testing by a qualified person (see chapter 2.2 "Necessary competencies"). The checklists contain mini-
mum testing requirements. Depending on the application, other tests may be necessary.

Safety
Leuze electronic GmbH + Co. KG MLC 100 7
2 Safety
Before using the safety sensor, a risk assessment must be performed according to valid standards (e.g.
ENISO12100:2010, ENISO13849‑1:2015, EN62061:2005+A1:2012). The result of the risk assessment
determines the required safety level of the safety sensor (see chapter 14.1 "Safety-relevant technical
data").
For mounting, operating and testing, this document as well as all applicable national and international stan-
dards, regulations, rules and directives must be observed. Relevant and supplied documents must be ob-
served, printed out and handed to affected persons.
ÄBefore working with the safety sensor, completely read and observe the documents applicable to your
task.
In particular, the following national and international legal regulations apply for the commissioning, techni-
cal inspections and work with safety sensors:
• Directive 2006/42/EC
• Directive 2014/35/EU
• Directive 2014/30/EU
• Directive 89/655/EEC supplemented by directive 95/63EC
• OSHA 1910 Subpart O
• Safety regulations
• Accident-prevention regulations and safety rules
• Ordinance on Industrial Safety and Health and employment protection act
• Product Safety Law (ProdSG and 9. ProdSV)
NOTICE
For safety-related information you may also contact local authorities (e.g., industrial inspec-
torate, employer's liability insurance association, labor inspectorate, occupational safety and
health authority).
2.1 Intended use and foreseeable misuse
WARNING
A running machine may result in serious injury!
ÄMake certain that the safety sensor is correctly connected and that the protective function of
the protective device is ensured.
ÄMake certain that, during all conversions, maintenance work and inspections, the system is
securely shut down and protected against being restarted.
2.1.1
Intended use
• The safety sensor may only be used after it has been selected in accordance with the respectively ap-
plicable instructions and relevant standards, rules and regulations regarding labor protection and safety
at work, and after it has been installed on the machine, connected, commissioned, and checked by a
competent person (see chapter 2.2 "Necessary competencies"). The devices are designed for indoor
use only.
• When selecting the safety sensor it must be ensured that its safety-related capability meets or exceeds
the required performance level PLr ascertained in the risk assessment (see chapter 14.1 "General
specifications").
• The safety sensor protects persons or body parts at points of operation, danger zones or access points
of machines and systems.
• With the access guarding function, the safety sensor detects persons only when they enter the danger
zone but cannot tell whether there are any persons inside the danger zone. For this reason, a start/
restart interlock or a suitable stepping behind protection in the safety chain is essential in this case.
• Maximum permissible approach speeds (see ISO13855):
• 1.6m/s for access guarding

Safety
Leuze electronic GmbH + Co. KG MLC 100 8
• 2.0m/s for guards of points of operation
• The construction of the safety sensor must not be altered. When manipulating the safety sensor, the
protective function is no longer guaranteed. Manipulating the safety sensor also voids all warranty
claims against the manufacturer of the safety sensor.
• The improper repair of the protective device may result in loss of the protective function. Make no re-
pairs to the device components.
• The safety sensor must be inspected regularly by a competent person to ensure proper integration and
mounting (see chapter 2.2 "Necessary competencies").
• The safety sensor must be exchanged after a maximum of 20 years. Repairs or the exchange of wear
parts do not extend the mission time.
2.1.2
Foreseeable misuse
Any use other than that defined under the “Approved purpose” or which goes beyond that use is consid-
ered improper use.
In principle, the safety sensor is not suitable as a protective device for use in the following cases:
• Danger posed by ejected objects or the spraying of hot or hazardous liquids from within the danger
zone
• Applications in explosive or easily flammable atmospheres
2.2 Necessary competencies
The safety sensor may only be configured, installed, connected, commissioned, serviced and tested in its
respective application by persons who are suitably qualified for the given task. General prerequisites for
suitably qualified persons:
• They have a suitable technical education.
• They are familiar with the relevant parts of the operating instructions for the safety sensor and the oper-
ating instructions for the machine.
Task-specific minimum requirements for competent persons:
Configuration
Specialist knowledge and experience in the selection and use of protective devices on machines as well as
the application of technical rules and the locally valid regulations on labor protection, safety at work and
safety technology.
Specialist knowledge in programming safety-related controls SRASW acc. to ENISO13849-1.
Mounting
Specialist knowledge and experience needed for the safe and correct installation and alignment of the
safety sensor with regard to the respective machine.
Electrical installation
Specialist knowledge and experience needed for the safe and correct electrical connection as well as safe
integration of the safety sensor in the safety-related control system.
Operation and maintenance
Specialist knowledge and experience needed for the regular inspection and cleaning of the safety sensor –
following instruction by the person responsible.
Servicing
Specialist knowledge and experience in the mounting, electrical installation and the operation and mainte-
nance of the safety sensor in accordance with the requirements listed above.
Commissioning and testing
• Experience and specialist knowledge in the rules and regulations of labor protection, safety at work and
safety technology that are necessary for being able to assess the safety of the machine and the use of
the safety sensor, including experience with and knowledge of the measuring equipment necessary for
performing this work.

Safety
Leuze electronic GmbH + Co. KG MLC 100 9
• In addition, a task related to the subject matter is performed in a timely manner and knowledge is kept
up to date through continuous further training ‑ Competent person in terms of the German Betrieb-
ssicherheitsverordnung (Ordinance on Industrial Safety and Health) or other national legal regulations.

Safety
Leuze electronic GmbH + Co. KG MLC 100 10
2.3 Responsibility for safety
Manufacturer and operator must ensure that the machine and implemented safety sensor function properly
and that all affected persons are adequately informed and trained.
The type and content of all imparted information must not lead to unsafe actions by users.
The manufacturer of the machine is responsible for:
• Safe machine construction and information on any residual risks
• Safe implementation of the safety sensor, verified by the initial test performed by a competent person
(see chapter 2.2 "Necessary competencies")
• Imparting all relevant information to the operating company
• Adhering to all regulations and directives for the safe commissioning of the machine
The operator of the machine is responsible for:
• Instructing the operator
• Maintaining the safe operation of the machine
• Adhering to all regulations and directives for labor protection and safety at work
• Periodic testing by a competent person (see chapter 2.2 "Necessary competencies")
2.4 Disclaimer
The liability of Leuze electronic GmbH + Co. KG is to be excluded in the following cases:
• Safety sensor is not used as intended.
• Safety notices are not adhered to.
• Reasonably foreseeable misuse is not taken into account.
• Mounting and electrical connection are not properly performed.
• Proper function is not tested (see chapter 9 "Testing").
• Changes (e.g., constructional) are made to the safety sensor.

Device description
Leuze electronic GmbH + Co. KG MLC 100 11
3 Device description
The safety sensors from the MLC 100 series are active opto-electronic protective devices. They satisfy the
following standards:
MLC 100
Type in accordance with ENIEC61496 4
Category in accordance with ENISO13849 4
Performance Level (PL) in accordance with ENISO13849-1:2015 e
Safety Integrity Level (SIL) in accordance with IEC61508 and SILCL in ac-
cordance with ENIEC62061
3
The safety sensor consists of a transmitter and a receiver (see chapter 3.1 "Device overview of the MLC
family"). It is protected against overvoltage and overcurrent acc. to IEC60204-1 (protection class3). The
safety sensor is not dangerously influenced by ambient light (e.g., welding sparks, warning lights).
3.1 Device overview of the MLC family
The series consists of a transmitter and the corresponding receiver. An overview of the characteristic fea-
tures is given in the following table.
Tab.3.1: Device models in the series with specific features and functions
Transmitter Receiver
MLC 100 MLC 110
OSSDs (2x) ■
Transmission channel changeover ■ ■
LED indicator ■ ■
Automatic start/restart ■
Range reduction ■
Protective field properties
The beam distance and the number of beams are dependent on the resolution and protective field height.
NOTICE
Depending on the resolution, the effective protective field height can be larger than the optically
active area of the safety sensor housed in yellow (see chapter 3.1 "Device overview of the MLC
family" and see chapter 14.1 "General specifications").
Device synchronization
The synchronization of receiver and transmitter for creating a functioning protective field is done optically,
i.e. without cables, via two specially coded synchronization beams. A cycle (i.e. a pass from the first to the
last beam) is called a scan. The length of a scan determines the length of the response time and affects the
calculation of the safety distance (see chapter 6.1.1 "Calculation of safety distanceS").
NOTICE
For the correct synchronization and function of the safety sensor, at least one of the two syn-
chronization beams must be free during synchronization and operation.

Device description
Leuze electronic GmbH + Co. KG MLC 100 12
a
b
b
a Optically active area, housed in yellow
b Synchronization beams
Fig.3.1: Transmitter-receiver system
QR code
A QR code as well as the corresponding web address are located on the safety sensor.
At the web address, you will find device information and error messages after scanning the QR code with a
mobile end device or after entering the web address.
When using mobile end devices, mobile service charges can accrue.
Fig.3.2: QR code with corresponding web address (URL) on the safety sensor
3.2 Connection technology
The transmitter and receiver feature an M12 connector as an interface to the machine control with the fol-
lowing number of pins:
Device model Device type Device plug
MLC 100 Transmitter 5-pin
MLC 110 Receiver 5-pin

Device description
Leuze electronic GmbH + Co. KG MLC 100 13
3.3 Display elements
The display elements of the safety sensors simplify start-up and fault analysis.
3.3.1
Operating indicators on the MLC100 transmitter
Located in the connection cap on the transmitter are two LEDs which serve as function indicators:
12
1 LED1, green/red
2 LED2, green
Fig.3.3: Indicators on the MLC 100 transmitter
Tab.3.2: Meaning of the LEDs on the transmitter
State Description
LED1 LED2
OFF OFF Device switched off
Green OFF Normal operation on channel1
Green Green Normal operation on channel2
Green, flashing OFF Reduced operating range on channel1
Green, flashing Green, flashing Reduced operating range on channel2
Red OFF Device error
Green Red, flashing External test (MLC 502 only)

Device description
Leuze electronic GmbH + Co. KG MLC 100 14
3.3.2
Operating indicators on the MLC110 receiver
Located on the receiver are two LEDs for displaying the operating state:
13
4
2
1 LED1, red/green
2 LED2, red
3 OSSD icon
4 Transmission channel icon C2
Fig.3.4: Indicators on the MLC 110 receiver
Tab.3.3: Meaning of the LEDs on the receiver
LED Color State Description
1 Red/green OFF Device switched off
Red OSSD off
Red, flashing slowly (approx.1Hz) External error
Red, flashing fast (approx.10Hz) Internal error
Green, flashing slowly (ap-
prox.1Hz)
OSSD on, weak signal
Green OSSD on
2 Red OFF Transmission channel C1
ON OSSD off, transmission channel
C2

Functions
Leuze electronic GmbH + Co. KG MLC 100 15
4 Functions
An overview of features and functions of the safety sensor can be found in chapter “Device description”
(see chapter 3.1 "Device overview of the MLC family").
Overview of functions
• Range reduction
• Transmission channel changeover
4.1 Transmission channel changeover
Transmission channels are used to prevent mutual interference of safety sensors which are located close
to each other.
NOTICE
To guarantee reliable operation, the infrared beams are modulated so they can be discerned
from the ambient light. Welding sparks or warning lights, e.g. from passing high-lift trucks,
thereby do not influence the protective field.
With the factory setting, the safety sensor works in all operating modes with transmission channelC1.
The transmission channel of the transmitter can be switched by changing the supply voltage polarity (see
chapter 7.1.1 "MLC100 transmitter").
The transmission channel of the receiver can be switched by changing the supply voltage polarity (see
chapter 7.1.2 "MLC110 receiver").
NOTICE
Faulty function due to incorrect transmission channel!
Select the same transmission channel on the transmitter and corresponding receiver.
4.2 Operating range selection
In addition to selecting the suitable transmission channels (see chapter 4.1 "Transmission channel
changeover"), the operating range selection also serves to prevent mutual interference of adjacent safety
sensors. At reduced operating range the light power of the transmitter reduces, so that around half of the
nominal range is reached.
Select operating range:
ÄWire pin4 (see chapter 7.1 "Pin assignment transmitter and receiver").
ðThe wiring of pin4 determines the transmitting power and thereby the range.
WARNING
Impairment of the protective function due to incorrect transmitting power!
The light power emitted from the transmitter is reduced through a single channel and without
safety-relevant monitoring.
ÄDo not use this configuration option for safety purposes.
ÄNote that the distance to reflective surfaces must always be selected so that no reflection
bypass can occur even at maximum transmitting power (see chapter 6.1.3 "Minimum dis-
tance to reflective surfaces").

Applications
Leuze electronic GmbH + Co. KG MLC 100 16
5 Applications
The safety sensor only creates square protective fields.
NOTICE
For applications with increased mechanical requirements, device models are available in ver-
sion MLC…/V (see chapter 15 "Order guide and accessories").
5.1 Point of operation guarding
Point of operation guarding for hand and finger protection is typically the most common application for this
safety sensor. In accordance with ENISO13855, resolutions from 14to40mm make sense here. This
yields the necessary safety distance, among others (see chapter 6.1.1 "Calculation of safety distanceS").
Fig.5.1: Point of operation guarding protects reaching into the danger zone, e.g. for cartoners or filling systems
Fig.5.2: Point of operation guarding protects reaching into the danger zone, e.g. for a pick&place robot applica-
tion

Mounting
Leuze electronic GmbH + Co. KG MLC 100 17
6 Mounting
WARNING
Improper mounting may result in serious injury!
The protective function of the safety sensor is only ensured if appropriately and professionally
mounted for the respective, intended area of application.
ÄOnly allow the safety sensor to be installed by qualified persons (see chapter 2.2 "Neces-
sary competencies").
ÄMaintain the necessary safety distances (see chapter 6.1.1 "Calculation of safety dis-
tanceS").
ÄMake sure that stepping behind, crawling under or stepping over the protective device is reli-
ably ruled out and reaching under, over or around is taken into account in the safety dis-
tance, if applicable with additional distanceCRO corresponding to ISO13855.
ÄTake measures to prevent that the safety sensor can be used to gain access to the danger
zone, e.g. by stepping or climbing into it.
ÄObserve the relevant standards, regulations and these instructions.
ÄClean the transmitter and receiver at regular intervals: environmental conditions (see chap-
ter 14 "Technical data"), care (see chapter 10 "Maintenance").
ÄAfter mounting, check the safety sensor for proper function.
6.1 Arrangement of transmitter and receiver
Optical protective devices can only perform their protective function if they are mounted with adequate
safety distance. When mounting, all delay times must be taken into account, such as the response times of
the safety sensor and control elements as well as the stopping time of the machine, among others.
The following standards specify calculation formulas:
• IEC61496-2, "Active optoelectronic protective devices": distance of the reflecting surfaces/deflecting
mirrors
• ISO13855, "Safety of machines - The positioning of protective equipment in respect of approach
speeds of parts of the human body": mounting situation and safety distances
NOTICE
In accordance with ISO13855, with a vertical protective field, it is possible to pass under beams
over 300mm or pass over beams under 900mm. If the protective field is horizontal, climbing on
the safety sensor must be prevented through suitable installation or with covers and the like.
6.1.1
Calculation of safety distanceS
General formula for calculating the safety distanceS of an Optoelectronic Protective Device acc. to
ISO13855
S [mm] = Safety distance
K [mm/s] = Approach speed
T [s] = Total time of the delay, sum from (ta+ti+tm)
ta[s] = Response time of the protective device
ti[s] = Response time of the safety relay
tm[s] = Stopping time of the machine
C [mm] = Additional distance to the safety distance

Mounting
Leuze electronic GmbH + Co. KG MLC 100 18
NOTICE
If longer stopping times are determined during regular inspections, an appropriate additional
time must be added to tm.
6.1.2
Calculation of safety distance if protective fields act orthogonally to the approach direction
With vertical protective fields, ISO13855 differentiates between
• SRT: safety distance concerning access through the protective field
• SRO: safety distance concerning access over the protective field
The two values are distinguished by the way additional distanceC is determined:
• CRT: from a calculation formula or as a constant (see chapter 6.1.1 "Calculation of safety distanceS")
• CRO: from the following table “Reaching over the vertical protective field of electro-sensitive protective
equipment (excerpt from ISO13855)”
The larger of the two values SRT and SRO is to be used.
Calculation of safety distanceSRT acc. to ISO13855 when access occurs through the protective
field:
Calculation of safety distanceSRT for point of operation guarding
SRT [mm] = Safety distance
K [mm/s] = Approach speed for point of operation guarding with approach reaction and normal approach di-
rection to the protective field (resolution 14to40mm): 2000mm/s or 1600mm/s, when
SRT>500mm
T [s] = Total time of the delay, sum from (ta+ti+tm)
ta[s] = Response time of the protective device
ti[s] = Response time of the safety relay
tm[s] = Stopping time of the machine
CRT [mm] = Additional distance for point of operation guarding with approach reaction with resolutions of
14to40mm, d=resolution of protective device CRT=8×(d-14)mm
Calculation example
The feeding-in area in a machine with a stopping time of 190ms is to be safeguarded with a safety light
curtain with 14mm of resolution and 600mm of protective field height. The safety light curtain has a re-
sponse time of 14ms.
ÄCalculate safety distanceSRT using the formula acc. to ISO13855.
K [mm/s] = 2000
T [s] = (0.014+0.190)
CRT [mm] = 8×(14-14)
SRT [mm] = 2000mm/s×0.204s+0mm
SRT [mm] = 408
SRT is smaller than 500mm; this is why the calculation may not be repeated with 1600mm/s.
NOTICE
Implement the stepping behind protection required here, e.g., through the use of an additional
safety sensor for area protection.

Mounting
Leuze electronic GmbH + Co. KG MLC 100 19
Calculation of safety distanceSRo acc. to ISO13855 when protective field is accessed from above:
Calculation of safety distanceSRo for point of operation guarding
SRO [mm] = Safety distance
K [mm/s] = Approach speed for point of operation guarding with approach reaction and normal approach di-
rection to the protective field (resolution 14to40mm): 2000mm/s or 1600mm/s, when
SRO>500mm
T [s] = Total time of the delay, sum from (ta+ti+tm)
ta[s] = Response time of the protective device
ti[s] = Response time of the safety relay
tm[s] = Stopping time of the machine
CRO [mm] = Additional distance in which a body part can move towards the protective device before the pro-
tective device triggers: value (see the following table “Reaching over the vertical protective field
of electro-sensitive protective equipment (excerpt from ISO13855)”).
a
3
CRO
KxT
b
12
SRO
1 Safety sensor
2 Danger zone
3 Floor
a Height of the point of operation
b Height of the upper beam of the safety sensor
Fig.6.1: Additional distance to the safety distance when reaching over and under
Tab.6.1: Reaching over the vertical protective field of electro-sensitive protective equipment(excerpt from
ISO13855)
Heighta
of the
point of
opera-
tion
[mm]
Heightb of the upper edge of the protective field of the electro-sensitive protective
equipment
900 1000 1100 1200 1300 1400 1600 1800 2000 2200 2400 2600
Additional distanceCRO to the danger zone [mm]
2600000000000000
2500 400 400 350 300 300 300 300 300 250 150 100 0
2400 550 550 550 500 450 450 400 400 300 250 100 0
2200 800 750 750 700 650 650 600 550 400 250 0 0

Mounting
Leuze electronic GmbH + Co. KG MLC 100 20
Heighta
of the
point of
opera-
tion
[mm]
Heightb of the upper edge of the protective field of the electro-sensitive protective
equipment
900 1000 1100 1200 1300 1400 1600 1800 2000 2200 2400 2600
Additional distanceCRO to the danger zone [mm]
2000 950 950 850 850 800 750 700 550 400 0 0 0
1800 1100 1100 950 950 850 800 750 550 0 0 0 0
1600 1150 1150 1100 1000 900 850 750 450 0 0 0 0
1400 1200 1200 1100 1000 900 850 650 0 0 0 0 0
1200 1200 1200 1100 1000 850 800 0 0 0 0 0 0
1000 1200 1150 1050 950 750 700 0 0 0 0 0 0
800 1150 1050 950 800 500 450 0 0 0 0 0 0
600 1050 950 750 550 0 0 0 0 0 0 0 0
400 900 700 0 0 0 0 0 0 0 0 0 0
200 600 0 0 0 0 0 0 0 0 0 0 0
0 000000000000
Depending on the specified values you can work with the above-mentioned table in three ways:
1. Given are:
• Heighta of the point of operation
• DistanceS of the point of operation from the safety sensor, and additional distanceCRO
To be determined is the required heightb of the upper beam of the safety sensor and thereby its protective
field height.
ÄLook for the line with the specification of the point of operation height in the left column.
ÄIn this line, look for the column with the next highest specification for additional distance CRO.
ðThe required height of the upper beam of the safety sensor is up top in the column head.
2. Given are:
• Heighta of the point of operation
• Heightb of the upper beam of the safety sensor
To be determined is the required distance S of the safety sensor to the point of operation and thereby addi-
tional distance CRO.
ÄIn the column head, look for the column with the next lowest entry for the height of the upper beam of
the safety sensor.
ÄLook for the line with the next highest specification of the point of operation heighta in this column.
ðIn the intersection point of the line and the column, you will find additional distanceCRO.
3. Given are:
• DistanceS of the point of operation from the safety sensor, and additional distanceCRO.
• Heightb of the upper beam of the safety sensor
To be determined is the permitted heighta of the point of operation.
ÄIn the column head, look for the column with the next lowest entry for the height of the upper beam of
the safety sensor.
ÄLook for the next lowest value for real additional distance CRO in this column.
ðIn this line, go to the left column: here you will find the permitted height of the point of operation.
ÄNow calculate safety distanceS using the general formula acc. to ISO13855 (see chapter 6.1.1 "Cal-
culation of safety distanceS").
ðThe larger of the two values SRT and SRO is to be used.
This manual suits for next models
19
Table of contents
Other Leuze Safety Equipment manuals
Popular Safety Equipment manuals by other brands

Guardian Fall Protection
Guardian Fall Protection SSMR G-Rail Base instruction manual

Performance Variable
Performance Variable Omega manual

Ansell
Ansell Alphatec 3000 PAPR Instructions for use

Mustang Survival
Mustang Survival EP 38 owner's manual

IRONRIDGE
IRONRIDGE GROUND MOUNT installation manual

ntt
ntt TOPPAS operating instructions

Classic Accessories
Classic Accessories OVERDRIVE 77410 instructions

Petzl
Petzl TOOLEASH manual

Guardian Fall Protection
Guardian Fall Protection 30800 instruction manual

E2S
E2S BExCP3C-BG instruction manual

HANCOM LIFECARE
HANCOM LIFECARE SCA420 instruction manual

Mini Gadgets
Mini Gadgets BBSElectricalBox user manual